一、安装
1、安装
composer create-project laravel/laravel=v5.5.28 laravel
2、测试
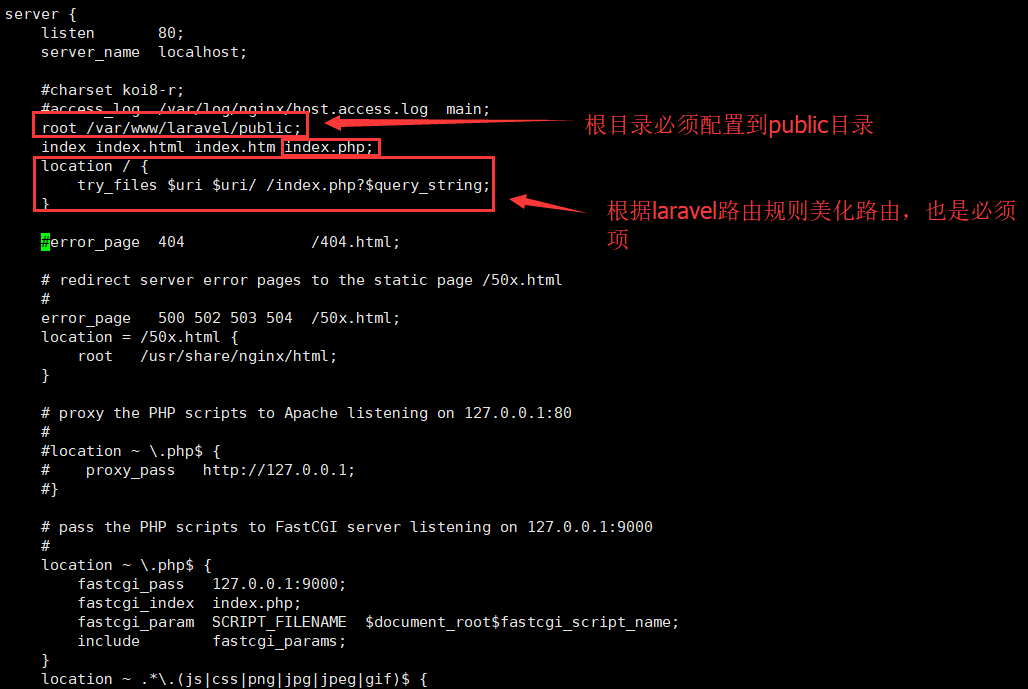
配置nginx根目录为laravel/public,并且美化路由:
root /var/www/laravel/public;
index index.html index.htm index.php;
location / {
    try_files $uri $uri/ /index.php?$query_string;
}
http://localhost/index.php,出现如下页面证明安装laravel成功:

二、路由Route:
1、get案例:
Route::get('basic1', function() {
    return 'hello basic1';
});
2、post案例:
Route::post('basic2', function() {
    return 'hello basic2';
});
备注:如果出现如下页面
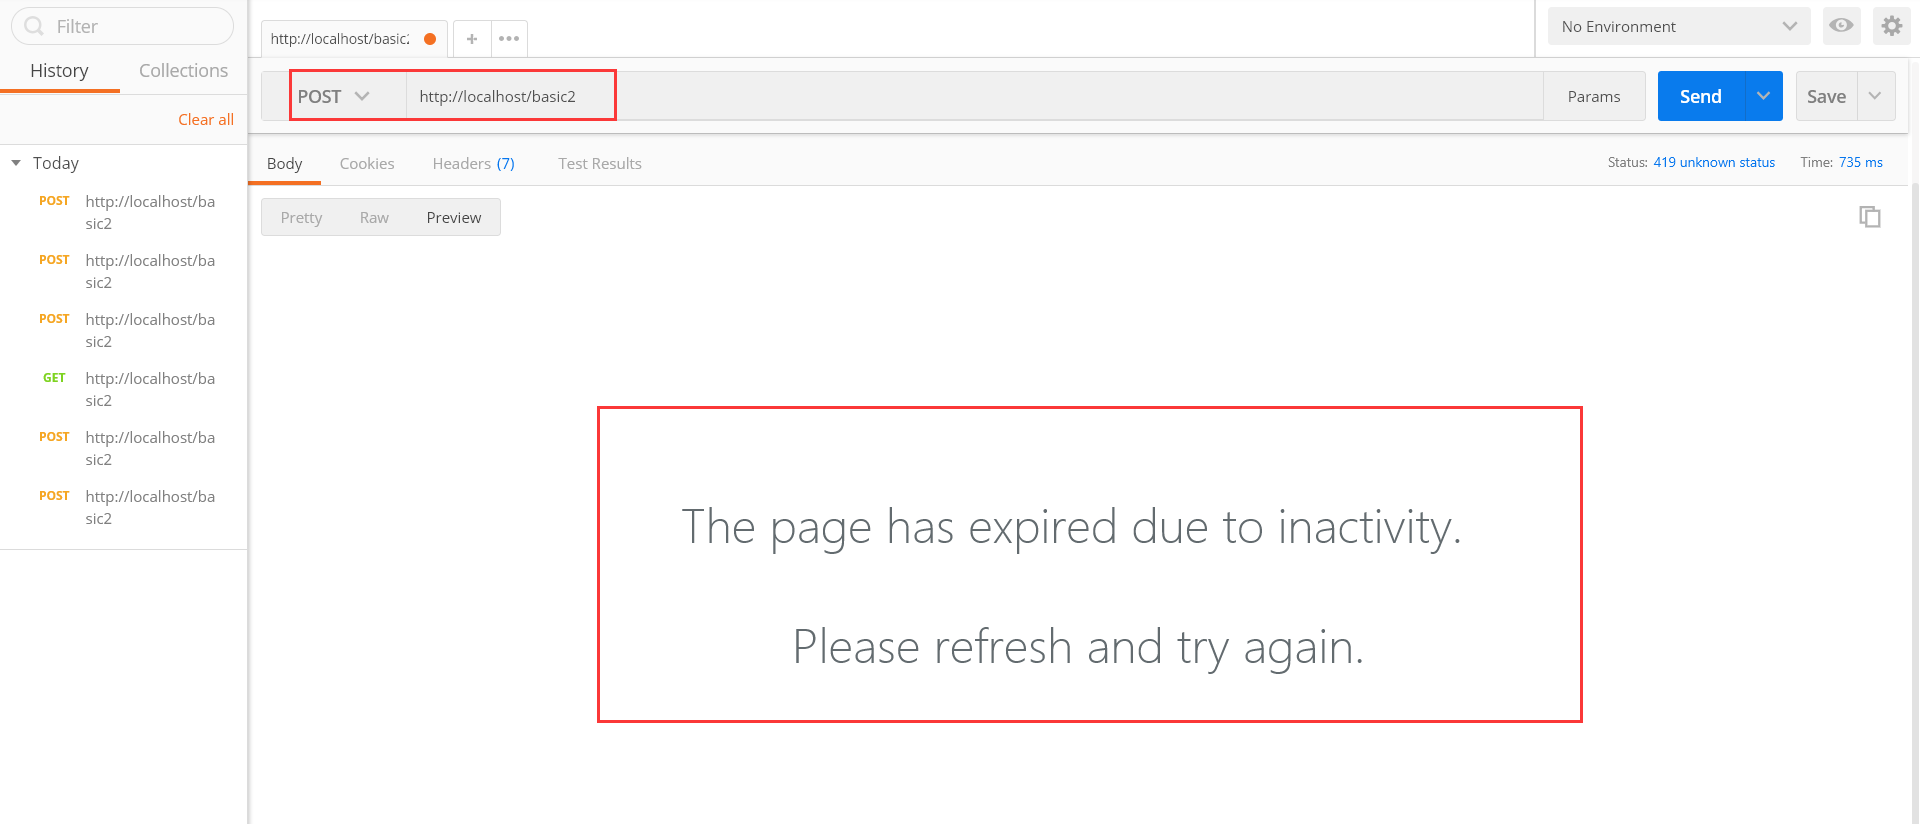
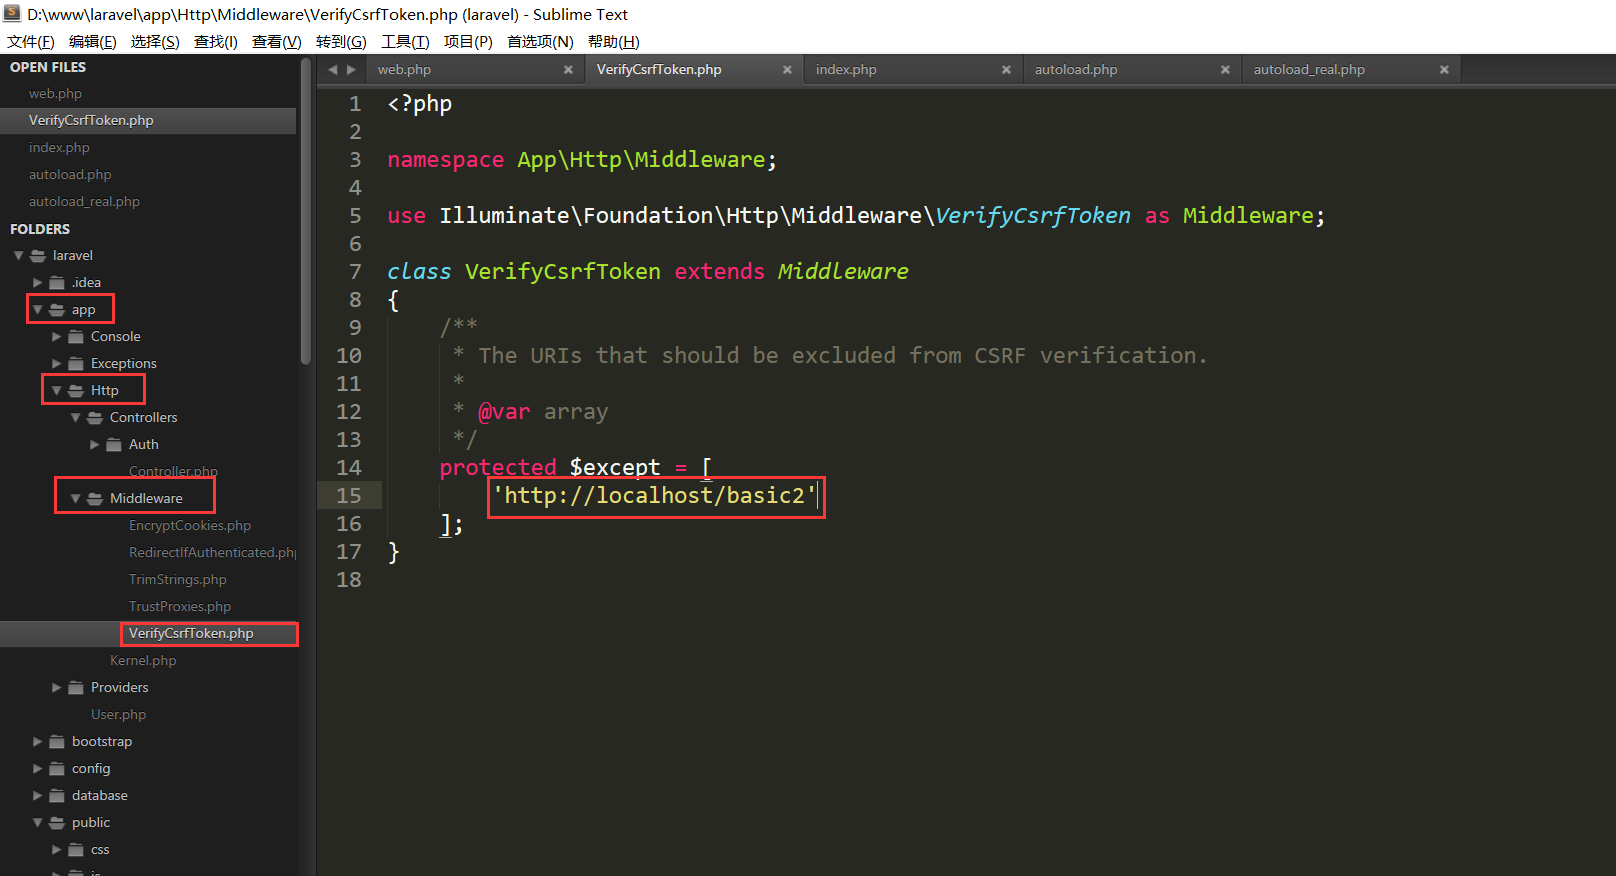
原因:因为post方法需要进行csrf验证,这里用postman测试,可以将该url设置为不用csrf验证,处理如下:
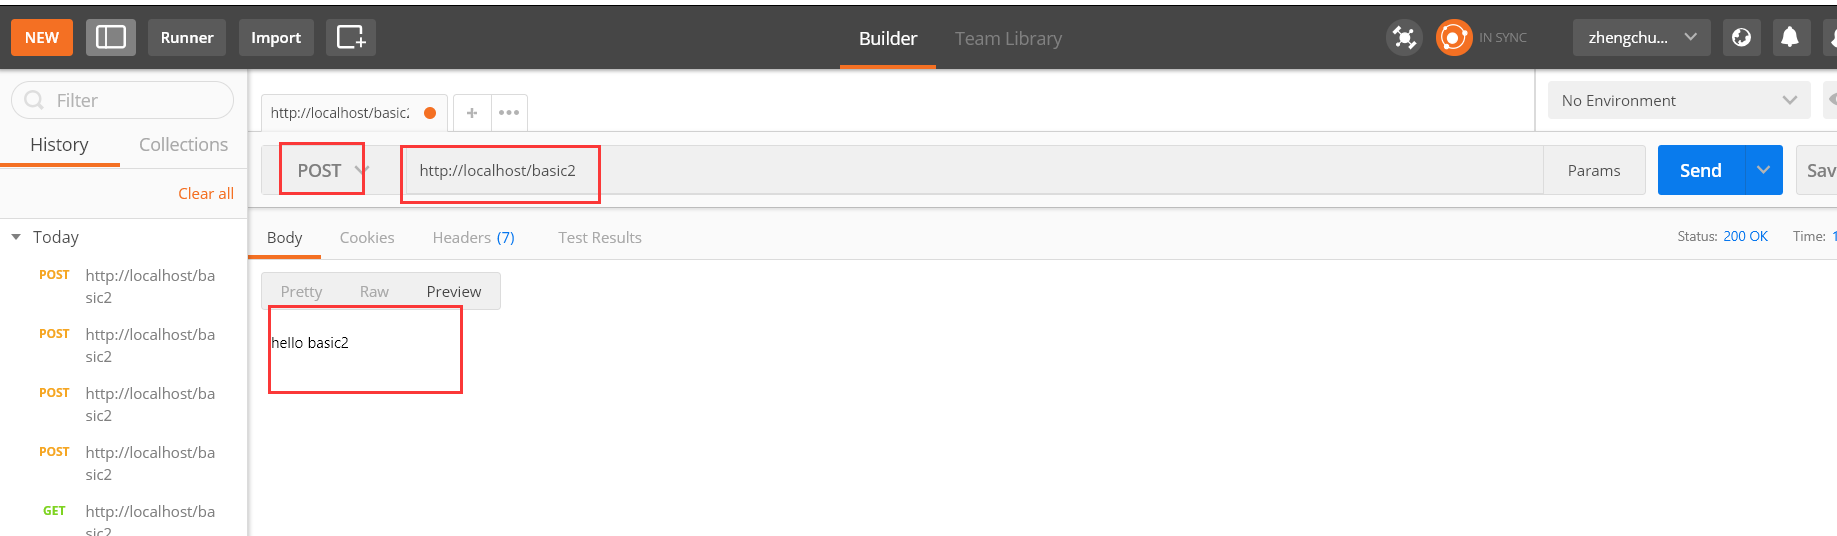
然后再次访问,即可:
3、多请求路由:
Route::match(['get', 'post'], 'multy1', function() {
    return 'hello multy1';
});
Route::any('multy2', function() {
    return 'hello multy2';
});
4、路由参数:
1)传递参数:
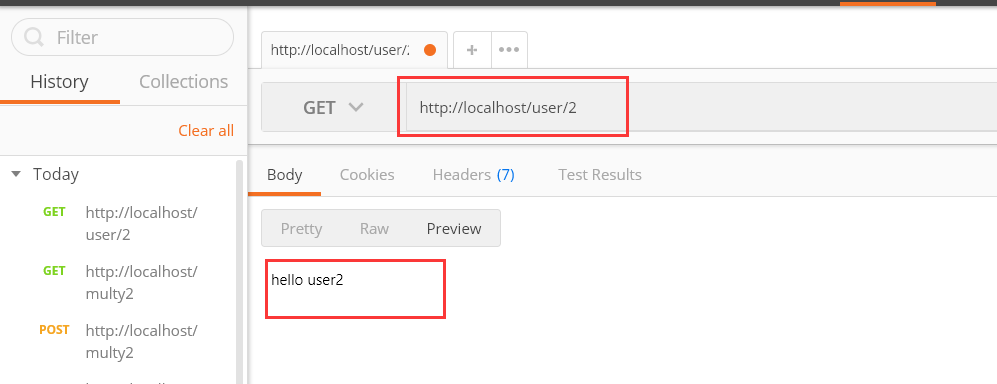
Route::get('user/{id}', function($id) {
    return 'hello user' . $id;
});
2)设置参数可选:
Route::get('user/{id?}', function($id = 1) {
    return 'hello user' . $id;
});
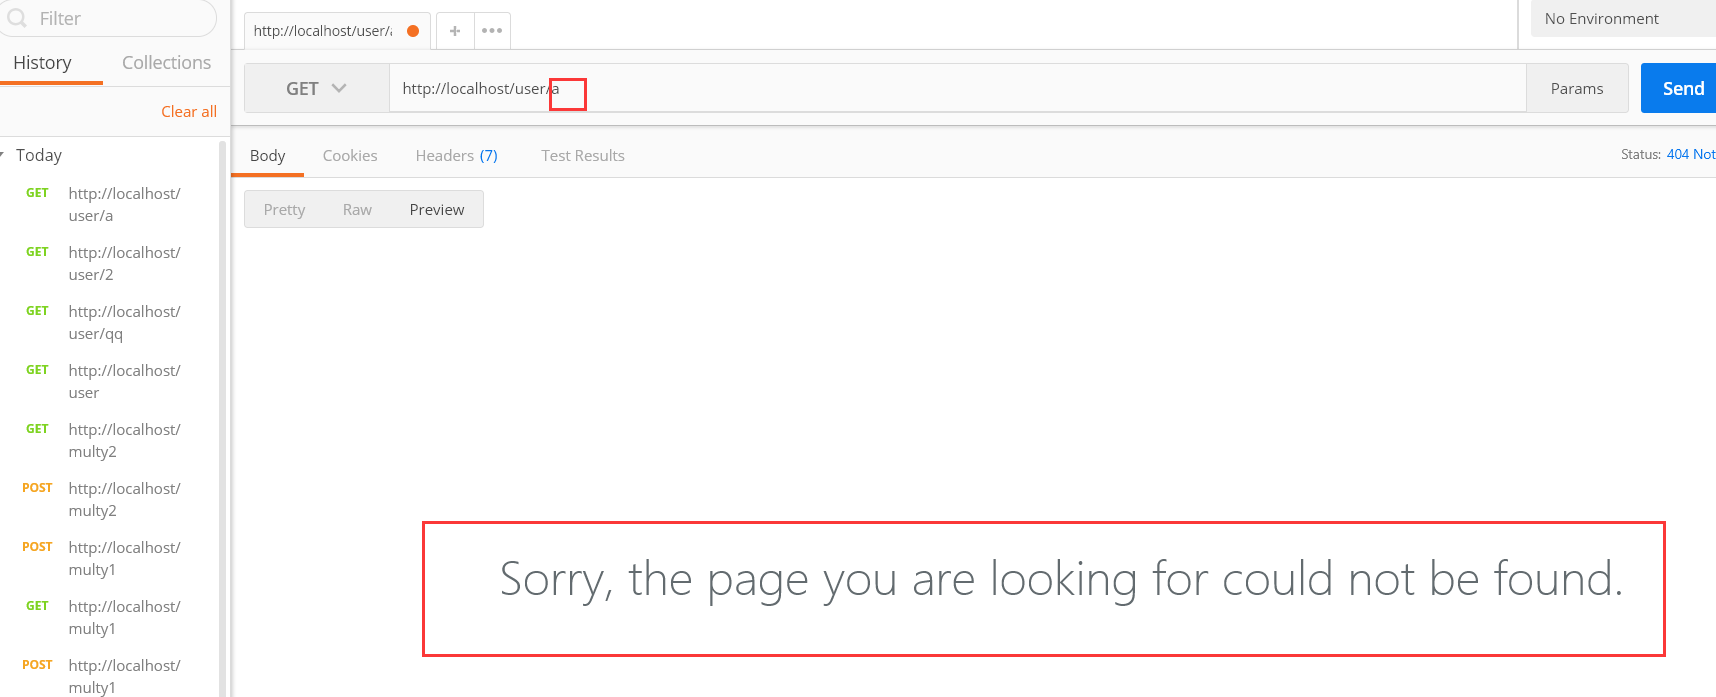
3)参数验证:
Route::get('user/{id?}', function($id = 1) {
    return 'hello user' . $id;
})->where('id', '[0-9]+');
这时,如果请求参数不符合条件,则会报错:
多参数验证写法:
Route::get('user/{id?}/{name?}', function($id = 1, $name = 'lily') {
    return 'hello user id:' . $id . ', name:' . $name;
})->where(['id' => '[0-9]+', 'name' => '[a-zA-Z]+']);
5、路由别名:
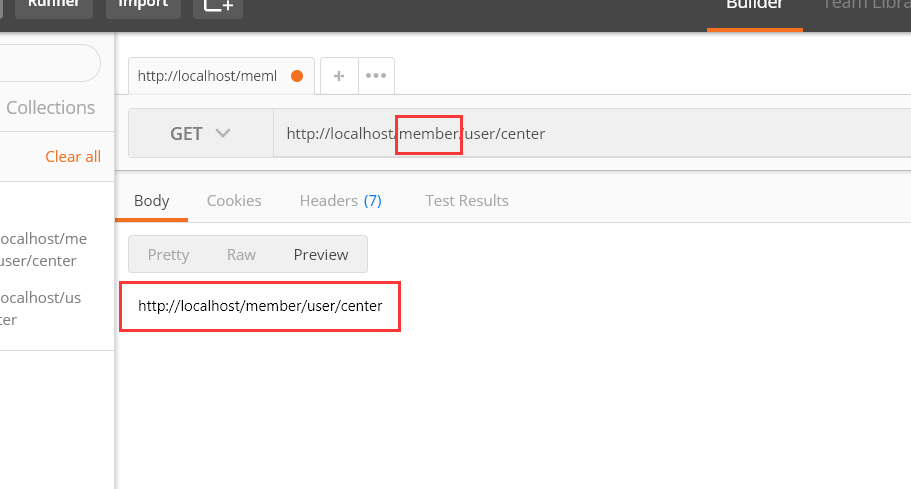
Route::get('user/center', ['as' => 'center', function(){
    return route('center');
}]);

6、路由群组:
Route::group(['prefix' => 'member'], function() {
    Route::get('user/center', ['as' => 'center', function(){
        return route('center');
    }]);

    Route::any('multy2', function() {
        return 'hello multy2';
    });
});
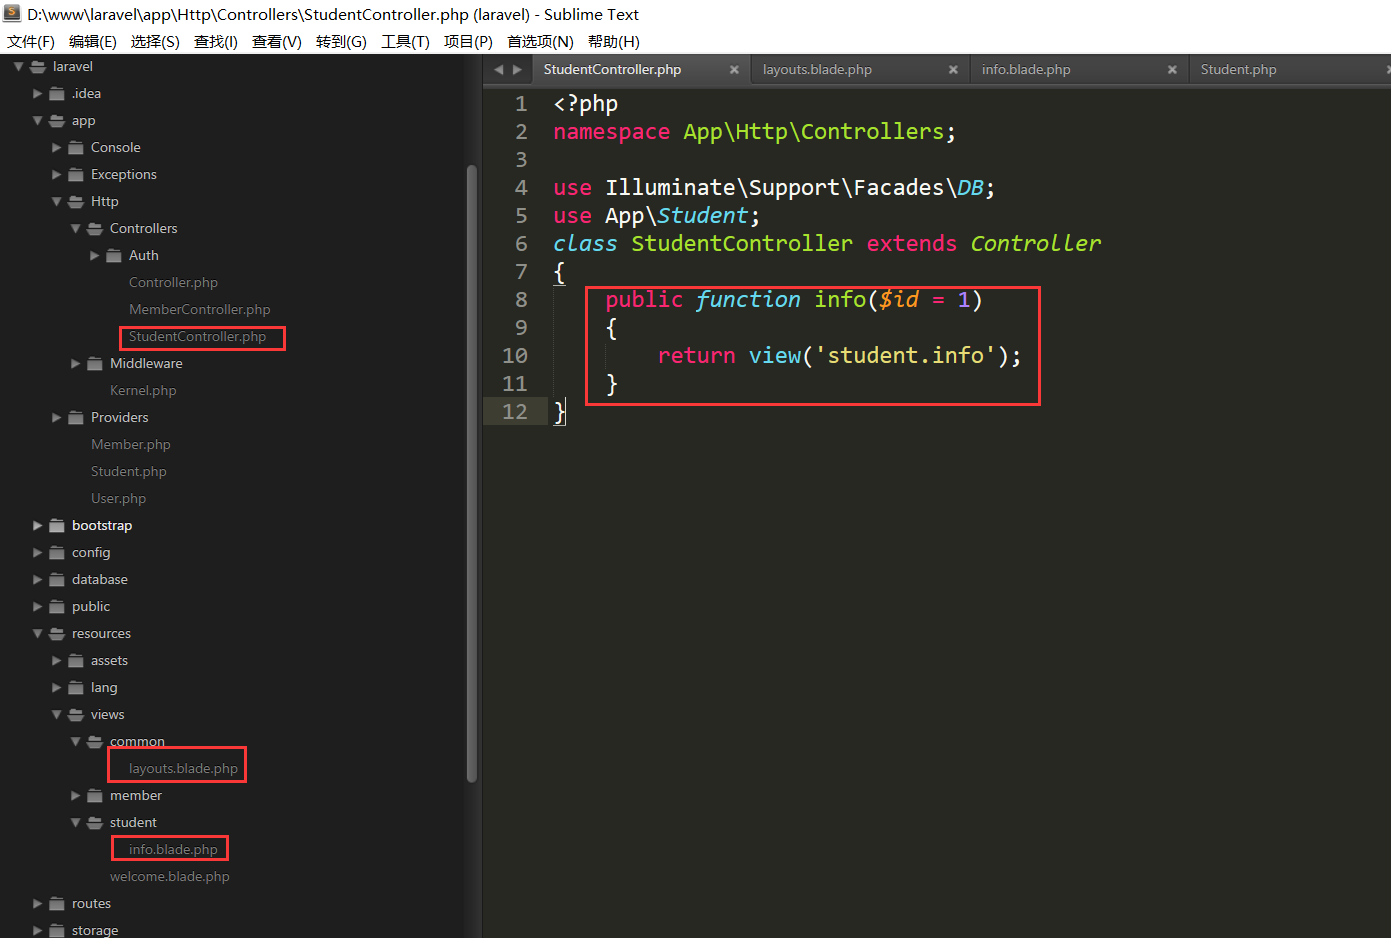
7、路由中输出视图:

三、控制器
1、创建控制器:
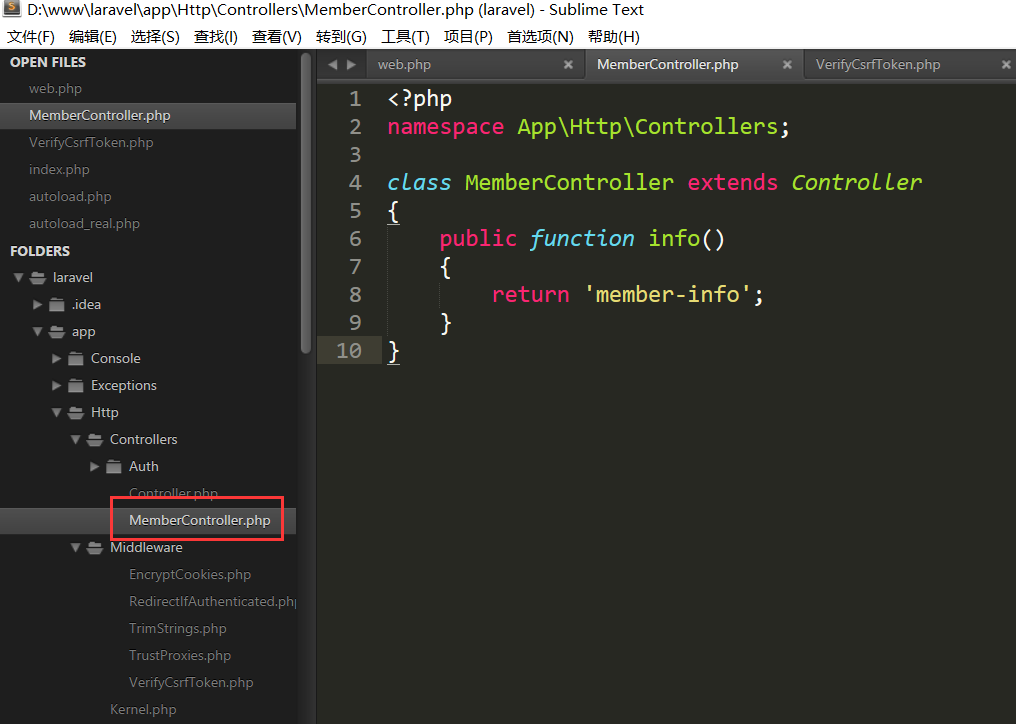
<?php
namespace AppHttpControllers;

class MemberController extends Controller
{
    public function info()
    {
        return 'member-info';
    }
}
2、路由访问控制器下的方法:
1)
Route::get('member/info', 'MemberController@info');
2)
Route::get('member/info', ['uses' => 'MemberController@info']);
四、视图:
1、创建及传参

<?php
namespace AppHttpControllers;

class MemberController extends Controller
{
    public function info()
    {
        return view('member/info', [
            'name' => 'lisi',
            'age' => 20
        ]);
    }
}
五、模型:
1、创建模型:

<?php
namespace App;

use IlluminateDatabaseEloquentModel;
class Member extends Model
{
    public static function getMember()
    {
        return 'member name is sean';
    }
}
六、数据库操作:
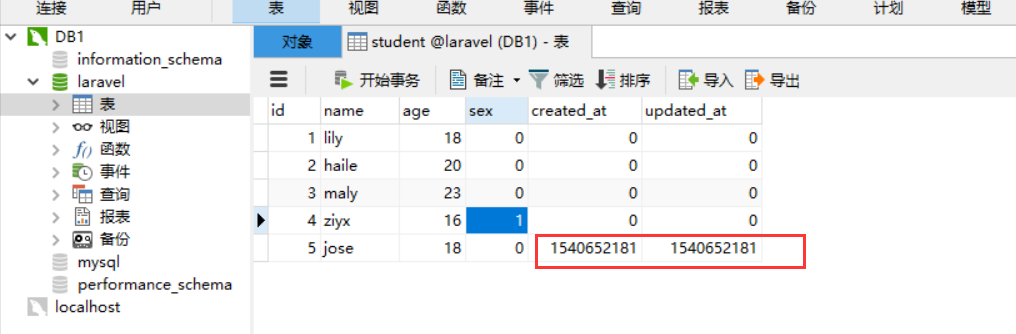
1、数据库准备:
CREATE database laravel;
use laravel;
CREATE TABLE IF NOT EXISTS student( `id` INT AUTO_INCREMENT PRIMARY KEY, `name` VARCHAR(255) NOT NULL DEFAULT '' COMMENT '姓名', `age` TINYINT UNSIGNED NOT NULL DEFAULT 0, `sex` TINYINT UNSIGNED NOT NULL DEFAULT 0, `created_at` INT NOT NULL DEFAULT 0, `updated_at` INT NOT NULL DEFAULT 0 ) ENGINE=InnoDB DEFAULT CHARSET=UTF8 AUTO_INCREMENT=1 COMMENT='学生表';
2、laravel配置数据库:

3、使用facade实现CURD
1)查询:
$students = DB::select('select * from student where id > ?',
[1]);

2)新增:
$bool = DB::insert('insert into student(name, age) values (?, ?)',
            ['tom', 20]);
3)修改:
$num = DB::update('update student set age = ? where name = ?',
            [22, 'tom']);
4)删除:
$num = DB::delete('delete from student where id = ?',
            [3]);
4、查询构造器实现CURD:
1)新增:
$bool = DB::table('student')->insert([
                'name' => 'zhangsan',
                'age' => 18
            ]);
2)新增并且返回自增id:
$id = DB::table('student')->insertGetId([
                'name' => 'lisi',
                'age' => 21
            ]);
3)插入多条数据:
$bool = DB::table('student')->insert([
                ['name' => 'test1','age' => 21],
                ['name' => 'test2','age' => 21],
            ]);
4)更新数据:
$num = DB::table('student')
            ->where('id', 2)
            ->update(['age' => 30]);
5)自增,默认为自增1:
$num = DB::table('student')
            ->where('id', 2)
            ->increment('age', 3);
6)自减,默认为自减1:
$num = DB::table('student')
            ->where('id', 2)
            ->decrement('age', 3);
7)自增同时更改其他字段:
$num = DB::table('student')
            ->where('id', 2)
            ->increment('age', 3, ['name' => 'haha']);
8)删除:
$num = DB::table('student')
            ->where('id', '>=', 4)
            ->delete();
9)清空数据表:
DB::table('student')
       ->truncate();
10)查询
10.1获取所有数据:get
$students = DB::table('student')->get();
10.2获取一条数据:first
$student = DB::table('student')->orderBy('id', 'desc')->first();
10.3多个查询条件查询语句:whereRaw
$students = DB::table('student')
            ->whereRaw('id >= ? and age > ?', [2, 20])
            ->get();
10.4返回指定单个字段:pluck
$students = DB::table('student')
            ->pluck('name');
10.5查询指定的字段:select
$students = DB::table('student')
            ->select('name', 'age')
            ->get();
10.6分批查询,适用于表数据很多的时候使用:chunk
DB::table('student')
   ->orderBy('id', 'desc')
    ->chunk(2, function($students) {
        var_dump($students);
    });
11)聚合函数
11.1计数:count
$nums = DB::table('student')->count();
11.2查询最大值、最小值:max、min
$age = DB::table('student')->max('age');
$age = DB::table('student')->min('age');
11.3平均数:avg
$age = DB::table('student')->avg('age');
11.4求和:sum
$age = DB::table('student')->sum('age');
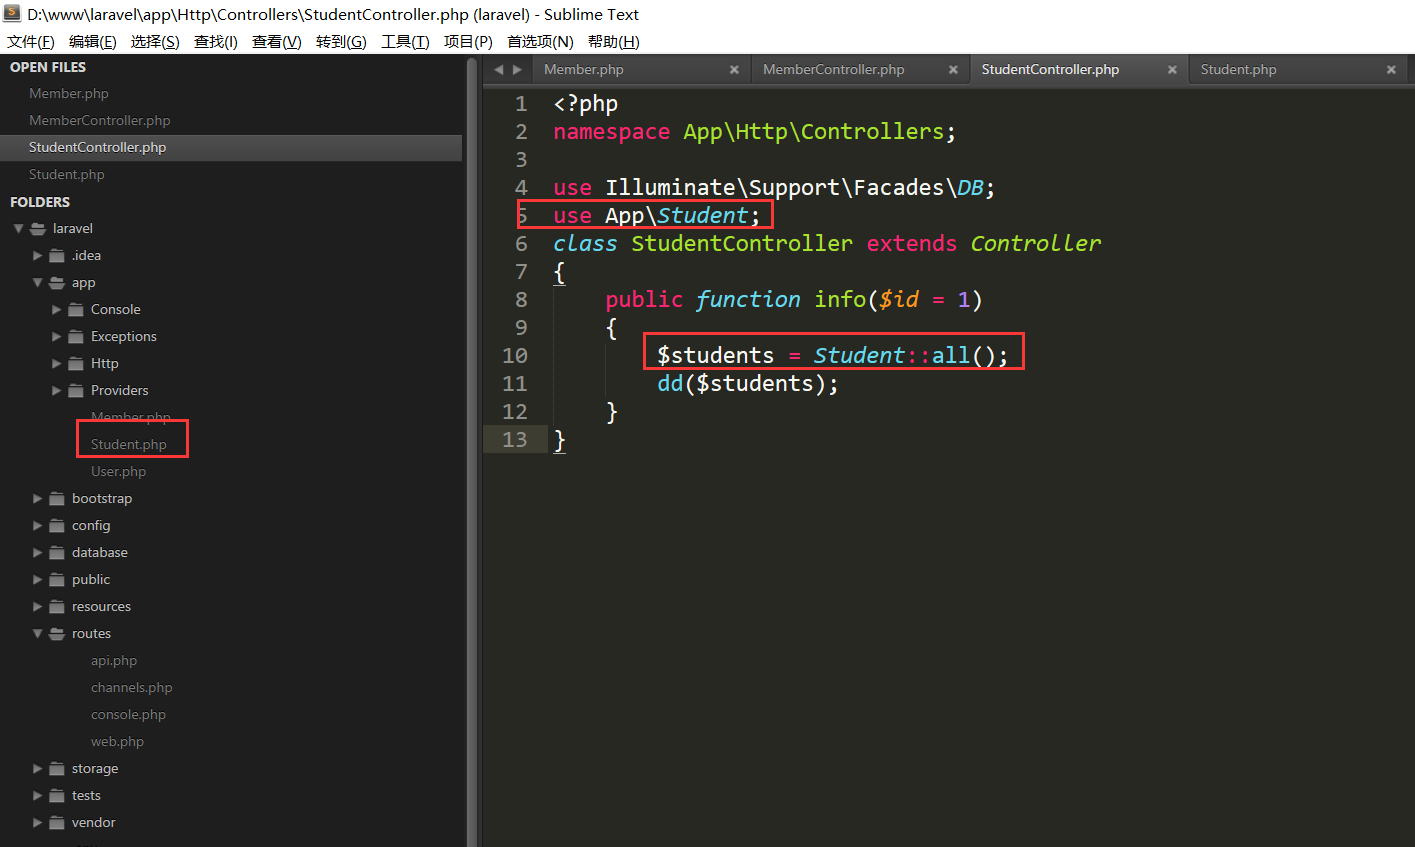
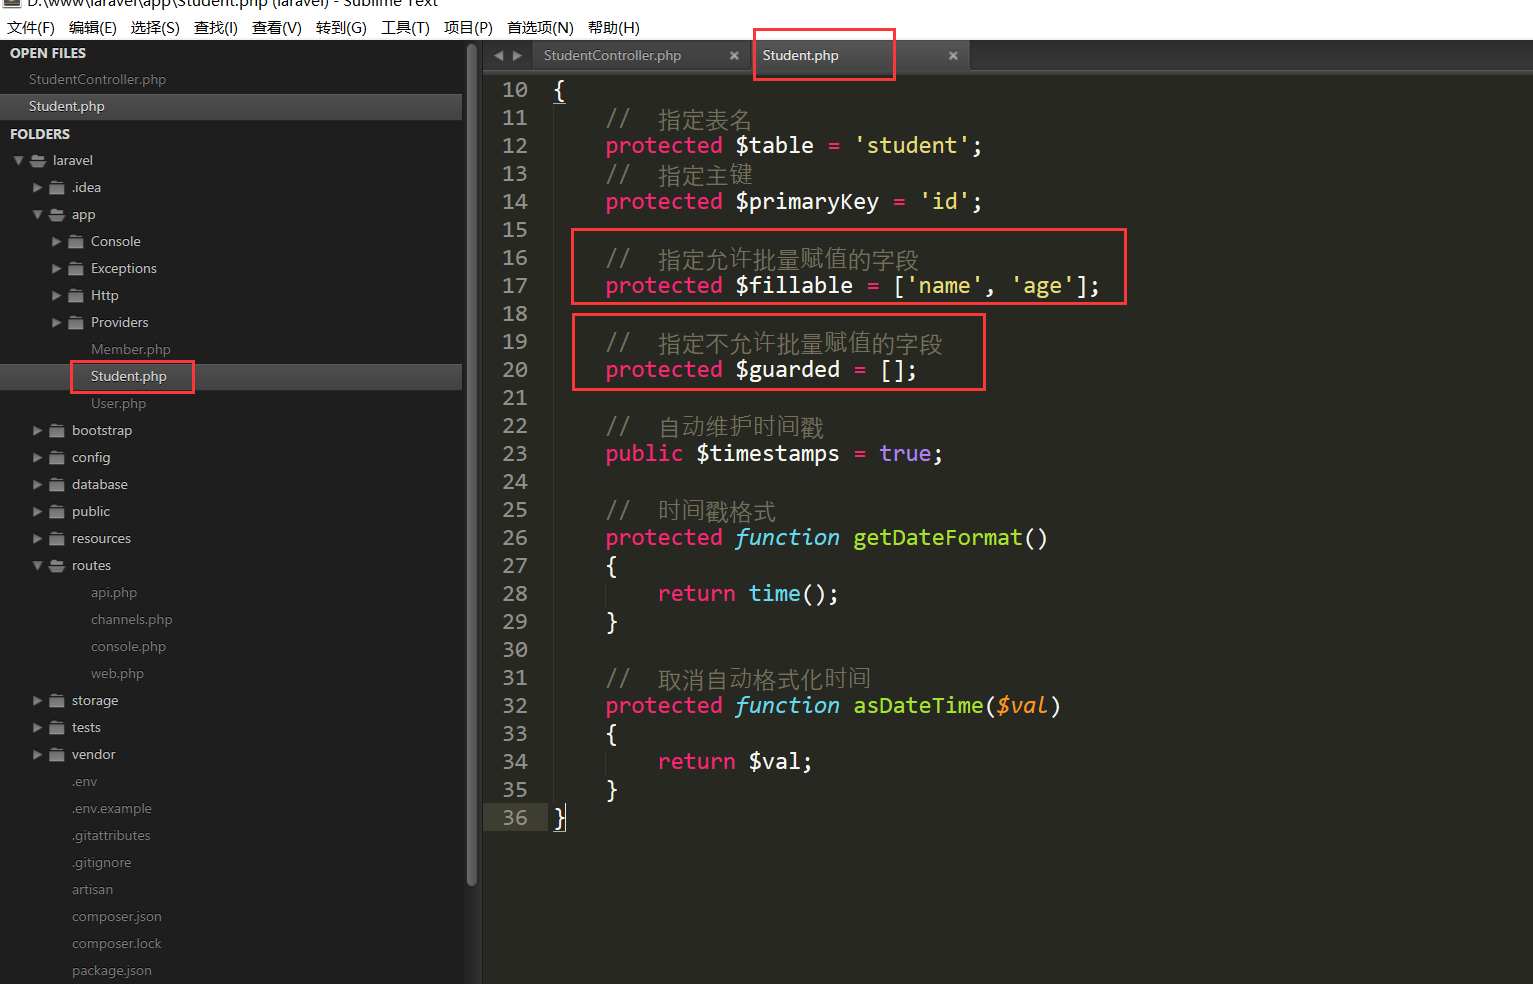
4、Eloquent ORM模型的建立及查询数据
1)建立模型
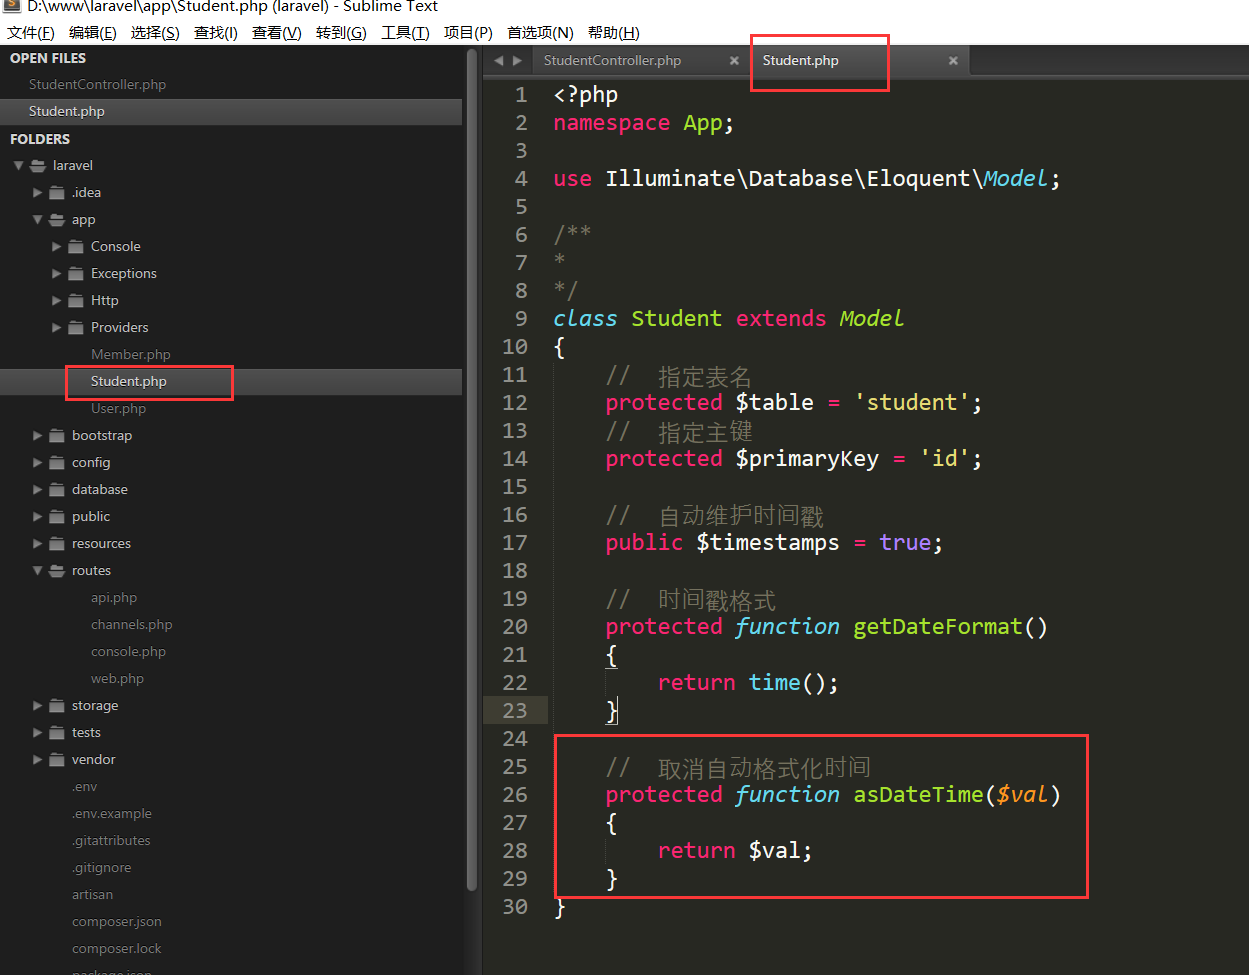
<?php
namespace App;

use IlluminateDatabaseEloquentModel;

/**
*
*/
class Student extends Model
{
    //    指定表名
    protected $table = 'student';
    //    指定主键
    protected $primaryKey = 'id';

    //    自动维护时间戳
    public $timestamps = true;

    //    时间戳格式
    protected function getDateFormat()
    {
        return time();
    }
}
2、查询
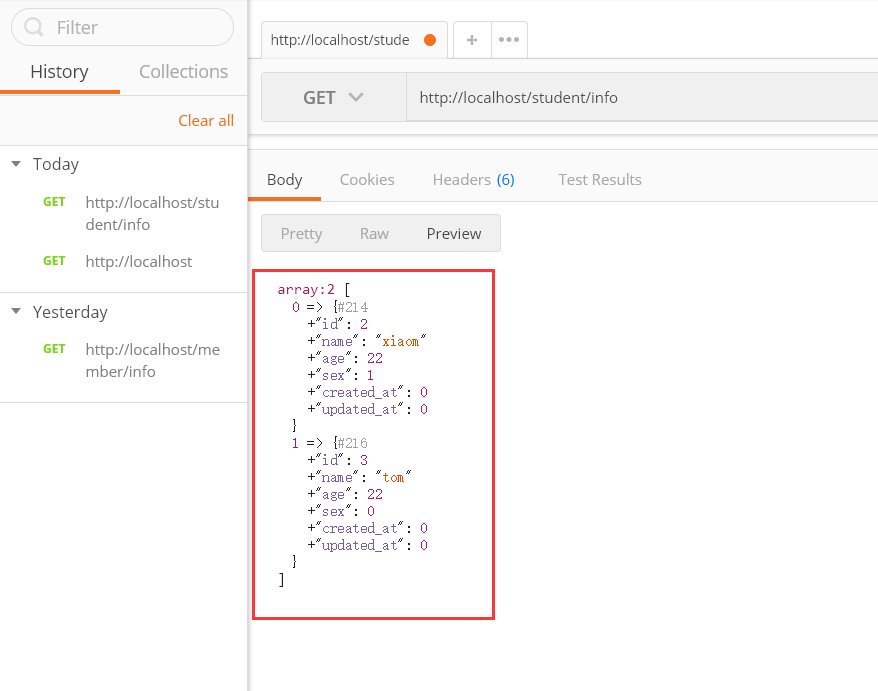
1)查询所有记录:all
$students = Student::all();
2)根据主键查询一条数据:find
$students = Student::find(2);
3)根据主键查询一条数据,查询不到抛出异常:findOrFail
$students = Student::findOrFail(12);
4)可用查询构造器的方法,如下所示,其他方法类似:
Student::orderBy('id', 'desc')
    ->chunk(2, function($students){
        var_dump($students);
    });
3、新增数据:
1)新增
$student = new Student();
$student->name = 'jose';
$student->age = 18;
$bool = $student->save();
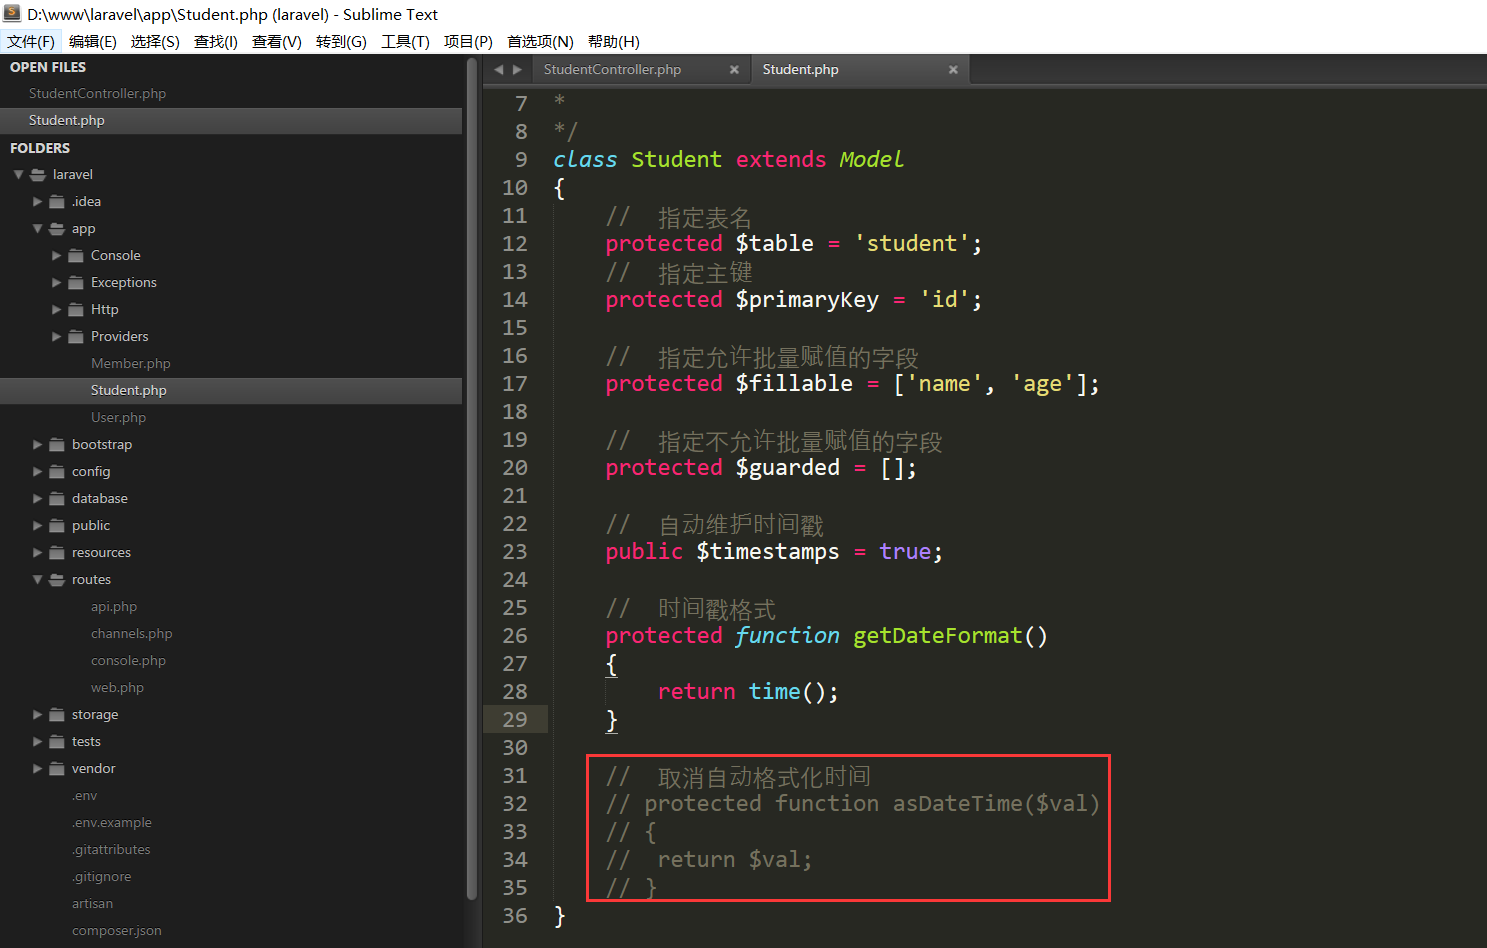
2)新增的数据更新时间戳和添加时间戳取出时是自动被格式化了的时间:
$student = Student::find(5);
echo $student->updated_at;

如果不想模型自动格式化时间,需要在模型里添加asDateTime方法:
//    取消自动格式化时间
protected function asDateTime($val)
{
    return $val;
}
3)create新增数据:
$student = Student::create(
    ['name' => 'xiaoen', 'age' => 32]
);
前提条件是模型需要设置允许批量赋值的字段或不允许批量赋值的字段
//    指定允许批量赋值的字段
protected $fillable = ['name', 'age'];

//    指定不允许批量赋值的字段
protected $guarded = [];
4)查找数据,如果查找不到则新增数据:firstOrCreate
$student = Student::firstOrCreate(
    ['name' => 'xiaoen1', 'age' => 32]
);
5)查找数据,如果没有数据则创建数据对象,需要保存到数据库时再调用save方法:firstOrNew
$student = Student::firstOrNew(
    ['name' => 'xiaoen2', 'age' => 32]
);
$bool = $student->save();
4、更新数据
1)通过模型更新数据:
$student = Student::find(1);
$student->name = 'tiantian';
$bool = $student->save();
确保asDateTime方法为屏蔽状态,不然上述更新会报错:
2)批量更新:update
$num = Student::where('id', '>', 6)
    ->update(['age' => 23]);
5、删除
1)通过模型删除:delete
$student = Student::find(5);
$bool = $student->delete();
2)通过主键删错:destroy
如下为删错id为7和8的记录:
$num = Student::destroy(7, 8);
3)删除指定数据:使用where
$num = Student::where('id', '>', 3)->delete();
七、Blade模板
1、模板继承:@section、@yield、@extends
公共模板:common.layouts.blade.php
<!DOCTYPE html>
<html lang="en">
<head>
    <meta charset="UTF-8">
    <title>laravel - @yield('title')</title>
    <style type="text/css">
        .header {
            width: 1000px;
            height: 150px;
            margin: 0 auto;
            background: #f5f5f5;
            border: 1px solid #ddd;
        }
        .main {
            width: 1000px;
            height: 300px;
            margin: 0 auto;
            margin-top: 15px;
            clear: both;
        }
        .main .sidebar {
            float: left;
            width: 20%;
            height: inherit;
            background: #f5f5f5;
            border: 1px solid #ddd;
        }
        .main .content {
            float: right;
            width: 75%;
            height: inherit;
            background: #f5f5f5;
            border: 1px solid #ddd;
        }
        .footer {
            width: 1000px;
            height: 150px;
            margin: 0 auto;
            margin-top: 15px;
            background: #f5f5f5;
            border: 1px solid #ddd;
        }
    </style>
</head>
<body>
    <div class="header">
        @section('header')
        头部
        @show
    </div>
    <div class="main">
        <div class="sidebar">
            @section('sidebar')
            侧边栏
            @show
        </div>
        <div class="content">
            @yield('content', '主要内容区域')
        </div>
    </div>
    <div class="footer">
        @section('footer')
        底部
        @show
    </div>
</body>
</html>
继承模板:info.blade.php
@extends('common.layouts')
@section('header')
    header
@stop

@section('sidebar')
    @parent
    sidebar
@stop

@section('content')
    content
@stop
对应目录:


效果显示:

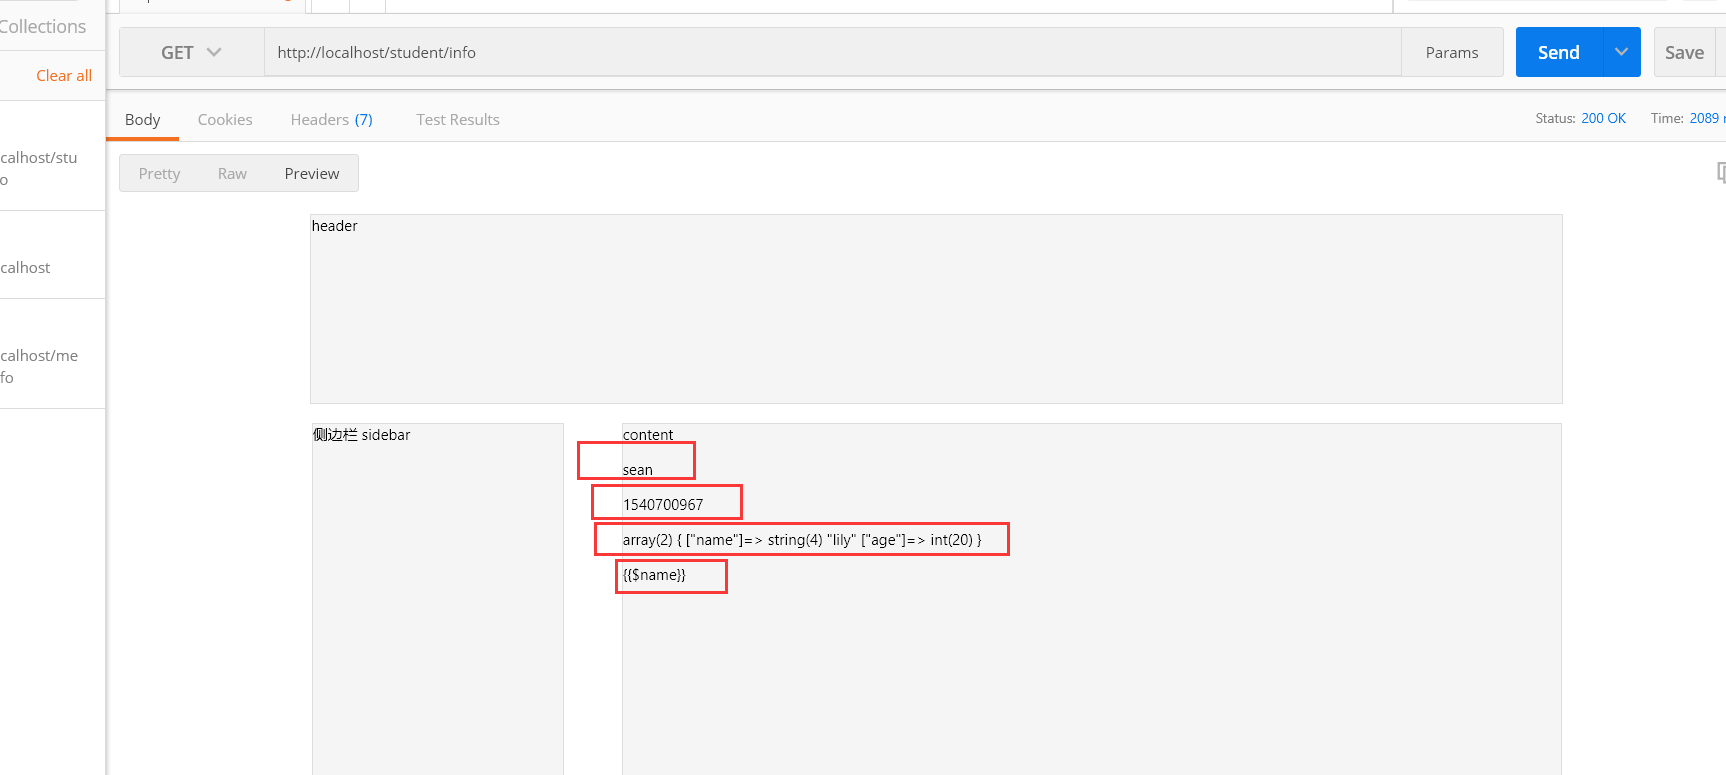
2、模板中变量的输出
1)方法中传变量

2)模板中调用变量:

显示效果图:
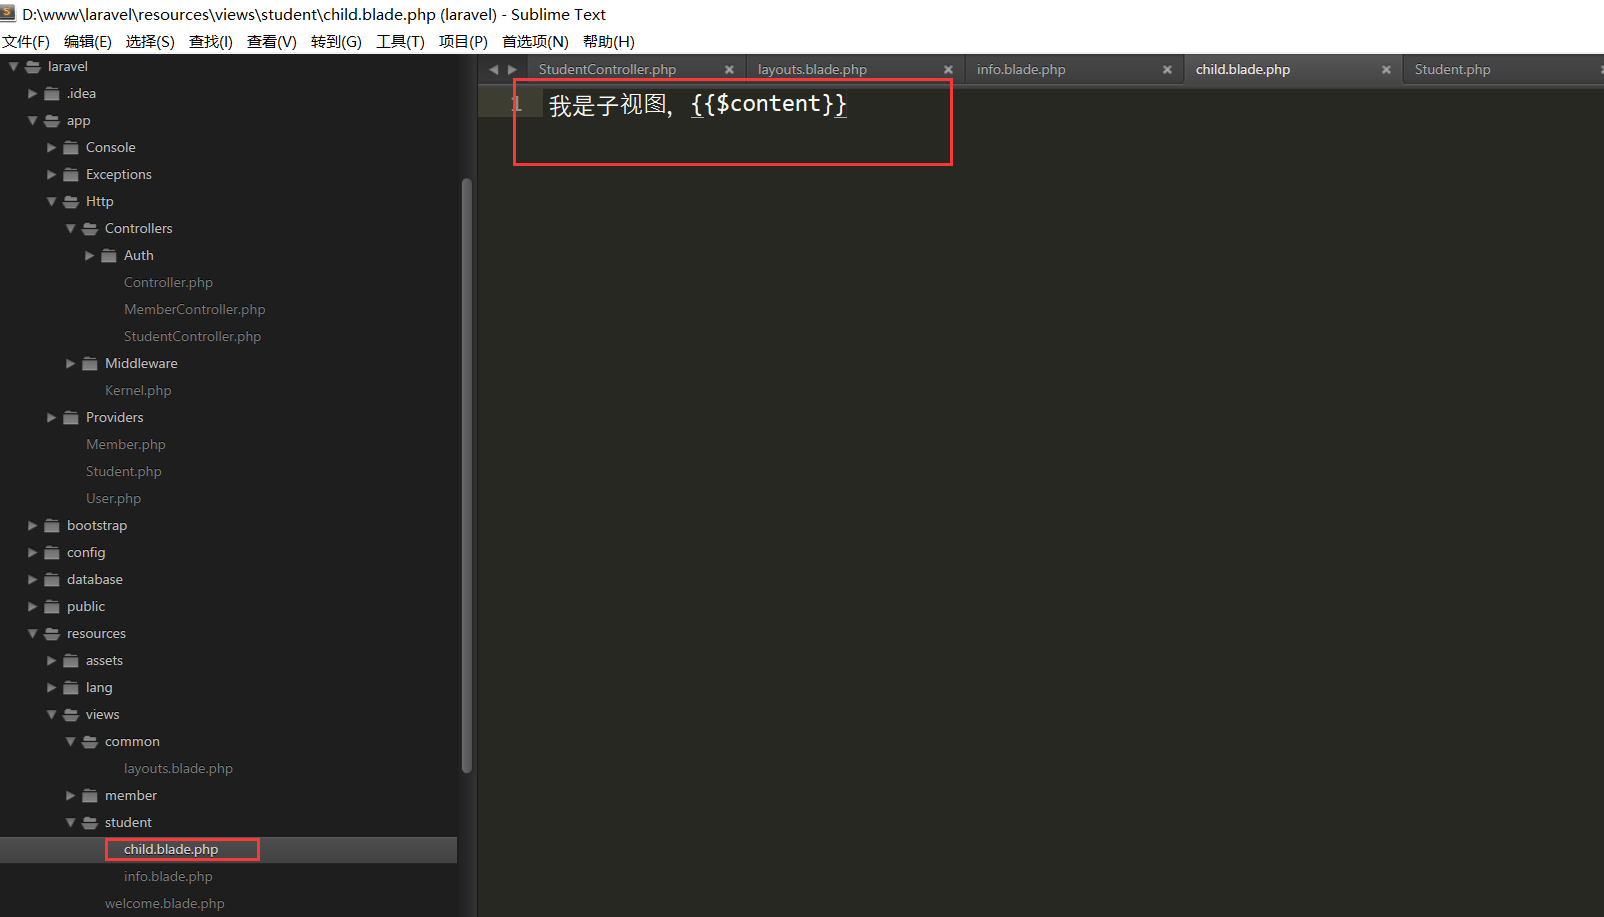
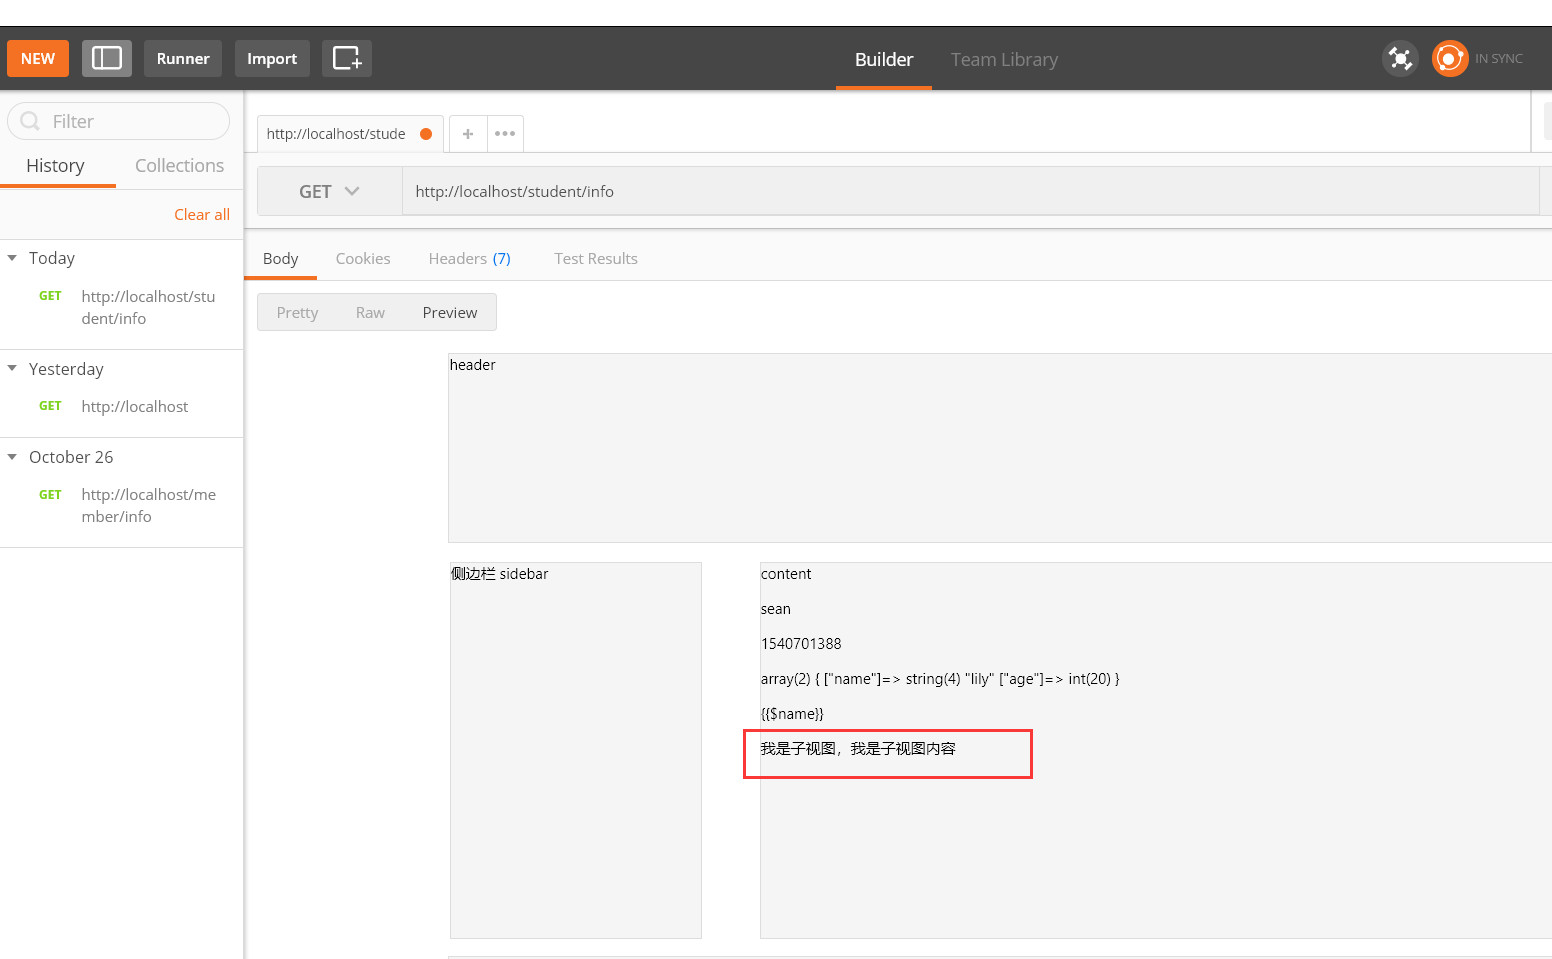
3、模板中引入子视图:@include
@include('student.child', ['content' => '我是子视图内容'])

子视图代码:
显示效果图:
4、模板中的流程控制:
1)@if、@elseif、@else、@endif
<!-- 1、if -->
@if ($name == 'sean')
    I am sean
@elseif ($name == 'lily')
    I am lily
@else
    Who am I?
@endif
备注,if条件中也是可以使用php函数
@if (in_array($name, $arr))
    true
@else
    false
@endif
2)@unless:相当于@if的取反
@unless ($name != 'sean')
    I am sean
@endunless
3)@for
@for ($i = 0; $i < 5; $i++)
    {{$i}}
@endfor
4)@foreach
@foreach ($students as $student)
    {{$student->name}}
@endforeach
5)@forelse、@empy:@forelse遍历的对象中没有数据时输出@empty中的内容
@forelse ($students as $student)
    {{$student->name}}
@empty
    null
@endforelse
5、模板中的url
1)准备要跳转的url
Route::get('user/center', ['as' => 'center', 'uses' => 'StudentController@testUrl']);
2)模板中使用不同的方法来跳转:url()、action()、route();一般使用rout()方法根据别名跳转
<a href="{{url('user/center')}}">url()方法</a>
<a href="{{action('StudentController@testUrl')}}">action()方法</a>
<a href="{{route('center')}}">route()方法</a>