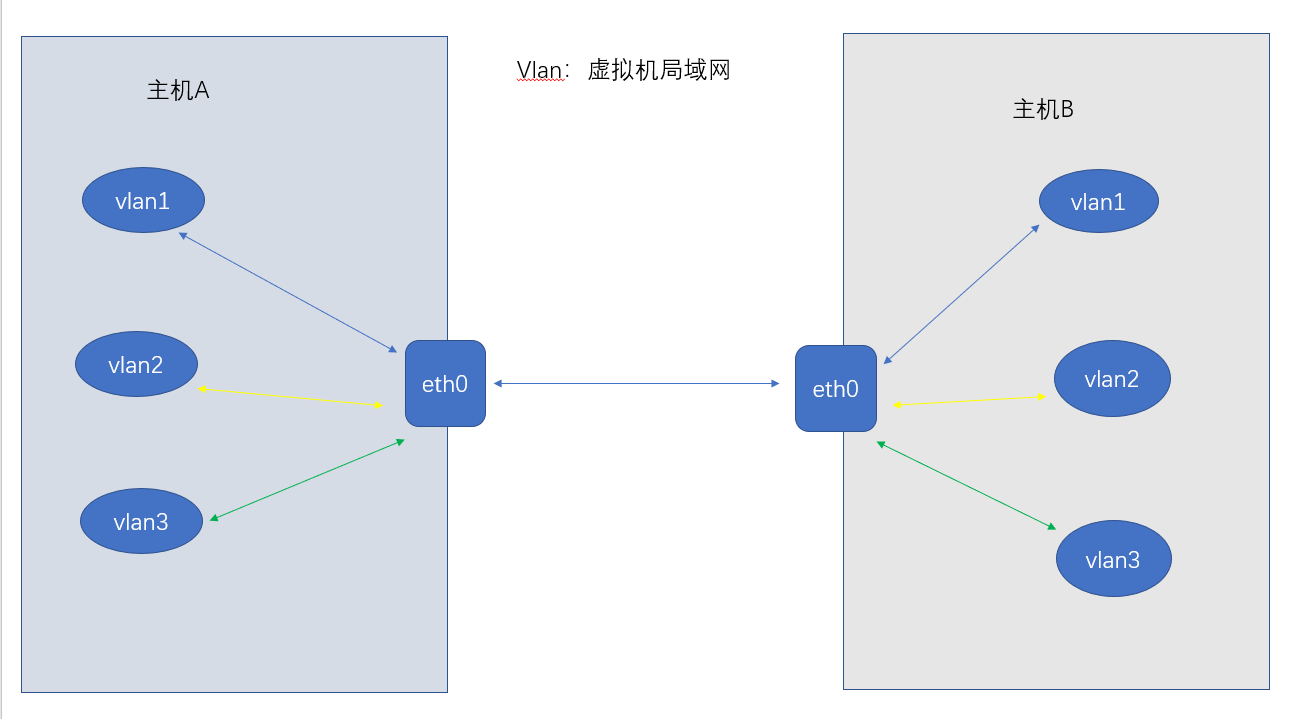
vlan:虚拟局域网
VLAN是一种将局域网设备从逻辑上划分成一个个网段,从而实现虚拟工作组的数据交换技术
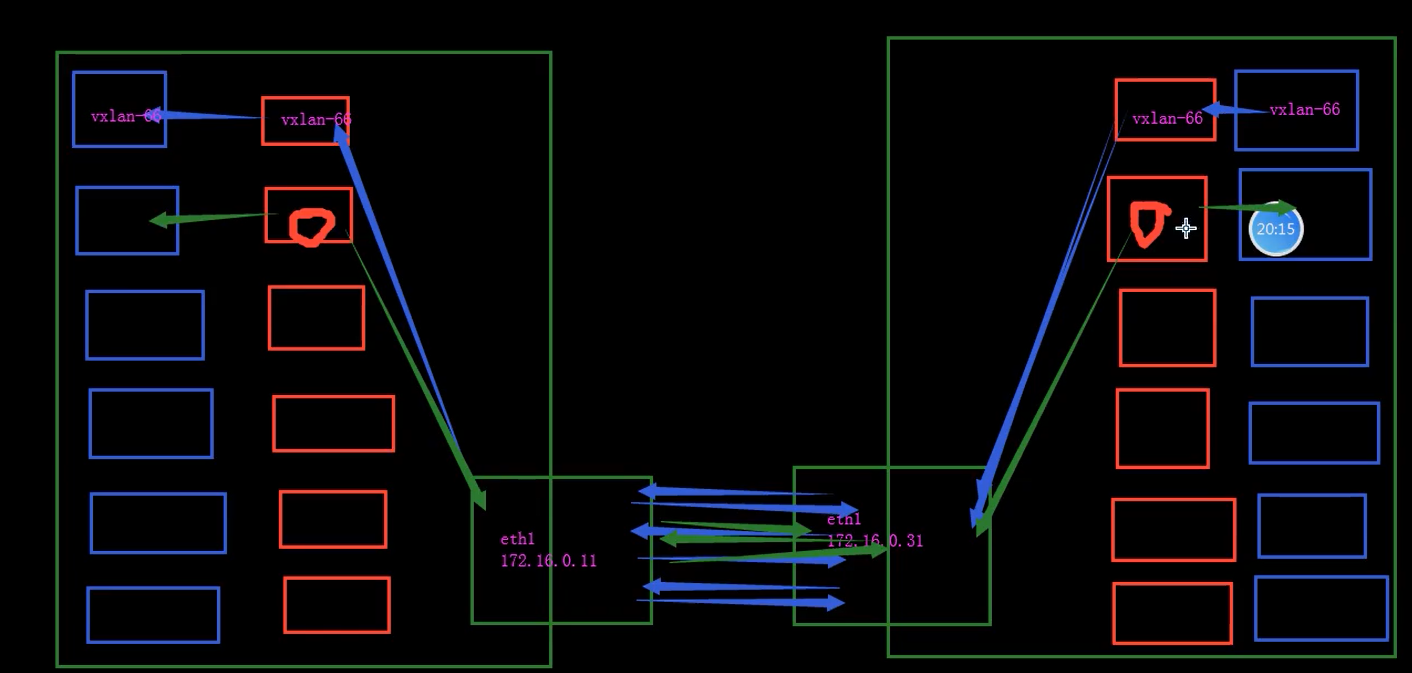
vxlan:(Virtual eXtensible LAN可扩展虚拟局域网),基于IP网络之上,采用的是MAC in UDP技术(通过建立隧道进行传输数据)
控制节点修改:
建议将之前配置的flat网络的虚拟机全部删除:(本次操作全部是将flat的网络模式更改为3层的模式)
1:编辑/etc/neutron/neutron.conf文件并完成以下操作:
[root@controller01 ~]# vim /etc/neutron/neutron.conf
在该[DEFAULT]部分中,启用模块化第2层(ML2)插件,路由器服务和重叠的IP地址
[DEFAULT]
core_plugin = ml2
service_plugins = router
allow_overlapping_ips = true
2:配置模块化层2(ML2)插件
ML2插件使用Linux桥接器机制为实例构建第2层(桥接和交换)虚拟网络基础结构。
-
编辑
/etc/neutron/plugins/ml2/ml2_conf.ini文件并完成以下操作:-
在该
[ml2]部分中,启用平面,VLAN和VXLAN网络:
tenant_network_types:定义租户的网络类型,,l2population此参数是为了优化l2网络插件性能[ml2]
type_drivers = flat,vlan,vxlan
tenant_network_types = vxlan
mechanism_drivers = linuxbridge,l2population -
在该[ml2_type_vxlan]部分中,为自助服务网络配置VXLAN网络标识符范围:vlan:1-4096 vlan:4096*4096-2
[ml2_type_vxlan]
vni_ranges = 1:100000
3:配置Linux网桥代理
前提:对每个节点进行添加一个vxlan单独使用网卡,并且给每个网卡进行添加永久地址:(添加之后注意不要重启网络服务,使用ifup进行重启网卡)
Linux网桥代理为实例构建第2层(桥接和交换)虚拟网络基础结构并处理安全组。
-
编辑
/etc/neutron/plugins/ml2/linuxbridge_agent.ini文件并完成以下操作
[vxlan]
enable_vxlan = true
local_ip = 10.100.203.201
l2_population = true
4:配置第3层剂
第3层(L3)代理为自助式虚拟网络提供路由和NAT服务。
-
编辑
/etc/neutron/l3_agent.ini文件并完成以下操作
在该[DEFAULT]部分中,配置Linux网桥接口驱动程序和外部网桥:
[DEFAULT]
interface_driver = linuxbridge
启动服务:
[root@controller01 ~]# systemctl restart neutron-server.service
> neutron-linuxbridge-agent.service neutron-dhcp-agent.service
> neutron-metadata-agent.service
[root@controller01 ~]# systemctl enable neutron-l3-agent.service
[root@controller01 ~]# systemctl start neutron-l3-agent.service
计算节点修改:
[root@compute01 ~]# vim /etc/neutron/plugins/ml2/linuxbridge_agent.ini
[vxlan]
enable_vxlan = true
local_ip = 10.100.203.202
l2_population = true
重启服务:
[root@compute01 ~]# systemctl restart neutron-linuxbridge-agent.service
检测:

开启 路由:
[root@compute01 ~]# vim /etc/openstack-dashboard/local_settings
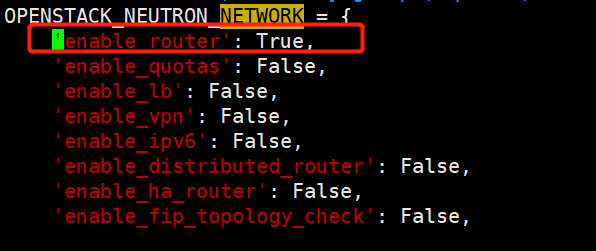
[root@compute01 ~]# systemctl restart httpd
创建网络(vxlan网络创建的时候必须要有公有网络和私有网络同时创建)
1:创建一个网络
[root@controller01 ~]# openstack network create selfprovider
2:在网络上创建一个子网
[root@controller01 ~]# openstack network create selfprovider
[root@controller01 ~]# openstack subnet create --network selfprovider
> --dns-nameserver 114.114.114.114 --gateway 172.16.1.1
> --subnet-range 172.16.1.0/24 selfsubnet
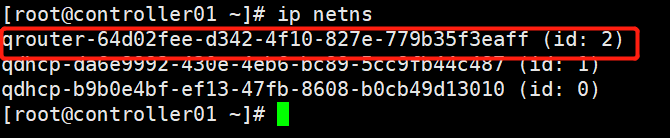
3:创建路由:
[root@controller01 ~]# openstack router create router
4:将网络的子网添加为路由器上的接口:
[root@controller01 ~]# openstack router add subnet router selfsubnet
5:给路由器设置公有网络的网关:
[root@controller01 ~]# neutron router-gateway-set router provider
验证操作:
[root@controller01 ~]# openstack port list --router router
+--------------------------------------+------+-------------------+-------------------------------------------------------------------------------+--------+
| ID | Name | MAC Address | Fixed IP Addresses | Status |
+--------------------------------------+------+-------------------+-------------------------------------------------------------------------------+--------+
| d5db964d-3a40-46f4-ba59-e71b13dbdc19 | | fa:16:3e:b5:6a:34 | ip_address='172.16.1.1', subnet_id='67b74cd2-304e-46ae-8eb2-448f0c0410c1' | ACTIVE |
| f3ce76b9-5452-4b47-b48f-cf6ba752dea3 | | fa:16:3e:4a:27:8e | ip_address='10.100.214.151', subnet_id='fe427e08-7d4f-46ec-bebd-1a2d277fbef2' | ACTIVE |
+--------------------------------------+------+-------------------+-------------------------------------------------------------------------------+--------+
从控制节点或任意公共物理网络上的节点Ping这个IP地址:
[root@controller01 ~]# ping -c 4 10.100.214.151