github项目地址https://github.com/H-Designer/SpringBoot
这一节要总结的是:国际化语言设定,以及拦截器的设定
上一节总结的是:项目跟路径设定、项目首址设定(https://www.cnblogs.com/zhaochunhui/p/11331803.html)
##4、根据国际化的设置:
在application.properties中进行设置国际化语言的存放地址
spring.messages.basename=i18n.login
然后在resources中进行设置
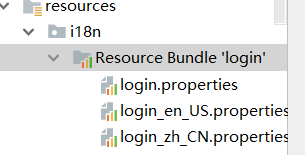
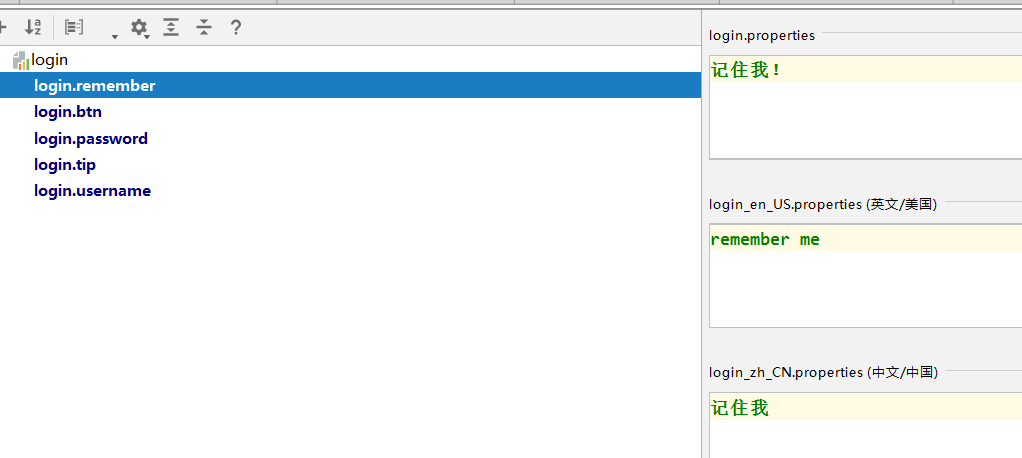
进行中英文的设定
<!DOCTYPE html>
<html lang="en" xmlns:th="http://www.thymeleaf.org">
<head>
<meta http-equiv="Content-Type" content="text/html; charset=UTF-8">
<meta name="viewport" content="width=device-width, initial-scale=1, shrink-to-fit=no">
<meta name="description" content="">
<meta name="author" content="">
<title>Signin Template for Bootstrap</title>
<!-- Bootstrap core CSS -->
<link th:href="@{asserts/css/bootstrap.min.css}" rel="stylesheet">
<!--<link href="asserts/css/bootstrap.min.css" rel="stylesheet">-->
<!-- Custom styles for this template -->
<!--<link href="asserts/css/signin.css" rel="stylesheet">-->
<link th:href="@{asserts/css/signin.css}" rel="stylesheet">
</head>
<body class="text-center">
<form class="form-signin" th:action="@{/user/login}" action="dashboard.html" th:method="post">
<img class="mb-4" th:src="@{asserts/img/bootstrap-solid.svg}" alt="" width="72" height="72">
<h1 class="h3 mb-3 font-weight-normal" th:text="#{login.tip}"></h1>
<!--判断是否提示信息-->
<p th:text="${mes}" style="color: red" th:if="${not #strings.isEmpty(mes)}"/>
<label class="sr-only"th:text="#{login.username}"></label>
<input type="text" name="username" class="form-control" th:placeholder="#{login.username}" required="" autofocus="">
<label class="sr-only"th:text="#{login.password}"></label>
<input type="password" name="password" class="form-control" th:placeholder="#{login.password}" required="">
<div class="checkbox mb-3">
<label>
<input type="checkbox" value="remember-me"> [[#{login.remember}]]
</label>
</div>
<button class="btn btn-lg btn-primary btn-block" type="submit" th:text="#{login.btn}"></button>
<p class="mt-5 mb-3 text-muted">© 2017-2018</p>
<a class="btn btn-sm" th:href="@{/index.html(l='zh_CN')}">中文</a>
<a class="btn btn-sm" th:href="@{/index.html(l='en_US')}">English</a>
</form>
</body>
</html>
这里面,<label class="sr-only"th:text="#{login.password}"></label>其中的#{login.password}访问到的就是根据不同语言设定访问到的不同的语言格式。
<a class="btn btn-sm" th:href="@{/index.html(l='zh_CN')}">中文</a>
<a class="btn btn-sm" th:href="@{/index.html(l='en_US')}">English</a>
在点击不同的语言格式的时候,根绝th:href进行访问到"@{/index.html},根绝从controller进行解析,访问到的还是login.html页面
(l='en_US')这个就是参数的传递,(key=value)
然后在MyLocalResolver进行参数的获取
public class MyLocalResolver implements LocaleResolver {
@Override
public Locale resolveLocale(HttpServletRequest request) {
String l=request.getParameter("l");
Locale locale =Locale.getDefault();
if(!StringUtils.isEmpty(l)){
String [] spilt=l.split("_");
locale = new Locale(spilt[0],spilt[1]);
}
return locale;
}
@Override
public void setLocale(HttpServletRequest request, HttpServletResponse response, Locale locale) {
}
}
其中,根据(HttpServletRequest request)进行从网页上进行request进行请求
然后在configuration中进行Bean的添加,将这个模块添加到容器系统中,进行应用:
@Bean//添加组件(将网页获取的中英文标识的字符串进行返回)
public LocaleResolver localeResolver(){
return new MyLocalResolver();
}
}
通过Bean进行容器的添加,在系统中就存在相应的功能
##5.在登陆界面form表单里面进行提交的
<form class="form-signin" th:action="@{/user/login}" action="dashboard.html" th:method="post">,
会在controller中进行解析(method中的是post方式,在controller中要以)@PostMapping(value = "/user/login")进行解析
package com.example.controller;
import org.springframework.stereotype.Controller;
import org.springframework.web.bind.annotation.PostMapping;
import org.springframework.web.bind.annotation.RequestParam;
import org.thymeleaf.util.StringUtils;
import javax.servlet.http.HttpSession;
import java.util.Map;
@Controller
public class LoginController {
@PostMapping(value = "/user/login")
// @RequestParam ("username") String Username,根绝从login网页中传入的值进行数据的接收
public String login(@RequestParam ("username") String Username,
@RequestParam ("password")String Password,
Map<Object,String> map, HttpSession session){
//登陆成功
if(!StringUtils.isEmpty(Username)&&Password.equals("123")) {
session.setAttribute("loginusername",Username);
return "redirect:/main.html";
}
//登录失败
else{
map.put("mes","用户名密码错误");
return "login";
}
}
}
根据th:action="@{/user/login}"进行controller的解析
@Controller
public class LoginController {
@PostMapping(value = "/user/login")
// @RequestParam ("username") String Username,根绝从login网页中传入的值进行数据的接收
// @RequestParam ("password")String Password,
public String login(@RequestParam ("username") String Username,
@RequestParam ("password")String Password,
Map<Object,String> map, HttpSession session){
//登陆成功
if(!StringUtils.isEmpty(Username)&&Password.equals("123")) {
session.setAttribute("loginusername",Username);
return "redirect:/main.html";
}
//登录失败
else{
map.put("mes","用户名密码错误");
return "login";
}
}
}
这里面进行解析,同时根据在前台传过来的值,进行分析,(连接数据库同类),将传入的值与正确的值进行比较,如果相同进行跳转
并且// @RequestParam ("username") String Username,根据从login网页中传入的值进行数据的接收
跳转到的就是bashboard.html
"redirect:/main.html";重定向:定向到的相当于是localhost:8080/crud/main.html(main.html进行controller解析)
##6.然后就是拦截器的设定
写一个拦截器
/*
* 登陆拦截器
* */
public class LoginHandlerInterceptor implements HandlerInterceptor {
//在目标方法执行之前
@Override
public boolean preHandle(HttpServletRequest request, HttpServletResponse response, Object handler) throws Exception {
Object user = request.getSession().getAttribute("loginusername");
if(user == null){
//未登录,进行拦截,返回登陆界面
request.setAttribute("mes","没有权限请先进行登陆操作");
request.getRequestDispatcher("index.html").forward(request,response);
return false;
}else {
//已登录,放行
return true;
}
}
@Override
public void postHandle(HttpServletRequest request, HttpServletResponse response, Object handler, ModelAndView modelAndView) throws Exception {
}
@Override
public void afterCompletion(HttpServletRequest request, HttpServletResponse response, Object handler, Exception ex) throws Exception {
}
}
在这里面就是集成现成的拦截器函数,在其中进行部分功能的丰富(返回错误信息)
在config中添加到bean中进行功能的丰富:
@Bean //将组件注册在容器(地址映像)
public WebMvcConfigurerAdapter webMvcConfigurerAdapter(){
WebMvcConfigurerAdapter adapter = new WebMvcConfigurerAdapter() {
@Override
public void addViewControllers(ViewControllerRegistry registry) {
registry.addViewController("/").setViewName("login");
registry.addViewController("/index.html").setViewName("login");
registry.addViewController("/main.html").setViewName("dashboard");
}
//注册拦截器
@Override
public void addInterceptors(InterceptorRegistry registry) {
//super.addInterceptors(registry);
//静态资源; *.css , *.js
//SpringBoot已经做好了静态资源映射
registry.addInterceptor(new LoginHandlerInterceptor()).addPathPatterns("/**")
.excludePathPatterns("/index.html","/","/user/login","/asserts/**");
}
};
return adapter;
}
其中进行拦截registry.addInterceptor(new LoginHandlerInterceptor()).addPathPatterns("/**")
.excludePathPatterns("/index.html","/","/user/login","/asserts/**");
除去(excludePathPatterns)部分的请求,其余的请求都会进行拦截("/index.html","/","/user/login","/asserts/**");
下一节总结:员工列表、多个页面的项目布局的提取(https://www.cnblogs.com/zhaochunhui/p/11332050.html)