第一步:安装git。 apt-get install git
第二步:配置用户名和密码:
git config –global user.name “XXX”
git config –global user.email “XXX”
配置完后在根目录下会生成.gitconfig文件。里面就记录了刚才配置的用户名和邮箱,也可以使用git config –list来查看
第三步:为GitHub账户添加SSH Keys。ssh-keygen -t rsa -C "xx@xxx"。这个邮箱和在github上注册的邮箱保持一致。在生成的时候会提示生成的文件名。这里命令为git_hub
Generating public/private rsa key pair.
Enter file in which to save the key (/root/.ssh/id_rsa): git_hub
Enter passphrase (empty for no passphrase):
Enter same passphrase again:
Your identification has been saved in git_hub.
Your public key has been saved in git_hub.pub.
The key fingerprint is:
SHA256:QTabcdedbBdfdf1237Wxkjdkfdiidfdf21 maple412@163.com
The key's randomart image is:
+---[RSA 2048]----+
| .ooo B+. |
|o.oo.. @ oo |
|o=+. % o . |
|.o...= = + |
| . .E S o |
| o+.+ + . |
| .o ..= o |
| o .+ . |
| .. .o |
+----[SHA256]-----+
完成后在~/.ssh下就会生成git_hub以及git_hub.pub文件。
第四步:赋值SSH Key到GITHUB
打开前面生成的git_hub.pub文件,将其中的秘钥添加到github上去:登录github-> Settings-> SSH and GPG Keys-> New SSH key添加
第五步: 测试是否连接成功
sh -T git@github.com
The authenticity of host 'github.com (13.250.177.223)' can't be established.
RSA key fingerprint is SHA256:nThbg6kXUpJWGl7E1IGOCspRomTxdCARLviKw6E5SY8.
Are you sure you want to continue connecting (yes/no)? yes
Warning: Permanently added 'github.com,13.250.177.223' (RSA) to the list of known hosts.
Permission denied (publickey).
提示认证被拒绝
用ssh -T git@github.com进行测试下。看到有如下的输出。查找私秘钥id_rsa/id_dsa/id_ecdsa/id_ed25519 没有找到。
debug1: Authentications that can continue: publickey
debug1: Next authentication method: publickey
debug1: Trying private key: /root/.ssh/id_rsa
debug1: Trying private key: /root/.ssh/id_dsa
debug1: Trying private key: /root/.ssh/id_ecdsa
debug1: Trying private key: /root/.ssh/id_ed25519
debug1: No more authentication methods to try.
Permission denied (publickey).
原因在于前面生成私秘钥的时候我们指定了生成的文件名为git_hub.pub。因此有2个解决办法:
1 生成私秘钥的时候就按照默认的id_rsa文件名生成
2 通过ssh-add方法将生成的秘钥文件加入。先执行eval `ssh-agent` 。然后执行ssh-add ~/.ssh/git_hub。ssh-add –l就能看到我们的秘钥文件了
此时再执行连接测试,就可以连接成功了
Warning: Permanently added the RSA host key for IP address '52.74.223.119' to the list of known hosts.
Hi maple412! You've successfully authenticated, but GitHub does not provide shell access.
下面来看下如何上传工程到github上去。
1 点击New repository, 然后填下仓库代码的信息

2 点击clone or download复制仓库代码的URL
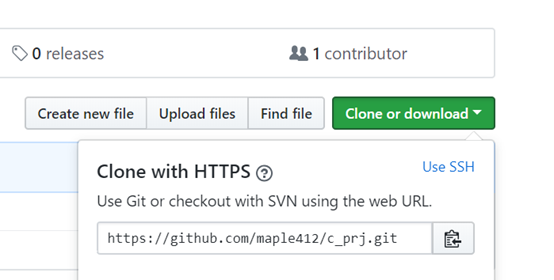
3 执行命令:git clone https://github.com/maple412/c_prj.git
正克隆到 'c_prj'...
remote: Enumerating objects: 3, done.
remote: Counting objects: 100% (3/3), done.
remote: Total 3 (delta 0), reused 0 (delta 0), pack-reused 0
展开对象中: 100% (3/3), 完成
完成后,将会创建c_prj文件夹,其中包含了.git以及README
drwxr-xr-x 3 root root 4096 3月 5 14:02 .
drwx------ 11 root root 4096 3月 5 14:02 ..
drwxr-xr-x 3 root root 4096 3月 5 14:02 c_prj
root@testnb:~/git_prj# cd ./c_prj
root@test-nb:~/git_prj/c_prj# ls -al
总用量 16
drwxr-xr-x 3 root root 4096 3月 5 14:02 .
drwxr-xr-x 3 root root 4096 3月 5 14:02 ..
drwxr-xr-x 8 root root 4096 3月 5 14:02 .git
-rw-r--r-- 1 root root 33 3月 5 14:02 README.md
root@test-nb:~/git_prj/c_prj# cat README.md
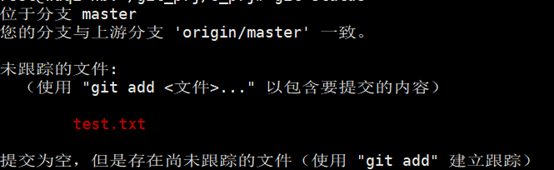
4 生成一个需要上传的文件。echo "test for git commit" > test.txt 。此时执行git status发现test.txt为红色,这是因为还未提交的缘故。
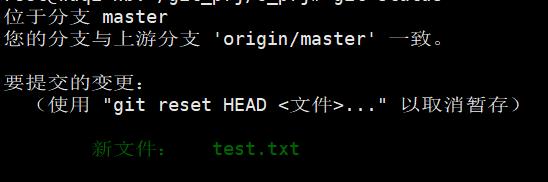
5 执行git add --all将所有的文件都添加进git,如果只想添加某些文件,就将--all替换为你想提交的文件名,执行完后再用git status查看已经变成绿色了
6 执行git commit
git commit -m 'test'
[master 2016693] test
1 file changed, 1 insertion(+)
create mode 100644 test.txt
然后再执行git push,下面的结果表示已经push 成功
对象计数中: 3, 完成.
Delta compression using up to 8 threads.
压缩对象中: 100% (2/2), 完成.
写入对象中: 100% (3/3), 281 bytes | 281.00 KiB/s, 完成.
Total 3 (delta 0), reused 0 (delta 0)
To https://github.com/maple412/c_prj.git
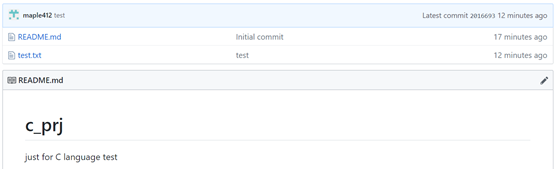
9c4d0d2..2016693 master -> master
此时在github上也能看到上传的文件了