官网安装步骤参考:
https://github.com/ctripcorp/apollo/wiki/%E5%88%86%E5%B8%83%E5%BC%8F%E9
%83%A8%E7%BD%B2%E6%8C%87%E5%8D%97
Apollo包的介绍
apollo一共三个包:apollo-portal.zip、apollo-configservice.zip、apollo-adminservice.zip
说明:
portal:后台配置管理页面;
config:提供配置的读取、推送等功能;
admin:提供配置的修改、发布等功能
1.环境准备
jdk : 1.8+ mysql 5.7
mkdir -p /opt/java/
tar xzf jdk-8u261-linux-x64.tar.gz -C /opt/java/
vim /etc/profile
export JAVA_HOME=/opt/java/jdk1.8.0_261
export CLASSPATH=$:CLASSPATH:$JAVA_HOME/lib/
export PATH=$PATH:$JAVA_HOME/bin
source /etc/profile
java -version
2.下载
两种方式:
1.下载源码自己编译(需要修改源码的可以选择)
https://github.com/ctripcorp/apollo
2.下载官方编译好的
https://github.com/ctripcorp/apollo/releases
这里选择官方编译好的,下载如下三个压缩包

3.下载sql文件导入,生成数据库
地址:https://github.com/nobodyiam/apollo-build-scripts/tree/master/sql
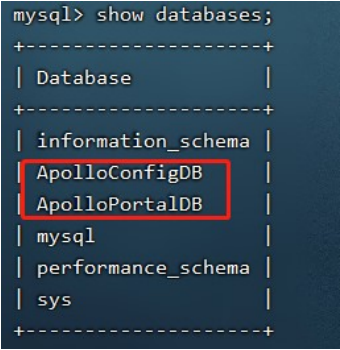
下载好后导入mysql生成数据库:
mkdir -p /opt/apollo-build-scripts-master/sql/
/opt/zbox/run/mysql/mysql -u root -p #进入数据库, 密码 123456
source /opt/apollo-build-scripts-master/sql/apolloconfigdb.sql
source /opt/apollo-build-scripts-master/sql/apolloportaldb.sql
4. 将下载好的三个压缩包上传至linux下并解压
cd /opt
mkdir -p {apollo-adminservice,apollo-configservice,apollo-portal}
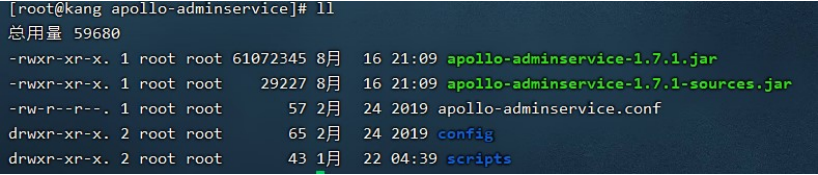
unzip /soft/apollo-adminservice-1.7.1-github.zip -d apollo-adminservice
unzip /soft/apollo-configservice-1.7.1-github.zip -d apollo-configservice
unzip /soft/apollo-portal-1.7.1-github.zip -d apollo-portal
ll apollo-adminservice
5.修改三个服务的配置文件
1.分别修改三个服务下的数据连接配置文件
vim apollo-adminservice/config/application-github.properties
vim apollo-configservice/config/application-github.properties
vim apollo-portal/config/application-github.properties

2.分别修改三个服务下的启动端口号配置文件(不需要修改端口号则略过)
vim apollo-adminservice/scripts/startup.sh
apollo-adminservice 8090
declare -i max_counter=120 # 120*5=600s #设置启动最大时间改为600秒
vim apollo-configservice/scripts/startup.sh
#如果8080被gitlab占用,可以改成8081, 下面apollo-env.properties和数据库
eureka.service.url端口也需改成8081
apollo-configservice 8080
declare -i max_counter=120 # 120*5=600s
vim apollo-portal/scripts/startup.sh
apollo-portal 8070
declare -i max_counter=120 # 120*5=600s
3.修改apollo-portal服务的下的meta配置:
vim apollo-portal/config/apollo-env.properties
这里的地址是apollo-configservice的服务地址,分别是不同环境下的服务地址,也可以只
配置(开发-dev)环境下的地址。

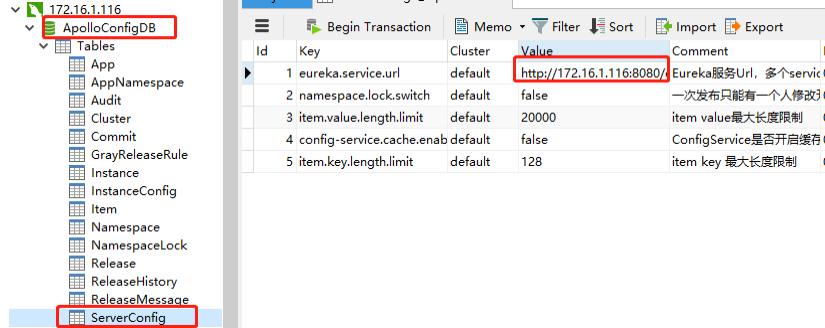
6.修改数据库中的meta地址
修改apolloconfigdb数据库中serverconfig表中的eureka.service.url:其中的地址为apollo-configservice的服务地址,端口为configservice的端口
7.新建启动和关闭三个服务的shell脚本
注意服务的启动顺序 configservice - adminservice - portal
vim apollo_start.sh
#!/bin/bash
/opt/apollo-configservice/scripts/startup.sh
/opt/apollo-adminservice/scripts/startup.sh
/opt/apollo-portal/scripts/startup.sh
vim apollo_shutdown.sh
#!/bin/bash
/opt/apollo-adminservice/scripts/shutdown.sh
/opt/apollo-configservice/scripts/shutdown.sh
/opt/apollo-portal/scripts/shutdown.sh
8.启动服务访问apollo
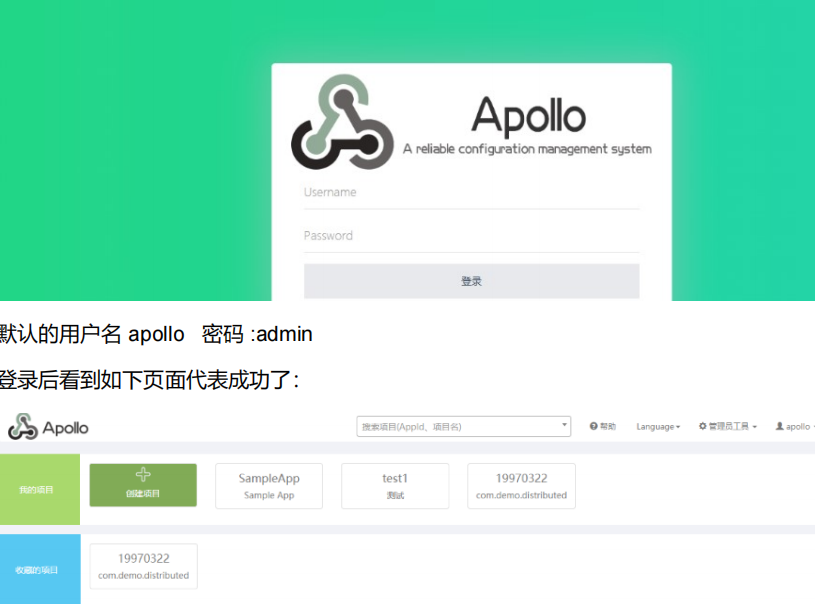
运行apollo_start.sh,启动三个服务后:输入如下地址 http://172.16.1.116:8070/ 这是
portal的服务地址(注意自己修改的端口号)
默认的用户名 apollo 密码 :admin
登录后看到如下页面代表成功了: