一:kong的简介
1.Kong是一款基于OpenResty(Nginx + Lua模块)编写的高可用、易扩展的,由Mashape公司开源的API Gateway项目。Kong是基于NGINX和Apache Cassandra或PostgreSQL构建的,能提供易于使用的RESTful API来操作和配置API管理系统,所以它可以水平扩展多个Kong服务器,通过前置的负载均衡配置把请求均 匀地分发到各个Server,来应对大批量的网络请求

upstream helloUpstream {
server localhost:3000 weighi(权重)=100;
}
server {
listen 80;
location /hello {
proxy_pass http://helloUpstream;
}
}
1.配置upstream
# curl -X POST http://localhost:8001/upstreams --data "name=helloUpstream"
2.配置target
# curl -X POST http://localhost:8001/upstreams/helloUpstream/targets --data "target=localhost:3000" --data "weight=100"
3.配置service
# curl -X POST http://localhost:8001/services --data "name=hello" --data "host=helloUpstream"
4.配置route
# curl -X POST http://localhost:8001/routes --data "paths[]=/hello" --data "service.id=(输入上次执行之后回馈的id号)"

> --network=kong-net
> -p 5432:5432
> -e "POSTGRES_USER=kong"
> -e "POSTGRES_DB=kong"
> -e "POSTGRES_PASSWORD=kong"
> --restart always
> postgres:9.6

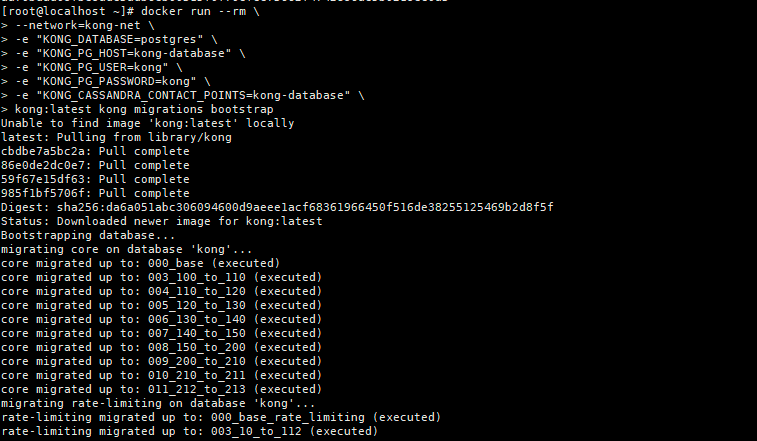
(3)使用临时Kong容器运行进行数据库初始化
[root@localhost ~]# docker run --rm
> --network=kong-net
> -e "KONG_DATABASE=postgres"
> -e "KONG_PG_HOST=kong-database"
> -e "KONG_PG_USER=kong"
> -e "KONG_PG_PASSWORD=kong"
> -e "KONG_CASSANDRA_CONTACT_POINTS=kong-database"
> kong:latest kong migrations bootstrap
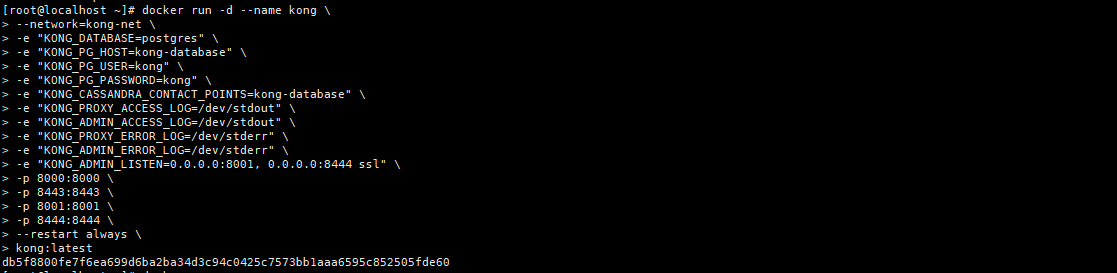
(4)启动Kong
[root@localhost ~]# docker run -d --name kong
> --network=kong-net
> -e "KONG_DATABASE=postgres"
> -e "KONG_PG_HOST=kong-database"
> -e "KONG_PG_USER=kong"
> -e "KONG_PG_PASSWORD=kong"
> -e "KONG_CASSANDRA_CONTACT_POINTS=kong-database"
> -e "KONG_PROXY_ACCESS_LOG=/dev/stdout"
> -e "KONG_ADMIN_ACCESS_LOG=/dev/stdout"
> -e "KONG_PROXY_ERROR_LOG=/dev/stderr"
> -e "KONG_ADMIN_ERROR_LOG=/dev/stderr"
> -e "KONG_ADMIN_LISTEN=0.0.0.0:8001, 0.0.0.0:8444 ssl"
> -p 8000:8000
> -p 8443:8443
> -p 8001:8001
> -p 8444:8444
> --restart always
> kong:latest
然后在浏览器上访问http://IP:8001 或者在命令行输入curl http://IP:8001

在浏览器上显示

接下来就是安装界面
konga的安装
(1)初始化Konga 数据库
命令:[root@localhost ~]# docker run --rm --network=kong-net pantsel/konga:latest -c prepare -a postgres -u postgresql://kong:kong@kong-database:5432/konga_db

(2)运行Konga
[root@localhost ~]# docker run -p 1337:1337
> --network=kong-net
> -e "KONG_DATABASE=postgres"
> -e "KONG_PG_HOST=kong-database"
> -e "KONG_PG_USER=kong"
> -e "KONG_PG_PASSWORD=kong"
> -e "KONG_CASSANDRA_CONTACT_POINTS=kong-database"
> -e "DB_DATABASE=konga_db"
> -e "KONGA_HOOK_TIMEOUT=120000"
> --name konga
> pantsel/konga

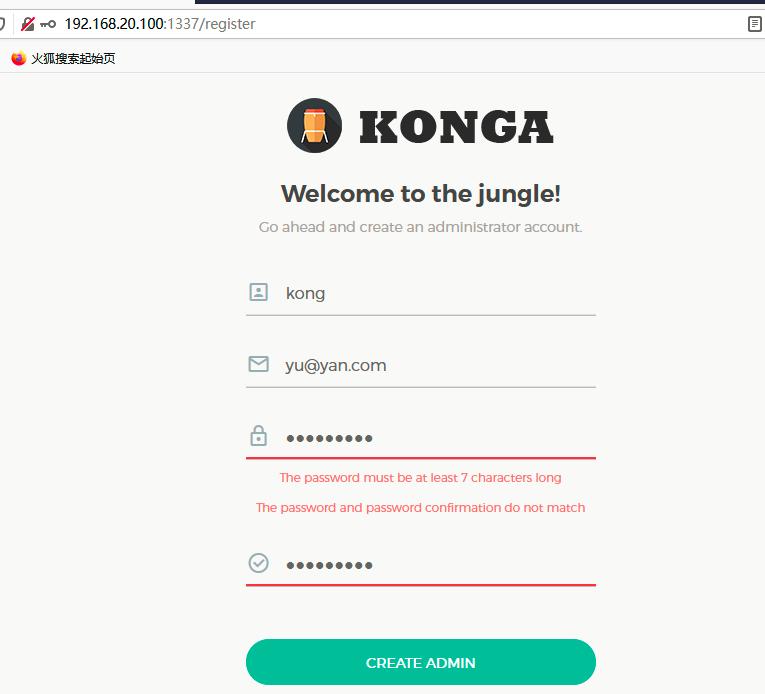
然后再浏览器上访问http://192.168.20.100:1337

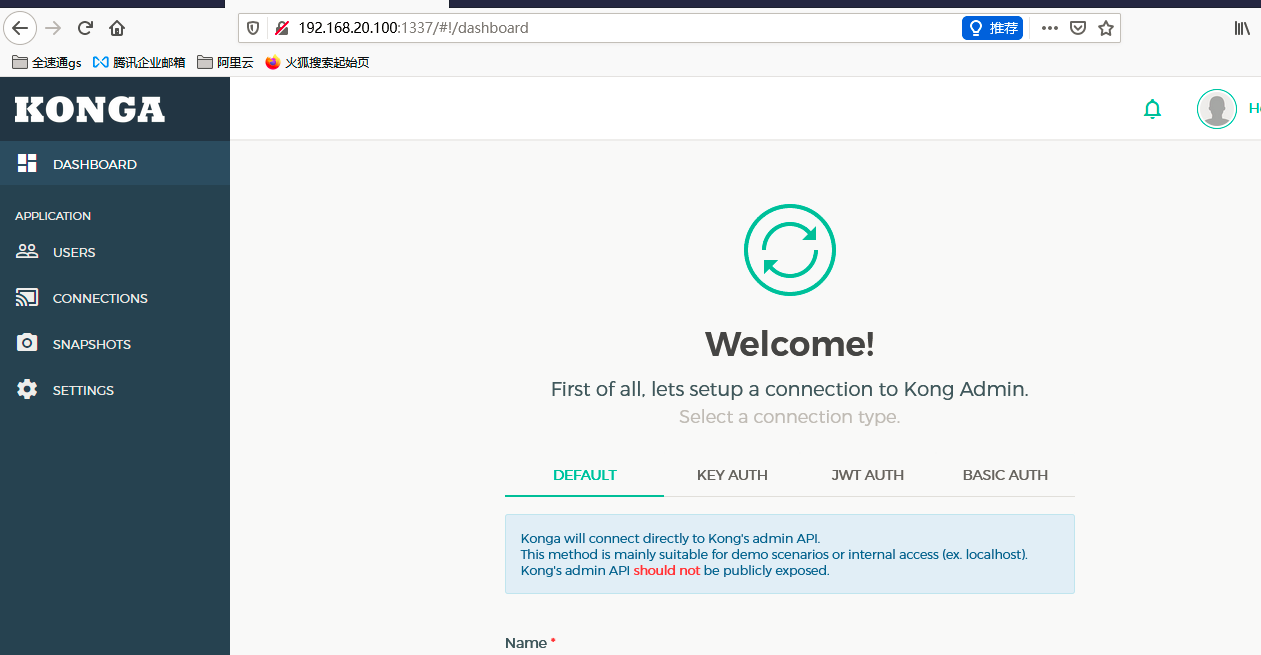
自此就部署完毕了