本文参考spring官网email接口文档所写。
spring-email官方网址:https://docs.spring.io/spring/docs/5.1.8.RELEASE/spring-framework-reference/integration.html#mail
1:相关依赖
        <!-- https://mvnrepository.com/artifact/org.springframework.boot/spring-boot-starter-mail -->
        <dependency>
            <groupId>org.springframework.boot</groupId>
            <artifactId>spring-boot-starter-mail</artifactId>
            <version>2.1.6.RELEASE</version>
        </dependency>
2:邮箱收件人model
package com.dev.model.email;

import java.io.Serializable;

/**
 * Created on 2019-08-02 16:16.
 *
 * @author zgq7
 */
public class EmailModel implements Serializable {

    /**
     * 收件人姓名
     **/
    private String recieverName;

    /**
     * 收件人邮箱地址
     **/
    private String recieverEmailAddress;

    /**
     * 邮件主题
     **/
    private String emailTheme;

    /**
     * 邮件内容
     **/
    private String emailContent;

    public String getRecieverName() {
        return recieverName;
    }

    public void setRecieverName(String recieverName) {
        this.recieverName = recieverName;
    }

    public String getRecieverEmailAddress() {
        return recieverEmailAddress;
    }

    public void setRecieverEmailAddress(String recieverEmailAddress) {
        this.recieverEmailAddress = recieverEmailAddress;
    }

    public String getEmailTheme() {
        return emailTheme;
    }

    public void setEmailTheme(String emailTheme) {
        this.emailTheme = emailTheme;
    }

    public String getEmailContent() {
        return emailContent;
    }

    public void setEmailContent(String emailContent) {
        this.emailContent = emailContent;
    }
}
3:邮箱工具类
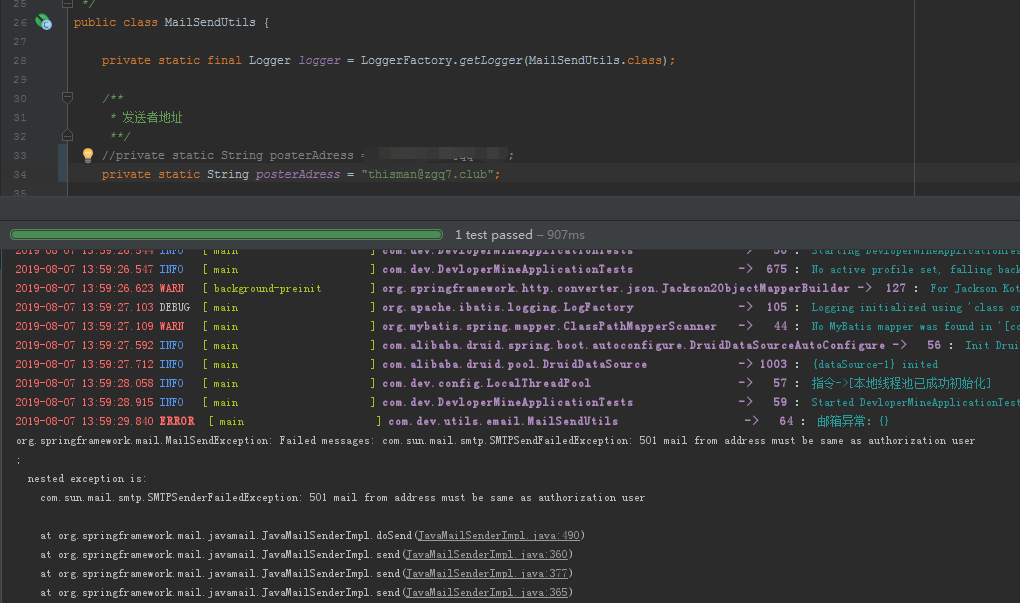
package com.dev.utils.email;

import com.dev.model.email.EmailModel;
import org.jetbrains.annotations.NotNull;
import org.slf4j.Logger;
import org.slf4j.LoggerFactory;
import org.springframework.beans.factory.annotation.Autowired;
import org.springframework.beans.factory.annotation.Value;
import org.springframework.mail.MailException;
import org.springframework.mail.javamail.JavaMailSender;
import org.springframework.mail.javamail.JavaMailSenderImpl;
import org.springframework.mail.javamail.MimeMessageHelper;
import org.springframework.mail.javamail.MimeMessagePreparator;

import javax.mail.Message;
import javax.mail.MessagingException;
import javax.mail.internet.MimeMessage;
import java.time.LocalDateTime;
import java.time.format.DateTimeFormatter;

/**
 * Created on 2019-08-02 16:06.
 *
 * @author zgq7
 */
public class MailSendUtils {

    private static final Logger logger = LoggerFactory.getLogger(MailSendUtils.class);

    /**
     * 发送者地址
     **/
    private static String posterAdress = "xxx@qq.com";

    /**
     * 发送者姓名
     **/
    private static final String posterName = "xxx";

    @Autowired
    private JavaMailSender javaMailSender;

    @Autowired
    private JavaMailSenderImpl javaMailSenderImpl;

    /**
     * 文本发送
     **/
    public void sendEmailAsText(final EmailModel emailModel) {
        MimeMessagePreparator mimeMessagePreparator = mimeMessage -> {
            mimeMessage.setFrom(posterAdress);
            mimeMessage.setRecipients(Message.RecipientType.TO, emailModel.getRecieverEmailAddress());
            mimeMessage.setText("<html><body>"
                    + "hello:" + emailModel.getRecieverName()
                    + "<br>" + "msg:" + emailModel.getEmailContent()
                    + "<br>" + "from :" + posterName
                    + "</body></html>");
        };
        try {
            this.javaMailSender.send(mimeMessagePreparator);
            logger.info("邮箱已返送至[{}]邮箱!", emailModel.getRecieverName());
        } catch (MailException e) {
            logger.error("邮箱异常:{}", e);
        }
    }

    /**
     * html 网页发送
     * 该方法为同步方法
     **/
    public void sendEmailAsSysExceptionHtml(final EmailModel emailModel) {
        MimeMessage mimeMessage = javaMailSenderImpl.createMimeMessage();
        MimeMessageHelper mimeMessageHelper;
        try {
            mimeMessageHelper = new MimeMessageHelper(mimeMessage, true);
            mimeMessageHelper.setFrom(posterAdress);
            mimeMessageHelper.setTo(emailModel.getRecieverEmailAddress());
            mimeMessageHelper.setText("<!DOCTYPE html>
" +
                            "<html>
" +
                            "	<head>
" +
                            "		<meta charset="UTF-8">
" +
                            "		<title></title>
" +
                            "	</head>
" +
                            "	<style>
" +
                            "		body,
" +
                            "		table,
" +
                            "		tbody,
" +
                            "		tr {
" +
                            "			background-color: aquamarine;
" +
                            "			background-size: 100%;
" +
                            "		}
" +
                            "	</style>
" +
                            "
" +
                            "	<body>
" +
                            "		<table border="solid 2 px" align="center" style="text-align: center;">
" +
                            "			<tbody>
" +
                            "				<tr>
" +
                            "					<td width="200px" bgcolor="coral">时间</td>
" +
                            "					<td width="80%" bgcolor="azure">" + LocalDateTime.now().format(DateTimeFormatter.ofPattern("yyyy-MM-dd HH:mm:ss")) + "</td>
" +
                            "				</tr>
" +
                            "				<tr>
" +
                            "					<td width="200px" bgcolor="coral">信息</td>
" +
                            "					<td width="80%" bgcolor="azure">" + "测试" + "</td>
" +
                            "				</tr>
" +
                            "				<tr>
" +
                            "					<td width="200px" bgcolor="coral">堆栈</td>
" +
                            "					<td width="80%" bgcolor="azure" style="text-align: left;">" + emailModel.getEmailContent() + "</td>
" +
                            "				</tr>
" +
                            "			</tbody>
" +
                            "		</table>
" +
                            "	</body>
" +
                            "
" +
                            "</html>"
                    , true);

            this.javaMailSender.send(mimeMessage);
            logger.info("邮箱已返送至[{}]邮箱!", emailModel.getRecieverName());

        } catch (MessagingException e) {
            e.printStackTrace();
        } catch (MailException e) {
            logger.error("邮箱异常:{}", e);
        }
    }

}
notice3.1:可自行设置文本发送api、html发送api、图片发送api等。我的工具包中只写了文本发送和html发送两种格式的api。
4:注册EmailUtils的bean
package com.dev.config;
import com.dev.utils.email.MailSendUtils;

/**
 * Created by zgq7 on 2019/6/6.
 * 注册一些bean进入ioc
 *
 */
@Configuration
public class BeanRegistryCenterConfig {


    /**
     * 邮箱工具类 bean 注册
     **/
    @Bean
    public MailSendUtils mailSendUtils() {
        return new MailSendUtils();
    }

}
5:Application.properties配置
spring.mail.host=smtp.qq.com
spring.mail.port=587
spring.mail.username=你的qq@qq.com
spring.mail.password=xxxxx
spring.mail.protocol=smtp
spring.mail.default-encoding=UTF-8
notice1:spring.mail.usernam,是你的qq邮箱地址
notice2:spring.mail.password,不要用真正的qq邮箱密码,而是qq邮箱第三方服务授权码
下面是获取qq邮箱第三方服务授权码的操步骤:
5.1:登录qq邮箱,进入首页,点击设置按钮

5.2:点击账户设置

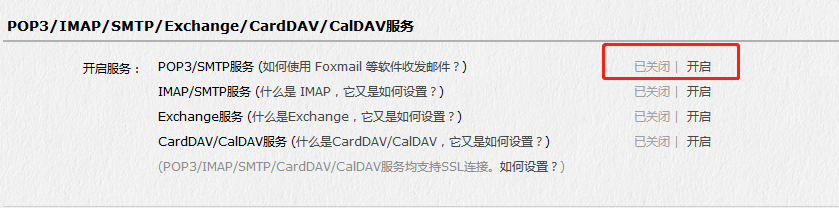
并拉到最下面点击我圈中的开启按钮
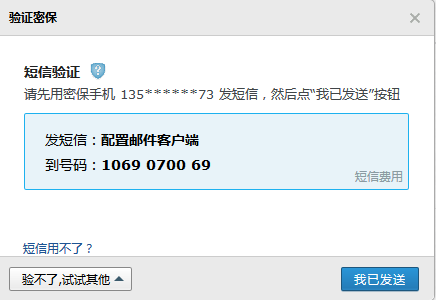
然后会弹出一个小框提示你发信息,发就行了,发送之后点击验证会收到授权码

除了spring.mail.username、spring.mail.password 两项要换成自己的 ,其他的和我一样就行;
6:邮件发送测试
6.1:文本发送测试
    /**
     * Java Mail 文本发送
     **/
    @Test
    public void EmaiTest() {
        EmailModel emailModel = new EmailModel();
        emailModel.setEmailTheme("测试");
        emailModel.setRecieverName("测试");
        emailModel.setEmailContent("测试");
        emailModel.setRecieverEmailAddress("xxx@qq.com");

        mailSendUtils.sendEmailAsText(emailModel);
    }
发送成功后:
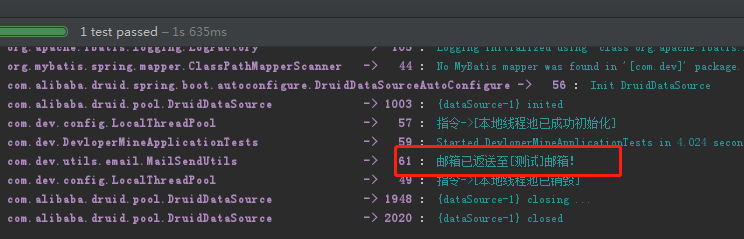
目标邮箱收到的邮件:

6.2:html发送测试
    /**
     * Java Mail 网页发送
     **/
    @Test
    public void EmailTest2() throws MessagingException, InterruptedException {
        EmailModel emailModel = new EmailModel();
        emailModel.setEmailTheme("测试");
        emailModel.setRecieverName("测试");
        emailModel.setEmailContent("测试");
        emailModel.setRecieverEmailAddress("xxx@qq.com");

        mailSendUtils.sendEmailAsSysExceptionHtml(emailModel);

    }
目标邮箱收到的邮件:
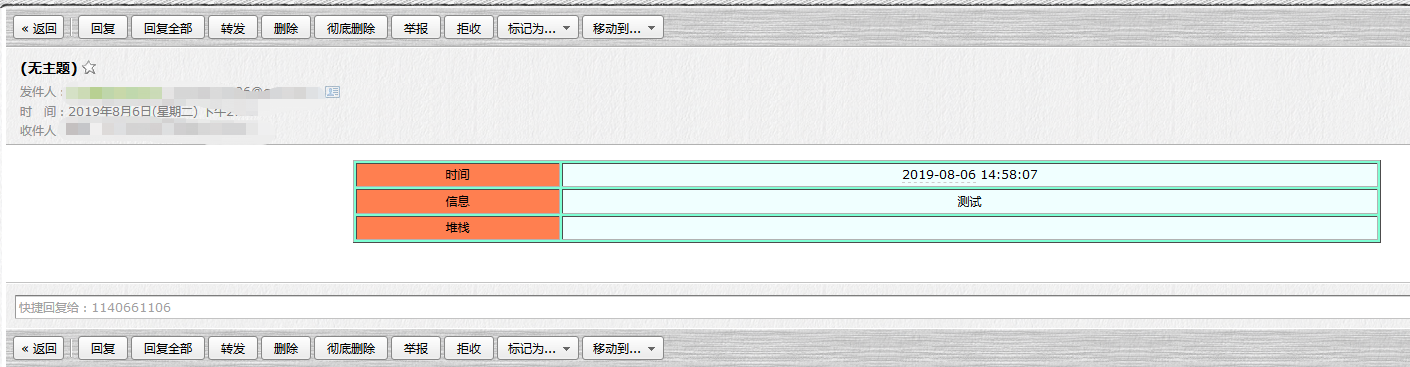
这个展示效果可以自己设置。
7:注意点
发送邮件者的邮箱地址为qq邮箱,否则会QQ邮箱认证报错。而接收者邮箱可以为其他的邮箱,如企业邮箱、网易邮箱等。