1.參考文献:
1.利用Java编写简单的WebService实例 http://nopainnogain.iteye.com/blog/791525
2.Axis2与Eclipse整合开发Web Service http://tech.ddvip.com/2009-05/1242968642120461.html
3.http://blog.csdn.net/lightao220/article/details/3489015
4.http://clq9761.iteye.com/blog/976029
5.使用Eclipse+Axis2+Tomcat构建Web Services应用(实例解说篇)
2.实例1(主要看到[2])
2.1.系统功能:
2.2.开发前准备:
- 安装Eclipse-jee;
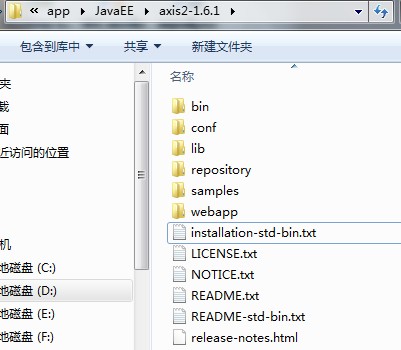
- 下载最新版本号的Axis2,网址http://axis.apache.org/axis2/java/core/download.cgi ,选择Standard Binary Distribution的zip包,解压缩得到的文件夹名axis2-1.4.1,文件夹内的文件结构例如以下:
2.3.开发前配置:
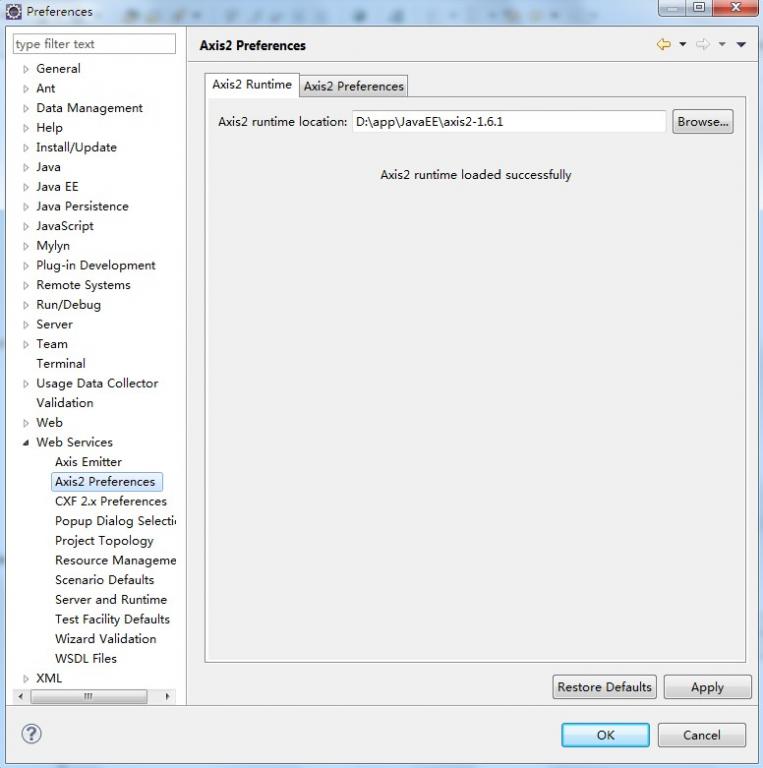
在Eclipse的菜单条中,Window --> Preferences --> Web Service --> Axis2 Perferences,在Axis2 runtime location中选择Axis2解压缩包的位置,设置好后,点"OK"即行。(如图)
2.4.开发Web Service:
(1)新建一个Java Project,命名为"WebServiceTest1"
(2)新建一个class,命名为"CalculateService",完整代码例如以下:
package edu.sjtu.webservice;
/**
* 计算器运算
* @author rongxinhua
*/
public class CalculateService {
//加法
public float plus(float x, float y) {
return x + y;
}
//减法
public float minus(float x, float y) {
return x - y;
}
//乘法
public float multiply(float x, float y) {
return x * y;
}
//除法
public float divide(float x, float y) {
if(y!=0)
{
return x / y;
}
else
return -1;
}
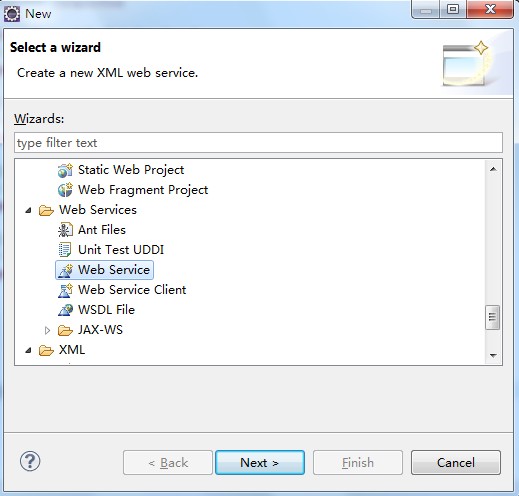
}(3)在"WebServiceTest1"项目上new --> other,找到"Web Services"以下的"Web Service";
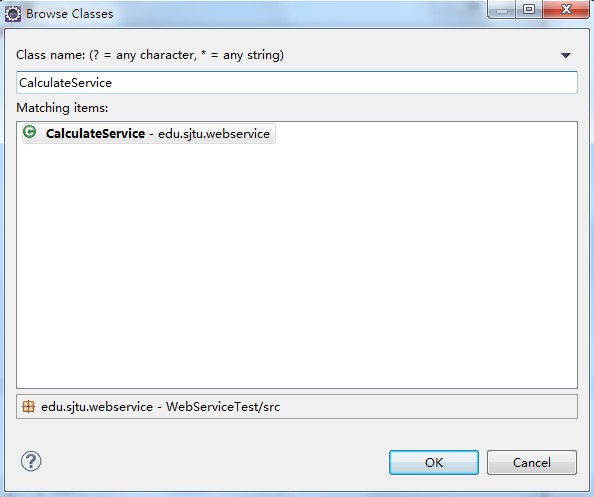
(4)下一步(next),在出现的Web Services对象框,在Service implementation中点击"Browse",进入Browse Classes对象框,查找到我们刚才写的写的CalculateService类。(例如以下图)。点击"ok",则回到Web Service话框。
(5)在Web Service对话框中,将Web Service type中的滑块,调到"start service“的位置,将Client type中的滑块调到"Test client"的位置。
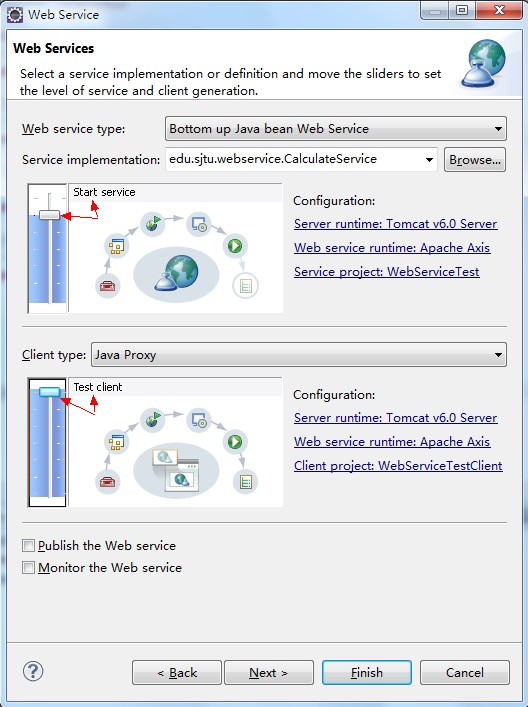
(6)在Web Service type滑块图的右边有个"Configuration",点击它以下的选项,进入Service Deployment Configuration对象框,在这里选择对应的Server(我这里用Tomcat6.0)和Web Service runtime(选择Apache Axis2),例如以下图:
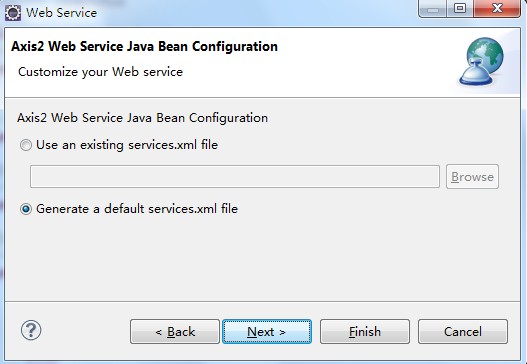
(7)点OK后,则返回到Web Service对话框,同理,Client type中的滑块右边也有"Configuration",也要进行对应的置,步骤同上。完毕后,Next --> next即行。进入到Axis2 Web Service Java Bean Configuration,我们选择Generate a default services.xml,例如以下图所看到的:
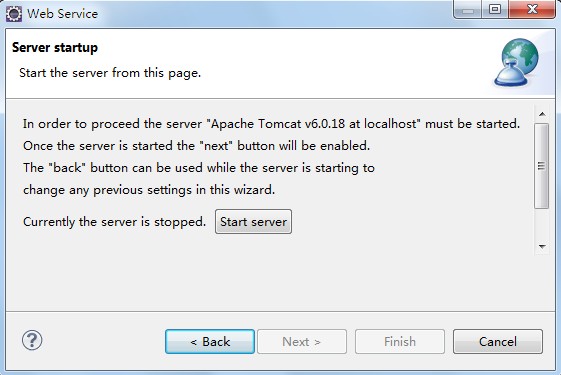
(8)到了Server startup对话框,有个按键"start server"(例如以下图),点击它,则可启动Tomcat服务器了。
(9)等启完后,点击"next -- > next",一切默认即行,最后,点击完毕。最后,出现例如以下界面:(Web Service Explorer),我们在这里便可測试我们的Web服务。(使用浏览器打开的话使用例如以下地址:http://127.0.0.1:19189/wse/wsexplorer/wsexplorer.jsp?org.eclipse.wst.ws.explorer=3)。例如以下图所看到的:
注:在浏览器中打开Web Service Explorer(有时候在eclipse中关闭了webservice explorer,能够用这样的方法打开)
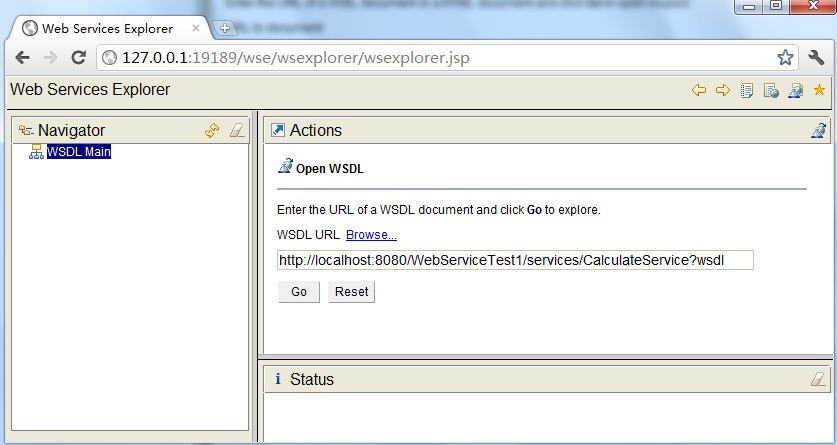
首先登录地址:http://127.0.0.1:19189/wse/wsexplorer/wsexplorer.jsp。然后在网页右上角选择Web Service Exoplorer标签。然后输入WSDL地址:http://localhost:8080/WebServiceTest1/services/CalculateService?wsdl 。这个wsdl地址就是我们刚才公布服务的那个wsdl。点击go,例如以下图所看到的:
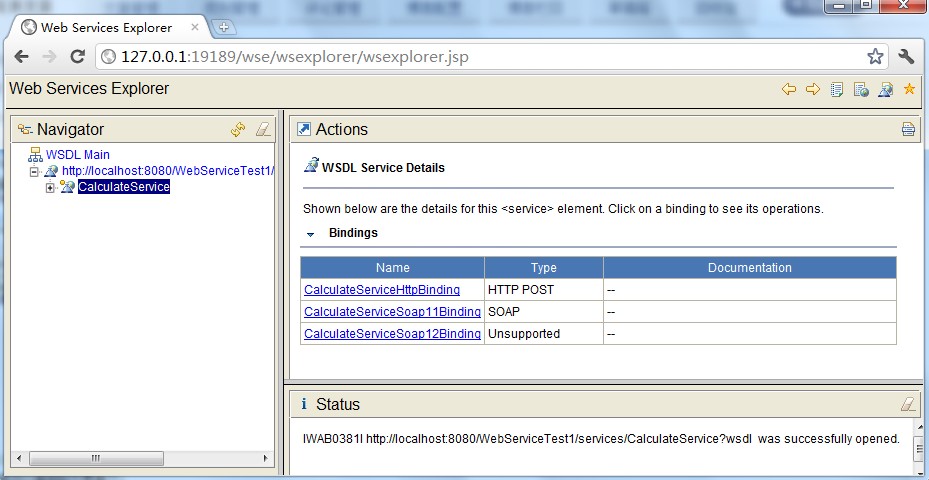
然后就能够看到例如以下界面了:
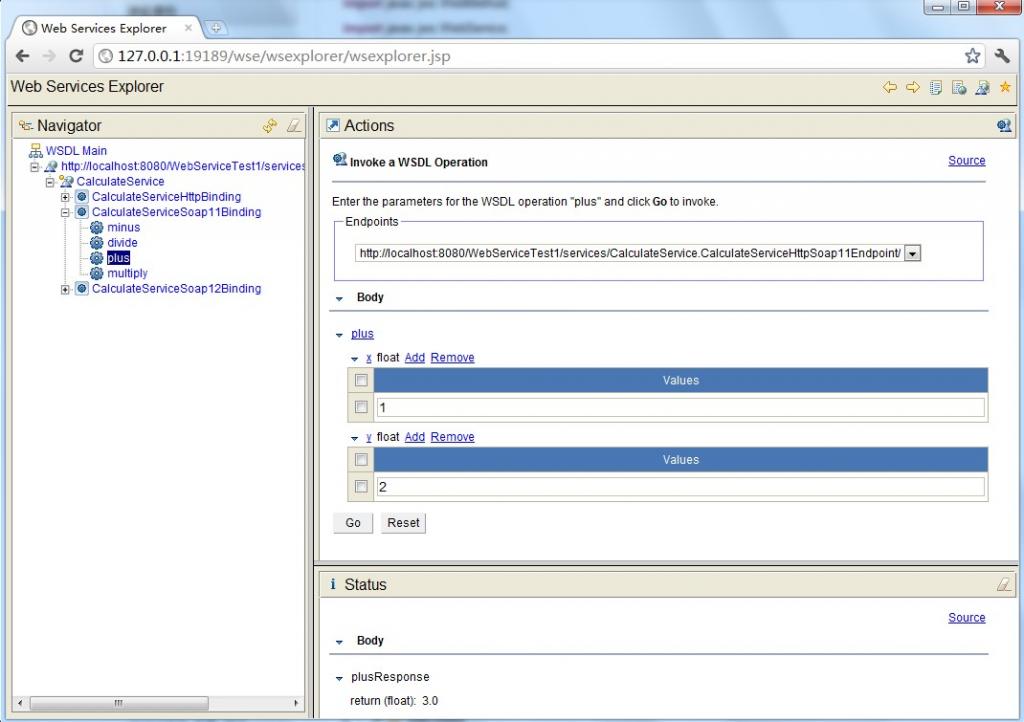
(10)測试比較简单,比如,我们选择一个"plus"的Operation(必须是CalculateServiceSoap11Binding),出现下图,在x的输入框中输入1,在y的输入框中输入2,点击"go",便会在status栏中显示结果3.0。其它方法的測试也类似。结果如上图所看到的。
2.5.CalculateServiceclient调用程序
package edu.sjtu.webservice.test;

import javax.xml.namespace.QName;
import org.apache.axis2.AxisFault;
import org.apache.axis2.addressing.EndpointReference;
import org.apache.axis2.client.Options;
import org.apache.axis2.rpc.client.RPCServiceClient;

public class CalculateServiceTest {

	/**
	 * @param args
	 * @throws AxisFault
	 */
	public static void main(String[] args) throws AxisFault {
		// TODO Auto-generated method stub

		// 使用RPC方式调用WebService
		RPCServiceClient serviceClient = new RPCServiceClient();
		Options options = serviceClient.getOptions();
		// 指定调用WebService的URL
		EndpointReference targetEPR = new EndpointReference(
				"http://localhost:8080/WebServiceTest1/services/CalculateService");
		options.setTo(targetEPR);

		// 指定要调用的计算机器中的方法及WSDL文件的命名空间:edu.sjtu.webservice。
		QName opAddEntry = new QName("http://webservice.sjtu.edu","plus");//加法
		QName opAddEntryminus = new QName("http://webservice.sjtu.edu","minus");//减法
		QName opAddEntrymultiply = new QName("http://webservice.sjtu.edu","multiply");//乘法
		QName opAddEntrydivide = new QName("http://webservice.sjtu.edu","divide");//除法
		// 指定plus方法的參数值为两个,各自是加数和被加数
		Object[] opAddEntryArgs = new Object[] { 1,2 };
		// 指定plus方法返回值的数据类型的Class对象
		Class[] classes = new Class[] { float.class };
		// 调用plus方法并输出该方法的返回值
		System.out.println(serviceClient.invokeBlocking(opAddEntry,opAddEntryArgs, classes)[0]);
		System.out.println(serviceClient.invokeBlocking(opAddEntryminus,opAddEntryArgs, classes)[0]);
		System.out.println(serviceClient.invokeBlocking(opAddEntrymultiply,opAddEntryArgs, classes)[0]);
		System.out.println(serviceClient.invokeBlocking(opAddEntrydivide,opAddEntryArgs, classes)[0]);

	}
}执行结果:3.0 -1.0 2.0 0.5
3.实例2.HelloService
(1)首先定义服务方法,代码例如以下所看到的:
package edu.sjtu.webservice;

public class HelloService {
	public String sayHelloNew() {
		return "hello";
	}

	public String sayHelloToPersonNew(String name) {
		if (name == null) {
			name = "nobody";
		}
		return "hello," + name;
	}

	public void updateData(String data) {
		System.out.println(data + " 已更新。");
	}
}
(2)參考实例1将这种方法公布为服务。
(3)编写client代码调用WebService(主要參考[5])
本文样例与其它样例最大的不同就在这里,其它样例一般须要依据刚才的服务wsdl生成clientstub,然后通过stub来调用服务,这样的方式显得比較单一,client必须须要stub存根才可以訪问服务,非常不方面。本样例的client不採用stub方式,而是一种实现通用的调用方式,不须要不论什么client存根就可以訪问服务。仅仅须要指定对于的web servce地址、操作名、參数和函数返回类型就可以。代码例如以下所看到的:
HelloServiceTest2.java
package edu.sjtu.webservice.test;

import javax.xml.namespace.QName;

import org.apache.axis2.AxisFault;
import org.apache.axis2.addressing.EndpointReference;
import org.apache.axis2.client.Options;
import org.apache.axis2.rpc.client.RPCServiceClient;

public class HelloServiceTest2 {
	private RPCServiceClient serviceClient;
	private Options options;
	private EndpointReference targetEPR;

	public HelloServiceTest2(String endpoint) throws AxisFault {
		serviceClient = new RPCServiceClient();
		options = serviceClient.getOptions();
		targetEPR = new EndpointReference(endpoint);
		options.setTo(targetEPR);
	}

	public Object[] invokeOp(String targetNamespace, String opName,
			Object[] opArgs, Class<?>[] opReturnType) throws AxisFault,
			ClassNotFoundException {
		// 设定操作的名称
		QName opQName = new QName(targetNamespace, opName);
		// 设定返回值
		// Class<?>[] opReturn = new Class[] { opReturnType };
		// 操作须要传入的參数已经在參数中给定,这里直接传入方法中调用
		return serviceClient.invokeBlocking(opQName, opArgs, opReturnType);
	}

	/**
	 * @param args
	 * @throws AxisFault
	 * @throws ClassNotFoundException
	 */
	public static void main(String[] args) throws AxisFault,
			ClassNotFoundException {
		// TODO Auto-generated method stub
		final String endPointReference = "http://localhost:8080/WebServiceTest1/services/HelloService";
		final String targetNamespace = "http://webservice.sjtu.edu";
		HelloServiceTest2 client = new HelloServiceTest2(endPointReference);

		String opName = "sayHelloToPersonNew";
		Object[] opArgs = new Object[] { "My Friends" };
		Class<?>[] opReturnType = new Class[] { String[].class };

		Object[] response = client.invokeOp(targetNamespace, opName, opArgs,
				opReturnType);
		System.out.println(((String[]) response[0])[0]);
	}

}
执行该程序,点击Run As->Java application,能够看到控制台端口的输出是:Hello, My Friends,表明客户端调用成功。该样例最大的不同和优势表如今客户端的调用方式,或者说是发起服务调用的方式,尽管比起客户端stub存根的方式,代码稍多,可是这样的方式统一,不须要生产stub存根代码,攻克了客户端有非常多类的问题。假设读者对这些代码进一步封装,我想调用方式非常easy,仅仅须要传递相关參数,这更好地说明了服务调用的优势。并且这样的方式更加简单明了,一看便知详细含义。而不须要弄得stub类的一些机制。(4)改写client调用服务的代码
(3)中提到的client应用代码写的稍微有些繁杂,以下将上面的client调用service程序进行改写,简洁了很多。代码例如以下:
HelloServiceTest.java
import javax.xml.namespace.QName;
import org.apache.axis2.AxisFault;
import org.apache.axis2.addressing.EndpointReference;
import org.apache.axis2.client.Options;
import org.apache.axis2.rpc.client.RPCServiceClient;

public class HelloServiceTest {
	public static void main(String args[]) throws AxisFault {
		// 使用RPC方式调用WebService
		RPCServiceClient serviceClient = new RPCServiceClient();
		Options options = serviceClient.getOptions();
		// 指定调用WebService的URL
		EndpointReference targetEPR = new EndpointReference("http://localhost:8080/WebServiceTest1/services/HelloService");
		options.setTo(targetEPR);

		// 指定要调用的sayHelloToPerson方法及WSDL文件的命名空间
		QName opAddEntry = new QName("http://webservice.sjtu.edu","sayHelloToPersonNew");
		// 指定sayHelloToPerson方法的參数值
		Object[] opAddEntryArgs = new Object[] { "xuwei" };
		// 指定sayHelloToPerson方法返回值的数据类型的Class对象
		Class[] classes = new Class[] { String.class };
		// 调用sayHelloToPerson方法并输出该方法的返回值
		System.out.println(serviceClient.invokeBlocking(opAddEntry,opAddEntryArgs, classes)[0]);
	}
}