windows 下安装配置 Nginx 详解
本文转自https://blog.csdn.net/kingscoming/article/details/79042874
nginx功能之一可以启动一个本地服务器,通过配置server_name和root目录等来访问目标文件
尽管通过这种方式能实现分布式文件存储,但也存在弊端,就是FTP很容易被入侵,而且小型的网站使用FTP作为文件服务器是没问题的,但是项目访问量持续增加的话,必要考虑文件服务器的扩展性与高可用,目前成熟的文件服务器也有很多,例如FastDFS,可以快速的进行线性扩容。
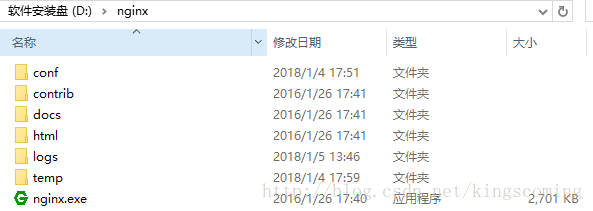
1.下载Nginx
下载后解压,如下图:
2.Nginx配置
找到 conf 目录里的 nginx.conf 文件,配置Nginx
2.1.基本配置如下:
-
#user nobody;
-
-
#指定nginx进程数
-
-
worker_processes 1;
-
-
#全局错误日志及PID文件
-
-
#error_log logs/error.log;
-
-
#error_log logs/error.log notice;
-
-
#error_log logs/error.log info;
-
-
#pid logs/nginx.pid;
-
-
events {
-
-
# 连接数上限
-
-
worker_connections 1024;
-
-
}
-
-
#设定http服务器,利用它的反向代理功能提供负载均衡支持
-
-
http {
-
-
#设定mime类型,类型由mime.type文件定义
-
-
include mime.types;
-
-
default_type application/octet-stream;
-
-
#设定日志格式
-
-
#log_format main '$remote_addr - $remote_user [$time_local] "$request" '
-
-
# '$status $body_bytes_sent "$http_referer" '
-
-
# '"$http_user_agent" "$http_x_forwarded_for"';
-
-
#使用哪种格式的日志
-
-
#access_log logs/access.log main;
-
-
#sendfile 指令指定 nginx 是否调用 sendfile 函数(zero copy 方式)来输出文件,对于普通应用,
-
-
sendfile on;
-
-
#tcp_nopush on;
-
-
#连接超时时间
-
-
#keepalive_timeout 0;
-
-
keepalive_timeout 65;
-
-
#开启gzip压缩 ,压缩html
-
-
#gzip on;
-
-
#设定负载均衡的服务器列表 支持多组的负载均衡,可以配置多个upstream 来服务于不同的Server.
-
-
#nginx 的 upstream 支持 几 种方式的分配
-
-
#1)、轮询(默认) 每个请求按时间顺序逐一分配到不同的后端服务器,如果后端服务器down掉,能自动剔除。
-
-
#2)、weight 指定轮询几率,weight和访问比率成正比,用于后端服务器性能不均的情况。 跟上面样,指定了权重。
-
-
#3)、ip_hash 每个请求按访问ip的hash结果分配,这样每个访客固定访问一个后端服务器,可以解决session的问题。
-
-
#4)、fair
-
-
#5)、url_hash #Urlhash
-
-
upstream mysvr {
-
-
#weigth参数表示权值,权值越高被分配到的几率越大
-
-
#1.down 表示单前的server暂时不参与负载
-
-
#2.weight 默认为1.weight越大,负载的权重就越大。
-
-
#3.backup: 其它所有的非backup机器down或者忙的时候,请求backup机器。所以这台机器压力会最轻。
-
-
#server 192.168.1.116 down;
-
-
#server 192.168.1.116 backup;
-
-
server 192.168.1.121 weight=1;
-
-
server 192.168.1.122 weight=2;
-
-
}
-
#配置代理服务器的地址,即Nginx安装的服务器地址、监听端口、默认地址
-
-
server {
-
-
#1.侦听80端口
-
-
listen 80;
-
-
#对于server_name,如果需要将多个域名的请求进行反向代理,可以配置多个server_name来满足要
-
server_name localhost;
-
#charset koi8-r;
-
#access_log logs/host.access.log main;
-
location / {
-
-
# 默认主页目录在nginx安装目录的html子目录。
-
-
root html;
-
-
index index.html index.htm;
-
-
proxy_pass http://mysvr; #跟载均衡服务器的upstream对应
-
-
}
-
-
#error_page 404 /404.html;
-
# redirect server error pages to the static page /50x.html
-
-
## 定义错误提示页面
-
-
#error_page 500 502 503 504 /50x.html;
-
-
#location = /50x.html {
-
-
# root html;
-
-
#}
-
-
# proxy the PHP scripts to Apache listening on 127.0.0.1:80
-
-
#
-
-
#location ~ .php$ {
-
-
# proxy_pass http://127.0.0.1;
-
-
#}
-
-
-
# pass the PHP scripts to FastCGI server listening on 127.0.0.1:9000
-
-
#
-
-
#location ~ .php$ {
-
-
# root html;
-
-
# fastcgi_pass 127.0.0.1:9000;
-
-
# fastcgi_index index.php;
-
-
# fastcgi_param SCRIPT_FILENAME /scripts$fastcgi_script_name;
-
-
# include fastcgi_params;
-
-
#}
-
-
# deny access to .htaccess files, if Apache's document root
-
-
# concurs with nginx's one
-
-
#
-
-
#location ~ /.ht {
-
-
# deny all;
-
-
#}
-
-
}
-
-
# another virtual host using mix of IP-, name-, and port-based configuration
-
-
#
-
-
#server {
-
-
# listen 8000;
-
-
# listen somename:8080;
-
-
# server_name somename alias another.alias;
-
-
# location / {
-
-
# root html;
-
-
# index index.html index.htm;
-
-
# }
-
-
#}
-
-
# HTTPS server
-
-
#
-
-
#server {
-
-
# listen 443 ssl;
-
-
# server_name localhost;
-
-
# ssl_certificate cert.pem;
-
-
# ssl_certificate_key cert.key;
-
-
# ssl_session_cache shared:SSL:1m;
-
-
# ssl_session_timeout 5m;
-
-
-
-
# ssl_ciphers HIGH:!aNULL:!MD5;
-
-
# ssl_prefer_server_ciphers on;
-
-
-
-
# location / {
-
-
# root html;
-
-
# index index.html index.htm;
-
-
# }
-
-
#}
-
-
}
2.2.server配置

2.3.可以配置多个server
如下,这样访问localhost 就能访问到了 D:/source 目录。
-
http {
-
-
#静态文件
-
-
server {
-
-
listen 80;
-
-
server_name static.com;
-
-
location / {
-
-
root D:/source ;
-
-
}
-
-
}
-
-
#html文件
-
-
server {
-
-
listen 80;
-
-
server_name 127.0.0.1 localhost;
-
-
location / {
-
-
root D:/source ;
-
-
index index.html index.htm;
-
-
}
-
-
}
-
-
}
3.启动Nginx
注意不要直接双击nginx.exe,这样会导致修改配置后重启、停止nginx无效,需要手动关闭任务管理器内的所有nginx进程
cmd 进入Nginx解压目录 执行以下命令
|
start nginx : 启动nginx服务 nginx -s reload :修改配置后重新加载生效 nginx -s reopen :重新打开日志文件 |
启动后如何检查是否启动成功呢? 输入命令 tasklist /fi "imagename eq nginx.exe" 看到以下信息说明启动成功了
一切就绪,访问一下server 里配置的 server_name 是不是被重定向到 upstream配置的服务器上了,是不是很简单!
4.nginx常用命令:
|
验证配置是否正确: nginx -t 查看Nginx的版本号:nginx -V 启动Nginx:start nginx 快速停止或关闭Nginx:nginx -s stop 正常停止或关闭Nginx:nginx -s quit 配置文件修改重装载命令:nginx -s reload |
5.常见错误
如果启动失败 可以看下logs目录下 error.log 文件里的错误信息。
我在第一次安装的时遇到两个错误,也是最容易碰到的问题,在这里列出来方便大家碰到相同的问题时快速解决。
1.端口占用问题
我的配置文件里服务侦听的是 80 端口,由于机器上部署了IIS,80端口被默认站点占用,把站点关闭就可以了,这个问题在错误日志里记录是这样的。
2015/01/15 10:44:12 [emerg] 8800#5988: bind() to 0.0.0.0:80 failed (10013: An attempt was made to access a socket in a way forbidden by its access permissions)
碰到类似的错误,请确认端口是否被占用或被防火墙屏蔽
2.Nginx所在目录有中文
错误日志大致输出一下内容
2015/01/15 11:55:55 [emerg] 5664#8528: CreateFile() "E:软件 ginx-1.7.8/conf/nginx.conf" failed (1113: No mapping for the Unicode character exists in the target multi-byte code page)
3. 启用缓存时报错
2015/01/15 17:26:50 [emerg] 17068#20356: shared zone "cache_one" has no equal addresses: 02CF0000 vs 02A20000
2015/01/15 17:26:50 [alert] 11536#11228: worker process 17068 exited with code 1
我一直没有找到解决的方法,有人说重启服务,或者缓存设置大一点就可以了,我试了一下没有用的,官网 原文是这样讲的,只能认为windwos下无解了。
: The cache and other modules which require shared memory support do
: not work in Windows Vista and later due to address space layout
: randomization being enabled in these Windows versions.
4.缺少nginx.pid文件
nginx: [error] CreateFile() "E: ginx ginx-1.9.3/logs/nginx.pid" failed
nginx: [error] CreateFile() "E: ginx ginx-1.9.3/logs/nginx.pid" failed
nginx: [error] Open() "E: ginx ginx-1.9.3/logs/nginx.pid" failed
解决方法:
使用命令创建/logs/nginx.pid文件:
nginx -c conf/nginx.conf
5.bash: nginx: command not found
有可能是你再linux命令行环境下运行了windows命令,
如果你之前是允许 nginx -s reload报错, 试下 ./nginx -s reload
或者 用windows系统自带命令行工具运行
6.windows下nginx访问web目录提示403 Forbidden
在windows下 http服务器nginx时,访问web目录提示403 Forbidden,首先需要了解nginx出现403错误是什么意思:
403 Forbidden表示你在请求一个资源文件但是nginx不允许你查看,403 Forbidden 只是一个HTTP状态码,像404,200一样不是技术上的错误。
找到nginx.conf:
将user nobody 改为user root;重启ng,仍无效果。
后发现nginx默认是不支持浏览目录的。
找到 autoindex off 更改为on。 重启ng,正常访问。
另外Linux下,nginx.conf配置文件最上面的那个“# user nobody”要改成“user ftpuser”,不然访问可能会出现403错误。