一、三要素
请求方式、请求地址、请求参数
二、拆分接口
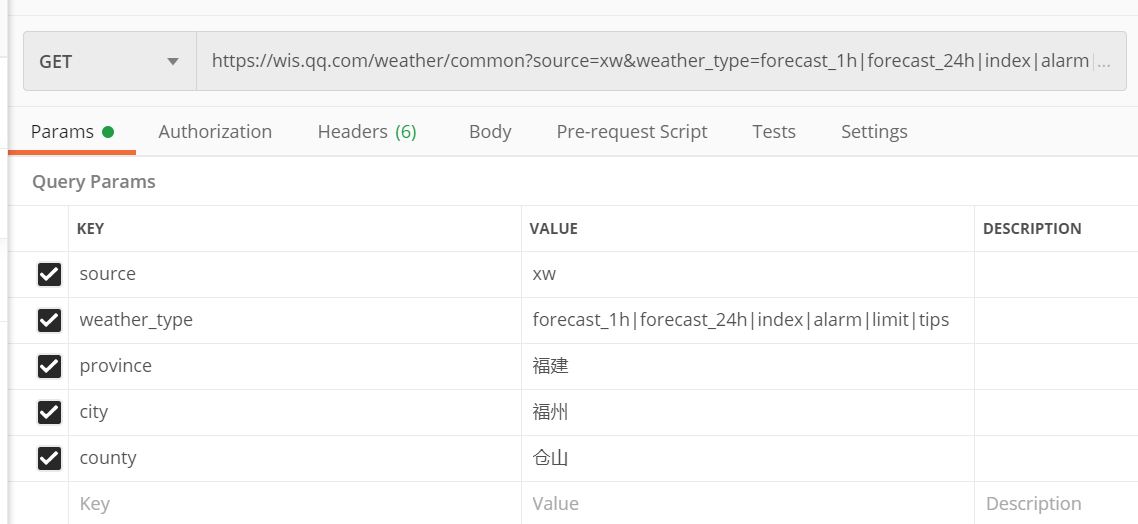
腾讯天气: https://wis.qq.com/weather/common?source=xw&weather_type=forecast_1h|forecast_24h|index|alarm|limit|tips&province=福建&city=福州&county=仓山
https: 是协议
wis.qq.com: 域名
/weather/common :路径
?后面都是参数
&:参数分隔符
三、get post
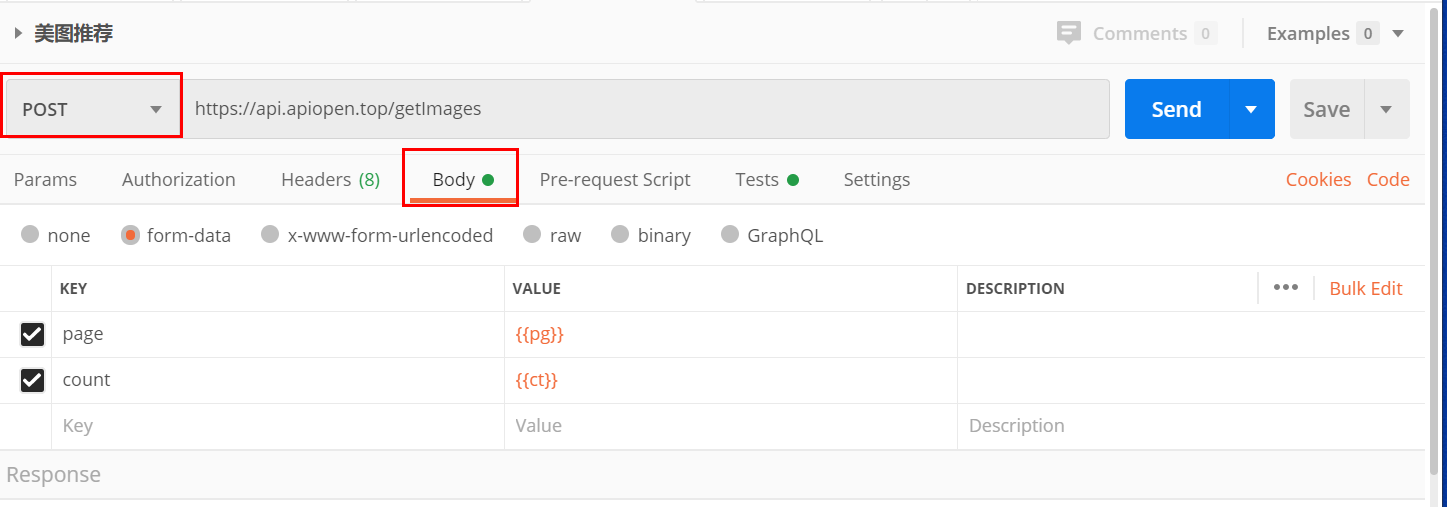
get 请求参数直接写在url后面
POST 请求参数写在Body里面
四、参数化
是什么:使用指定的数据源的数据替换脚本中的动态数据的参数
为什么:效率高,脚本可维护性好
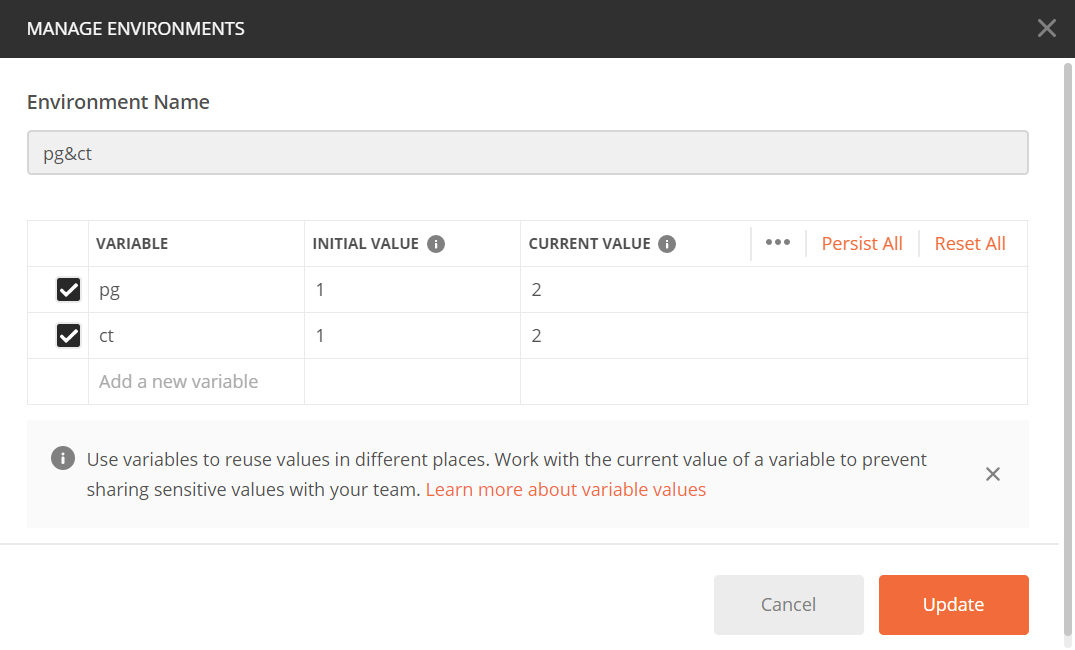
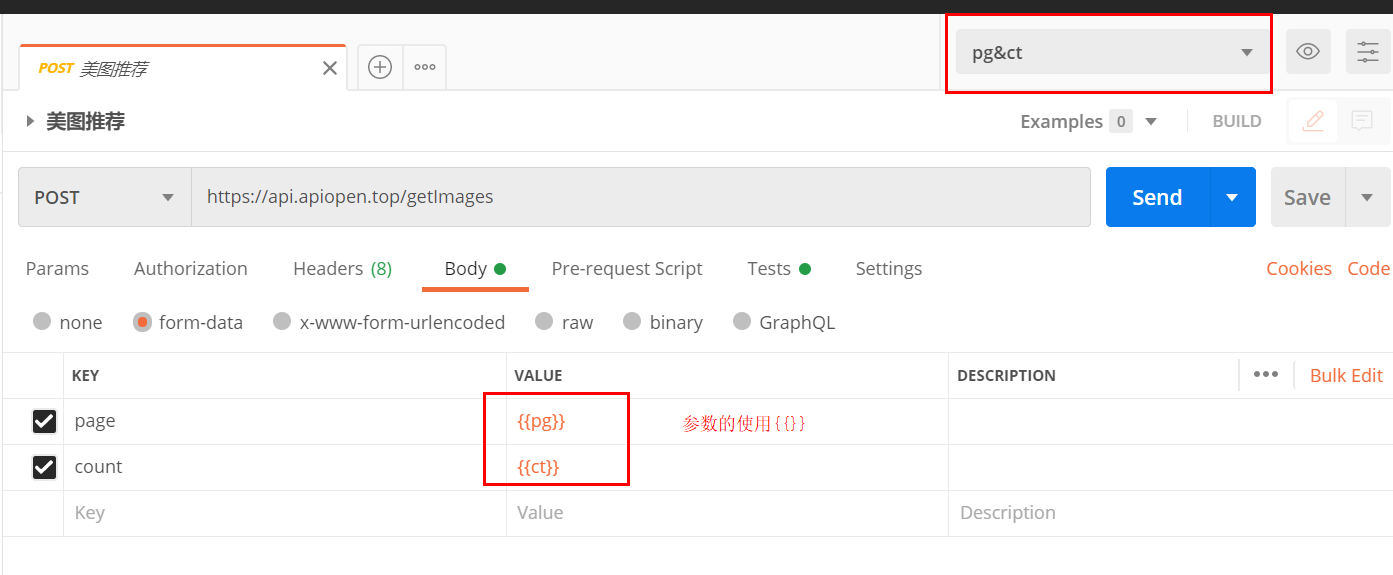
怎么做:通过环境变量或者全局变量设置参数
没有选中环境变量的时候,使用全局变量设置的参数
区别:1.环境变量可以定义多套,全局只能一套
2.没有选中环境变量的时候,引用全局变量设置的参数
1.设置环境变量
2.使用环境变量
五、断言
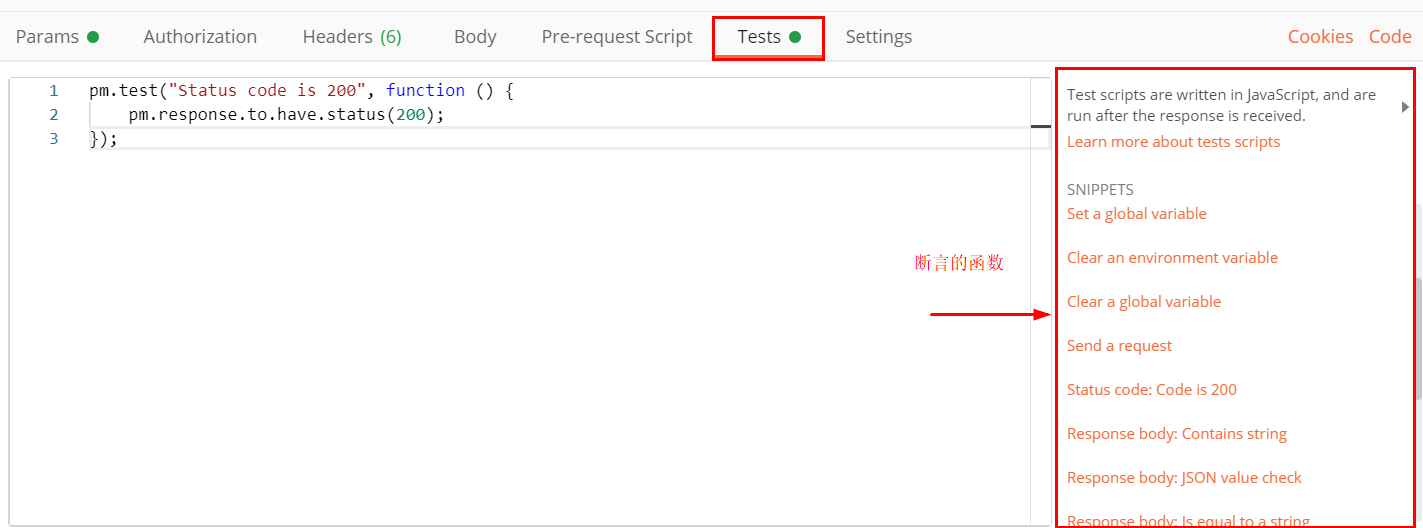
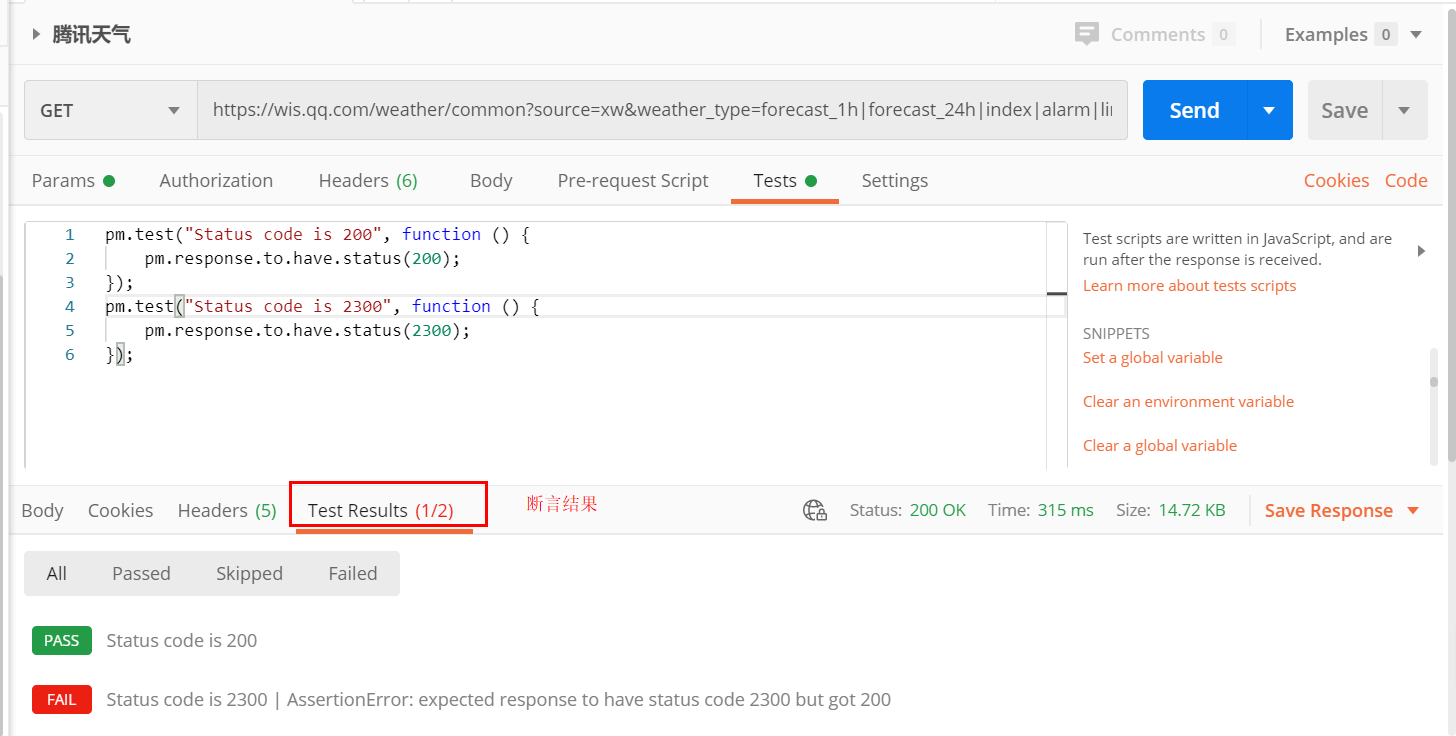
断言是:将预期结果和实际结果做比对
断言结果:pass 就是你的预期结果和接口返回的实际结果一致
FAIL 就是不符合
当然断言不严谨,也可能是你的逻辑不对,会导致判断错误
2.介绍常见断言
Get an environment variable 获取环境变量 | pm.environment.get("variable_key"); |
Get a global variable 获取全局变量 | pm.globals.get("variable_key"); |
Get a variable 获取一个变量(全局和环境都可以) | pm.variables.get("variable_key"); |
Set an environment variable(设置一个环境变量) | pm.environment.set("variable_key", "variable_value"); |
Set an globle variable(设置全局变量) | pm.globals.set("variable_key", "variable_value"); |
| clear an environment variable(清除环境变量) | pm.environment.unset("variable_key"); |
| clear an globle variable(清除全局变量) | pm.globals.unset("variable_key"); |
| send a request(发送一个请求) | pm.sendRequest("https://postman-echo.com/get", function (err, response) { console.log(response.json()); }); |
| Status code :Code is 200 (判断状态码是200) | pm.test("Status code is 200", function () { pm.response.to.have.status(200); }); |
| Response body :Contains string(响应结果包含的字符串) | pm.test("Body matches string", function () { pm.expect(pm.response.text()).to.include("string_you_want_to_search"); }); |
| Response body :JSON value check(检查json值) | pm.test("Your test name", function () { var jsonData = pm.response.json(); pm.expect(jsonData.value).to.eql(100); }); |
| Response headers:Content-Type header check(内容类型检查是否存在) | pm.test("Content-Type is present", function () { pm.response.to.have.header("Content-Type"); }); |
Response time is less than 200ms (响应时间小于200ms) | pm.test("Response time is less than 200ms", function () { pm.expect(pm.response.responseTime).to.be.below(200); }); |
| Status code:Successful POST request(成功的POST状态码) | pm.test("Successful POST request", function () { pm.expect(pm.response.code).to.be.oneOf([201,202]); }); |
| Status code :Code name has string(代码名称含一个字符串) | pm.test("Status code name has string", function () { pm.response.to.have.status("Created"); }); |
| Response body :Conver XML body to a JSON boject (将XML正文转换为JSON对象) | var jsonObject = xml2Json(responseBody); |
| Use Tiny Validator for JSON data | var schema = { "items": { "type": "boolean" } }; var data1 = [true, false]; var data2 = [true, 123]; pm.test('Schema is valid', function() { pm.expect(tv4.validate(data1, schema)).to.be.true; pm.expect(tv4.validate(data2, schema)).to.be.true; }); |
var jsonData = JSON.parse(  responseBody);//获取响应数据

tests["Check respose status value"] = jsonData.status === 1;

pm.test("判断data里面第一个json数据的id为1", function () {
var jsonData = pm.response.json();
pm.expect(jsonData.data[0].id).to.eql(1);});关联:上一个请求的返回值给下一个请求使用
1.在上个请求的断言里面获取响应值,然后设置环境变量(前提是环境变量有这个环境变量 )
2.在下一个请求使用刚刚获取的环境变量参数
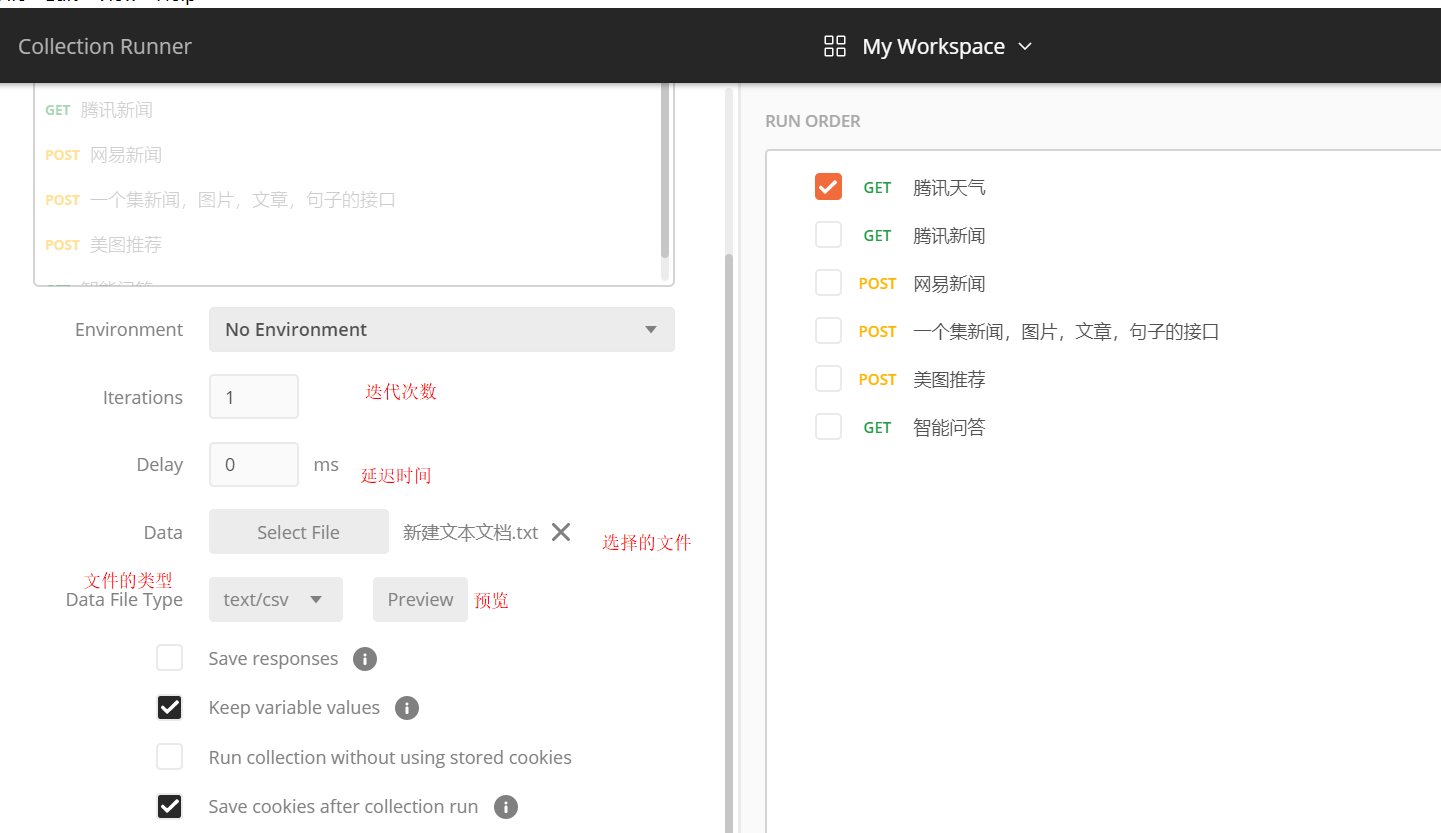
七、简单并发,根据迭代的次数
点击Runner,选择你想要的并发的接口
