1.完成Docker-compose的安装
- 按照参考手册来安装Docker-compose时间会很长
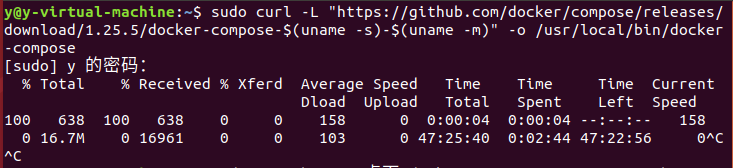
- 通过curl命令下的链接把这个包下载下来就可以提速

2.Dockerfile编写
创建docker-compose文件夹,并创建相应的dockerfile文件
docker-nginx
FROM nginx
MAINTAINER by Yaobink
EXPOSE 2419
docker-php
FROM php:7.4-fpm
MAINTAINER by Yaobink
FROM php:7.4-fpm
RUN apt-get update && apt-get install -y
        libfreetype6-dev
        libjpeg62-turbo-dev
        libpng-dev
    && docker-php-ext-install pdo_mysql
    && docker-php-ext-configure gd --with-freetype --with-jpeg
    && docker-php-ext-install -j$(nproc) gd
docker-mysql
FROM mysql:5.7
MAINTAINER by Yaobink
docker-myadmin
FROM phpmyadmin/phpmyadmin
MAINTAINER by Yaobink
EXPOSE 8080
配置nginx的配置文件
server {
    listen       2419;
    server_name  localhost;

    #charset koi8-r;
    #access_log  /var/log/nginx/host.access.log  main;

    location / {
        root   /usr/myweb;
        index  index.html index.htm;
    }

    #error_page  404              /404.html;

    # redirect server error pages to the static page /50x.html
    #
    error_page   500 502 503 504  /50x.html;
    location = /50x.html {
        root   /usr/share/nginx/html;
    }

    # proxy the PHP scripts to Apache listening on 127.0.0.1:80
    #
    #location ~ .php$ {
    #    proxy_pass   http://127.0.0.1;
    #}

    # pass the PHP scripts to FastCGI server listening on 127.0.0.1:9000
    #
    location ~ .php$ {
        root           /usr/myweb;
        fastcgi_pass   c_php:9000;
        fastcgi_index  index.php;
        fastcgi_param  SCRIPT_FILENAME  /scripts$fastcgi_script_name;
        include        fastcgi_params;
    }

    # deny access to .htaccess files, if Apache's document root
    # concurs with nginx's one
    #
    #location ~ /.ht {
    #    deny  all;
    #}
}
编写docker-compose.yml
version: "3"
services:
 php:
    image: my_php
    container_name: c_php
    build:
      context: .
      dockerfile: dockerfile_php
    environment:
      MYSQL_PASSWORD: 123456            #设置好环境变量,在php代码中使用变量名直接引用
    volumes:
      - ./web:/usr/myweb                  #挂载工作目录到本机web目录

 nginx:
    image: my_nginx                #指定镜像名
    container_name: c_nginx             #指定容器名
    build:
      context: .
      dockerfile: dockerfile_nginx      #指定dockerfile文件
    ports:
      - "80:2419"                       #修改端口映射
    volumes:
      - ./web:/usr/myweb                #挂载容器卷,本地/容器内修改文件后,另一方都会同步更新;
      - ./default.conf:/etc/nginx/conf.d/default.conf     #挂载配置文件


 mysql:
   image: my_mysql
   container_name: c_mysql
   build:
      context: .
      dockerfile: dockerfile_mysql
   ports:
     - "3306:3306"
   volumes:
     - ./mysql_data:/var/lib/mysql       #挂载容器卷,实现数据同步,防止数据丢失

 phpmyadmin:
    image: my_myphpmyadmin
    container_name: c_myphpmyadmin
    build:
      context: .
      dockerfile: dockerfile_phpmyadmin
    ports:
      - "8080:80" # phpmyadmin默认监听80
    environment:
      PMA_HOST: mysql                     #指定mysql服务所在的host
3.使用Compose实现多容器运行机制
执行docker-compose文件
sudo docker-compose up -d --build
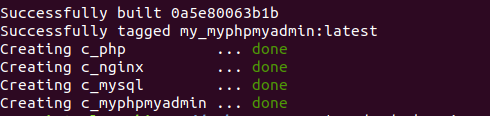
查看镜像创建和容器创建的结果


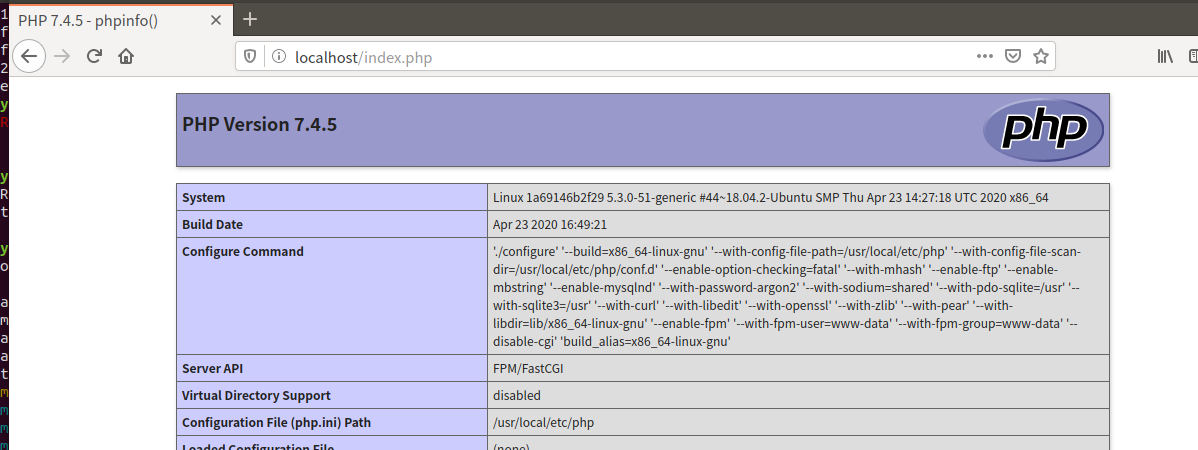
4.服务测试
测试访问index.html和index.php

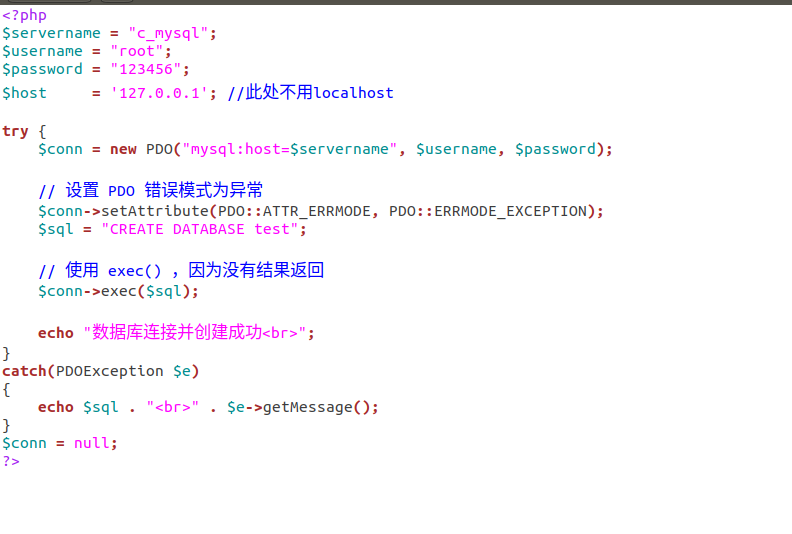
修改index.php内容
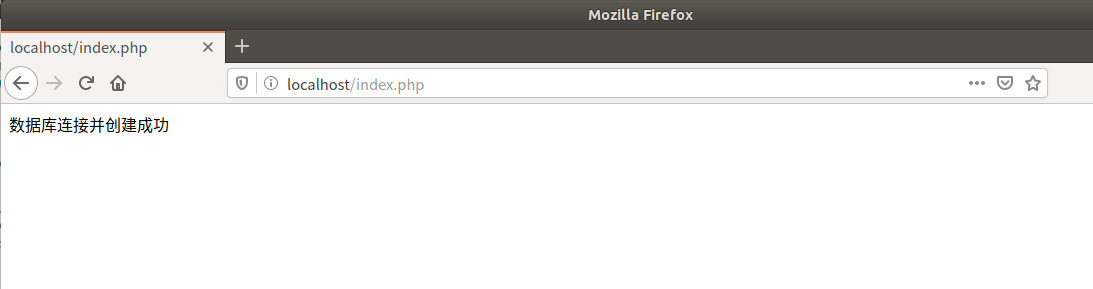
访问index.php
在服务测试访问index.php时无法连接,发现defaul.conf里面的设置端口不正确以及配置文件中的容器名没有对应。问题解决后,发现成功实现php文件下的内容,成功连接数据库并创建表格
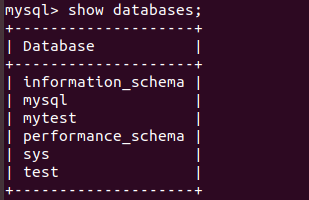
- 进入容器查看数据库
sudo docker exec -it c_mysql /bin/bash
mysql -u root -p
show databases;
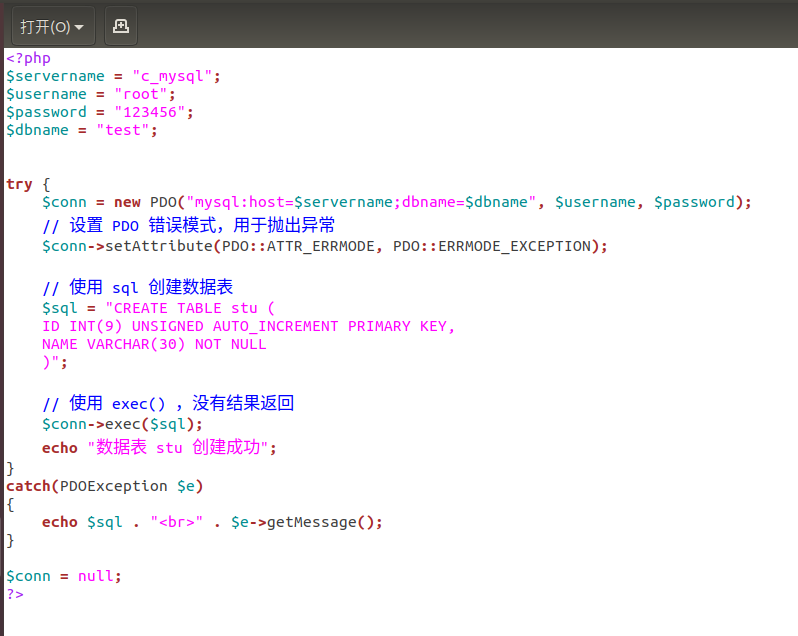
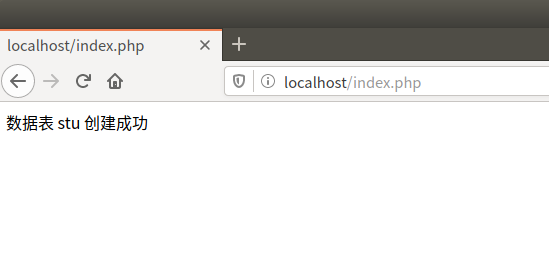
创建数据表
- 编辑index.php文档
- 查看结果

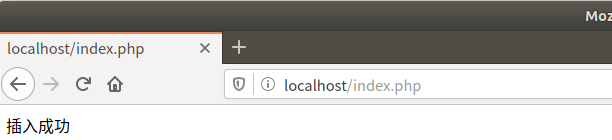
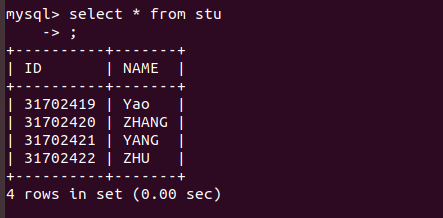
插入并查询数据
- 编辑index.php文档
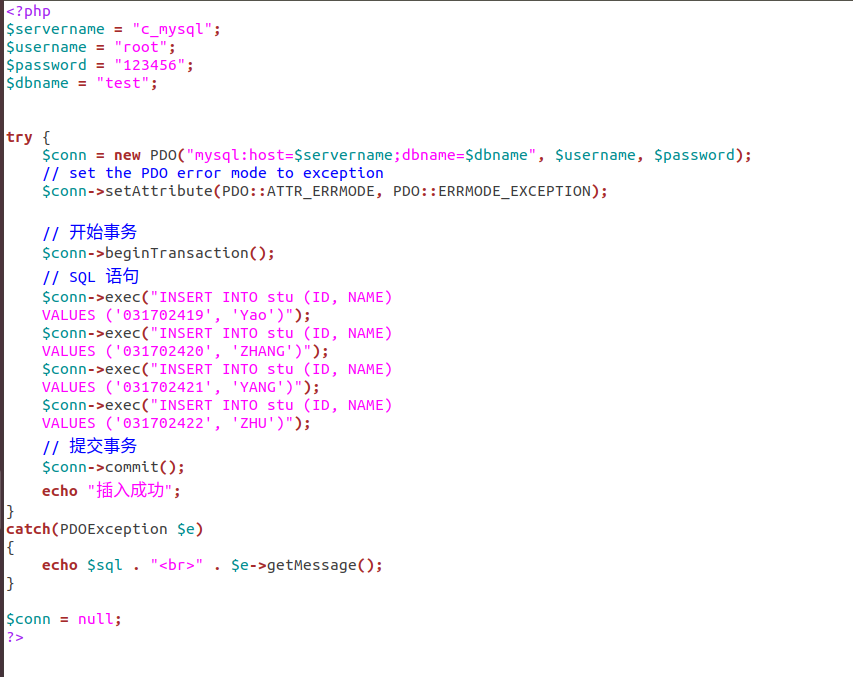
- 查看结果
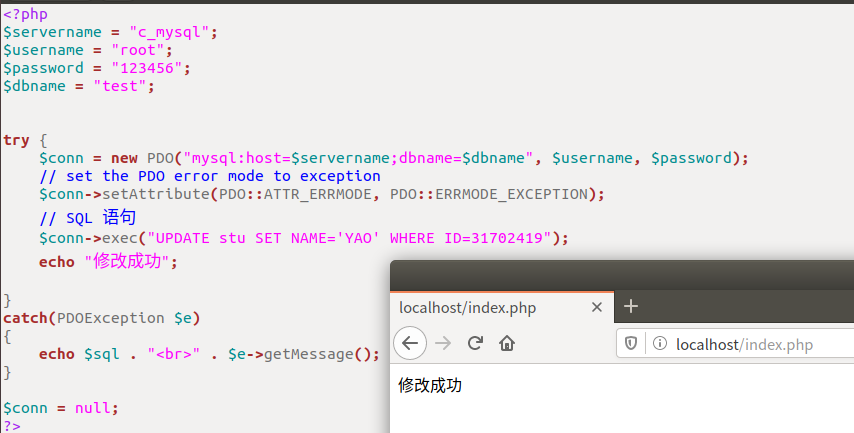
修改数据
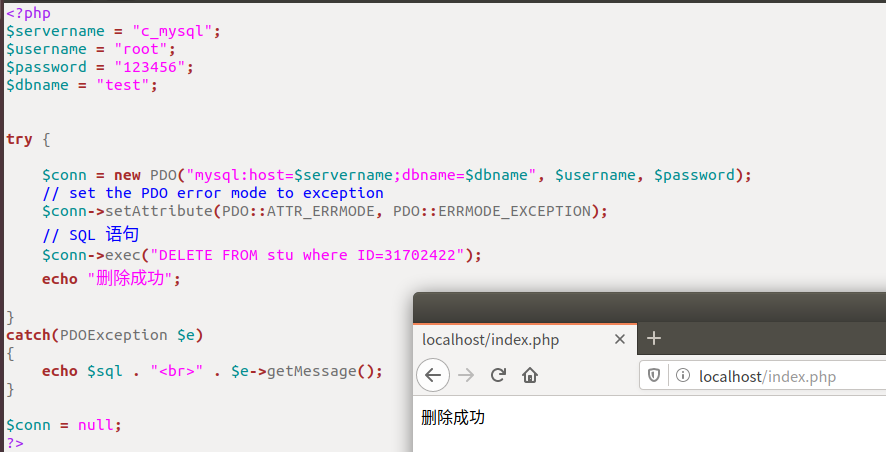
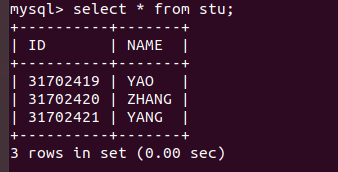
删除数据
5.总结
本次实验是在两天时间内完成的,因为对知识的了解掌握程度不够和本人的粗心大意,实验中出现了很多的问题,端口号设置不正确、配置文件编写不正确等等,通过查看日志、百度错误提示语句等手段解决了问题。
乍一看这次作业会感觉很难,但是在亲自动手开始做之后,会发现并没有想象中那么难以下手。虽然仍然遇到了很多问题,但是通过百度、询问、查资料等方式都可以慢慢的解决。