1.前言
上个Shiro Demo基础搭建是基于官方的快速入门版本,没有集成其他框架,只是简单的通过Main方法来执行Shiro工作流程,并测试一下比较核心的函数;但在企业开发中一般都会集成Spring,因为被Spring管理后很多事情都交给了Spring框架进行了管理,而且Spring框架提供了丰富的支持类,不仅方便我们开发人员进行扩展,也利于维护,通过Spring管理我们能把更多的细节放在业务上,提高我们的开发效率。
搭建环境(eclipse+jdk1.7+tomcat7.0)
- 首先是 新建一个web工程,引入Spring和Shiro相关jar包,如图

2. 新建一个applicationContext.xml文件,用来配置Shiro
<?xml version="1.0" encoding="UTF-8"?>
<beans xmlns="http://www.springframework.org/schema/beans"
    xmlns:xsi="http://www.w3.org/2001/XMLSchema-instance"
    xsi:schemaLocation="http://www.springframework.org/schema/beans http://www.springframework.org/schema/beans/spring-beans.xsd">


<bean id="securityManager" class="org.apache.shiro.web.mgt.DefaultWebSecurityManager">
    <property name="cacheManager" ref="cacheManager"></property>
    <property name="realm" ref="jdbcRealm"></property>
</bean>


<bean id="cacheManager" class="org.apache.shiro.cache.ehcache.EhCacheManager">
    <property name="cacheManagerConfigFile" value="classpath:ehcache.xml"></property>
</bean>

<bean id="jdbcRealm" class="com.zdd.shiro.ShiroRealm"></bean>


<bean id="lifecycleBeanPostProcessor" class="org.apache.shiro.spring.LifecycleBeanPostProcessor">
</bean>

<!--  5. 启用 IOC 容器中使用 shiro 的注解. 但必须在配置了 LifecycleBeanPostProcessor 之后才可以使用. -->

    <bean class="org.springframework.aop.framework.autoproxy.DefaultAdvisorAutoProxyCreator"
          depends-on="lifecycleBeanPostProcessor"/>
    <bean class="org.apache.shiro.spring.security.interceptor.AuthorizationAttributeSourceAdvisor">
        <property name="securityManager" ref="securityManager"/>
    </bean>

 <!--
    6. 配置 ShiroFilter.
    6.1 id 必须和 web.xml 文件中配置的 DelegatingFilterProxy 的 <filter-name> 一致.
                      若不一致, 则会抛出: NoSuchBeanDefinitionException. 因为 Shiro 会来 IOC 容器中查找和 <filter-name> 名字对应的 filter bean.
    -->
    <bean id="shiroFilter" class="org.apache.shiro.spring.web.ShiroFilterFactoryBean">
        <property name="securityManager" ref="securityManager"/>
        <property name="loginUrl" value="/login.jsp"/>
        <property name="successUrl" value="/list.jsp"/>
        <property name="unauthorizedUrl" value="/unauthorized.jsp"/>

         <property name="filterChainDefinitions">
            <value>
                /login.jsp = anon
                # everything else requires authentication:
                /** = authc
            </value>
        </property>

    </bean>

</beans>
3. 配置ehcache.xml


<ehcache>

    <!-- Sets the path to the directory where cache .data files are created.

         If the path is a Java System Property it is replaced by
         its value in the running VM.

         The following properties are translated:
         user.home - User's home directory
         user.dir - User's current working directory
         java.io.tmpdir - Default temp file path -->
    <diskStore path="java.io.tmpdir"/>

    <cache name="authorizationCache"
           eternal="false"
           timeToIdleSeconds="3600"
           timeToLiveSeconds="0"
           overflowToDisk="false"
           statistics="true">
    </cache>

    <cache name="authenticationCache"
           eternal="false"
           timeToIdleSeconds="3600"
           timeToLiveSeconds="0"
           overflowToDisk="false"
           statistics="true">
    </cache>

    <cache name="shiro-activeSessionCache"
           eternal="false"
           timeToIdleSeconds="3600"
           timeToLiveSeconds="0"
           overflowToDisk="false"
           statistics="true">
    </cache>

    <!--Default Cache configuration. These will applied to caches programmatically created through
        the CacheManager.

        The following attributes are required for defaultCache:

        maxInMemory       - Sets the maximum number of objects that will be created in memory
        eternal           - Sets whether elements are eternal. If eternal,  timeouts are ignored and the element
                            is never expired.
        timeToIdleSeconds - Sets the time to idle for an element before it expires. Is only used
                            if the element is not eternal. Idle time is now - last accessed time
        timeToLiveSeconds - Sets the time to live for an element before it expires. Is only used
                            if the element is not eternal. TTL is now - creation time
        overflowToDisk    - Sets whether elements can overflow to disk when the in-memory cache
                            has reached the maxInMemory limit.

        -->
    <defaultCache
        maxElementsInMemory="10000"
        eternal="false"
        timeToIdleSeconds="120"
        timeToLiveSeconds="120"
        overflowToDisk="true"
        />

    <!--Predefined caches.  Add your cache configuration settings here.
        If you do not have a configuration for your cache a WARNING will be issued when the
        CacheManager starts

        The following attributes are required for defaultCache:

        name              - Sets the name of the cache. This is used to identify the cache. It must be unique.
        maxInMemory       - Sets the maximum number of objects that will be created in memory
        eternal           - Sets whether elements are eternal. If eternal,  timeouts are ignored and the element
                            is never expired.
        timeToIdleSeconds - Sets the time to idle for an element before it expires. Is only used
                            if the element is not eternal. Idle time is now - last accessed time
        timeToLiveSeconds - Sets the time to live for an element before it expires. Is only used
                            if the element is not eternal. TTL is now - creation time
        overflowToDisk    - Sets whether elements can overflow to disk when the in-memory cache
                            has reached the maxInMemory limit.

        -->

    <!-- Sample cache named sampleCache1
        This cache contains a maximum in memory of 10000 elements, and will expire
        an element if it is idle for more than 5 minutes and lives for more than
        10 minutes.

        If there are more than 10000 elements it will overflow to the
        disk cache, which in this configuration will go to wherever java.io.tmp is
        defined on your system. On a standard Linux system this will be /tmp"
        -->
    <cache name="sampleCache1"
        maxElementsInMemory="10000"
        eternal="false"
        timeToIdleSeconds="300"
        timeToLiveSeconds="600"
        overflowToDisk="true"
        />

    <!-- Sample cache named sampleCache2
        This cache contains 1000 elements. Elements will always be held in memory.
        They are not expired. -->
    <cache name="sampleCache2"
        maxElementsInMemory="1000"
        eternal="true"
        timeToIdleSeconds="0"
        timeToLiveSeconds="0"
        overflowToDisk="false"
        /> -->

    <!-- Place configuration for your caches following -->

</ehcache>
   4.  新建一个spring-servlet.xml,用来配置Spring MVC,因为项目用到的Spring mvc


<?xml version="1.0" encoding="UTF-8"?>
<beans xmlns="http://www.springframework.org/schema/beans"
    xmlns:xsi="http://www.w3.org/2001/XMLSchema-instance"
    xmlns:mvc="http://www.springframework.org/schema/mvc"
    xmlns:context="http://www.springframework.org/schema/context"
    xsi:schemaLocation="http://www.springframework.org/schema/mvc http://www.springframework.org/schema/mvc/spring-mvc-4.0.xsd
        http://www.springframework.org/schema/beans http://www.springframework.org/schema/beans/spring-beans.xsd
        http://www.springframework.org/schema/context http://www.springframework.org/schema/context/spring-context-4.0.xsd">

    <context:component-scan base-package="com.zdd.shiro"></context:component-scan>

    <bean class="org.springframework.web.servlet.view.InternalResourceViewResolver">
        <property name="prefix" value="/"></property>
        <property name="suffix" value=".jsp"></property>
    </bean>

    <mvc:annotation-driven></mvc:annotation-driven>
    <mvc:default-servlet-handler/>

</beans>
5. 配置web.xml,注意的是需要配置Shiro拦截器,因为集成Spring后每次请求都需要被Shiro拦截
<?xml version="1.0" encoding="UTF-8"?>
<web-app xmlns:xsi="http://www.w3.org/2001/XMLSchema-instance"
    xmlns="http://java.sun.com/xml/ns/javaee"
    xsi:schemaLocation="http://java.sun.com/xml/ns/javaee http://java.sun.com/xml/ns/javaee/web-app_2_5.xsd"
    id="WebApp_ID" version="2.5">

    <!-- needed for ContextLoaderListener -->
    <context-param>
        <param-name>contextConfigLocation</param-name>
        <param-value>classpath:applicationContext.xml</param-value>
    </context-param>

    <!-- Bootstraps the root web application context before servlet initialization -->
    <listener>
        <listener-class>org.springframework.web.context.ContextLoaderListener</listener-class>
    </listener>

    <!-- The front controller of this Spring Web application, responsible for handling all application requests -->
    <servlet>
        <servlet-name>spring</servlet-name>
        <servlet-class>org.springframework.web.servlet.DispatcherServlet</servlet-class>
        <load-on-startup>1</load-on-startup>
    </servlet>

    <!-- Map all requests to the DispatcherServlet for handling -->
    <servlet-mapping>
        <servlet-name>spring</servlet-name>
        <url-pattern>/</url-pattern>
    </servlet-mapping>

    <!-- Shiro Filter is defined in the spring application context: -->
    <!--
    1. 配置  Shiro 的 shiroFilter.
    2. DelegatingFilterProxy 实际上是 Filter 的一个代理对象. 默认情况下, Spring 会到 IOC 容器中查找和
    <filter-name> 对应的 filter bean. 也可以通过 targetBeanName 的初始化参数来配置 filter bean 的 id.
    -->
    <filter>
        <filter-name>shiroFilter</filter-name>
        <filter-class>org.springframework.web.filter.DelegatingFilterProxy</filter-class>
        <init-param>
            <param-name>targetFilterLifecycle</param-name>
            <param-value>true</param-value>
        </init-param>
    </filter>

    <filter-mapping>
        <filter-name>shiroFilter</filter-name>
        <url-pattern>/*</url-pattern>
    </filter-mapping>

</web-app>
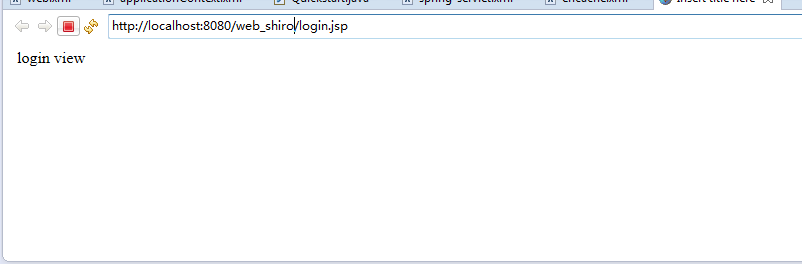
6. 在applicationContext,xml中我配置的是 只有login页面可以匿名访问,其他的都需要认证能访问,所以新建一个login.jsp和一个user.jsp,测试下效果

以上就是一个基础的Shiro和Spring集成的一个demo,其中的大部分代码和配置文件也是官网提供。
最后运行项目后默认是跳转到了login.jsp页面(因为在上面代码里配置了只有认证后才能访问其他页面)