一:什么是端口转发?
SSH 会自动加密和解密所有SSH 客户端与服务端之间的网络数据。但是,SSH 还能够将其他TCP 端口的网络数据通过SSH 链接来转发,并且自动提供了相应的加密及解密服务。这一过程也被叫做“隧道”(tunneling),这是因为SSH 为其他TCP 链接提供了一个安全的通道来进行传输而得名。例如,Telnet,SMTP,LDAP 这些TCP 应用均能够从中得益,避免了用户名,密码以及隐私信息的明文传输。而与此同时,如果工作环境中的防火墙限制了一些网络端口的使用,但是允许SSH 的连接,也能够通过将TCP 端口转发来使用SSH 进行通讯。
二:SSH 端口转发能够提供两大功能:
1.加密SSH Client 端至SSH Server 端之间的通讯数据2.突破防火墙的限制完成一些之前无法建立的TCP 连接
三:SSH端口本地转发
本地转发机制:
-L localport:remotehost:remotehostportsshserver
选项:
-f 后台启用
-N 不打开远程shell,处于等待状态
-g 启用网关功能
举例:
ssh–L 9527:telnetsrv:23 -N sshsrv
telnet 127.0.0.1 9527
当访问本机的9527的端口时,被加密后转发到sshsrv的ssh服务,再解密被转发到telnetsrv:23
data < >localhost:9527 < > localhost:XXXXX < > sshsrv:22 < > sshrv:yyyyy < > telnetsrv:23
流程解释:
数据一旦telnet以后,数据会发送到本机9527端口,再在本机开一个随机端口,充当ssh客户端,再把数据流量发送到22端口的ssh服务端,收到数据以后,解密数据,临时开一个随机端口充当客户端,再把流量发送到23端口telnet服务端
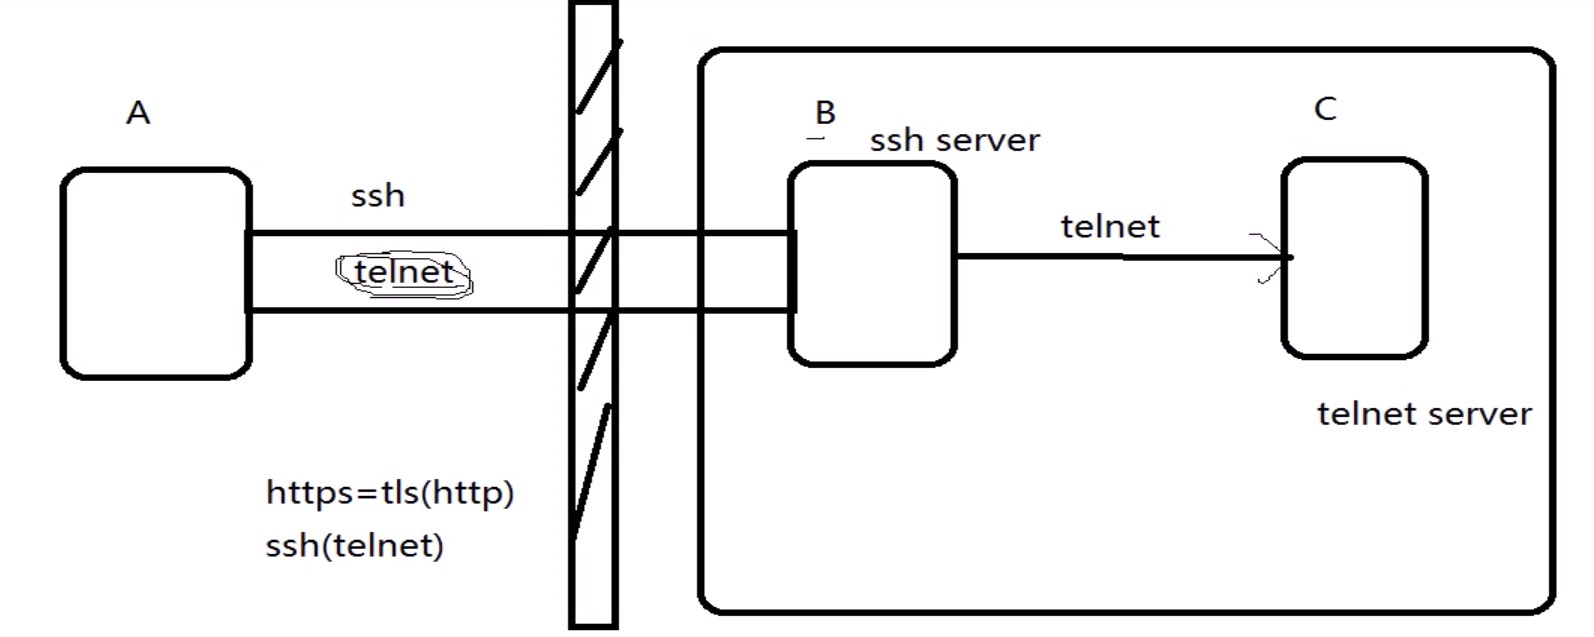
ssh协议里面封装了telnet,一旦A连接了B主机,立即使用telnet连接C主机,此过程可以突破防火墙的限制
#实验
A->C 访问被限制
A-B->C 使用B主机作为跳板突破访问限制
选项回顾
-L 本机端口
-f 后台启用,可以在本机直接执行命令,无需另开新终端
-N 不打开远程shell,处于等待状态,不跳到远程主机,还在主机上,只是搭好了隧道,桥搭好,不ssh上去
-g 启用网关功能
-R 服务端口
环境:
[root@Centos6 ~]# vim /etc/hosts
A:Centos7  172.18.254.173
B:Centos6  172.18.253.175
C:Centos6-1 172.18.253.192
注:每个机器都添加hosts
条件:设置防火墙策略不让Centos7直连Centos6-1
[root@centos6-1 ~]# iptables -A INPUT -s centos7 -j REJECT
操作:
[root@centos7 ~]# ssh -L 9527:centos6-1:23 -Nf centos6
#通过本地9527端口访问centos6-1服务器IP地址使用telnet协议23端口,跳板机ip地址
[root@centos7 ~]# ss -tn
State     Recv-Q Send-Q         Local Address:Port                       Peer Address:Port
ESTAB      0      96            172.18.254.173:22                          172.18.0.100:57618
ESTAB      0      0             172.18.254.173:35024                     172.18.253.175:22
#隧道已经搭建好了,此时A主机可以通过telnet访问C主机
[root@centos7 ~]# telnet 127.0.0.1 9527    #访问成功
Trying 127.0.0.1...
Connected to 127.0.0.1.
Escape character is '^]'.
CentOS release 6.9 (Final)
Kernel 2.6.32-696.el6.x86_64 on an x86_64
Centos6-1 login: docker
Password:
Last login: Mon Apr  9 21:33:43 from centos7

#删除ssh端口本地装发
[docker@centos6-1 ~]$ exit    #退出telnet但是隧道还是搭着可以使用ps aux查看到
[root@centos7 ~]# ps aux
root       6624  0.0  0.1 180392  1392 ?       Ss   21:59   0:00 ssh -L 9527:centos6-1:23 -Nf centos6
[root@centos7 ~]# killall ssh   #删除搭建的桥
[root@centos7 ~]# telnet centos6-1 #此时可以说明清除成功
Trying 172.18.253.192...
telnet: connect to address 172.18.253.192: Connection refused
总结:
Centos6上面实现代理科学上网不能用1080端口
有的公司管理的比较严格,指向外面开放80端口,如果想从我外面连接主机可以改ssh接口,在连接指定端口-p
四:SSH端口远程装发
远程转发机制:
-R sshserverport:remotehost:remotehostportsshserver
举例:
ssh–R 9527:telnetsrv:23 –N sshsrv
让sshsrv侦听9527端口的访问,如有访问,就加密后通过ssh服务转发请求到本机ssh客户端,再由本机解密后转发到telnetsrv:23
Data < > sshsrv:9527 < > sshsrv:22 < > localhost:XXXXX < > localhost:YYYYY< >telnetsrv:23
需求:
在A(Centos7)上开启smtp服务(postfix),B(Centos6)做跳板,C(Centos6-1)客户端给Centos7发送邮件
流程解析:
C-x->A (拒绝访问)
C-B->A (通过远程代理,接受访问)
查看环境:
[root@centos7 ~]# ss -ntl   #查看25端口有没有开启
LISTEN      0      100                            127.0.0.1:25                                                 *:*
[root@centos7 ~]# vim /etc/postfix/main.cf   #对文件配置文件进行修改,Centos7已经不同早期系统使用sendmail作为默认邮件服务器
#目的:修改绑定接口配置
# 不同文件有些localhost意思完全相反,此处localhost再邮件是127,而DNS中是表示的是本地的所有IP,相当于此处的all
#inet_interfaces = all   #此行不是所有主机而是所有ip意思   #此处去掉注释
#inet_interfaces = $myhostname
#inet_interfaces = $myhostname, localhost
inet_interfaces = localhost    #这一行说明接口是绑定在127.0.0.1上   #加上注释
[root@centos7 ~]# ss -ntl
LISTEN      0      100                                   *:25                                                 *:*
环境配置:
[root@centos7 ~]# systemctl start telnet.socket   #开启telnet-server
[root@centos7 ~]# systemctl status telnet.socket   #查看一下是否已经开启
[root@centos7 ~]# iptables -nvL   #查看一下防火墙策略
[root@centos7 ~]# systemctl stop firewalld.service     #关闭防火墙
[root@Centos6 ~]# chkconfig --list iptables   #查看各运行级别防火墙开机运行状态
iptables        0:off   1:off   2:on    3:on    4:on    5:on    6:off
[root@Centos6 ~]# chkconfig iptables off   #关闭防火墙
[root@Centos6 ~]# chkconfig --list iptables   #所有运行级别防火墙都关闭
iptables        0:off   1:off   2:off   3:off   4:off   5:off   6:off
[root@Centos6 ~]# chkconfig --del iptables   #移除开机自动启动防火墙
[root@Centos6-1 ~]# telnet centos7 25   #测试centos6-1可以通过telnet 25端口连接Centos7
Trying 172.18.254.173...
Connected to centos7.
Escape character is '^]'.
220 centos7.localdomain ESMTP Postfix    #测试成功,25端口可以连接
#关闭跳板机(Centos6)和远程服务器(Centos7)上的SELINUX
[root@centos7 ~]# vim /etc/selinux/config
SELINUX=disabled
[root@centos7 ~]# setenforce 0
创建目标条件:
[root@centos7 ~]# iptables -A INPUT -s centos6-1 -j REJECT   #设置防火墙策略,使Centos7不接受Centos6一切请求
[root@centos6-1 ~]# telnet centos7 25
Trying 172.18.254.173...
telnet: connect to address 172.18.254.173: Connection refused
操作:Centos6-1使用远程转发,发送邮件给Centos7
[root@Centos6 ~]# ssh -R 9527:centos7:25 -fN centos6-1   #建立隧道,此过程确保Centos6可以公钥连接centos6-1,否则需要手动口令验证
[root@Centos6 ~]# ss -ntl    #检查邮件服务,可以知道服务已经开启
LISTEN      0      100                                               ::1:25                                               :::*
LISTEN      0      100                                         127.0.0.1:25                                                 *:*
[root@centos6-1 .ssh]# ss -ntl   #此时也可以看到跳板机Centos6-1上9527端口已经在监听
LISTEN      0      128                                         127.0.0.1:9527                                               *:*
LISTEN      0      128                                               ::1:9527                                             :::*
[root@centos6-1 ~]# ps -ef |grep ssh   #查看一下ssh运行的进程
root       2288      1  0 09:58 ?        00:00:00 ssh -R 9527:centos7:25 -fN centos6-1
[root@centos6-1 .ssh]# telnet 127.0.0.1 9527   #此时可以通过telnet连接Cetnos7绕过了防火墙
Trying 127.0.0.1...
Connected to 127.0.0.1.
Escape character is '^]'.
220 centos7.localdomain ESMTP Postfix    #如果想退出进入telnet>   快捷键ctrl + ]
[root@centos7 ~]# ss -nt
State       Recv-Q Send-Q                     Local Address:Port                                   Peer Address:Port
ESTAB       0      0                         172.18.254.173:25                                    172.18.253.175:32898
ESTAB       0      96                        172.18.254.173:22                                      172.18.0.100:58652
#此时在Centos7上发现有IP尾号为100的机子在连接实际上是Centos6-1在连接

#最后验证是否能成功发送邮件
[root@centos6-1 ~]# telnet localhost 9527   #给Centos7发送邮件
Trying ::1...
Connected to localhost.
Escape character is '^]'.
220 centos7.localdomain ESMTP Postfix
mail from:ceo@app.com
250 2.1.0 Ok
rcpt to:root@centos7
250 2.1.5 Ok
data
354 End data with <CR><LF>.<CR><LF>
hello
.
250 2.0.0 Ok: queued as 86A5411EA866
quit
221 2.0.0 Bye
Connection closed by foreign host.

[root@centos7 ~]# mail    #可以收到邮件信息
Heirloom Mail version 12.5 7/5/10. Type ? for help.
"/var/spool/mail/root": 12 messages 12 new
>N  1 root                 Fri Mar 16 10:31  14/496   "Output from your job       4"
N  2 (Cron Daemon)         Sat Mar 17 08:00  25/886   "Cron <root@zangfans> /root/bin/etcback.sh"
N  3 root                 Sat Mar 17 10:20  14/506   "Output from your job       2"
N  4 (Cron Daemon)         Tue Mar 20 08:00  25/886   "Cron <root@zangfans> /root/bin/etcback.sh"
N  5 user@localhost.local Wed Mar 28 08:19 2129/142373 "[abrt] kernel: WARNING: CPU: 1 PID: 0 at net/sched/sch_generic.c:300 dev"
N  6 user@localhost.local Fri Apr  6 19:41 1151/90323 "[abrt] nautilus: nautilus-desktop killed by SIGSEGV"
N  7 HR@centos7.localdoma Tue Apr 10 14:44  16/633   "*** SECURITY information for centos7 ***"
N  8 HR@centos7.localdoma Tue Apr 10 16:38  16/637   "*** SECURITY information for centos7 ***"
N  9 HR@centos7.localdoma Tue Apr 10 16:38  16/641   "*** SECURITY information for centos7 ***"
N 10 HR@centos7.localdoma Tue Apr 10 16:39  16/637   "*** SECURITY information for centos7 ***"
N 11 HR@centos7.localdoma Tue Apr 10 16:39  16/641   "*** SECURITY information for centos7 ***"
N 12 ceo@app.com           Wed Apr 11 10:20  10/314
& 12
Message 12:
From ceo@app.com Wed Apr 11 10:20:29 2018
Return-Path: <ceo@app.com>
X-Original-To: root@centos7
Delivered-To: root@centos7.localdomain
Status: R

hello
五:动态端口转发
原理:
当用firefox访问internet时,本机的1080端口做为代理服务器,firefox的访问请求被转发到sshserver上,由sshserver替之访问internet
动态转发机制:
ssh-D 1080 root@sshserver
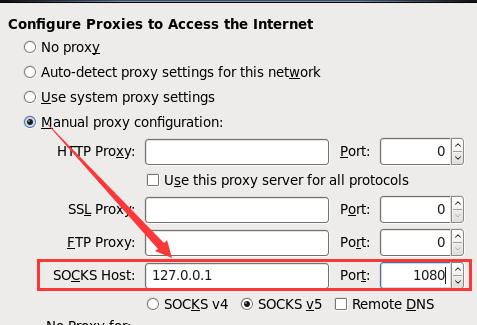
在本机firefox设置代理socket proxy:127.0.0.1:1080
测试:
curl --socks5 127.0.0.1:1080 http://zangfans.com
在企业内部或者网络中,基于安全策略不能随便访问互联网某些站点
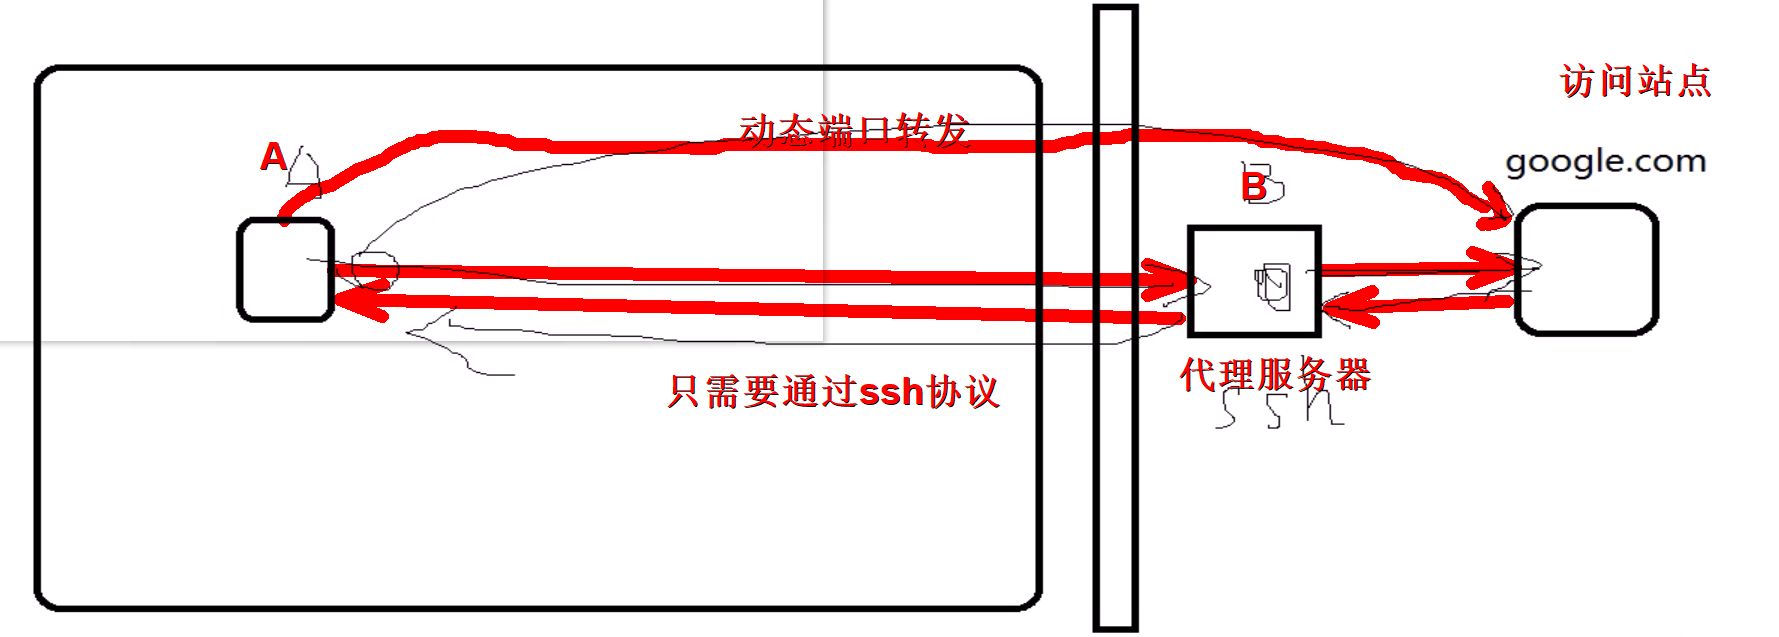
需求:
访问站点:Centos7
代理服务:centos6
企业内部主机:Centos6-1
环境配置:
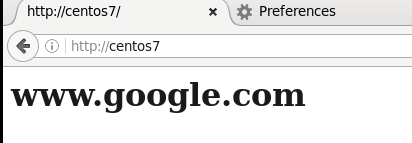
[root@centos7 ~]# systemctl status httpd   #查看Cetnos7上httpd服务有没有开启
[root@centos7 ~]# iptables -A INPUT -s centos6-1 -j REJECT   #设置防火墙策略,使Centos7不接受Centos6一切请求
#确保Centos6,Centos6-1开启了防火墙都关闭了
#设置Centos7网页显示内容
[root@centos7 html]# vim index.html
<h1>www.google.com</h1>
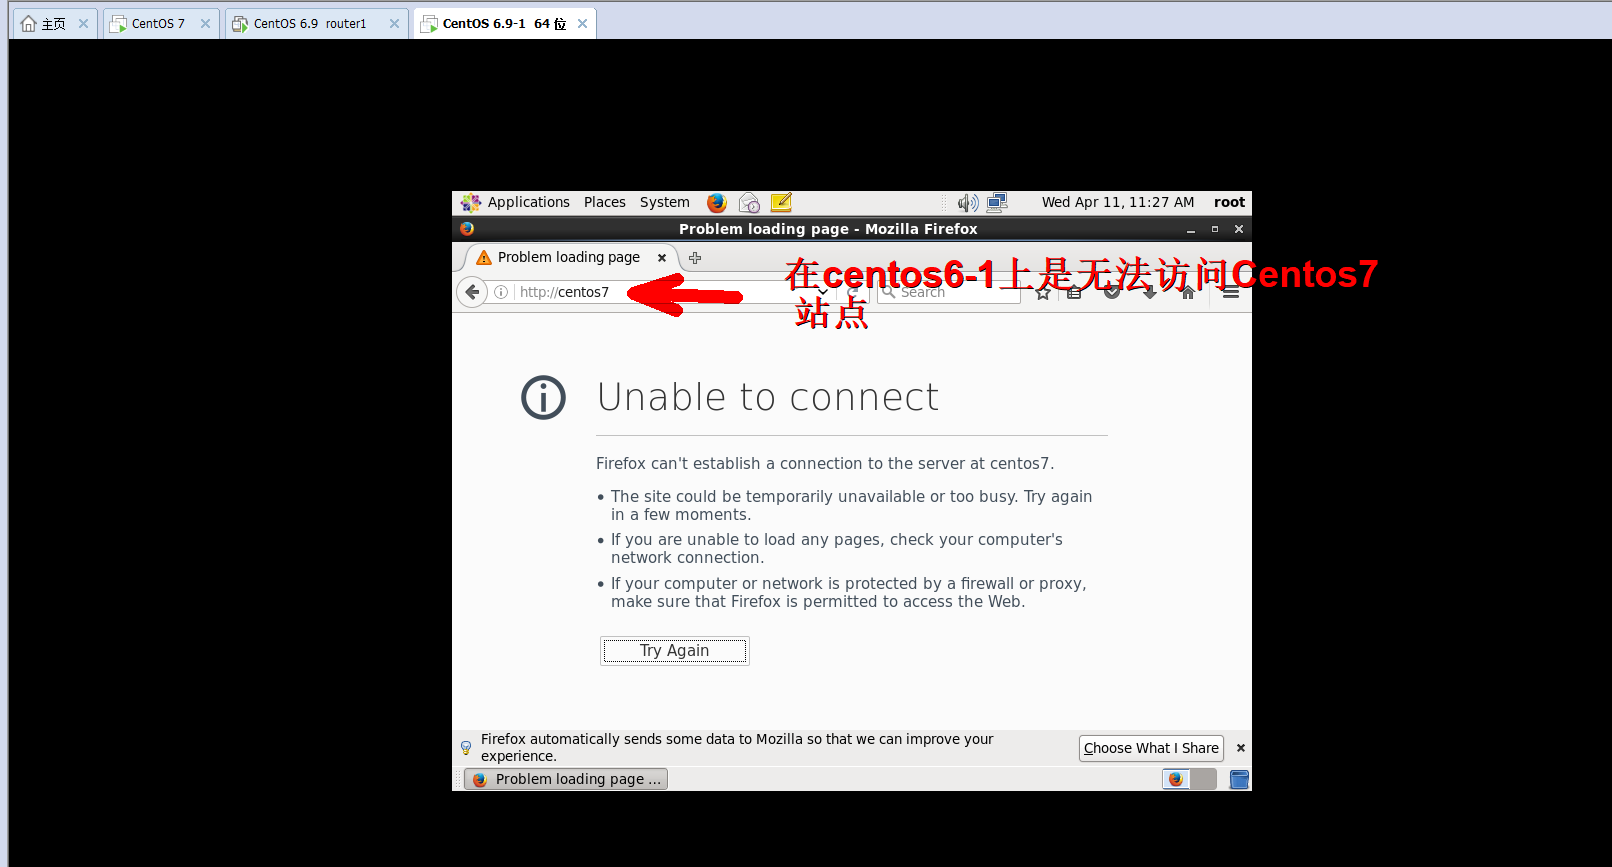
#虚拟机上此时是否能够访问Centos7站点
#在此处需要多加,主机自己现在init如果从runlevel 3到5可能会出现重启防火墙策略,开启则关闭策略,对Centos7的策略重置
操作:
选项: -D 本地端口号
[root@centos6-1 ~]# ssh -D 1080 centos6   #无秘钥登录,则需要密码验证
[root@Centos6 ~]# ss -nt
State       Recv-Q Send-Q                                 Local Address:Port                                   Peer Address:Port
ESTAB       0      0                                      172.18.253.175:47618                                 172.18.253.192:22
ESTAB       0      0                                      172.18.253.175:22                                    172.18.253.192:45114
ESTAB       0      0                                      172.18.253.175:22                                      172.18.0.100:58896
[root@centos6-1 ~]# ss -nt
State       Recv-Q Send-Q                                 Local Address:Port                                   Peer Address:Port
ESTAB       0      0                                      172.18.253.192:45172                                 172.18.253.175:22
ESTAB       0      0                                      172.18.253.192:22                                      172.18.0.100:58868
ESTAB       0      0                                      172.18.253.192:22                                    172.18.253.175:47618

#最后通过curl命令页面验证
[root@centos6-1 ~]# curl --socks5 127.0.0.1 centos7   #默认端口就是1080
<h1>www.google.com</h1>
#此方法也只能通过linux机器才进行互联网访问,windows机器暂不支持
知识补充
curl里面--socks5选项
  --socks5 <host[:port]>
            Use the specified SOCKS5 proxy  - but resolve the host name locally. If the port number is not specified, it is
            assumed at port 1080.

            This option overrides any previous use of -x, --proxy, as they are mutually exclusive.

            Since 7.21.7, this option is superfluous since you can specify a socks5 proxy with -x, --proxy using a socks5://
            protocol prefix.

            If this option is used several times, the last one will be used. (This option was previously wrongly documented and
            used as --socks without the number appended.)

            This option (as well as --socks4) does not work with IPV6, FTPS or LDAP.
基于网页验证
此时虚拟机任不能直接访问Centos7,下面设置socks代理
当本地1080端口受到外部网站请求会转发到外部服务器上面去,代理服务器通过1080端口把请求转发到站点服务器上面去
此时方可正常访问外部站点