前面的复习:
所以说window.setInterval() 和 window.clearInterval()
和 window.setTimeout() 和 window.clearTimeout() 都是浏览器的对象(BOM),而不是DOM对象。


最后一个就是当鼠标进入的时候停止播放,当鼠标离开的时候继续播放。。。。。。
scroll 系列:


div的滚动事件onscroll(因为滚动条是在div 中的):


 1 <!DOCTYPE html>
 2 <html lang="en">
 3     <head>
 4         <meta charset="UTF-8">
 5         <title>这是网页的标题</title>
 6         <style>
 7             *{
 8                 margin:0;
 9                 padding:0;
10             }
11             div{
12                 width: 300px;
13                 height: 200px;
14                 border:1px solid red;
15                 overflow: auto;
16             }
17             input{
18                 position: absolute;
19                 left: 400px;
20                 top: 100px;
21             }
22
23         </style>
24     </head>
25     <body>
26         <div id="dv">我我我我哦我我发就是空地金风科技发简历的空间付款撒地方姐夫撒娇的反馈及发生的借款方方法大师傅就卡了
27 发电房绝绝绝地反击打飞机浮点数据按扣发奖金安防监控大师傅发手机端放发电房绝绝绝地反击打飞机浮点数据按扣发奖金安防监控大师傅发手机端放 发电房绝绝绝地反击打飞机浮点数据按扣发奖金安防监控大师傅发手机端放 发电房绝绝绝地反击打飞机浮点数据按扣发奖金安防监控大师傅发手机端放 发电房绝绝绝地反击打飞机浮点数据按扣发奖金安防监控大师傅发手机端放发电房绝绝绝地反击打飞机浮点数据按扣发奖金安防监控大师傅发手机端放发电房绝绝绝地反击打飞机浮点数据按扣发奖金安防监控大师傅发手机端放
28         </div>
29         <input type="button" value="点我" id="btn">
30         <script src="js/common.js"></script>
31         <script>
32             document.onmousemove = function (evt) {
33                 getId$("img").style.left = evt.clientX +"px";
34                 getId$("img").style.top = evt.clientY +"px";
35
36             };
37         </script>
38     </body>
39 </html>
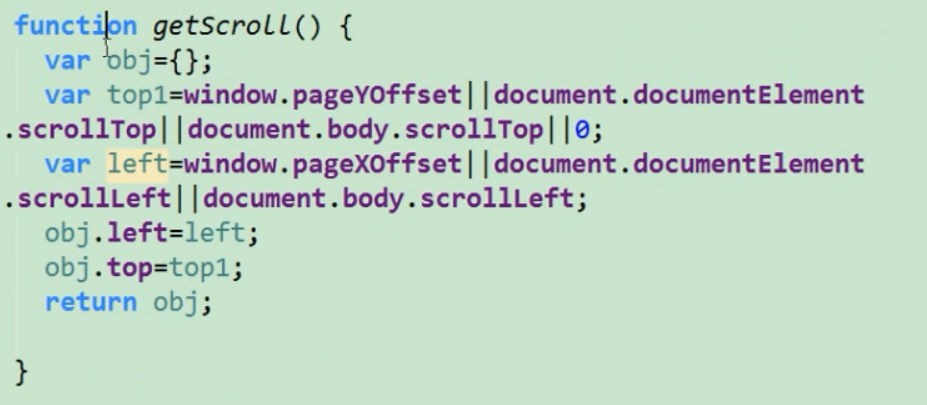
整个网页的滚动事件---封装getScroll()函数:
向上卷曲出去的距离: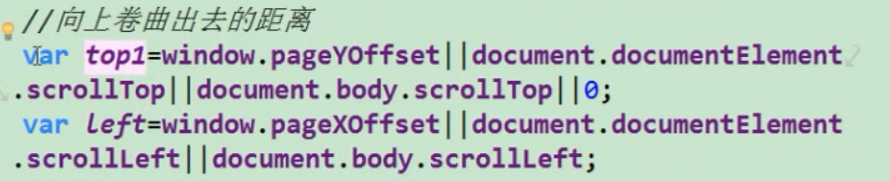
它是兼容代码,有的浏览器认为是浏览器向上出去的距离,有的是支持整体文档向上出去的距离,而有的是认为body出去的距离了!
 1 <!DOCTYPE html>
 2 <html lang="en">
 3     <head>
 4         <meta charset="UTF-8">
 5         <title>这是网页的标题</title>
 6     </head>
 7     <body>
 8         <input type="button" value="点我" id="btn">
 9         <script src="js/common.js"></script>
10         <script>
11             function getScroll() {
12                 var obj = {};
13                 //兼容代码
14                 var top = window.pageYOffset || document.documentElement.scrollTop || document.body.scrollTop || 0;
15                             //浏览器            // html                                //body
16                 var left = window.pageXOffset || document.documentElement.scrollLeft || document.body.scrollLeft || 0;
17                 obj.top = top;
18                 obj.left = left;
19                 return obj;
20             }
21         </script>
22     </body>
23 </html>
 1 <!DOCTYPE html>
 2 <html lang="en">
 3     <head>
 4         <meta charset="UTF-8">
 5         <title>这是网页的标题</title>
 6     </head>
 7     <body>
 8         <input type="button" value="点我" id="btn">
 9         <script src="js/common.js"></script>
10         <script>
11             function getScroll() {
12                 var obj = {};
13                 //兼容代码
14                 obj.top = window.pageYOffset || document.documentElement.scrollTop || document.body.scrollTop || 0;
15                             //浏览器            // html                                //body
16                 obj.left = window.pageXOffset || document.documentElement.scrollLeft || document.body.scrollLeft || 0;
17                 return obj;
18             }
19         </script>
20     </body>
21 </html>
 1 <!DOCTYPE html>
 2 <html lang="en">
 3     <head>
 4         <meta charset="UTF-8">
 5         <title>这是网页的标题</title>
 6     </head>
 7     <body>
 8         <input type="button" value="点我" id="btn">
 9         <script src="js/common.js"></script>
10         <script>
11             function getScroll() {
12                 var obj = {
13                     //兼容代码
14                     top : window.pageYOffset || document.documentElement.scrollTop || document.body.scrollTop || 0,
15                                 //浏览器            // html                                //body
16                     left : window.pageXOffset || document.documentElement.scrollLeft || document.body.scrollLeft || 0
17                 };
18                 return obj;
19             }
20         </script>
21     </body>
22 </html>
 1 <!DOCTYPE html>
 2 <html lang="en">
 3     <head>
 4         <meta charset="UTF-8">
 5         <title>这是网页的标题</title>
 6     </head>
 7     <body>
 8         <input type="button" value="点我" id="btn">
 9         <script src="js/common.js"></script>
10         <script>
11             function getScroll() {
12                 return {
13                     //兼容代码
14                     top : window.pageYOffset || document.documentElement.scrollTop || document.body.scrollTop || 0,
15                                 //浏览器            // html                                //body
16                     left : window.pageXOffset || document.documentElement.scrollLeft || document.body.scrollLeft || 0
17                 };
18             }
19         </script>
20     </body>
21 </html>
 1 <!DOCTYPE html>
 2 <html lang="en">
 3     <head>
 4         <meta charset="UTF-8">
 5         <title>这是网页的标题</title>
 6     </head>
 7     <body>
 8         <div>大数据分开就</div>
 9         <div>大数据分开就</div>
10         <div>大数据分开就</div>
11         <div>大数据分开就</div>
12         <div>大数据分开就</div>
13         <div>大数据分开就</div>
14         <div>大数据分开就</div>
15         <div>大数据分开就</div>
16         <div>大数据分开就</div>
17         <div>大数据分开就</div>
18         <div>大数据分开就</div>
19         <div>大数据分开就</div>
20         <div>大数据分开就</div>
21         <div>大数据分开就</div>
22         <div>大数据分开就</div>
23         <div>大数据分开就</div>
24         <div>大数据分开就</div>
25         <div>大数据分开就</div>
26         <div>大数据分开就</div>
27         <div>大数据分开就</div>
28         <div>大数据分开就</div>
29         <div>大数据分开就</div>
30         <div>大数据分开就</div>
31         <div>大数据分开就</div>
32         <div>大数据分开就</div>
33         <div>大数据分开就</div>
34         <div>大数据分开就</div>
35         <div>大数据分开就</div>
36         <div>大数据分开就</div>
37         <div>大数据分开就</div>
38         <div>大数据分开就</div>
39         <div>大数据分开就</div>
40         <div>大数据分开就</div>
41         <input type="button" value="点我" id="btn">
42         <script src="js/common.js"></script>
43         <script>
44             function getScroll() {
45                 return {
46                     //兼容代码
47                     top : window.pageYOffset || document.documentElement.scrollTop || document.body.scrollTop || 0,
48                                 //浏览器            // html                                //body
49                     left : window.pageXOffset || document.documentElement.scrollLeft || document.body.scrollLeft || 0
50                 };
51             }
52             //浏览器的滚动事件
53             window.onscroll = function () {
54                 console.log(getScroll().top);
55             };
56         </script>
57     </body>
58 </html>
案例:固定导航栏:
 1 <!DOCTYPE html>
 2 <html>
 3     <head lang="en">
 4         <meta charset="UTF-8">
 5         <title>这是网页标题</title>
 6         <style>
 7             * {
 8             margin: 0;
 9             padding: 0
10             }
11
12             img {
13             vertical-align: top;
14             }
15
16             .main {
17             margin: 0 auto;
18             width: 1000px;
19             margin-top: 10px;
20
21             }
22
23             .fixed {
24             position: fixed;
25             top: 0;
26             left: 0;
27             }
28         </style>
29     </head>
30     <body>
31         <div class="top" id="topPart">
32             <img src="images/top.png" alt=""/>
33         </div>
34         <div class="nav" id="navBar">
35             <img src="images/nav.png" alt=""/>
36         </div>
37         <div class="main" id="mainPart">
38             <img src="images/main.png" alt=""/>
39         </div>
40         <script src="js/common.js"></script>
41         <script>
42             //滚动事件
43             function getScroll() {
44                 return {
45                     top:window.pageYOffset || document.documentElement.scrollTop || document.body.scrollTop || 0,
46                     left: window.pageXOffset || document.documentElement.scrollLeft || document.body.scrollLeft || 0
47                 };
48             }
49             window.onscroll = function () {
50                 if(getScroll().top >= getId$("topPart").offsetTop){
51                     getId$("navBar").style.position = "fixed";
52                     getId$("navBar").style.top = "0px";
53                 }
54             };
55         </script>
56     </body>
57 </html>
 1 <!DOCTYPE html>
 2 <html>
 3     <head lang="en">
 4         <meta charset="UTF-8">
 5         <title>这是网页标题</title>
 6         <style>
 7             * {
 8                 margin: 0;
 9                 padding: 0
10             }
11             img {
12                 vertical-align: top;
13             }
14             .mainPart {
15                 margin: 0 auto;
16                 width: 1000px;
17                 margin-top: 10px;
18             }
19             .fixed {
20                 position: fixed;
21                 top: 0;
22                 left: 0;
23             }
24         </style>
25     </head>
26     <body>
27         <div class="topPart" id="topPart">
28             <img src="images/top.png" alt=""/>
29         </div>
30         <div class="navBar" id="navBar">
31             <img src="images/nav.png" alt=""/>
32         </div>
33         <div class="mainPart" id="mainPart">
34             <img src="images/main.png" alt=""/>
35         </div>
36         <script src="js/common.js"></script>
37         <script>
38             //滚动事件
39             function getScroll() {
40                 return {
41                     top:window.pageYOffset || document.documentElement.scrollTop || document.body.scrollTop || 0,
42                     left: window.pageXOffset || document.documentElement.scrollLeft || document.body.scrollLeft || 0
43                 };
44             }
45             window.onscroll = function () {
46                 if(getScroll().top >= getId$("topPart").offsetHeight){
47                     getId$("navBar").className = "nav fixed";
48                     getId$("mainPart").style.marginTop = getId$("navBar").offsetHeight +"px";
49                 }else{
50                     getId$("navBar").className = "nav";
51                     getId$("mainPart").style.marginTop = "10px";
52                 }
53             };
54         </script>
55     </body>
56 </html>
其中的images链接为:https://files.cnblogs.com/files/zach0812/images.zip
封装动画函数:
复习之前的动画函数 animation() 它是个匀速的函数,因为它的step =10 是个常量,
 1 function animation(ele,targetPos) {
 2                 //清理定时器
 3                 window.clearInterval(ele.timeId);
 4                 ele.timeId = setInterval(function () {
 5                     //获取当前的位置
 6                     var curPos = ele.offsetLeft;
 7                     //每次移动的步数
 8                     var step = 10;
 9                     step = targetPos > curPos ? step :-step;
10
11                     //判断  本次移动后的curPos 和 目标tarPos 的差距
12                     if(Math.abs(targetPos - curPos ) > Math.abs(step)){
13                         curPos += step;
14                         ele.style.left = curPos +'px';
15                     }else{
16                         window.clearInterval(ele.timeId);
17                         ele.style.left = targetPos +'px';
18                     }
19                 },10);
20             }
下面我们看的是变速运动。。。变速动画.
实现缓动效果:
![]()
即step = (targetPos - curPos)/10;
 1 <!DOCTYPE html>
 2 <html>
 3     <head lang="en">
 4         <meta charset="UTF-8">
 5         <title>这是网页标题</title>
 6         <style>
 7             * {
 8                 margin: 0;
 9                 padding: 0
10             }
11             div{
12                 width: 200px;
13                 height: 100px;
14                 background-color: green;
15                 position: absolute;
16                 left: 0;
17                 top: 0;
18                 margin-top: 20px;
19             }
20         </style>
21     </head>
22     <body>
23         <input type="button" value="移动到400px" id="btn1">
24         <input type="button" value="移动到800px" id="btn2">
25         <div id="dv"></div>
26         <script src="js/common.js"></script>
27         <script>
28             function animation(ele,targetPos) {
29                 //清理定时器
30                 window.clearInterval(ele.timeId);
31                 ele.timeId = setInterval(function () {
32                     //获取当前的位置
33                     var curPos = ele.offsetLeft;
34                     //每次移动的步数
35                     var step = (targetPos - curPos) / 10;
36                     // step = targetPos > curPos ? step :-step;  不需要这个了
37
38                     //判断  本次移动后的curPos 和 目标tarPos 的差距
39                     if(Math.abs(targetPos - curPos ) > Math.abs(step)){
40                         curPos += step;
41                         ele.style.left = curPos +'px';
42                     }else{
43                         window.clearInterval(ele.timeId);
44                         ele.style.left = targetPos +'px';
45                     }
46                 },10);
47             }
48             getId$("btn1").onclick = function(){
49                 animation(getId$("dv"),400);
50             };
51              getId$("btn2").onclick = function(){
52                 animation(getId$("dv"),800);
53             };
54         </script>
55     </body>
56 </html>
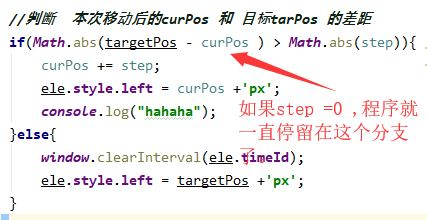
但是这里是有bug 的,因为step 避免不了会出现小数,结果未知不太精准,所以我们要尽可能的使得step 为整数。
而且,当step 为正数的时候要向上取整 Math.ceil() 。为负数的时候向下取整 Math.floor() ..... 每次走可以多走,不可少走。
之所以不可少走是因为当到最后的阶段的时候,step 将会变得很小。如果向下取整就直接为0了,所以 此时的二者直接的距离是一直大于 step 的。这导致程序不能到直接设定为目标位置的分支。
 1 <!DOCTYPE html>
 2 <html>
 3     <head lang="en">
 4         <meta charset="UTF-8">
 5         <title>这是网页标题</title>
 6         <style>
 7             * {
 8                 margin: 0;
 9                 padding: 0
10             }
11             div{
12                 width: 200px;
13                 height: 100px;
14                 background-color: green;
15                 position: absolute;
16                 left: 0;
17                 top: 0;
18                 margin-top: 20px;
19             }
20         </style>
21     </head>
22     <body>
23         <input type="button" value="移动到400px" id="btn1">
24         <input type="button" value="移动到800px" id="btn2">
25         <div id="dv"></div>
26         <script src="js/common.js"></script>
27         <script>
28             function animation(ele,targetPos) {
29                 //清理定时器
30                 window.clearInterval(ele.timeId);
31                 ele.timeId = setInterval(function () {
32                     //获取当前的位置
33                     var curPos = ele.offsetLeft;
34                     //每次移动的步数
35                     var step = (targetPos - curPos) / 10;
36                     // step = targetPos > curPos ?Math.ceil(step): Math.floor(step); //正数向上取整 负数向下取整
37                     step = Math.ceil(step);
38
39                     //判断  本次移动后的curPos 和 目标tarPos 的差距
40                     if(Math.abs(targetPos - curPos ) > Math.abs(step)){
41                         curPos += step;
42                         ele.style.left = curPos +'px';
43                         console.log("我停在这个分支了");
44                     }else{
45                         window.clearInterval(ele.timeId);
46                         ele.style.left = targetPos +'px';
47                     }
48                 },1);
49             }
50             getId$("btn1").onclick = function(){
51                 animation(getId$("dv"),400);
52             };
53              getId$("btn2").onclick = function(){
54                 animation(getId$("dv"),800);
55             };
56         </script>
57     </body>
58 </html>
总结: step 只能向上取整,不能向下取整,这是很严重的问题会导致定时器不能被清理!
 1 <!DOCTYPE html>
 2 <html>
 3     <head lang="en">
 4         <meta charset="UTF-8">
 5         <title>这是网页标题</title>
 6         <style>
 7             * {
 8                 margin: 0;
 9                 padding: 0
10             }
11             div{
12                 width: 200px;
13                 height: 100px;
14                 background-color: green;
15                 position: absolute;
16                 left: 0;
17                 top: 0;
18                 margin-top: 20px;
19             }
20         </style>
21     </head>
22     <body>
23         <input type="button" value="移动到400px" id="btn1">
24         <input type="button" value="移动到800px" id="btn2">
25         <div id="dv"></div>
26         <script src="js/common.js"></script>
27         <script>
28             function animation(ele,targetPos) {
29                 //清理定时器
30                 window.clearInterval(ele.timeId);
31                 ele.timeId = setInterval(function () {
32                     //获取当前的位置
33                     var curPos = ele.offsetLeft;
34                     //每次移动的步数
35                     var step = (targetPos - curPos) / 10;
36                     step = targetPos > curPos ?Math.ceil(step): Math.floor(step); //正数向上取整 负数向下取整
37
38                     //判断  本次移动后的curPos 和 目标tarPos 的差距
39                     if(Math.abs(targetPos - curPos ) > Math.abs(step)){
40                         curPos += step;
41                         ele.style.left = curPos +'px';
42                     }else{
43                         window.clearInterval(ele.timeId);
44                         ele.style.left = targetPos +'px';
45                     }
46                 },1);
47             }
48             getId$("btn1").onclick = function(){
49                 animation(getId$("dv"),400);
50             };
51              getId$("btn2").onclick = function(){
52                 animation(getId$("dv"),800);
53             };
54         </script>
55     </body>
56 </html>
还有到最后的几步都是以 1 向上增加的。所以不用担心超过目标值 ,可以直接用 == 判断
 1 <!DOCTYPE html>
 2 <html>
 3     <head lang="en">
 4         <meta charset="UTF-8">
 5         <title>这是网页标题</title>
 6         <style>
 7             * {
 8                 margin: 0;
 9                 padding: 0
10             }
11             div{
12                 width: 200px;
13                 height: 100px;
14                 background-color: green;
15                 position: absolute;
16                 left: 0;
17                 top: 0;
18                 margin-top: 20px;
19             }
20         </style>
21     </head>
22     <body>
23         <input type="button" value="移动到400px" id="btn1">
24         <input type="button" value="移动到800px" id="btn2">
25         <div id="dv"></div>
26         <script src="js/common.js"></script>
27         <script>
28             function animation(ele,targetPos) {
29                 //清理定时器
30                 window.clearInterval(ele.timeId);
31                 ele.timeId = setInterval(function () {
32                     //获取当前的位置
33                     var curPos = ele.offsetLeft;
34                     //每次移动的步数
35                     var step = (targetPos - curPos) / 10;
36                     step = targetPos > curPos ?Math.ceil(step): Math.floor(step); //正数向上取整 负数向下取整
37
38                     if(curPos == targetPos){ //到最后的几步都是以 1 向上增加的。所以不用担心超过目标值 ,可以直接用== 判断。
39                         window.clearInterval(ele.timeId);
40                     }else{
41                         curPos += step;
42                         ele.style.left = curPos +"px";
43                     }
44                 },1);
45             }
46             getId$("btn1").onclick = function(){
47                 animation(getId$("dv"),400);
48             };
49              getId$("btn2").onclick = function(){
50                 animation(getId$("dv"),800);
51             };
52         </script>
53     </body>
54 </html>
 1 <!DOCTYPE html>
 2 <html>
 3     <head lang="en">
 4         <meta charset="UTF-8">
 5         <title>这是网页标题</title>
 6         <style>
 7             * {
 8                 margin: 0;
 9                 padding: 0
10             }
11             div{
12                 width: 200px;
13                 height: 100px;
14                 background-color: green;
15                 position: absolute;
16                 left: 0;
17                 top: 0;
18                 margin-top: 20px;
19             }
20         </style>
21     </head>
22     <body>
23         <input type="button" value="移动到400px" id="btn1">
24         <input type="button" value="移动到800px" id="btn2">
25         <div id="dv"></div>
26         <script src="js/common.js"></script>
27         <script>
28             function animation(ele,targetPos) {
29                 //清理定时器
30                 window.clearInterval(ele.timeId);
31                 ele.timeId = setInterval(function () {
32                     //获取当前的位置
33                     var curPos = ele.offsetLeft;
34                     //每次移动的步数
35                     var step = (targetPos - curPos) / 10;
36                     step = targetPos > curPos ?Math.ceil(step): Math.floor(step); //正数向上取整 负数向下取整
37
38                     curPos += step;
39                     ele.style.left = curPos +"px";
40
41                     if(curPos == targetPos){ //到最后的几步都是以 1 向上增加的。所以不用担心超过目标值 ,可以直接用== 判断。
42                         window.clearInterval(ele.timeId);
43                     }
44                     //测试代码:
45                     console.log("目标位置:"+targetPos+" 当前位置:"+curPos+" 每次移动的步数: "+step+"");
46
47
48                 },1);
49             }
50             getId$("btn1").onclick = function(){
51                 animation(getId$("dv"),400);
52             };
53              getId$("btn2").onclick = function(){
54                 animation(getId$("dv"),800);
55             };
56         </script>
57     </body>
58 </html>
测试代码:
console.log("目标位置:"+targetPos+" 当前位置:"+curPos+" 每次移动的步数: "+step+"");
案例 导航栏筋斗云:
 1 <!DOCTYPE html>
 2 <html>
 3     <head lang="en">
 4         <meta charset="UTF-8">
 5         <title>这是网页标题</title>
 6         <style>
 7             * {
 8               margin: 0;
 9               padding: 0
10             }
11             ul {
12               list-style: none
13             }
14             body {
15               background-color: #333;
16             }
17             .nav {
18               width: 800px;
19               height: 42px;
20               margin: 100px auto;
21               background: url(images/rss.png) right center no-repeat;
22               background-color: #fff;
23               border-radius: 10px;
24               position: relative;
25             }
26             .nav li {
27               width: 83px;
28               height: 42px;
29               text-align: center;
30               line-height: 42px;
31               float: left;
32               cursor: pointer;
33             }
34             .nav span {
35               position: absolute;
36               top: 0;
37               left: 0;
38               width: 83px;
39               height: 42px;
40               background: url(images/cloud.gif) no-repeat;
41             }
42             ul {
43               position: relative;
44             }
45         </style>
46     </head>
47     <body>
48         <div class="nav">
49           <span id="cloud"></span>
50           <ul id="navBar">
51             <li>北京校区</li>
52             <li>上海校区</li>
53             <li>广州校区</li>
54             <li>深圳校区</li>
55             <li>武汉校区</li>
56             <li>关于我们</li>
57             <li>联系我们</li>
58             <li>招贤纳士</li>
59           </ul>
60         </div>
61         <script src="js/common.js"></script>
62         <script>
63             //1获取云彩 对象
64             var cloud = getId$("cloud");
65             //2获取所有的li 标签
66             var lists = getId$("navBar").children;
67             //3为每个li 都注册三个事件  进入 离开  和 点击事件
68             function mouseenterHandle() {
69                 //移动到当前鼠标进入的地方
70                 animation_variableSpeed(cloud,this.offsetLeft);
71             }
72             var lastPos = 0;
73             function mouseleaveHandle() {
74                 //回到上次的位置
75                 animation_variableSpeed(cloud,lastPos);
76             }
77             function clickHandle() {
78                 //点击的时候 记录上次的位置
79                 lastPos = this.offsetLeft;
80             }
81
82             for (var i=0 ;i<lists.length;i++){
83                 lists[i].onmouseenter = mouseenterHandle;  //因为是在循环中所以使用有名函数
84                 lists[i].onmouseleave = mouseleaveHandle;
85                 lists[i].onclick = clickHandle;
86             }
87         </script>
88     </body>
89 </html>
注:其中的common.js 为如下:
 1 /**
 2  * 根据id 或者根据tagName 返回相应的元素
 3  * */
 4 function getId$(id){
 5    return document.getElementById(id);
 6 }
 7 function getTags$(tagName) {
 8     return document.getElementsByTagName(tagName)
 9 }
10
11 //绑定事件 和 取消绑定的 兼容代码:
12 function addEventListener(ele, type, fn) {
13     if(ele.addEventListener){
14         ele.addEventListener(type,fn,false);
15     }else if(ele.attachEvent){
16         ele.attachEvent("on"+type,fn);
17     }else{
18         ele["on"+type] = fn;
19     }
20 }
21
22 function removeEventListener(ele, type, fn) {
23     if(ele.removeEventListener){
24         ele.removeEventListener(type,fn,false);
25     }else if(ele.detachEvent){
26         ele.detachEvent("on"+type,fn);
27     }else{
28         ele["on"+type] =null;
29     }
30 }
31
32 /*
33 * 将指定的元素移动到指定的位置   匀速移动 缓动效果  。。。
34 * */
35 function animation_constSpeed(ele, targetPos) {
36     //点击的时候先清理定时器  (保证无论点击多少次,都是只有一个定时器在起作用)
37     window.clearInterval(ele.timeId);
38
39     ele.timeId = setInterval(function () {
40         //获取div 的当前位置
41         var current = ele.offsetLeft; //数字类型   没有 px
42         //速度  每次移动多少px
43         var step = 10;
44         step = current<targetPos?step:-step;
45         //如果还有的距离小于step 就继续走。反之,直接设定为目标
46         if(Math.abs(targetPos -current) > Math.abs(step)){
47             current +=step;
48             ele.style.left = current +"px";
49         }else{
50             window.clearInterval(ele.timeId);
51             ele.style.left = targetPos +"px";
52         }
53     },20); //0.01s
54 }
55
56 /*
57 * 将指定的元素移动到指定的位置  变速移动
58 * */
59 function animation_variableSpeed(ele,targetPos) {
60         //清理定时器
61         window.clearInterval(ele.timeId);
62         ele.timeId = setInterval(function () {
63             //获取当前的位置
64             var curPos = ele.offsetLeft;
65             //每次移动的步数
66             var step = (targetPos - curPos) / 10;
67             step = targetPos > curPos ?Math.ceil(step): Math.floor(step); //正数向上取整 负数向下取整
68
69             curPos += step;
70             ele.style.left = curPos +"px";
71
72             if(curPos == targetPos){ //到最后的几步都是以 1 向上增加的。所以不用担心超过目标值 ,可以直接用== 判断。
73                 window.clearInterval(ele.timeId);
74             }
75             //测试代码:
76             //console.log("目标位置:"+targetPos+" 当前位置:"+curPos+" 每次移动的步数: "+step+"");
77         },1);
78 }
79
80 //getScroll() 获取 网页滚动距离的 的函数
81 function getScroll() {
82     return {
83         top:window.pageYOffset || document.documentElement.scrollTop || document.body.scrollTop || 0,
84         left: window.pageXOffset || document.documentElement.scrollLeft || document.body.scrollLeft || 0
85     };
86 }
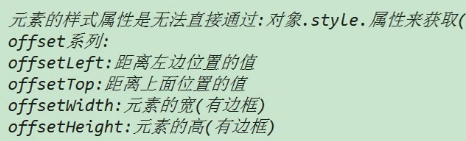
获取更准确css样式值:
offsetLeft 获得的值一定是对的吗?不一定!
 1 <!DOCTYPE html>
 2 <html>
 3     <head lang="en">
 4         <meta charset="UTF-8">
 5         <title>这是网页标题</title>
 6         <style>
 7             * {
 8               margin: 0;
 9               padding: 0
10             }
11             div{
12                 width: 200px;
13                 height: 100px;
14                 background-color: purple;
15                 left :100px;  //虽然此时 没有脱标,但是left 还是设置了属性的值的,
16             }
17         </style>
18     </head>
19     <body>
20         <input type="button" value="点我" id="btn">
21         <div id="dv"></div>
22         <script src="js/common.js"></script>
23         <script>
24             getId$("btn").onclick = function () {
25                 //获取offsetLeft
26                 console.log(getId$("dv").offsetLeft );  //输出来 居然是0. 我们上面知道left 的属性值应该是100
27             };
28         </script>
29     </body>
30 </html>
它打印应该是100,但是输出的却是0!
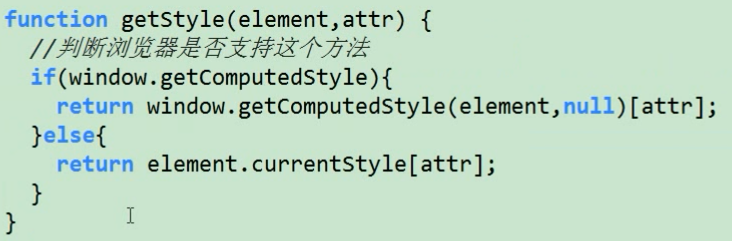
下面介绍一个函数:


首先是有两个参数,元素和伪类。第二个参数不是必须的,当不查询伪类元素的时候可以忽略或者传入 null。
和ele.style 的异同:

<!DOCTYPE html>
<html>
    <head lang="en">
        <meta charset="UTF-8">
        <title>这是网页标题</title>
        <style>
            * {
              margin: 0;
              padding: 0
            }
            div{
                width: 200px;
                height: 100px;
                background-color: purple;
                left :100px;  /*虽然此时 没有脱标,但是left 还是设置了属性的值的,*/
            }
        </style>
    </head>
    <body>
        <input type="button" value="点我" id="btn">
        <div id="dv"></div>
        <script src="js/common.js"></script>
        <script>
            getId$("btn").onclick = function () {
                //获取offsetLeft
                // console.log(getId$("dv").offsetLeft );  //输出来 居然是0. 我们上面知道left 的属性值应该是100
                //console.log(window.getComputedStyle(getId$("dv"),null));
                var dv_cssObj = window.getComputedStyle(getId$("dv",null)); //获取dv对象的css样式的值
                console.log(dv_cssObj.left);  //此时输出为 100px
            };
        </script>
    </body>
</html>
所以,以后使用还是要使用 window.getComputedStyle(ele,null) 函数!
注:IE8中支持的是 ele.currentStyle(); 还有它们获得的类型都是字符串类型

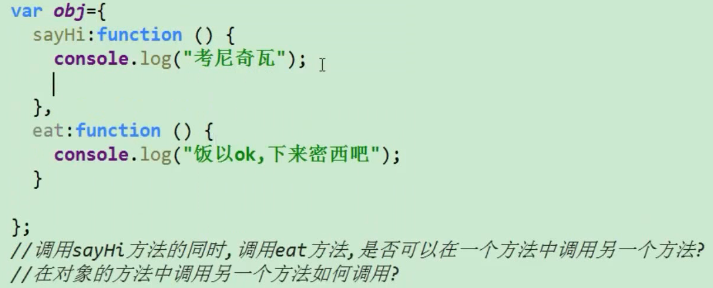
再次补充:两个知识点: 对象点 等价于 中括号 判断对象是否有某个属性
而且在js 中,可以点出来的都是可以用 中括号的。

判断对象中是否有 某个属性

下面是兼容代码:(版本一)
更简洁的版本:

封装动画函数:
封装动画函数 (使得任意元素的任意一个属性值变化):
 1 <!DOCTYPE html>
 2 <html>
 3     <head lang="en">
 4         <meta charset="UTF-8">
 5         <title>这是网页标题</title>
 6         <style>
 7             * {
 8               margin: 0;
 9               padding: 0
10             }
11             div{
12                  200px;
13                 height: 100px;
14                 background-color: purple;
15                 position: absolute;
16             }
17         </style>
18     </head>
19     <body>
20         <input type="button" value="点我" id="btn">
21         <div id="dv"></div>
22         <script src="js/common.js"></script>
23         <script>
24
25             //计算后的样式属性,一个元素的任意的属性值,字符串类型
26             function getStyleValue(ele, attr) {
27                 if(window.getComputedStyle){
28                     return window.getComputedStyle(ele,null)[attr];
29                 }else{
30                     return ele.currentStyle[attr]; //IE8 中 的
31                 }
32             }
33             //变速改变任意对象的任意属性大小的函数
34             function animation_variableSpeed(ele,attr,targetPos) {  //ele 对象  attr 属性名字 targetPos 目标位置
35                 //清理定时器
36                 window.clearInterval(ele.timeId);
37                 ele.timeId = setInterval(function () {
38                     //获取当前的位置
39                     // var curPos = ele.offsetLeft;
40                     var curPos = parseInt(getStyleValue(ele,attr));
41                     console.log(curPos);
42                     //每次移动的步数
43                     var step = (targetPos - curPos) / 10;
44                     step = targetPos > curPos ?Math.ceil(step): Math.floor(step); //正数向上取整 负数向下取整
45
46                     curPos += step;
47                     ele.style[attr] = curPos +"px";
48
49                     if(curPos == targetPos){ //到最后的几步都是以 1 向上增加的。所以不用担心超过目标值 ,可以直接用== 判断。
50                         window.clearInterval(ele.timeId);
51                     }
52                     //测试代码:
53                     //console.log("目标位置:"+targetPos+" 当前位置:"+curPos+" 每次移动的步数: "+step+"");
54                 },1);
55             }
56             getId$("btn").onclick = function () {
57                 // animation_variableSpeed(getId$("dv"),"left",400);
58                 // animation_variableSpeed(getId$("dv"),"top",400);
59                 // animation_variableSpeed(getId$("dv"),"width",400);
60                 animation_variableSpeed(getId$("dv"),"height",400);
61                 console.log("hahahha");
62             };
63
64
65         </script>
66     </body>
67 </html>
封装动画函数 (使得任意元素的多个属性值变化):
 1 <!DOCTYPE html>
 2 <html>
 3     <head lang="en">
 4         <meta charset="UTF-8">
 5         <title>这是网页标题</title>
 6         <style>
 7             * {
 8               margin: 0;
 9               padding: 0
10             }
11             div{
12                  200px;
13                 height: 100px;
14                 background-color: purple;
15                 position: absolute;
16             }
17         </style>
18     </head>
19     <body>
20         <input type="button" value="点我" id="btn">
21         <div id="dv"></div>
22         <script src="js/common.js"></script>
23         <script>
24
25             //计算后的样式属性,一个元素的任意的属性值,字符串类型
26             function getStyleValue(ele, attr) {
27                 if(window.getComputedStyle){
28                     return window.getComputedStyle(ele,null)[attr];
29                 }else{
30                     return ele.currentStyle[attr]; //IE8 中 的
31                 }
32             }
33             //变速改变任意对象的任意属性大小的函数
34             function animation_variableSpeed(ele,json) {  //ele 对象  attr 属性名字 targetPos 目标位置 func_callbk回调函数
35                 var len = Object.getOwnPropertyNames(json).length;  //它是获取json对象中 有多少个字段。
36                 //console.log(len);
37                 var i =0;  //为了使得当每个属性都 变化之后,再清楚定时器!!!
38                 //清理定时器
39                 window.clearInterval(ele.timeId);
40                 ele.timeId = setInterval(function () {
41                     for(var key in json){
42                         i++;
43                         var attr = key;
44                         var targetPos = json[key];
45                         //获取当前的位置
46                         // var curPos = ele.offsetLeft;
47                         var curPos = parseInt(getStyleValue(ele,attr));
48                         console.log(curPos);
49                         //每次移动的步数
50                         var step = (targetPos - curPos) / 10;
51                         step = targetPos > curPos ?Math.ceil(step): Math.floor(step); //正数向上取整 负数向下取整
52
53                         curPos += step;
54                         ele.style[attr] = curPos +"px";
55
56                         if(curPos == targetPos && i==len) { //到最后的几步都是以 1 向上增加的。所以不用担心超过目标值 ,可以直接用== 判断。
57                             window.clearInterval(ele.timeId);
58
59                         }
60                     }
61                     i=0;  //必须的!
62                 },1);
63             }
64             getId$("btn").onclick = function () {
65                 animation_variableSpeed(getId$("dv"),{"height":400,"width":400,"top":200,"left":300});
66             };
67
68
69         </script>
70     </body>
71 </html>
这里最后的时候用到了一个函数,
Object.getOwnPropertyNames( 对象 ) 它返回一个包含所有key 的数组!。
我们利用它得到一个对象中包含的 键值对的个数
 1             function f() {
 2                 var json  =  {
 3                     "width":100,
 4                     "height":200
 5                 };
 6                 var ret =  Object.getOwnPropertyNames(json);  //返回一个数组 里面放了 对象的key
 7                 //console.log(ret);
 8                 console.log("对象中的键值对的个数为: "+ret.length);
 9             }
10             f();
封装动画函数 (加上回调函数):
 1 <!DOCTYPE html>
 2 <html>
 3     <head lang="en">
 4         <meta charset="UTF-8">
 5         <title>这是网页标题</title>
 6         <style>
 7             * {
 8               margin: 0;
 9               padding: 0
10             }
11             div{
12                 width: 200px;
13                 height: 100px;
14                 background-color: purple;
15                 position: absolute;
16             }
17         </style>
18     </head>
19     <body>
20         <input type="button" value="点我" id="btn">
21         <div id="dv"></div>
22         <script src="js/common.js"></script>
23         <script>
24             function func_callback() {
25                 console.log("hello I am func callbk!");
26             }
27             //计算后的样式属性,一个元素的任意的属性值,字符串类型
28             function getStyleValue(ele, attr) {
29                 if(window.getComputedStyle){
30                     return window.getComputedStyle(ele,null)[attr];
31                 }else{
32                     return ele.currentStyle[attr]; //IE8 中 的
33                 }
34             }
35             //变速改变任意对象的任意属性大小的函数
36             function animation_variableSpeed(ele,json,func_callback) {  //ele 对象  attr 属性名字 targetPos 目标位置 func_callbk回调函数
37                 var len = Object.getOwnPropertyNames(json).length;  //它是获取json对象中 有多少个字段。
38                 //console.log(len);
39                 var i =0;  //为了使得当每个属性都 变化之后,再清楚定时器!!!
40                 //清理定时器
41                 window.clearInterval(ele.timeId);
42                 ele.timeId = setInterval(function () {
43                     for(var key in json){
44                         i++;
45                         var attr = key;
46                         var targetPos = json[key];
47                         //获取当前的位置
48                         // var curPos = ele.offsetLeft;
49                         var curPos = parseInt(getStyleValue(ele,attr));
50                         console.log(curPos);
51                         //每次移动的步数
52                         var step = (targetPos - curPos) / 10;
53                         step = targetPos > curPos ?Math.ceil(step): Math.floor(step); //正数向上取整 负数向下取整
54
55                         curPos += step;
56                         ele.style[attr] = curPos +"px";
57
58                         if(curPos == targetPos && i==len) { //到最后的几步都是以 1 向上增加的。所以不用担心超过目标值 ,可以直接用== 判断。
59                             window.clearInterval(ele.timeId);
60
61                             //所有的属性都更改完毕之后再调用回调函数!
62                             if(func_callback){ //有 callbk 才可以调用
63                                 func_callback();
64                             }
65                         }
66                     }
67                     i=0;  //必须的!
68                 },1);
69             }
70             getId$("btn").onclick = function () {
71                 animation_variableSpeed(getId$("dv"),{"height":400,"width":400,"top":200,"left":300},func_callback);
72             };
73         </script>
74     </body>
75 </html>
 1 <!DOCTYPE html>
 2 <html>
 3     <head lang="en">
 4         <meta charset="UTF-8">
 5         <title>这是网页标题</title>
 6         <style>
 7             * {
 8               margin: 0;
 9               padding: 0
10             }
11             div{
12                 width: 200px;
13                 height: 100px;
14                 background-color: purple;
15                 position: absolute;
16             }
17         </style>
18     </head>
19     <body>
20         <input type="button" value="点我" id="btn">
21         <div id="dv"></div>
22         <script src="js/common.js"></script>
23         <script>
24             function func_callback02(){
25                 animation_variableSpeed(getId$("dv"),{"width":200,"height":150,"left":30,"top":300})
26             }
27             function func_callback() {
28                 animation_variableSpeed(getId$("dv"),{"width":20,"height":20,"left":30,"top":30},func_callback02);
29             }
30             //计算后的样式属性,一个元素的任意的属性值,字符串类型
31             function getStyleValue(ele, attr) {
32                 if(window.getComputedStyle){
33                     return window.getComputedStyle(ele,null)[attr];
34                 }else{
35                     return ele.currentStyle[attr]; //IE8 中 的
36                 }
37             }
38             //变速改变任意对象的任意属性大小的函数
39             function animation_variableSpeed(ele,json,func_callback) {  //ele 对象  attr 属性名字 targetPos 目标位置 func_callbk回调函数
40                 var len = Object.getOwnPropertyNames(json).length;  //它是获取json对象中 有多少个字段。
41                 //console.log(len);
42                 var i =0;  //为了使得当每个属性都 变化之后,再清楚定时器!!!
43                 //清理定时器
44                 window.clearInterval(ele.timeId);
45                 ele.timeId = setInterval(function () {
46                     for(var key in json){
47                         i++;
48                         var attr = key;
49                         var targetPos = json[key];
50                         //获取当前的位置
51                         // var curPos = ele.offsetLeft;
52                         var curPos = parseInt(getStyleValue(ele,attr));
53                         console.log(curPos);
54                         //每次移动的步数
55                         var step = (targetPos - curPos) / 10;
56                         step = targetPos > curPos ?Math.ceil(step): Math.floor(step); //正数向上取整 负数向下取整
57
58                         curPos += step;
59                         ele.style[attr] = curPos +"px";
60
61                         if(curPos == targetPos && i==len) { //到最后的几步都是以 1 向上增加的。所以不用担心超过目标值 ,可以直接用== 判断。
62                             window.clearInterval(ele.timeId);
63
64                             //所有的属性都更改完毕之后再调用回调函数!
65                             if(func_callback){ //有 callbk 才可以调用
66                                 func_callback();
67                             }
68                         }
69                     }
70                     i=0;  //必须的!
71                 },1);
72             }
73             getId$("btn").onclick = function () {
74                 animation_variableSpeed(getId$("dv"),{"height":400,"width":400,"top":200,"left":300},func_callback);
75             };
76         </script>
77     </body>
78 </html>
 1 <!DOCTYPE html>
 2 <html>
 3     <head lang="en">
 4         <meta charset="UTF-8">
 5         <title>这是网页标题</title>
 6         <style>
 7             * {
 8               margin: 0;
 9               padding: 0
10             }
11             div{
12                 width: 200px;
13                 height: 100px;
14                 background-color: purple;
15                 position: absolute;
16             }
17         </style>
18     </head>
19     <body>
20         <input type="button" value="点我" id="btn">
21         <div id="dv"></div>
22         <script src="js/common.js"></script>
23         <script>
24             //计算后的样式属性,一个元素的任意的属性值,字符串类型
25             function getStyleValue(ele, attr) {
26                 if(window.getComputedStyle){
27                     return window.getComputedStyle(ele,null)[attr];
28                 }else{
29                     return ele.currentStyle[attr]; //IE8 中 的
30                 }
31             }
32             //变速改变任意对象的任意属性大小的函数
33             function animation_variableSpeed(ele,json,func_callback) {  //ele 对象  attr 属性名字 targetPos 目标位置 func_callbk回调函数
34                 var len = Object.getOwnPropertyNames(json).length;  //它是获取json对象中 有多少个字段。
35                 //console.log(len);
36                 var i =0;  //为了使得当每个属性都 变化之后,再清楚定时器!!!
37                 //清理定时器
38                 window.clearInterval(ele.timeId);
39                 ele.timeId = setInterval(function () {
40                     for(var key in json){
41                         i++;
42                         var attr = key;
43                         var targetPos = json[key];
44                         //获取当前的位置
45                         // var curPos = ele.offsetLeft;
46                         var curPos = parseInt(getStyleValue(ele,attr));
47                         console.log(curPos);
48                         //每次移动的步数
49                         var step = (targetPos - curPos) / 10;
50                         step = targetPos > curPos ?Math.ceil(step): Math.floor(step); //正数向上取整 负数向下取整
51
52                         curPos += step;
53                         ele.style[attr] = curPos +"px";
54
55                         if(curPos == targetPos && i==len) { //到最后的几步都是以 1 向上增加的。所以不用担心超过目标值 ,可以直接用== 判断。
56                             window.clearInterval(ele.timeId);
57
58                             //所有的属性都更改完毕之后再调用回调函数!
59                             if(func_callback){ //有 callbk 才可以调用
60                                 func_callback();
61                             }
62                         }
63                     }
64                     i=0;  //必须的!
65                 },1);
66             }
67             getId$("btn").onclick = function () {
68                 animation_variableSpeed(getId$("dv"),{"height":400,"width":400,"top":200,"left":300},function () {
69                     animation_variableSpeed(getId$("dv"),{"width":20,"height":20,"left":30,"top":30},function () {
70                         animation_variableSpeed(getId$("dv"),{"width":200,"height":150,"left":30,"top":300});  //它这次不再调用回调函数了
71                     })
72                 });
73             };
74         </script>
75     </body>
76 </html>
封装动画函数 (加上层级控制 和 层级控制):
层级的属性是 zIndex
透明度是opacity
它们两个和其他的属性不太一样,其他的属性单位是px ,它们二者是数字!所以在判断json 的时候要单独操作!
 1 <!DOCTYPE html>
 2 <html>
 3     <head lang="en">
 4         <meta charset="UTF-8">
 5         <title>这是网页标题</title>
 6         <style>
 7             * {
 8               margin: 0;
 9               padding: 0
10             }
11             div{
12                 width: 200px;
13                 height: 100px;
14                 background-color: purple;
15                 position: absolute;
16             }
17             input{
18                 z-index: 10;
19                 position: absolute;
20                 left: 0;
21                 top: 0;
22             }
23         </style>
24     </head>
25     <body>
26         <input type="button" value="点我" id="btn">
27         <div id="dv"></div>
28         <script src="js/common.js"></script>
29         <script>
30             //计算后的样式属性,一个元素的任意的属性值,字符串类型
31             function getStyleValue(ele, attr) {
32                 if(window.getComputedStyle){
33                     return window.getComputedStyle(ele,null)[attr];
34                 }else{
35                     return ele.currentStyle[attr]; //IE8 中 的
36                 }
37             }
38             //变速改变任意对象的任意属性大小的函数
39             function animation_variableSpeed(ele,json,func_callback) {  //ele 对象  attr 属性名字 targetPos 目标位置 func_callbk回调函数
40                 var len = Object.getOwnPropertyNames(json).length;  //它是获取json对象中 有多少个字段。
41                 //console.log(len);
42                 var i =0;  //为了使得当每个属性都 变化之后,再清楚定时器!!!
43                 //清理定时器
44                 window.clearInterval(ele.timeId);
45                 ele.timeId = setInterval(function () {
46                     for(var key in json){
47                         i++;
48                         var attr = key;
49                         var targetPos = json[key];
50
51                         if(attr == "opacity"){ //透明度属性
52                             //此时的 透明度的精度设计是 0.01
53                             var curPos = parseInt(getStyleValue(getId$("dv"),"opacity")*100); //透明度放大100倍方便计算(此时类型是数字类型)
54                             var targetPos =parseInt(json[attr] *100);  //目标透明度也放大100倍
55
56                             var step = (targetPos - curPos)/10;
57                             step = step >0?Math.ceil(step):Math.floor(step);
58                             curPos += step;
59
60                             ele.style[attr] = curPos/100;  //最后赋值的时候也要缩小100倍
61                             console.log("cur: "+curPos+" tar:"+targetPos+" step:"+step+" ");
62                         }else if(attr == "zIndex"){ //层次的属性
63                             ele.style[attr] = json[attr];
64                         }else{  //普通的属性
65                             //获取当前的位置
66                             var curPos = parseInt(getStyleValue(ele,attr));
67                             //每次移动的步数
68                             var step = (targetPos - curPos) / 10;
69                             step = targetPos > curPos ?Math.ceil(step): Math.floor(step); //正数向上取整 负数向下取整
70                             curPos += step;
71                             ele.style[attr] = curPos +"px";
72                         }
73                         if(curPos == targetPos && i==len) { //到最后的几步都是以 1 向上增加的。所以不用担心超过目标值 ,可以直接用== 判断。
74                             window.clearInterval(ele.timeId);
75                             //所有的属性都更改完毕之后再调用回调函数!
76                             if(func_callback){ //有 callbk 才可以调用
77                                 func_callback();
78                             }
79                         }
80                     }
81                     i=0;  //必须的!
82                 },1);
83             }
84             getId$("btn").onclick = function () {
85                 animation_variableSpeed(getId$("dv"),{"opacity":0.555,"width":500,"height":450,"left":349,"top":120},function () {
86                     animation_variableSpeed(getId$("dv"),{"zIndex":1000,"width":200,"height":150,"left":0,"top":0});
87                 });
88             };
89
90
91
92         </script>
93     </body>
94 </html>
颜色相关:
我们通常说的电脑的分辨率是 1024*768
它的意思是横着有 1024 个点,竖着有 768个点,
每个点中有三个颜色控制。分别为RGB 。
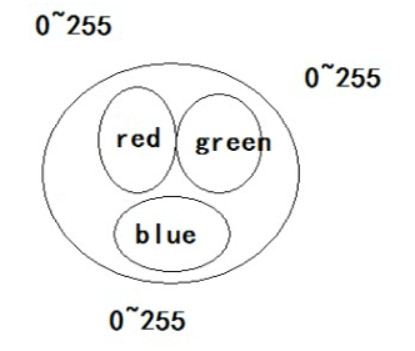
用0-255 来控制每个灯泡的亮度,如果三个灯泡都是255 那么就是太亮了,就是白色了。
如果三个灯泡都是0 ,那就是都没亮,那就是黑色!
我们平时喜欢用十六进制来表示颜色。
例如:白色用 #FF FF FF表示(#FFF)
黑色用 #00 00 00 表示(#000)!
案例:
手风琴:
图片下载:https://files.cnblogs.com/files/zach0812/%E6%89%8B%E9%A3%8E%E7%90%B4%E5%9B%BE%E7%89%87.zip
  1 <!DOCTYPE html>
  2 <html>
  3     <head lang="en">
  4         <meta charset="UTF-8">
  5         <title>这是网页标题</title>
  6         <style>
  7             * {
  8               margin: 0;
  9               padding: 0
 10             }
 11             li{
 12                 list-style: none;
 13             }
 14             div {
 15                 width: 1150px;
 16                 height: 400px;
 17                 /*background-color: purple;*/
 18                 /*border: 2px solid green;*/
 19                 margin:100px auto 0;
 20             }
 21             div ul{
 22                 width: 1300px;
 23                 /*background-color: cyan;*/
 24                 overflow: hidden;
 25             }
 26             div li{
 27                 width: 240px;
 28                 height: 400px;
 29                 /*background-color: red;*/
 30                 float :left;
 31             }
 32         </style>
 33     </head>
 34     <body>
 35         <div id="box">
 36             <ul>
 37                 <li></li>
 38                 <li></li>
 39                 <li></li>
 40                 <li></li>
 41                 <li></li>
 42             </ul>
 43         </div>
 44         <script src="js/common.js"></script>
 45         <script>
 46             function getStyleValue(ele, attr) {
 47                 if(window.getComputedStyle){
 48                     return window.getComputedStyle(ele,null)[attr];
 49                 }else{
 50                     return ele.currentStyle[attr]; //IE8 中 的
 51                 }
 52             }
 53             function animation_variableSpeed(ele,json,func_callback) {  //ele 对象  attr 属性名字 targetPos 目标位置 func_callbk回调函数
 54                 var len = Object.getOwnPropertyNames(json).length;  //它是获取json对象中 有多少个字段。
 55                 //console.log(len);
 56                 var i =0;  //为了使得当每个属性都 变化之后,再清楚定时器!!!
 57                 //清理定时器
 58                 window.clearInterval(ele.timeId);
 59                 ele.timeId = setInterval(function () {
 60                     for(var key in json){
 61                         i++;
 62                         var attr = key;
 63                         var targetPos = json[key];
 64
 65                         if(attr == "opacity"){ //透明度属性
 66                             //此时的 透明度的精度设计是 0.01
 67                             var curPos = parseInt(getStyleValue(getId$("dv"),"opacity")*100); //透明度放大100倍方便计算(此时类型是数字类型)
 68                             var targetPos =parseInt(json[attr] *100);  //目标透明度也放大100倍
 69
 70                             var step = (targetPos - curPos)/10;
 71                             step = step >0?Math.ceil(step):Math.floor(step);
 72                             curPos += step;
 73
 74                             ele.style[attr] = curPos/100;  //最后赋值的时候也要缩小100倍
 75                             console.log("cur: "+curPos+" tar:"+targetPos+" step:"+step+" ");
 76                         }else if(attr == "zIndex"){ //层次的属性
 77                             ele.style[attr] = json[attr];
 78                         }else{  //普通的属性
 79                             //获取当前的位置
 80                             var curPos = parseInt(getStyleValue(ele,attr));
 81                             //每次移动的步数
 82                             var step = (targetPos - curPos) / 10;
 83                             step = targetPos > curPos ?Math.ceil(step): Math.floor(step); //正数向上取整 负数向下取整
 84                             curPos += step;
 85                             ele.style[attr] = curPos +"px";
 86                         }
 87                         if(curPos == targetPos && i==len) { //到最后的几步都是以 1 向上增加的。所以不用担心超过目标值 ,可以直接用== 判断。
 88                             window.clearInterval(ele.timeId);
 89                             //所有的属性都更改完毕之后再调用回调函数!
 90                             if(func_callback){ //有 callbk 才可以调用
 91                                 func_callback();
 92                             }
 93                         }
 94                     }
 95                     i=0;  //必须的!
 96                 },10);
 97             }
 98
 99             //先获取所有的li 标签
100             var lists = getId$("box").getElementsByTagName("li");
101             for (var i =0;i<lists.length;i++){
102                 lists[i].style.backgroundImage = "url(images/"+(i+1)+".jpg)";
103
104                 //鼠标进入
105                 lists[i].onmouseenter = mouseenterEvent;
106                 //鼠标离开
107                 lists[i].onmouseleave = mouseleaveEvent;
108             }
109             function mouseenterEvent() {
110                 //先将所有的宽度都变为100
111                 for (var i =0 ;i<lists.length;i++){
112                     animation_variableSpeed(lists[i],{"width":100});
113                 }
114                 //然后将 自己的变为 800
115                 animation_variableSpeed(this,{"width":800});
116             }
117             function mouseleaveEvent() {
118                 //离开时 每个都恢复
119                 for (var i =0 ;i<lists.length;i++){
120                     animation_variableSpeed(lists[i],{"width":240});
121                 }
122             }
123         </script>
124     </body>
125 </html>
开机动画:
  1 <!DOCTYPE html>
  2 <html>
  3     <head lang="en">
  4         <meta charset="UTF-8">
  5         <title>这是网页标题</title>
  6         <style>
  7             * {
  8               margin: 0;
  9               padding: 0
 10             }
 11             .box{
 12                 /* 322px;*/
 13                 /*height: 353px;*/
 14                 position: fixed;
 15                 bottom: 0;
 16                 right: 0;
 17                 overflow: hidden;
 18             }
 19
 20             span{
 21                 position: absolute;
 22                 width: 30px;
 23                 height: 30px;
 24                 top:0;
 25                 right: 0;
 26                 /*background-color: cyan;*/
 27                 cursor: pointer;
 28             }
 29
 30         </style>
 31     </head>
 32     <body>
 33         <div class="box" id="box">
 34             <span id="closeButton"></span>
 35             <div class="head" id="topPart">
 36                 <img src="images/t.jpg" alt="">
 37             </div>
 38             <div class="body" id="bottomPart">
 39                 <img src="images/b.jpg" alt="">
 40             </div>
 41         </div>
 42         <script src="js/common.js"></script>
 43         <script>
 44             function getStyleValue(ele, attr) {
 45                 if(window.getComputedStyle){
 46                     return window.getComputedStyle(ele,null)[attr];
 47                 }else{
 48                     return ele.currentStyle[attr]; //IE8 中 的
 49                 }
 50             }
 51             function animation_variableSpeed(ele,json,func_callback) {  //ele 对象  attr 属性名字 targetPos 目标位置 func_callbk回调函数
 52                 var len = Object.getOwnPropertyNames(json).length;  //它是获取json对象中 有多少个字段。
 53                 //console.log(len);
 54                 var i =0;  //为了使得当每个属性都 变化之后,再清楚定时器!!!
 55                 //清理定时器
 56                 window.clearInterval(ele.timeId);
 57                 ele.timeId = setInterval(function () {
 58                     for(var key in json){
 59                         i++;
 60                         var attr = key;
 61                         var targetPos = json[key];
 62
 63                         if(attr == "opacity"){ //透明度属性
 64                             //此时的 透明度的精度设计是 0.01
 65                             var curPos = parseInt(getStyleValue(getId$("dv"),"opacity")*100); //透明度放大100倍方便计算(此时类型是数字类型)
 66                             var targetPos =parseInt(json[attr] *100);  //目标透明度也放大100倍
 67
 68                             var step = (targetPos - curPos)/10;
 69                             step = step >0?Math.ceil(step):Math.floor(step);
 70                             curPos += step;
 71
 72                             ele.style[attr] = curPos/100;  //最后赋值的时候也要缩小100倍
 73                             console.log("cur: "+curPos+" tar:"+targetPos+" step:"+step+" ");
 74                         }else if(attr == "zIndex"){ //层次的属性
 75                             ele.style[attr] = json[attr];
 76                         }else{  //普通的属性
 77                             //获取当前的位置
 78                             var curPos = parseInt(getStyleValue(ele,attr));
 79                             //每次移动的步数
 80                             var step = (targetPos - curPos) / 10;
 81                             step = targetPos > curPos ?Math.ceil(step): Math.floor(step); //正数向上取整 负数向下取整
 82                             curPos += step;
 83                             ele.style[attr] = curPos +"px";
 84                         }
 85                         if(curPos == targetPos && i==len) { //到最后的几步都是以 1 向上增加的。所以不用担心超过目标值 ,可以直接用== 判断。
 86                             window.clearInterval(ele.timeId);
 87                             //所有的属性都更改完毕之后再调用回调函数!
 88                             if(func_callback){ //有 callbk 才可以调用
 89                                 func_callback();
 90                             }
 91                         }
 92                     }
 93                     i=0;  //必须的!
 94                 },10);
 95             }
 96
 97             getId$("closeButton").onclick = function () {
 98                 //设置 下面的div 的高度渐渐变为0
 99                 animation_variableSpeed(getId$("bottomPart"),{"height":0},function () {
100                     //然后 再将整个box 的宽度变为 0
101                     animation_variableSpeed(getId$("box"),{"width":0});
102                 });
103             };
104         </script>
105     </body>
106 </html>

案例:旋转木马轮播图1
数组知识回顾:
1, shift() 操作(相当于 remove(0) 操作) //pop 是删除最后一个
1 var arr  = [1,2,3,4,5,6];
2         var ret =  arr.shift();
3         console.log("shift() 之后返回的是: "+ ret);
4         console.log(arr);
如何将 数组中的第一个元素放到最后呢?
先shift() 然后再push()进去,具体如下:
1         var arr  = [1,2,3,4,5,6];
2         arr.push(arr.shift());   // shift() 是有返回值的
3         console.log("操作过后的 arr : "+ arr);
如果一直进行这个操作(arr.push(arr.shift() )) 就达到了旋转木马的效果了!
1         var arr  = [1,2,3,4,5,6];
2         for (var i =0;i<12;i++){
3             arr.push(arr.shift());   // shift() 是有返回值的
4             console.log("操作"+(i+1)+"次过后的 arr : "+ arr);
5         }
2,unsshift
unshift() 相当于insert(0)
1         var arr  = [1,2,3,4,5,6];
2         arr.unshift(7);  //unshift 相当于 insert(0)
3         console.log(arr);
如何将 数组中的最后一个元素放到最前面呢?
先pop() 然后再unshift()进去,具体如下:
1         var arr  = [1,2,3,4,5,6];
2         arr.unshift(arr.pop());  //unshift 相当于 insert(0)
3         console.log(arr);
同理,如果一直进行这个操作(arr.unshift(arr.pop() )) 就达到了旋转木马的效果了!
总结:
插入有两种方式:
在最后插入:使用push()
在0位置插入:使用unshift()
删除返回值有两种:
在最后删:使用pop()
在0位置删:使用shift()
shift 在0 位置删,unshift 在 0位置插入
补充:
 1 function animation_variableSpeed(ele,json,func_callback) {  //ele 对象  attr 属性名字 targetPos 目标位置 func_callbk回调函数
 2     var len = Object.getOwnPropertyNames(json).length;  //它是获取json对象中 有多少个字段。
 3     //console.log(len);
 4     //清理定时器
 5     window.clearInterval(ele.timeId);
 6     ele.timeId = setInterval(function () {
 7         var flag = true ;  //假设都达到了目标!!!
 8         for(var attr in json){
 9             if(attr == "opacity"){ //透明度属性
10                 //此时的 透明度的精度设计是 0.01
11                 var curPos = parseInt(getStyleValue(ele,"opacity")*100); //透明度放大100倍方便计算(此时类型是数字类型)
12                 var targetPos =parseInt(json[attr] *100);  //目标透明度也放大100倍
13
14                 var step = (targetPos - curPos)/10;
15                 step = step >0?Math.ceil(step):Math.floor(step);
16                 curPos += step;
17
18                 ele.style[attr] = curPos/100;  //最后赋值的时候也要缩小100倍
19                 console.log("cur: "+curPos+" tar:"+targetPos+" step:"+step+" ");
20             }else if(attr == "zIndex"){ //层次的属性
21                 ele.style[attr] = json[attr];
22             }else{  //普通的属性
23                 //获取当前的位置
24                 var curPos = parseInt(getStyleValue(ele,attr));
25                 var targetPos = parseInt(json[attr]);
26                 //每次移动的步数
27                 var step = (targetPos - curPos) / 10;
28                 step = targetPos > curPos ?Math.ceil(step): Math.floor(step); //正数向上取整 负数向下取整
29                 curPos += step;
30                 ele.style[attr] = curPos +"px";
31             }
32             if(curPos != targetPos){
33                 flag = false;
34             }
35         }
36         console.log("flag = "+flag);
37         if(flag){
38             //清理定时器
39             window.clearInterval(ele.timeId);
40             //所有的属性都更改完毕之后再调用回调函数!
41             if(func_callback){ //有 callbk 才可以调用
42                 func_callback();
43             }
44             console.log("该清理了");
45             }
46     },10);
47 }

第三种写法,也是用于点击a之后不做具体的事 它和直接写个# 功能类似
继续上面的案例:
案例:旋转木马轮播图2:
代码见:https://files.cnblogs.com/files/zach0812/version01.zip
下面我们给动画函数上把锁,使得无论用户点多快,图片切换速度是一定的。
  1 <!DOCTYPE html>
  2 <html>
  3     <head lang="en">
  4         <meta charset="UTF-8">
  5         <title>旋转木马轮播图</title>
  6         <link rel="stylesheet" href="css/common.css"/>
  7         <script src="common.js"></script>
  8         <script>
  9             var config = [
 10                 {
 11                  400,
 12                 top: 20,
 13                 left: 50,
 14                 opacity: 0.2,
 15                 zIndex: 2
 16                 },//0
 17                 {
 18                  600,
 19                 top: 70,
 20                 left: 0,
 21                 opacity: 0.8,
 22                 zIndex: 3
 23                 },//1
 24                 {
 25                  800,
 26                 top: 100,
 27                 left: 200,
 28                 opacity: 1,
 29                 zIndex: 4
 30                 },//2
 31                 {
 32                  600,
 33                 top: 70,
 34                 left: 600,
 35                 opacity: 0.8,
 36                 zIndex: 3
 37                 },//3
 38                 {
 39                  400,
 40                 top: 20,
 41                 left: 750,
 42                 opacity: 0.2,
 43                 zIndex: 2
 44                 }//4
 45             ];
 46             //页面加载的事件
 47             window.onload = function () {
 48                 var flag = true;  //假设所有的动画执行完毕了, 锁!!!
 49
 50
 51                 //1---图片散开
 52                 var lists = getId$("wrap").getElementsByTagName("li");
 53                 function assign() {
 54                     for (var i = 0; i < lists.length; i++) {
 55                         //设置每个li,都要把宽,层级,透明度,left,top到达指定的目标位置
 56                         animation_variableSpeed(lists[i], config[i],function () {
 57                             flag = true;  //开锁的地方
 58                         });
 59                     }
 60                 }
 61                 assign();
 62
 63                 //鼠标进入,左右焦点的div显示
 64                 getId$("wrap").onmouseover = function () {
 65                     animation_variableSpeed(getId$("arrow"), {"opacity": 1});
 66                 };
 67                 //鼠标离开,左右焦点的div隐藏
 68                 getId$("wrap").onmouseout = function () {
 69                     animation_variableSpeed(getId$("arrow"), {"opacity": 0});
 70                 };
 71
 72                 //点击右面按钮的时候
 73                 getId$("arrRight").onclick = function () {
 74                     if(flag){
 75                         flag = false;  //上锁。
 76                         config.push(config.shift());  //把数组中第一个拿出来放到最后
 77                         assign();
 78                         //开锁在 animation中打开!
 79
 80                     }
 81                 };
 82                 //点击左面按钮的时候
 83                 getId$("arrLeft").onclick = function () {
 84                     if(flag ) {
 85                         flag = false; //上锁
 86                         config.unshift(config.pop());  //把数组中最后一个拿出来放到第一个
 87                         assign();
 88                         //开锁在 animation中打开!
 89                     }
 90                 };
 91
 92
 93
 94
 95             };
 96         </script>
 97
 98     </head>
 99     <body>
100         <div class="wrap" id="wrap">
101             <div class="slide" id="slide">
102                 <ul>
103                     <li><a href="#"><img src="images/slidepic1.jpg" alt=""/></a></li>
104                     <li><a href="#"><img src="images/slidepic2.jpg" alt=""/></a></li>
105                     <li><a href="#"><img src="images/slidepic3.jpg" alt=""/></a></li>
106                     <li><a href="#"><img src="images/slidepic4.jpg" alt=""/></a></li>
107                     <li><a href="#"><img src="images/slidepic5.jpg" alt=""/></a></li>
108                 </ul>
109                 <div class="arrow" id="arrow">
110                     <a href="javascript:;" class="prev" id="arrLeft"></a>
111                     <a href="javascript:;" class="next" id="arrRight"></a>
112                 </div>
113             </div>
114         </div>
115
116     </body>
117 </html>
最后一个系列client:
之前说过有 三个系列:
前面已经说过两个系列: offset系列 ,scroll系列,
前两个系列回顾:

下面是第三个系列:client系列!![]()
可视区域就是可以看到的区域!

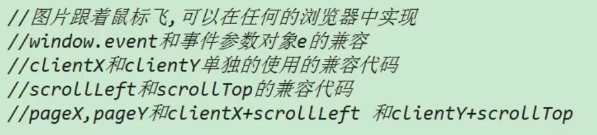
案例:图片跟着鼠标飞:
 1 <!DOCTYPE html>
 2 <html lang="en">
 3     <head>
 4         <meta charset="UTF-8">
 5         <title>这是网页的标题</title>
 6         <style>
 7             *{
 8                 margin: 0;
 9                 padding:0;
10             }
11             img{
12                 width: 40px;
13                 height: 40px;
14                 position: absolute;/*图片要 脱离文本流 */
15             }
16         </style>
17     </head>
18     <body>
19         <img src="images/slidepic5.jpg" alt="" id="im">
20         <script src="js/common.js"></script>
21         <script>
22             //文档 的 鼠标移动事件  (document 是比body 大的!!!)
23             // document.onmousemove = function () {
24                 // console.log(arguments.length);
25                 // console.log(arguments[0]); // MouseEvent {isTrusted: true, screenX: 437, screenY: 171, clientX: 81, clientY: 22, …}
26
27             // };
28
29             //谷歌 火狐中
30             /*
31             document.onmousemove = function (evt) {
32                 //console.log(evt);  //但是这行代码在IE8 里是不行的。  IE8 里的没有evt 这个参数。它里面是window.event 来代替
33                 getId$("im").style.left = evt.clientX +"px";
34                 getId$("im").style.top = evt.clientY +"px";
35             };
36             */
37
38             //IE8:中的
39
40             /*
41             document.onmousemove = function () {
42                 getId$("im").style.left = window.event.clientX +"px";
43                 getId$("im").style.top = window.event.clientY +"px";
44             };
45             */
46
47             /*
48             //兼容代码 version 01 :
49             document.onmousemove  = function (evt) {
50                 if(evt){  //如果有evt 参数的话
51                     getId$("im").style.left = evt.clientX +"px";
52                     getId$("im").style.top = evt.clientY +"px";
53                 }else{
54                     getId$("im").style.left = window.event.clientX +"px";
55                     getId$("im").style.top = window.event.clientY +"px";
56                 }
57             };
58             */
59             //version 02
60             document.onmousemove  = function (evt) {
61                 evt = evt || window.event;
62                 getId$("im").style.left = evt.clientX +"px";
63                 getId$("im").style.top = evt.clientY +"px";
64             };
65
66         </script>
67     </body>
68 </html>
上面的代码,假设如果body 的高度太大的时候就会出现以外了,
滚动条滚动,如果还是单单只用clientX 和 clientY 就会出现不准的情况!
就会出现错位,
错误如下代码:
 1 <!DOCTYPE html>
 2 <html lang="en">
 3     <head>
 4         <meta charset="UTF-8">
 5         <title>这是网页的标题</title>
 6         <style>
 7             *{
 8                 margin: 0;
 9                 padding:0;
10             }
11             img{
12                 width: 40px;
13                 height: 40px;
14                 position: absolute;/*图片要 脱离文本流 */
15             }
16             body{
17                 height: 2000px;
18             }
19         </style>
20     </head>
21     <body>
22         <img src="images/slidepic5.jpg" alt="" id="im">
23         <script src="js/common.js"></script>
24         <script>
25             //文档 的 鼠标移动事件  (document 是比body 大的!!!)
26             // document.onmousemove = function () {
27                 // console.log(arguments.length);
28                 // console.log(arguments[0]); // MouseEvent {isTrusted: true, screenX: 437, screenY: 171, clientX: 81, clientY: 22, …}
29
30             // };
31
32             //谷歌 火狐中
33             /*
34             document.onmousemove = function (evt) {
35                 //console.log(evt);  //但是这行代码在IE8 里是不行的。  IE8 里的没有evt 这个参数。它里面是window.event 来代替
36                 getId$("im").style.left = evt.clientX +"px";
37                 getId$("im").style.top = evt.clientY +"px";
38             };
39             */
40
41             //IE8:中的
42
43             /*
44             document.onmousemove = function () {
45                 getId$("im").style.left = window.event.clientX +"px";
46                 getId$("im").style.top = window.event.clientY +"px";
47             };
48             */
49
50             /*
51             //兼容代码 version 01 :
52             document.onmousemove  = function (evt) {
53                 if(evt){  //如果有evt 参数的话
54                     getId$("im").style.left = evt.clientX +"px";
55                     getId$("im").style.top = evt.clientY +"px";
56                 }else{
57                     getId$("im").style.left = window.event.clientX +"px";
58                     getId$("im").style.top = window.event.clientY +"px";
59                 }
60             };
61             */
62             //version 02
63             document.onmousemove  = function (evt) {
64                 evt = evt || window.event;
65                 getId$("im").style.left = evt.clientX +"px";
66                 getId$("im").style.top = evt.clientY +"px";
67             };
68
69         </script>
70     </body>
71 </html>
其实这个时候应该设置坐标是clientY + 向上滚出的距离!
或者使用PageY (Page 是相对于整个页面来说的。client 只是可视区域)
 1 <!DOCTYPE html>
 2 <html lang="en">
 3     <head>
 4         <meta charset="UTF-8">
 5         <title>这是网页的标题</title>
 6         <style>
 7             *{
 8                 margin: 0;
 9                 padding:0;
10             }
11             img{
12                 width: 40px;
13                 height: 40px;
14                 position: absolute;/*图片要 脱离文本流 */
15             }
16             body{
17                 height: 2000px;
18             }
19         </style>
20     </head>
21     <body>
22         <img src="images/slidepic5.jpg" alt="" id="im">
23         <script src="js/common.js"></script>
24         <script>
25
26             //谷歌  火狐中使用
27             document.onmousemove  = function (evt) {
28                 getId$("im").style.left = evt.pageX +"px";
29                 getId$("im").style.top = evt.pageY +"px";
30
31             };
32
33         </script>
34     </body>
35 </html>
但是pageX 和 pageY 在IE8 中却没有!
解决方法是 将clientY 加上卷出去的距离scrollTop!
代码见下面:
 1 <!DOCTYPE html>
 2 <html lang="en">
 3     <head>
 4         <meta charset="UTF-8">
 5         <title>这是网页的标题</title>
 6         <style>
 7             *{
 8                 margin: 0;
 9                 padding:0;
10             }
11             img{
12                 width: 40px;
13                 height: 40px;
14                 position: absolute;/*图片要 脱离文本流 */
15             }
16             body{
17                 height: 2000px;
18             }
19         </style>
20     </head>
21     <body>
22         <img src="images/slidepic5.jpg" alt="" id="im">
23         <script src="js/common.js"></script>
24         <script>
25
26             function getScroll(){
27                 return {
28                     left:window.pageXOffset ||document.documentElement.scrollLeft || document.body.scrollLeft || 0,
29                     top:window.pageYOffset || document.documentElement.scrollTop || document.body.scrollTop || 0
30                 }
31             }
32             document.onmousemove  = function (evt) {
33                 evt  = evt || window.event;
34                 getId$("im").style.left = evt.clientX + getScroll().left +"px";
35                 getId$("im").style.top = evt.clientY + getScroll().top +"px";
36             };
37
38         </script>
39     </body>
40 </html>
案例:图片跟着鼠标飞 终极版本:
问题:

兼容代码需要考虑的东西:
之前封装代码都是在一个函数中,现在我们将代码封装到一个对象中。
 1 <!DOCTYPE html>
 2 <html lang="en">
 3     <head>
 4         <meta charset="UTF-8">
 5         <title>这是网页的标题</title>
 6         <style>
 7             *{
 8                 margin: 0;
 9                 padding:0;
10             }
11             img{
12                 width: 40px;
13                 height: 40px;
14                 position: absolute;/*图片要 脱离文本流 */
15             }
16             body{
17                 height: 2000px;
18             }
19         </style>
20     </head>
21     <body>
22         <img src="images/slidepic5.jpg" alt="" id="im">
23         <script src="js/common.js"></script>
24         <script>
25             var obj = {
26                 getEvent:function (evt) {
27                     return  evt || window.event ;
28                 },
29                 getClientX:function(evt){
30                     return  this.getEvent(evt).clientX;
31                 },
32                 getClientY:function(evt){
33                     return this.getEvent(evt).clientY;
34                 },
35                 getScrollLeft:function () {
36                     return window.pageXOffset || document.documentElement.scrollLeft || document.body.scrollLeft || 0;
37                 },
38                 getScrollTop:function () {
39                     return window.pageYOffset || document.documentElement.scrollTop || document.body.scrollTop || 0;
40                 },
41                 getPageX:function (evt) {
42                     return this.getEvent(evt).pageX?this.getEvent(evt).pageX:this.getClientX(evt) + this.getScrollLeft();
43                 },
44                 getPageY:function (evt) {
45                     return this.getEvent(evt).pageY?this.getEvent(evt).pageY:this.getClientX(evt) + this.getScrollLeft();
46                 }
47             };
48             document.onmousemove  = function (evt) {
49                 getId$("im").style.left = obj.getPageX(evt) +"px";
50                 getId$("im").style.top = obj.getPageY(evt) +"px";
51             };
52
53         </script>
54     </body>
55 </html>