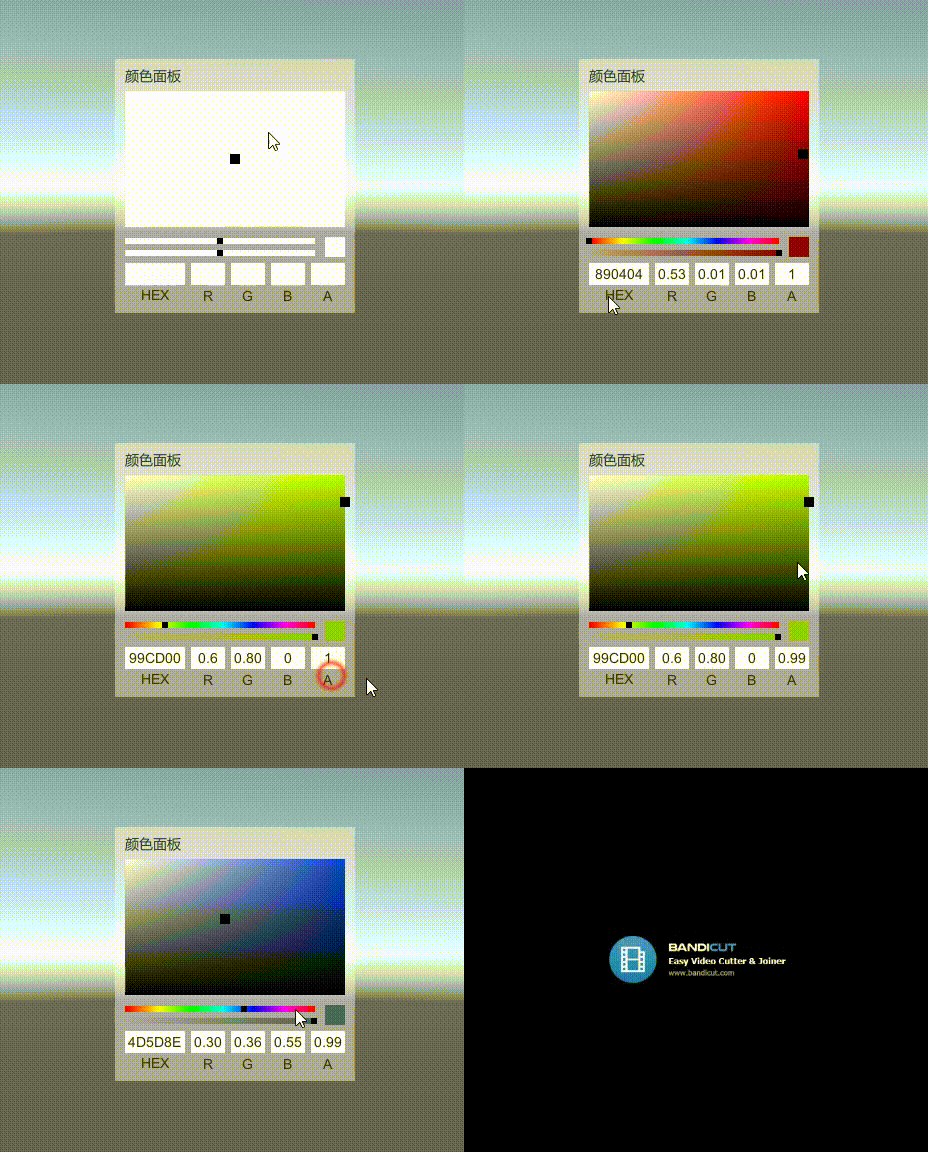
好久没更新了,趁着策划大佬还没给需求,抓紧总结一波。
先看效果图,数值那里还有点小问题,应该是转float引起的,问题不大。

在开始之前先搞明白这个面板的大致实现。
这是一个HSV/HSB调色界面。
H====>Hue====>颜色/色相
S====>Saturation====>饱和度
V====>Value / B====>Brightness 亮度(对光的量或光源的功率的感知)
在颜色面板的中间部分:

这是一张根据当前颜色值(Hue),生成饱和度(Saturation)和亮度(Value)的Texture2D,计算方式为:
    /// <summary>
    /// 更新饱和度
    /// </summary>
    private void UpdateStauration()
    {
        float sWidth = 200, sHeight = 200;
        saturation_Sprite = Sprite.Create(new Texture2D((int)sWidth, (int)sHeight), new Rect(0, 0, sWidth, sHeight), new Vector2(0, 0));

        Color.RGBToHSV(currentHue, out currentHueHsv.x, out currentHueHsv.y, out currentHueHsv.z);


        for (int y = 0; y < sHeight; y++)
        {
            for (int x = 0; x < sWidth; x++)
            {
                var pixColor = Color.HSVToRGB(currentHueHsv.x, x / sWidth, y / sHeight);
                saturation_Sprite.texture.SetPixel(x, y, pixColor);
            }
        }
        saturation_Sprite.texture.Apply();

        saturation.sprite = saturation_Sprite;

    }
通过当前颜色的H(色相)值,确定当前生成图片的颜色(也就是图片右上角的颜色)
通过横坐标遍历得到S(饱和度),
纵坐标遍历得到每个像素的V(亮度),
遍历后就得到了当前画面显示的效果。
下面那个彩色横条便是计算上面面板所需的Hue(色相)的数值的。

生成方式比较简单:
    /// <summary>
    /// 更新色泽度
    /// </summary>
    private void UpdateHue()
    {

        float w = 50, h = 10;

        hue_Sprite = Sprite.Create(new Texture2D((int)w, (int)h), new Rect(0, 0, w, h), new Vector2(0, 0));


        for (int x = 0; x <= w; x++)
        {
            Color pixColor = Color.HSVToRGB(x / w, 1, 1);
            for (int y = 0; y < h; y++)
            {
                hue_Sprite.texture.SetPixel(x, y, pixColor);
            }
        }
        hue_Sprite.texture.Apply();

        hue.sprite = hue_Sprite;
    }
只需让HSV中的S和V保持最大值1,根据横坐标遍历H的值便可以得到这个彩虹一样的横条。(在很多彩色计算中普遍使用这种方法。)
核心方法就这俩,剩下都是修饰和完善,直接看工程就好啦。
工程链接:https://github.com/wtb521thl/SelectColorPanel/tree/master
就这样。拜拜~