本文主要针对饼图进行相关的自定义配置。
饼图常用配置如下:
| 名称 | 效果 |
|---|---|
| name | 图标名称 |
| type | 指明图形的类型'pie','line'等 |
| hoverAnimation | 鼠标hover是否需要动画 |
| radius | 饼图的半径,数组的第一项是内半径,第二项是外半径 |
| center | 饼图的中心(圆心)坐标,数组的第一项是横坐标,第二项是纵坐标。 |
| label | 饼图图形上的文本标签,可用于说明图形的一些数据信息 |
| labelLine | 标签的视觉引导线样式 |
| data | 渲染数据 |
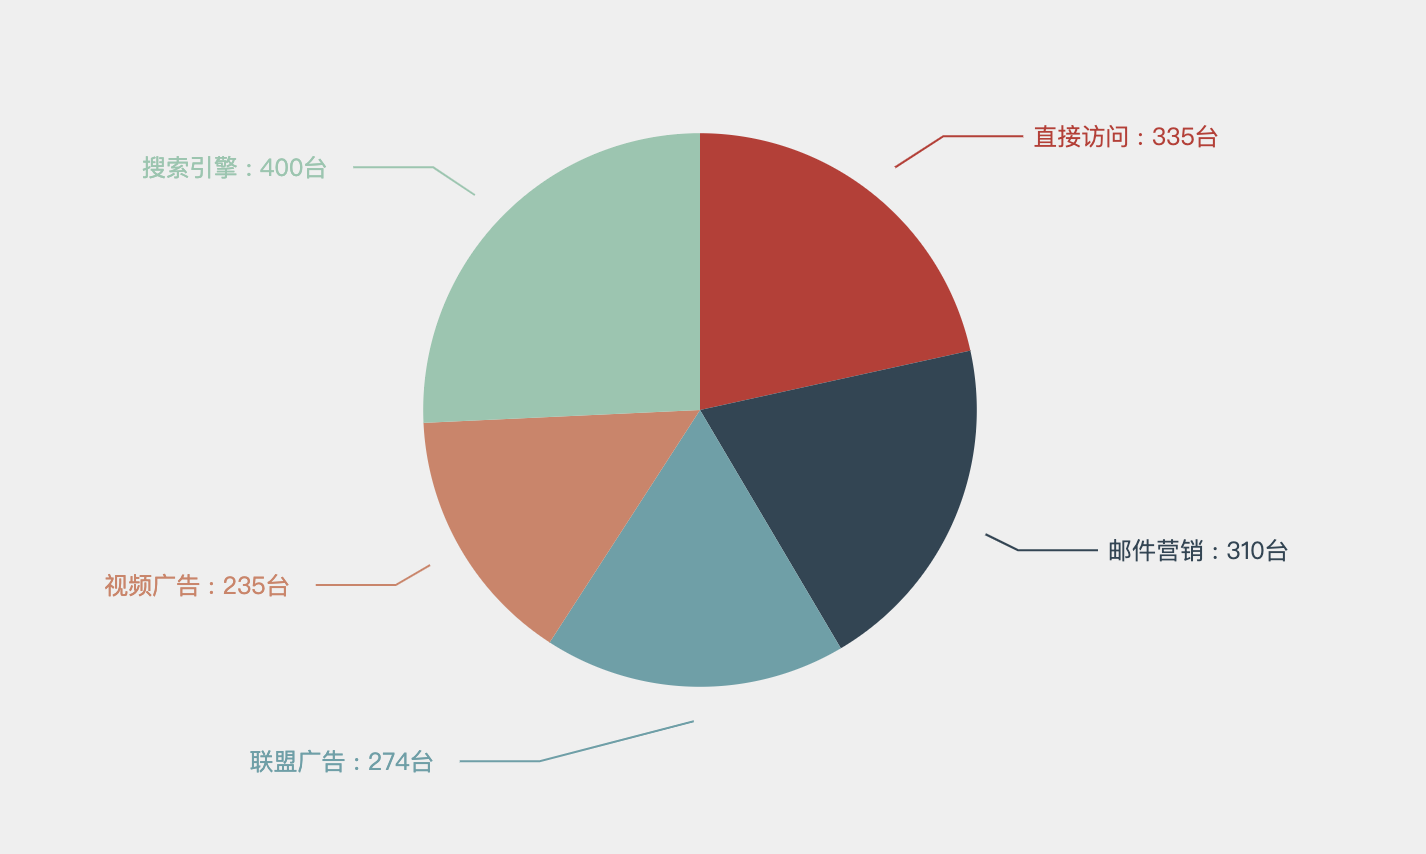
1、实现labelLine与图表的分离
思路:同圆心,不同半径两个饼图叠加的方式实现,半径较小的只显示图,不显示引导线与label,半径较大的不显示图,只显示引导线与label,这样就可以形成分离状态。
实现代码如下:
 series: [{
            //半径
            radius: ['0%', '40%'],
            type: 'pie',
            label: {
               //不显示文字
                show: false
            },
             labelLine: {
                //不显示引导线
                show: false
            },
            data: [
                {value: 335, name: '直接访问'},
                {value: 310, name: '邮件营销'},
                {value: 274, name: '联盟广告'},
                {value: 235, name: '视频广告'},
                {value: 400, name: '搜索引擎'}
            ]
        },
        {
            radius: ['0', '45%'],
            type: 'pie',
            //文字样式显示
            label: {
                 normal:{
                    show: true,
                    formatter:'{b} : {c}台  ',
                }
            },
            //引导线样式设置
            labelLine: {
                smooth: 0,
                length: 20,
                length2: 40
            },
            itemStyle: {
                //不显示饼图
                opacity:0,
            },
            data: [
                {value: 335, name: '直接访问'},
                {value: 310, name: '邮件营销'},
                {value: 274, name: '联盟广告'},
                {value: 235, name: '视频广告'},
                {value: 400, name: '搜索引擎'}
            ]

        }
    ]
2、实现label 在labelLine(引导线)上,且label自定义样式
- hover时label、labelLine颜色改变
- lable自定义颜色、位于labelLine上方
- 饼图内边框与外边框设置
重点属性:label 中的 formatter属性
字符串模板 模板变量有:
{a}:系列名。{b}:数据名, 即name。{c}:数据值,即value。{d}:百分比, 即数据所占的比例。
拿下面的栗子说明一下:
//{a|...} {b|...} 用于区分,区分的名字可以自定义,我这里直接使用了a、b、c;
formatter: '{a|{c}} {c|台}
  {b|{b}}

',
通过上面的格式可以通过rich分别对label设置样式,'
'可以实现换行的效果,如果想让label位于labelLine上可以使用'

'.
rich: {
           //value样式
                a: {
                  color: '#f3c773',
                  //字体粗细
                  fontWeight: 'bold',
                  //字体大小
                  fontSize: 45,
                  //设置行高,如果上下挨的比较紧不美观时
                  lineHeight: 35,
                  //水平方向:对其方向
                  align: 'center',
                  //垂直方向 :对齐方式。这里因为同一行的字体大小不一致,小字体会向上显得不美观;
                  verticalAlign: 'bottom',
                },
                //name样式
                b: {
                  color: '#e05932',
                  fontWeight: 'bold',
                  fontSize: 18,
                  lineHeight: 40,
                  align: 'center',
                },
          //小字体:台
                c: {
                  color: '#f3c773',
                  fontWeight: 'bold',
                  fontSize: 14,
                  align: 'center',
                  verticalAlign: 'bottom',
                },
              },
             //label偏离引导线时设置分别为:上、右、下、左;
              padding: [0, -90, 50, -90],
            },
样式一:

实现代码如下:
 series: [
        {
          name: '设备分布',
          type: 'pie',
          radius: ['55%', '85%'],
          center: ['50%', '50%'],
         // 饼图各部分颜色,部分数大于颜色数,就会循环使用这些颜色
          color: [
            'rgba(0,104,210,0.2)',
            'rgba(0,104,210,0.4)',
            'rgba(0,104,210,0.6)',
            'rgba(0,104,210,0.8)',
            'rgba(0,104,210,1)',
          ],
         // 如果要使用formatter属性 ,name 为数据项名称,value 为数据项值
          data:[
                {value: 1, name: '桥西区'},
                {value: 1, name: '宝安区'},
                {value: 1, name: '福田区'},
                ],
          //这里等一下单独说明
          label: {
            normal: {
              show: false,
              color: '#e05932',
              formatter: '{a|{c}} {c|台}
  {b|{b}}

',
              rich: {
                a: {
                  color: '#f3c773',
                  fontWeight: 'bold',
                  fontSize: 45,
                  lineHeight: 35,
                  align: 'center',
                  verticalAlign: 'bottom',
                },
                b: {
                  color: '#e05932',
                  fontWeight: 'bold',
                  fontSize: 18,
                  lineHeight: 40,
                  align: 'center',
                },
                c: {
                  color: '#f3c773',
                  fontWeight: 'bold',
                  fontSize: 14,
                  align: 'center',
                  verticalAlign: 'bottom',
                },
              },
              padding: [0, -90, 50, -90],
            },
          },
          labelLine: {
            show: false,
            //引导线颜色渐变
            lineStyle: {
              color: {
                type: 'linear',
                colorStops: [
                  {
                    offset: 0,
                    color: 'rgb(56,27,18)',
                  },
                  {
                    offset: 0.5,
                    color: 'rgb(224,89,50)',
                  },
                  {
                    offset: 1,
                    color: 'rgb(56,27,18)',
                  },
                ],
              },
              shadowColor: 'rgba(0, 0, 0, 0.5)',
              shadowBlur: 10,
               2,
            },
            smooth: 0,
            //第一条引导线长度
            length: 30,
            //第二条引导线长度
            length2: 100,
          },
          itemStyle: {
            shadowBlur: 200,
            shadowColor: 'rgba(0, 0, 0, 0.5)',
          },
          emphasis: {
            label: {
              //hover时显示引导线
              show: true,
            },
            labelLine: {
              //hover时显示引导线
              show: true,
            },
            itemStyle: {
             //hover时改变 饼图部分颜色(这里是渐变)
              color: new echarts.graphic.LinearGradient(0.2, 1, 0.2, 0, [
                { offset: 0, color: 'rgba(243,199,115,0.7)' },
                { offset: 0.7, color: 'rgba(200,140,82,0.7)' },
                { offset: 1, color: 'rgba(167,87,42,0.7)' },
              ]),
            },
          },

          animationType: 'scale',
          animationEasing: 'elasticOut',
          animationDelay(idx) {
            return Math.random() * 200;
          },
        },
        {
          type: 'pie',
          //内边框
          radius: ['54.2%', '55%'],
          center: ['50%', '50%'],
          // 鼠标移入变大
          hoverAnimation: false,
          //整圆
          data: [100],
          label: {
            show: false,
          },
        },
        {
          type: 'pie',
          //外边框
          radius: ['84.2%', '85%'],
          hoverAnimation: false,
          center: ['50%', '50%'],
          data: [100],
          label: {
            show: false,
          },
        },
      ],
样式二:
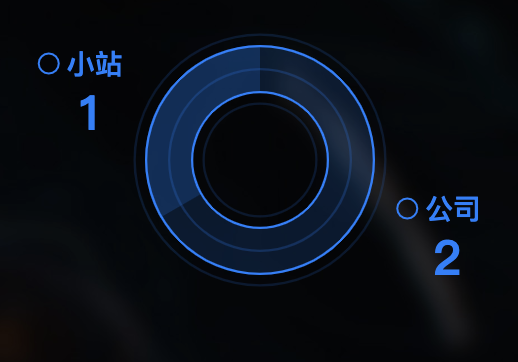
实现代码如下:
label: {
            normal: {
              show: true,
              formatter: ' {c|} {a|{b}}
  {b|{c}}',
              rich: {
                a: {
                  color: '#157dff',
                  fontWeight: 'bold',
                  fontSize: 14,
                  lineHeight: 25,
                  align: 'center',
                },
                b: {
                  color: '#157dff',
                  fontWeight: 'bold',
                  fontSize: 24,
                  align: 'center',
                },
                //自定义圆圈,类似于css画圆
                c: {
                  height: 10,
                   10,
                  lineHeight: 10,
                  borderWidth: 1,
                  borderColor: '#157dff',
                  borderRadius: 10,
                },
              },
             //有时label 会偏离饼图,不太美观,这个属性可以调整一下
              padding: [0, -15],
            },
echarts的配置很多,功能也很强大。希望这篇随笔能帮到大家,也是我自己学习的积累~