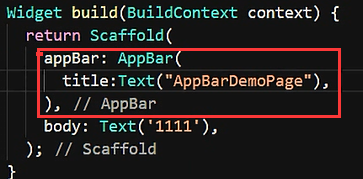
在flutter中的很多页面中,都会有下面这段代码:
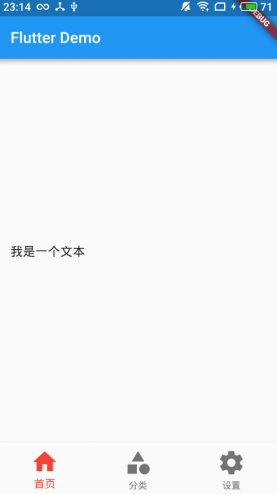
对应就是下图中的红色线框区域,被称作AppBar顶部导航。

项目准备
在使用AppBar之前,我们先新建一个tabBar的项目:
然后在pages文件夹下新建AppBarDemo.dart页面:
import 'package:flutter/material.dart';

class AppBarDemoPage extends StatelessWidget {
 const AppBarDemoPage({Key key}) : super(key: key);
  @override
  Widget build(BuildContext context) {
    return Scaffold(
      appBar:AppBar(
        title:Text('AppBarDemo'),
      ),
      body:Text('1111'),
    );
  }
}
然后配置路由:

并在Home.dart中添加跳转按钮:

但是这种情况下,项目启动后,默认加载的还是Home.dart页面,然后点击按钮,跳转到AppBarDemo.dart页面,为了方便操作,这里设置默认加载AppBarDemo.dart页面,只需要修改main.dart中的
initialRoute就可以了。


常用属性
在flutter中,AppBar有以下常用的可选属性:
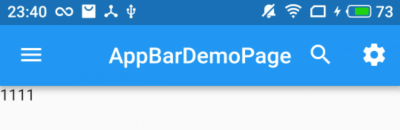
- leading :在标题前面显示的一个控件,在首页通常显示应用的 logo;在其他界面通常显示为返回按钮
- title :标题,通常显示为当前界面的标题文字,可以放组件
- actions :通常使用 IconButton 来表示,可以放按钮组
- bottom :通常放 tabBar,标题下面显示一个 Tab 导航栏
- backgroundColor :导航背景颜色
- iconTheme :图标样式
- textTheme :文字样式
- centerTitle :标题是否居中显示
AppBarDemo.dart
import 'package:flutter/material.dart';

class AppBarDemoPage extends StatelessWidget {
  const AppBarDemoPage({Key key}) : super(key: key);

  @override
  Widget build(BuildContext context) {
    return Scaffold(
      appBar: AppBar(
        title:Text("AppBarDemoPage"),
        // backgroundColor: Colors.red,
        centerTitle:true,
        leading: IconButton(
          icon: Icon(Icons.menu),
          onPressed: (){
            print('menu');
          },
        ),
        actions: <Widget>[
          IconButton(
            icon: Icon(Icons.search),
            onPressed: (){
              print('search');
            },
          ),
          IconButton(
            icon: Icon(Icons.settings),
            onPressed: (){
              print('settings');
            },
          )
        ],

      ),
      body: Text('1111'),
    );
  }
}
代码下载:点这里(提取码:fu4v)