概述
HTML是英文Hyper Text Mark-up Language(超文本标记语言)的缩写,它是一种制作万维网页面标准语言(标记)。相当于定义统一的一套规则,大家都来遵守他,
这样就可以让浏览器根据标记语言的规则去解释它。浏览器负责将标签翻译成用户“看得懂”的格式,呈现给用户!(例:djangomoan模版引擎)

HTML文档

Doctype
Doctype告诉浏览器使用什么样的html或xhtml规范来解析html文档
有和无的区别
- BackCompat:标准兼容模式未开启(或叫怪异模式[Quirks mode]、混杂模式)
- CSS1Compat:标准兼容模式已开启(或叫严格模式[Standards mode/Strict mode])
这个属性会被浏览器识别并使用,但是如果你的页面没有DOCTYPE的声明,那么compatMode默认就是BackCompat,这也就是恶魔的开始 -- 浏览器按照自己的方式解析渲染页 面,那么,在不同的浏览器就会显示不同的样式。如果你的页面添加了那么,那么就等同于开启了标准模式,那么浏览器就得老老实实的按照W3C的标准解析渲染页面,这样一来, 你的页面在所有的浏览器里显示的就都是一个样子了。
有,用什么?
Doctype告诉浏览器使用什么样的html或xhtml规范来解析html文档, dtd文件则包含了标记、attributes 、properties、约束规则。

Meta(metadata information)
提供有关页面的元信息,例:页面编码、刷新、跳转、针对搜索引擎和更新频度的描述和关键词
- 页面编码(告诉浏览器是什么编码)
< meta http-equiv=“content-type” content=“text/html;charset=utf-8”>
- 刷新和跳转
< meta http-equiv=“Refresh” Content=“30″>
< meta http-equiv=”Refresh“ Content=”5; Url=http://www.autohome.com.cn“ />
- 关键词
< meta name="keywords" content="华为,中华有为!" >
- 描述
例如:cnblogs
- X-UA-Compatible
微软的IE6是通过XP、Win2003等操作系统发布出来,作为占统治地位的桌面操作系统,也使得IE占据了通知地位,许多的网站开发的时候,就按照IE6的标准去开发,而IE6自身的标准也是微软公司内部定义的。到了IE7出来的时候,采用了微软公司内部标准以及部分W3C的标准,这个时候许多网站升级到IE7的时候,就比较痛苦,很多代码必须调整后,才能够正常的运行。而到了微软的IE8这个版本,基本上把微软内部自己定义的标准抛弃了,而全面的支持W3C的标准,由于基于对标准彻底的变化了,使得原先在早期IE8版本上能够访问的网站,在IE8中无法正常的访问,会出现一些排版错乱、文字重叠,显示不全等各种兼容性错误。
与任何早期浏览器版本相比,Internet Explorer 8 对行业标准提供了更加紧密的支持。 因此,针对旧版本的浏览器设计的站点可能不会按预期显示。 为了帮助减轻任何问题,Internet Explorer 8 引入了文档兼容性的概念,从而允许您指定站点所支持的 Internet Explorer 版本。 文档兼容性在 Internet Explorer 8 中添加了新的模式;这些模式将告诉浏览器如何解释和呈现网站。 如果您的站点在 Internet Explorer 8 中无法正确显示,则可以更新该站点以支持最新的 Web 标准(首选方式),也可以强制 Internet Explorer 8 按照在旧版本的浏览器中查看站点的方式来显示内容。 通过使用 meta 元素将 X-UA-Compatible 标头添加到网页中,可以实现这一点。
当 Internet Explorer 8 遇到未包含 X-UA-Compatible 标头的网页时,它将使用 指令来确定如何显示该网页。 如果该指令丢失或未指定基于标准的文档类型,则 Internet Explorer 8 将以 IE5 模式(Quirks 模式)显示该网页。更多
<meta http-equiv="X-UA-Compatible" content="IE=EmulateIE7" />
Title
网页头部信息
Link
- css
< link rel="stylesheet" type="text/css" href="css/common.css" >
- icon
< link rel="shortcut icon" href="image/favicon.ico">
Style
在页面中写样式
例如:< style type="text/css" >
.bb{
background-color: red;
}
< /style>
Script
- 引进文件
< script type="text/javascript" src="http://www.googletagservices.com/tag/js/gpt.js"> </script >
- 写js代码
< script type="text/javascript" > ... </script >
常用标签
标签之间可以嵌套
标签存在的意义,css操作,js操作
ps:chrome审查元素的使用
-定位
-查看样式
get与post区别?
浏览器请求服务器,发请求头与请求体两部分数据
数据内容存放的地方不一样,get是存在url中,post是放在请求体中。
标签一般分为两种:块级标签 和 行内标签
行内标签:a、span、select、img、input、label 等
块级标签:div、h1、p、br、fielset、ol、ul 等
各种符号:
http://www.cnblogs.com/web-d/archive/2010/04/16/1713298.html
p 和 br
p表示段落,默认段落之间是有间隔的!
br 是换行
a标签
< a href="http://www.autohome.com.cn"> </a>
1、target属性,_black表示在新的页面打开
2、锚 href='#某个标签的ID' 标签的ID不允许重复


<!DOCTYPE html>
<html lang="en">
<head>
    <meta charset="UTF-8">
    <title>Title</title>
</head>
<body>

    <a href="#i1">第一章</a>
    <a href="#i2">第二章</a>
    <a href="#i3">第三章</a>
    <a href="#i4">第四章</a>
    <div id="i1" style="height: 600px;">第一章的内容</div>
    <div id="i2" style="height: 600px;">第二章的内容</div>
    <div id="i3" style="height: 600px;">第三章的内容</div>
    <div id="i4" style="height: 600px;">第四章的内容</div>

</body>
</html>
img标签
默认img标签,有一个1px的边框
{
border:0;
}
 <!DOCTYPE html>
<html lang="en">
<head>
    <meta charset="UTF-8">
    <title>Title</title>
</head>
<body>
    <div>
        <a href="http://www.xiaohuar.com/">
            <img src="http://www.xiaohuar.com/d/file/20141116030511162.jpg"

             title="大美女"                      style="..."            alt="校花">
        </a>
    </div>
</body>
</html>
input系列标签和form标签的数据可以提交给后台
input标签
       input  type='text'  -name属性,value=‘鲁班’
     input  type='password'  -name属性,value=‘鲁班’
      input type="button" value="登录"  按钮
      input type="submit" value="提交"  提交按钮,表单

      input  type='radio'  -单选框 value,checked='checked',name属性(name相同则排斥)
      input  type='checkbox'  -复选框 value,checked='checked',name属性(批量获取数据)

      input  type='file'   -依赖form表单的一个属性  enctype="multipart/form-data"

      input type='reset'   -重置

      <textarea>默认值</textarea>   -name属性

      select标签    -name,内部option  value,提交到后台,size,multiple
H 标签
H1
H2
H3
H4
H5
H6
select 标签-下拉框
<!DOCTYPE html>
<html lang="en">
<head>
    <meta charset="UTF-8">
    <title>Title</title>
</head>
<body>
     <select name="city" size="2"  multiple="multiple">
                <option value="1" selected="selected">英雄联盟</option>
                <option value="2">王者荣耀</option>

     </select>

     <select name="city" size="2"  multiple="multiple">
                <option value="1" selected="selected">艾欧尼亚</option>
                <option value="2">忍者炎影</option>

     </select>
</body>
</html>
Checkbox
<!DOCTYPE html>
<html lang="en">
<head>
    <meta charset="UTF-8">
    <title>Title</title>
</head>
<body>

    <div>
        <p>兴趣爱好:</p>
            运动: <input  type="checkbox"  name="favor" value="1"/>
            游戏: <input  type="checkbox"  name="favor" value="2"/>
            音乐: <input  type="checkbox"  name="favor" value="3"/>
            阅读: <input  type="checkbox"  name="favor" value="4"/>
            旅游: <input  type="checkbox"  name="favor" value="5"/>
        <p>技能:</p>
            撩妹: <input  type="checkbox"  name="skill" value="1"/>
            编程: <input  type="checkbox"  name="skill" value="2"/>
    </div>
</body>
</html>
redio
<!DOCTYPE html>
<html lang="en">
<head>
    <meta charset="UTF-8">
    <title>Title</title>
</head>
<body>

    <div>
        <p>请选择性别:</p>
            男: <input  type="radio"  name="gender" value="1"/>
            女: <input  type="radio"  name="gender" value="2"/>
            未知: <input  type="radio"  name="gender" checked="checked"  value="3"/>

    </div>
</body>
</html>
password
<!DOCTYPE html>
<html lang="en">
<head>
    <meta charset="UTF-8">
    <title>Title</title>
</head>
<body>

    <div>
        <input type="password" name="pwd"/>
    </div>
</body>
</html>
button
<!DOCTYPE html>
<html lang="en">
<head>
    <meta charset="UTF-8">
    <title>Title</title>
</head>
<body>

    <div>
        <form  action="https://www.sogou.com/web">
        <input  type="text"  name="query"/>
        <input type="button" value="搜索1"/>
        <input  type="submit"  value="搜索"/>
        </form>
    </div>
</body>
</html>
file
提交文件时: enctype='multipart/form-data' method='POST'
textarea
<!DOCTYPE html>
<html lang="en">
<head>
    <meta charset="UTF-8">
    <title>Title</title>
</head>
<body>

    <div>
        <!--可以多行输入-->
        <textarea name="meno"></textarea>
    </div>
</body>
</html>
label
用于点击文件,使得关联的标签获取光标
姓名: 婚否:ul ol dl
ul
ul.li
ul.li
ul.li
ol
ol.li
ol.li
ol.li
dl
- 陕西省
- 西安
- 延安
- 宝鸡
- 山西省
- 太原
- 平遥
-
View Code
<!DOCTYPE html>
<html lang="en">
<head>
    <meta charset="UTF-8">
    <title>Title</title>
</head>
<body>
    <!--列表-->
    <div>
         <ul>
        <li>asdf</li>
        <li>asdf</li>
        <li>asdf</li>

    </ul>

    <ol>
        <li>adas</li>
        <li>adas</li>
        <li>adas</li>
    </ol>

    <dl>
        <dd>hehe</dd>
        <dd>hehe</dd>
        <dt>hehe</dt>
        <dt>hehe</dt>
    </dl>
    </div>
</body>
</html>
- table
-
View Code
<!DOCTYPE html>
<html lang="en">
<head>
    <meta charset="UTF-8">
    <title>Title</title>
</head>
<body>

    <table border="1">
        <tr>
            <td>主机名</td>
            <td>端口</td>
            <td>操作</td>
        </tr>

        <tr>
            <td>1.1.1.1</td>
            <td>22</td>
            <td>
                <a href="http://www.baidu.com">查看详细</a>
                <a href="#">修改</a>
            </td>
        </tr>
    </table>
    <table border="1">
        <thead>
            <!--colspan列合并-->

            <tr>
                <th colspan="2">表头1</th>
                <th>表头2</th>
                <th>表头3</th>

            </tr>
        </thead>

        <tbody>
            <!--rowspan行合并-->
            <tr>
                <td>a</td>
                <td rowspan="2">a</td>
                <td>a</td>

            </tr>
            <tr>
                <td>b</td>
                <td>b</td>
                <td>b</td>

            </tr>
            <tr>
                <td>c</td>
                <td>c</td>
                <td>c</td>

            </tr>
        </tbody>
    </table>

</body>
</html>
- fieldset
View Code<!DOCTYPE html> <html lang="en"> <head> <meta charset="UTF-8"> <title>Title</title> </head> <body> <fieldset> <legend>登录</legend> <label for="username">用户名:</label> <input id="username" type="text" name="user" /> <label for="pwd">密码:</label> <input id="pwd" type="text" name="password" /> </fieldset> </body> </html>
- form 表单
-
<--form标签用来向后台提交数据--> <form action='http://www.baidu.com' method='GET'> <input type='text' name='q'/> <input type='text' name='q'/> <input type='submit'/> </form> 进行文件上传下载时,必须以下面方法初始化form标签 <form action='http://wwwasdsd'> method='GET' enctype='multi'></form> -
View Code
<!DOCTYPE html>
<html lang="en">
<head>
    <meta charset="UTF-8">
    <title>Title</title>
</head>
<body>
    <form  action="https://www.sogou.com/web">
        <input  type="text"  name="query"/>
        <input  type="submit"  value="搜索"/>
    </form>

</body>
</html>
CSS
css是英文Cascading Style Sheets的缩写,称为层叠样式表,用于对页面进行美化。
存在方式有三种:元素内联、页面嵌入和外部引入,比较三种方式的优缺点。
注释:/* */
语法:style = 'key1:value1;key2:value2;'
- 在标签中使用 style='xx:xxx;'
- 在页面中嵌入 < style type="text/css"> </style > 块
- 引入外部css文件
必要性:美工会对页面的色彩搭配和图片的美化负责,开发人员则必须知道是如何实现的。
标签选择器
div{ background-color:red; }
<div > </div>
class选择器
.bd{ background-color:red; }
<div class='bd'> </div>
id选择器
#idselect{
background-color:red;
}
<div id='idselect' > </div>
关联选择器
#idselect p{
background-color:red;
}
<div id='idselect' >
<p> </p>
</div>
组合选择器
input,div,p{
background-color:red;
}
属性选择器
对选择到的标签再进行一次筛选
input[type='text']{ 100px; height:200px; }
PS:
优先级,标签style优先;其次是越往下优先级越高
background-背景
   background-img:url('xx.gif');#默认,div大,图片重复放
    background-repeat: repeat-y;沿y轴方向重复图片
    background-repeat: repeat-x;沿y轴方向重复图片
    background-position-x:设置图片x轴位置
    background-position-y:设置图片y轴位置
    background-position: 10px 10px;

    也可以直接使用CSS简写方法,直接填值
        background: #dddddd url(image/5.png)  10px 10px no-repeat;
background-color

background-image

background-repeat(no-repeat;repeat-x;repeat-y)

background-position


实例获取小心心:
<!DOCTYPE html>
<html lang="en">
<head>
    <meta charset="UTF-8">
    <title>Title</title>
</head>
<body>

    <!--图片将重复堆满整个div-->
    <div style="height: 100px;"></div>
    <div style="background-image: url(1.png);height: 176px;border: 1px solid red;"></div>

    <!--background-repeat: no-repeat;该属性使得图片在div不重复-->
    <div style="height: 20px;"></div>
    <div style="background-image: url(1.png);height: 176px;border: 1px solid red;background-repeat: no-repeat;"></div>

    <!--得到图标列图-->
    <div style="height: 20px;"></div>
    <div style="background-image: url(1.png); 18px;height: 176px;border: 1px solid red;background-repeat: no-repeat;"></div>

    <!--获取第一个小图标-->
    <div style="height: 20px;"></div>
    <div style="background-image: url(1.png); 18px;height: 20px;border: 1px solid red;background-repeat: no-repeat;"></div>

    <!--获取小心心图标-->
    <div style="height: 20px;"></div>
    <div style="background-image: url(1.png); 18px;height: 20px;background-position-x:0;background-position-y: -139px ;border: 1px solid red;background-repeat: no-repeat;"></div>

</body>
</html>
实例获取-上边图中的购物车图标:
<!DOCTYPE html>
<html lang="en">
<head>
    <meta charset="UTF-8">
    <title>Title</title>
</head>
<body>
    <!--获取购物车图标-->
    <div style="background-image: url(buy_car.png);
    height: 39px; 44px;margin-left: 5px;padding:0;border: 1px solid #dddddd;"></div>

</body>
</html>
实例用户登录输入框:
<!DOCTYPE html>
<html lang="en">
<head>
    <meta charset="UTF-8">
    <title>Title</title>
</head>
<body>
    <div style="height: 35px; 400px;position: relative;">
        <input type="text" style="height: 35px; 370px; padding-right: 30px;">
        <span style="position: absolute;top: 10px;right: 6px;background-image:
         url(i_name.jpg);height:16px;16px;display: inline-block;
       "></span>
    </div>

    <div style="height: 35px; 400px;position: relative;">
        <input type="text" style="height: 35px; 370px; padding-right: 30px;">
        <span style="position: absolute;top: 10px;right: 6px;background-image:
         url(i_pwd.jpg);height:16px;16px;display: inline-block;
       "></span>
    </div>
</body>
</html>
border-边框
-宽度,样式,颜色(border:4px dotted red)
-border-left
 <!DOCTYPE html>
<html lang="en">
<head>
    <meta charset="UTF-8">
    <title>Title</title>
</head>
<body>
     <div style=" 300px;height:100px;border: 2px solid red;">
         <div style=" 96px;height:20px;border: 1px solid royalblue;"></div>
    </div>
</body>
</html>
效果:

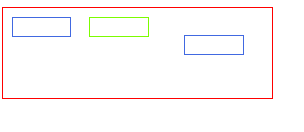
margin--外边距
 <!DOCTYPE html>
<html lang="en">
<head>
    <meta charset="UTF-8">
    <title>Title</title>
</head>
<body>
     <div style=" 300px;height:100px;border: 2px solid red;">
         <div style=" 64px;height:20px;margin:10px;float: left;border: 1px solid royalblue;"></div>
         <div style=" 64px;height:20px;margin:10px;float: left;border: 1px solid lawngreen;"></div>
         <div style=" 64px;height:20px;margin:30px;float: left;border: 1px solid royalblue;"></div>
         <div style="clear: both"></div>
     </div>
</body>
</html>
效果:
padding--内边距
 <!DOCTYPE html>
<html lang="en">
<head>
    <meta charset="UTF-8">
    <title>Title</title>
</head>
<body>
     <div style=" 300px;height:100px;border: 2px solid red;">
         <div style=" 64px;height:20px;padding:10px;float: left;border: 1px solid royalblue;"></div>
         <div style=" 64px;height:20px;padding:10px;float: left;border: 1px solid lawngreen;"></div>
         <div style=" 64px;height:20px;padding:30px;float: left;border: 1px solid royalblue;"></div>
         <div style="clear: both"></div>
     </div>
</body>
</html>
效果:

float
让标签浪起来,块级标签浪起来就可以堆叠了。
父级标签约束不了子集标签了,这时必须加下面的语句使得父级标签可以约束子集标签:
<<div style="clear: both;"></div>
<!DOCTYPE html>
<html lang="en">
<head>
    <meta charset="UTF-8">
    <title>Title</title>
</head>
<body>

    <div  style=" 20%;background-color: #ff7117;float: left">
        123456789
    </div>

    <div style=" 80%;background-color: rebeccapurple;float: left">
        987654321
    </div>

</body>
</html>
这是不加约束的code:
 <!DOCTYPE html>
<html lang="en">
<head>
    <meta charset="UTF-8">
    <title>Title</title>
</head>
<body>
     <div style=" 300px;border: 1px solid red;">
        <div style=" 96px;height: 30px;border: 1px solid green;float: left;"></div>
        <div style=" 96px;height: 30px;border: 1px solid green;float: left;"></div>
        <div style=" 96px;height: 30px;border: 1px solid green;float: left;"></div>
        <div style=" 96px;height: 30px;border: 1px solid green;float: left;"></div>
        <div style=" 96px;height: 30px;border: 1px solid green;float: left;"></div>
        <div style=" 96px;height: 30px;border: 1px solid green;float: left;"></div>
        <div style=" 96px;height: 30px;border: 1px solid green;float: left;"></div>
        <!--<div  style="clear: both;"></div>-->
    </div>
</body>
</html>
效果:
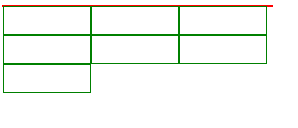
加上约束,使得父级标签重新获得对子标签的约束力:
 <!DOCTYPE html>
<html lang="en">
<head>
    <meta charset="UTF-8">
    <title>Title</title>
</head>
<body>
     <div style=" 300px;border: 1px solid red;">
        <div style=" 96px;height: 30px;border: 1px solid green;float: left;"></div>
        <div style=" 96px;height: 30px;border: 1px solid green;float: left;"></div>
        <div style=" 96px;height: 30px;border: 1px solid green;float: left;"></div>
        <div style=" 96px;height: 30px;border: 1px solid green;float: left;"></div>
        <div style=" 96px;height: 30px;border: 1px solid green;float: left;"></div>
        <div style=" 96px;height: 30px;border: 1px solid green;float: left;"></div>
        <div style=" 96px;height: 30px;border: 1px solid green;float: left;"></div>
        <div  style="clear: both;"></div>
    </div>
</body>
</html>
效果:

display
行内标签:无法设置高度,宽度,padding margin
块级标签:可以设置高度,宽度,padding margin
display:none;---让标签消失
display:block;---成为块级标签
display:inline-block;---既有块级标签的属性又有行内标签的属性。
position
   position:
      a.fiexd => 固定在页面的某个位置

      b.relative + absolute

         <div style='position:relative;'>
            <div style='position:absolute;top:0;left:0;'></div>
         </div>
a实例:
<!DOCTYPE html>
<html lang="en">
<head>
    <meta charset="UTF-8">
    <title>Title</title>
    <style >
        .pg-header{
            background-color: #1817ef;
            height: 48px;
            width: 100%;
            color: #dddddd;
            /*position的fixed属性, 固定在页面的某个位置*/
            position: fixed;
            top: 0;
            right: 0;
            left: 0;
            }
        .pg-body{
            background-color: #dddddd;
            height: 5000px;

            margin-top: 50px;
        }
    </style>
</head>
<body>
    <!--滑动滑轮时头部一直存在-->
    <div class="pg-header">头部</div>
    <div class="pg-body">中部</div>
</body>
</html>
b实例:
<!DOCTYPE html>
<html lang="en">
<head>
    <meta charset="UTF-8">
    <title>Title</title>
    <style>

        /*position的relative属性与absolute属性的结合使用*/
        .pg-md{
            position: relative;

            width: 500px;
            height: 200px;
            border: 1px solid red;
            margin: 0 auto;
        }
        .black-pg{
            position: absolute;
            width: 50px;
            height: 50px;
            background-color: black;
        }
        .left-bottom{
            left: 0;
            bottom: 0;
        }
        .right-bottom{
            right: 0;
            bottom: 0;
        }
        .left-top{
            left: 0;
            top: 0;
        }
    </style>
</head>
<body>
    <!--在上边div的左下角放一个黑色的正方形-->
    <div class="pg-md">
        <div class="black-pg left-bottom"></div>
    </div>
    <!--在中间div的右下角放一个黑色的正方形-->
    <div class="pg-md">
        <div class="black-pg right-bottom"></div>
    </div>
    <!--在下边div的左上角放一个黑色的正方形-->
    <div class="pg-md">
        <div class="black-pg left-top"></div>
    </div>
</body>
</html>
透明度
opcity: 0.5 透明度

z-index:层级顺序
z-index:层级顺序
实例:
<!DOCTYPE html>
<html lang="en">
<head>
    <meta charset="UTF-8">
    <title>Title</title>
</head>
<body>
    <!--z-index:的值越大就越靠近外层-->
    <div style="z-index: 10;position: fixed;top: 50%;left: 50%;
    margin-left: -250px;margin-top: -200px;background-color: white;height: 400px; 500px;">
        <input type="text" />
        <input type="text" />
        <input type="text" />
    </div>

    <div style="z-index: 9;background-color: black;position: fixed;top: 0;
    left: 0;
    right: 0;
    bottom: 0;
    opacity:0.5;
    /*opacity:0-1;设置透明度*/
    ">
    </div>

    <div style="height: 5000px;background-color: chartreuse;">铭记历史,吾辈当自强!</div>
</body>
</html>
overflow
overflow:hidden,auto
实例:
<!DOCTYPE html>
<html lang="en">
<head>
    <meta charset="UTF-8">
    <title>Title</title>
</head>
<body>
    <!--overflow: auto超过所规划的部分就加上滚动条-->
    <div style=" 200px;height: 300px;overflow: auto">
        <img src="2.jpg">
    </div>
    <!--overflow: hidden超过所规划的部分就隐藏-->
    <div style=" 200px;height: 300px;overflow: hidden">
        <img src="2.jpg">
    </div>
</body>
</html>
JS
JavaScript
独立的语言,浏览器就是JavaScript的解释器
JavaScript的存在形式:
     -Head中
            <script>
                //JavaScript代码
                alert(123);
            </script>

            <script type="text/javascript">
                //JavaScript代码
                alert(123);
            </script>
             默认值是type="text/javascript,表示里面的是js代码,可不写
        -文件
            <script src='js文件路径'></script>
    一般存在于HTML中,但是为了更好的用户体验,
    js代码最好放在body标签内容的
注释
当行注释 //
多行注释 /* */
学习语言先从基本数据类型入手
变量:
JavaScript中变量的声明是一个非常容易出错的点,局部变量必须一个 var 开头,如果未使用var,则默认表示声明的是全局变量。
Python:
   name = 'luban'
JavaScript:
   name = 'luban' #全局变量
   var name  name = 'luban' #局部变量
写JS代码:
-html文件中编写
-临时写,在浏览器终端
基本数据类型
// null、undefined
null是JavaScript语言的关键字,它表示一个特殊值,常用来描述“空值”。
undefined是一个特殊值,表示变量未定义。
数字(Number)
JavaScript中不区分整数值和浮点数值,JavaScript中所有数字均用浮点数值表示。

转换:

    parseInt(..)    将某值转换成数字,不成功则NaN
    parseFloat(..) 将某值转换成浮点数,不成功则NaN

特殊值:

    NaN,非数字。可使用 isNaN(num) 来判断。
    Infinity,无穷大。可使用 isFinite(num) 来判断
常量

Math.E
常量e,自然对数的底数。

Math.LN10
10的自然对数。

Math.LN2
2的自然对数。

Math.LOG10E
以10为底的e的对数。

Math.LOG2E
以2为底的e的对数。

Math.PI
常量figs/U03C0.gif。

Math.SQRT1_2
2的平方根除以1。

Math.SQRT2
2的平方根。

静态函数

Math.abs( )
计算绝对值。

Math.acos( )
计算反余弦值。

Math.asin( )
计算反正弦值。

Math.atan( )
计算反正切值。

Math.atan2( )
计算从X轴到一个点的角度。

Math.ceil( )
对一个数上舍入。

Math.cos( )
计算余弦值。

Math.exp( )
计算e的指数。

Math.floor( )
对一个数下舍人。

Math.log( )
计算自然对数。

Math.max( )
返回两个数中较大的一个。

Math.min( )
返回两个数中较小的一个。

Math.pow( )
计算xy。

Math.random( )
计算一个随机数。

Math.round( )
舍入为最接近的整数。

Math.sin( )
计算正弦值。

Math.sqrt( )
计算平方根。

Math.tan( )
计算正切值。

Math
字符串(String)
字符串是由字符组成的数组,但在JavaScript中字符串是不可变的:可以访问字符串任意位置的文本,但是JavaScript并未提供修改已知字符串内容的方法。
常见功能:
obj.length                           长度

obj.trim()                           移除空白
obj.trimLeft()
obj.trimRight()
obj.charAt(n)                        返回字符串中的第n个字符
obj.concat(value, ...)               拼接
obj.indexOf(substring,start)         子序列位置
obj.lastIndexOf(substring,start)     子序列位置
obj.substring(from, to)              根据索引获取子序列
obj.slice(start, end)                切片
obj.toLowerCase()                    大写
obj.toUpperCase()                    小写
obj.split(delimiter, limit)          分割
obj.search(regexp)                   从头开始匹配,返回匹配成功的第一个位置(g无效)
obj.match(regexp)                    全局搜索,如果正则中有g表示找到全部,否则只找到第一个。
obj.replace(regexp, replacement)     替换,正则中有g则替换所有,否则只替换第一个匹配项,
                                     $数字:匹配的第n个组内容;
                                     $&:当前匹配的内容;
                                     $`:位于匹配子串左侧的文本;
                                     $':位于匹配子串右侧的文本
                                     $$:直接量$符号
布尔类型(Boolean)
布尔类型仅包含真假,与Python不同的是其首字母小写。
    ==      比较值相等
    !=       不等于
    ===   比较值和类型相等
    !===  不等于
    ||        或
    &&      且
数组
JavaScript中的数组类似于Python中的列表
常见功能:
obj.length          数组的大小

obj.push(ele)       尾部追加元素
obj.pop()           尾部获取一个元素
obj.unshift(ele)    头部插入元素
obj.shift()         头部移除元素
obj.splice(start, deleteCount, value, ...)  插入、删除或替换数组的元素
                    obj.splice(n,0,val) 指定位置插入元素
                    obj.splice(n,1,val) 指定位置替换元素
                    obj.splice(n,1)     指定位置删除元素
obj.slice( )        切片
obj.reverse( )      反转
obj.join(sep)       将数组元素连接起来以构建一个字符串
obj.concat(val,..)  连接数组
obj.sort( )         对数组元素进行排序