快速构建springmvc+spring+swagger2环境
开发工具:Intellij idea
jdk: 1.8
开发步骤:
1.创建maven工程,如图建立工程结构
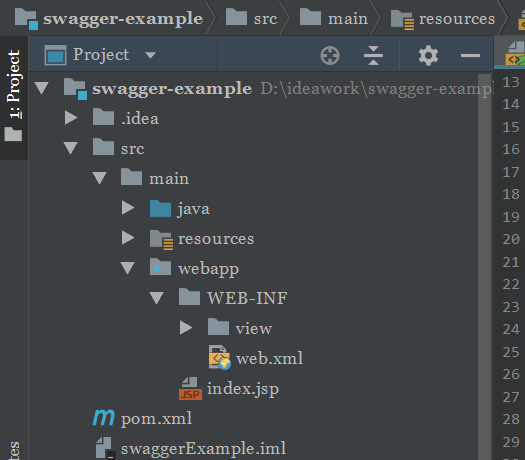
注意,wabapp一定在main目录下,否则工程可能读取不到wabapp文件。项目无法正常启动
2. 导入开发的依赖jar包。打开 pom.xml 引入依赖如下
<project xmlns:xsi="http://www.w3.org/2001/XMLSchema-instance" xmlns="http://maven.apache.org/POM/4.0.0"
         xsi:schemaLocation="http://maven.apache.org/POM/4.0.0 http://maven.apache.org/xsd/maven-4.0.0.xsd">
    <modelVersion>4.0.0</modelVersion>

    <groupId>com.idaoben</groupId>
    <artifactId>swaggerExample</artifactId>
    <version>1.0-SNAPSHOT</version>
    <packaging>war</packaging>

    <name>swaggerExample Maven Webapp</name>
    <!-- FIXME change it to the project's website -->
    <url>http://www.example.com</url>


    <properties>
        <project.build.sourceEncoding>UTF-8</project.build.sourceEncoding>
        <maven.compiler.source>1.8</maven.compiler.source>
        <maven.compiler.target>1.8</maven.compiler.target>
    </properties>

    <dependencies>
        <dependency>
            <groupId>junit</groupId>
            <artifactId>junit</artifactId>
            <version>4.11</version>
            <scope>test</scope>
        </dependency>
        <!-- spring -->
        <dependency>
            <groupId>org.springframework</groupId>
            <artifactId>spring-core</artifactId>
            <version>4.3.8.RELEASE</version>
        </dependency>
        <dependency>
            <groupId>org.springframework</groupId>
            <artifactId>spring-context</artifactId>
            <version>4.3.8.RELEASE</version>
        </dependency>
        <dependency>
            <groupId>org.springframework</groupId>
            <artifactId>spring-web</artifactId>
            <version>4.3.8.RELEASE</version>
        </dependency>
        <dependency>
            <groupId>org.springframework</groupId>
            <artifactId>spring-webmvc</artifactId>
            <version>4.3.8.RELEASE</version>
        </dependency>
        <dependency>
            <groupId>io.springfox</groupId>
            <artifactId>springfox-swagger2</artifactId>
            <version>2.7.0</version>
        </dependency>
        <dependency>
            <groupId>io.springfox</groupId>
            <artifactId>springfox-swagger-ui</artifactId>
            <version>2.7.0</version>
        </dependency>
        <!-- jackson -->
        <dependency>
            <groupId>com.fasterxml.jackson.core</groupId>
            <artifactId>jackson-databind</artifactId>
            <version>2.8.7</version>
        </dependency>
        <dependency>
            <groupId>com.fasterxml.jackson.core</groupId>
            <artifactId>jackson-core</artifactId>
            <version>2.8.7</version>
        </dependency>
        <!--日志框架-->
        <dependency>
            <groupId>org.slf4j</groupId>
            <artifactId>slf4j-api</artifactId>
            <version>1.8.0-beta2</version>
        </dependency>
        <dependency>
            <groupId>org.slf4j</groupId>
            <artifactId>slf4j-log4j12</artifactId>
            <version>1.8.0-beta2</version>
        </dependency>
        <dependency>
            <groupId>log4j</groupId>
            <artifactId>log4j</artifactId>
            <version>1.2.17</version>
        </dependency>
    </dependencies>

    <build>
        <finalName>swaggerExample</finalName>
        <pluginManagement><!-- lock down plugins versions to avoid using Maven defaults (may be moved to parent pom) -->
            <plugins>
                <plugin>
                    <artifactId>maven-clean-plugin</artifactId>
                    <version>3.0.0</version>
                </plugin>
                <!-- see http://maven.apache.org/ref/current/maven-core/default-bindings.html#Plugin_bindings_for_war_packaging -->
                <plugin>
                    <artifactId>maven-resources-plugin</artifactId>
                    <version>3.0.2</version>
                </plugin>
                <plugin>
                    <artifactId>maven-compiler-plugin</artifactId>
                    <version>3.7.0</version>
                </plugin>
                <plugin>
                    <artifactId>maven-surefire-plugin</artifactId>
                    <version>2.20.1</version>
                </plugin>
                <plugin>
                    <artifactId>maven-war-plugin</artifactId>
                    <version>3.2.0</version>
                </plugin>
                <plugin>
                    <artifactId>maven-install-plugin</artifactId>
                    <version>2.5.2</version>
                </plugin>
                <plugin>
                    <artifactId>maven-deploy-plugin</artifactId>
                    <version>2.8.2</version>
                </plugin>
            </plugins>
        </pluginManagement>
    </build>
</project>
注意,定义以war包方式打包,否则maven工具无法帮助完成构建
可以看到,除了spring基本的依赖以外,pom文件也已经引入日志框架,无需再另外导入。swagger2 依赖 jackson,所以必须把他们导入进来
3.新建文件:webapp/WEB-INF/web.xml,这是web项目启动配置文件,打开如下配置
<?xml version="1.0" encoding="UTF-8"?>
<web-app xmlns:xsi="http://www.w3.org/2001/XMLSchema-instance"
         xmlns="http://xmlns.jcp.org/xml/ns/javaee"
         xsi:schemaLocation="http://xmlns.jcp.org/xml/ns/javaee http://xmlns.jcp.org/xml/ns/javaee/web-app_3_1.xsd"
         version="3.1">

    <context-param>
        <param-name>contextConfigLocation</param-name>
        <param-value>classpath:applicationContext.xml</param-value>
    </context-param>

    <listener>
        <listener-class>org.springframework.web.context.ContextLoaderListener</listener-class>
    </listener>

    <servlet>
        <servlet-name>swagger-example</servlet-name>
        <servlet-class>org.springframework.web.servlet.DispatcherServlet</servlet-class>
        <init-param>
            <param-name>contextConfigLocation</param-name>
            <param-value>classpath:applicationContext-mvc.xml</param-value>
        </init-param>
        <load-on-startup>1</load-on-startup>
    </servlet>
    <servlet-mapping>
        <servlet-name>swagger-example</servlet-name>
        <url-pattern>/</url-pattern>
    </servlet-mapping>
</web-app>
主要分两部分,先配置 spring 的 ioc 容器,然后再配置springmvc 的 ioc 容器,这两个容器分别是父子关系,并在resources文件夹下新建applicationContext.xml文件和applicationContext-mvc.xml文件,分别对应spring的配置和springmvc的配置
4. 分别配置 spring ioc 容器和 springmvc ioc 容器
<?xml version="1.0" encoding="UTF-8"?>
<beans xmlns:xsi="http://www.w3.org/2001/XMLSchema-instance"
       xmlns:context="http://www.springframework.org/schema/context"
       xmlns="http://www.springframework.org/schema/beans"
       xsi:schemaLocation="http://www.springframework.org/schema/beans http://www.springframework.org/schema/beans/spring-beans.xsd http://www.springframework.org/schema/context http://www.springframework.org/schema/context/spring-context.xsd">
    <context:component-scan base-package="com.idaoben.swagger.example" use-default-filters="false">
        <context:exclude-filter type="annotation" expression="org.springframework.web.bind.annotation.RestController"/>
        <context:exclude-filter type="annotation"
                                expression="org.springframework.web.bind.annotation.ControllerAdvice"/>
    </context:component-scan>

</beans>
<?xml version="1.0" encoding="UTF-8"?>
<beans xmlns:xsi="http://www.w3.org/2001/XMLSchema-instance"
       xmlns:context="http://www.springframework.org/schema/context"
       xmlns:mvc="http://www.springframework.org/schema/mvc"
       xmlns="http://www.springframework.org/schema/beans"
       xsi:schemaLocation="http://www.springframework.org/schema/beans
       http://www.springframework.org/schema/beans/spring-beans.xsd
       http://www.springframework.org/schema/context
       http://www.springframework.org/schema/context/spring-context.xsd http://www.springframework.org/schema/mvc http://www.springframework.org/schema/mvc/spring-mvc.xsd">

    <context:component-scan base-package="com.idaoben.swagger.example" use-default-filters="false">
        <context:include-filter type="annotation" expression="org.springframework.web.bind.annotation.RestController"/>
        <context:include-filter type="annotation"
                                expression="org.springframework.web.bind.annotation.ControllerAdvice"/>
    </context:component-scan>

    <bean class="org.springframework.web.servlet.view.InternalResourceViewResolver">
        <property name="prefix" value="/WEB-INF/view/page"/>
        <property name="suffix" value=".jsp"/>
    </bean>

    <mvc:annotation-driven/>

</beans>
5.引入swagger2
在目录下新建 Swagger2Config.java 配置类,代码如下
@EnableSwagger2
public class Swagger2Config {

    public Swagger2Config() {
        System.out.println("Swagger2Config ......");
    }

    public Docket createApi() {
        return new Docket(DocumentationType.SWAGGER_2)
                .apiInfo(apiInfo())
                .select()
                .apis(RequestHandlerSelectors.withClassAnnotation(Api.class))
                .paths(PathSelectors.any())
                .build();
    }

    private ApiInfo apiInfo() {
        return new ApiInfoBuilder()
                .title("在线测试 api 文档")
                .description("在线接口api")
                .contact(new Contact("xxx信息科技有限公司", "https://testting.com", "123456@xxx.com"))
                .version("v1.0")
                .build();
    }

}
在applicationContext-mvc.xml文件中加上
<mvc:resources mapping="/springfox-swagger-ui/**" location="classpath:/META-INF/resources/webjars/"/>
    <mvc:resources mapping="/swagger-ui.html" location="classpath:/META-INF/resources/"/>

    <!--swagger配置-->
    <bean id="docketFactoryBean" class="com.idaoben.swagger.example.web.Swagger2Config"/>
    <bean id="docket" factory-bean="docketFactoryBean" factory-method="createApi"/>
6. 到这一步,基础环境已经搭建好了,我们可以写一个测试接口,如图创建项目工程结构
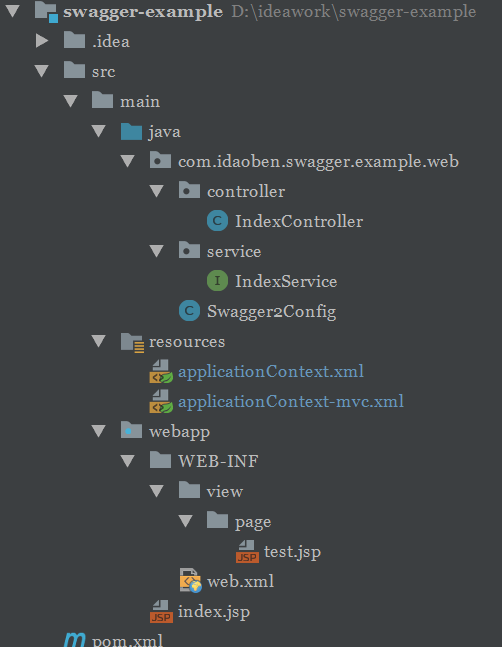
如图,新建了 controller 层和 service 层,在page下添加一个测试页面,IndexController接口代码如下
@Api(tags = "测试中心", value = "测试")
@RestController
@RequestMapping("/index")
public class IndexController {

    @ApiOperation("测试接口")
    @GetMapping("/test")
    public ModelAndView index() {
        ModelAndView mv = new ModelAndView();
        mv.setViewName("/test");
        return mv;
    }
}
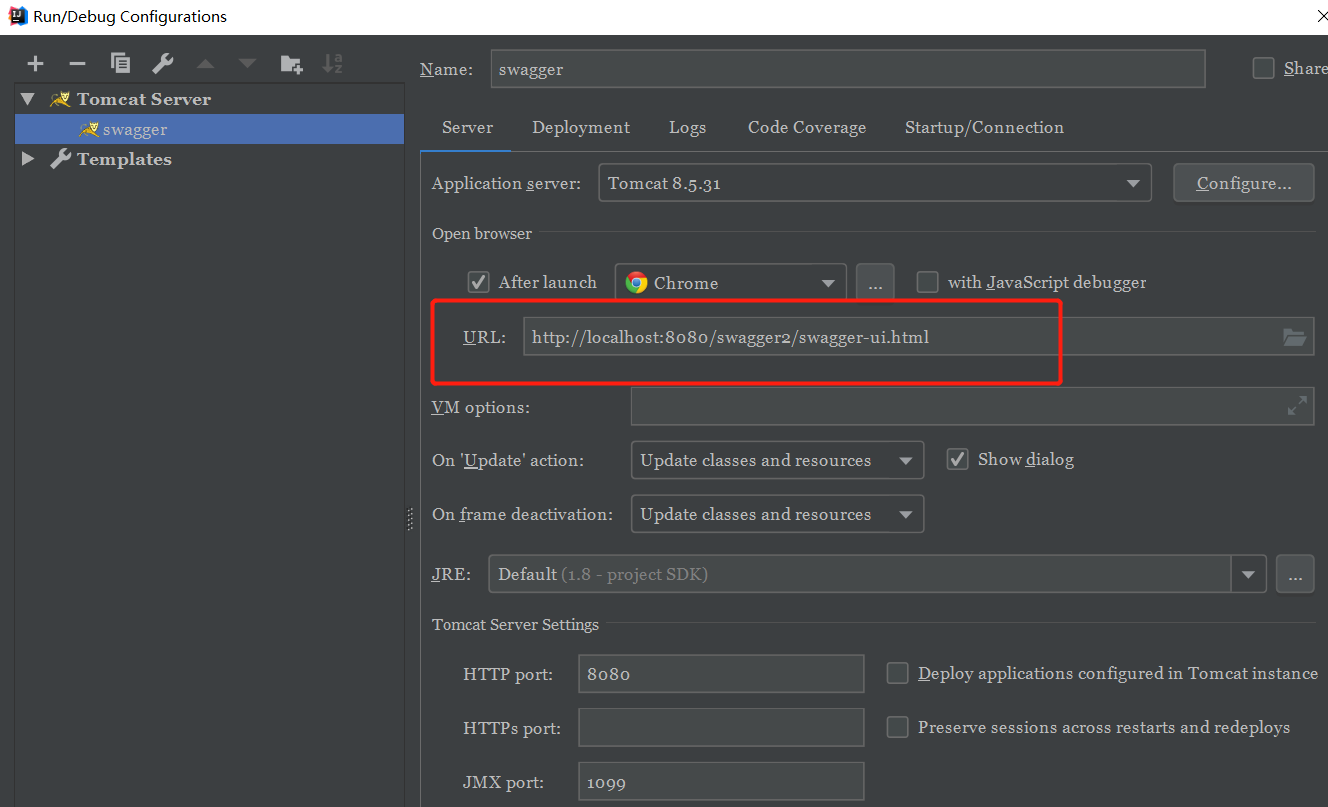
7.配置tomcat,在浏览器上打开项目
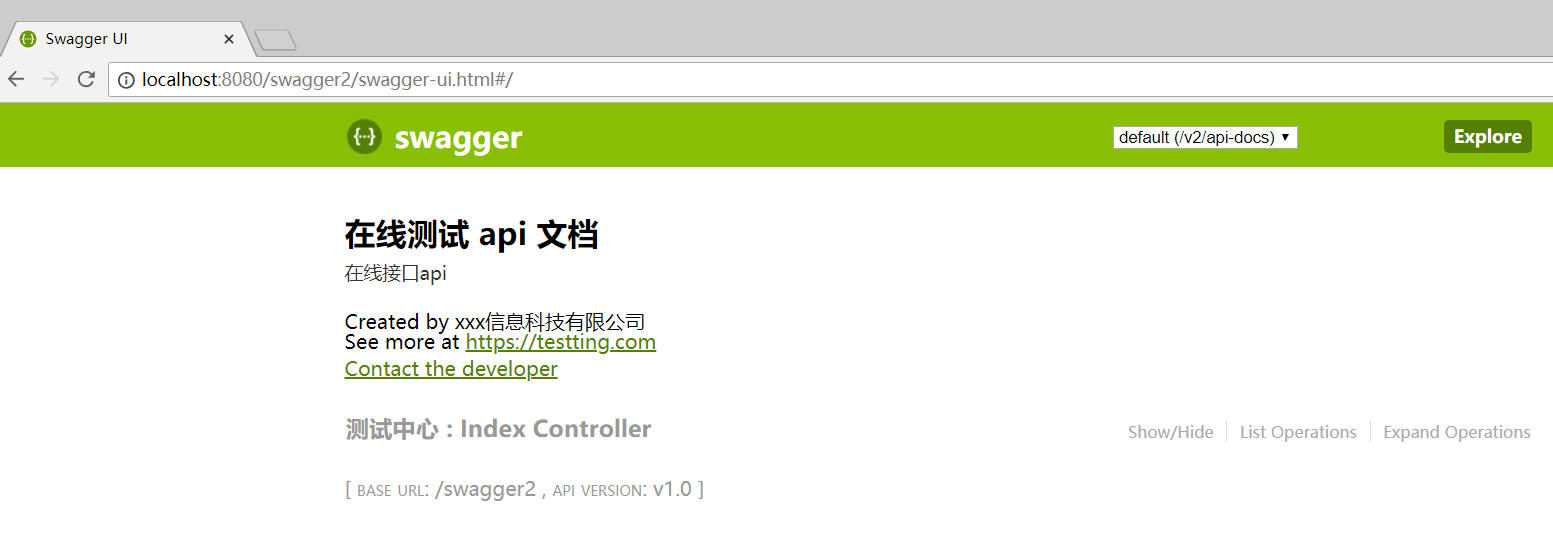
项目链接:
附上项目链接:https://github.com/yumiaoxia/swagger-example.git
