今天开始自己去写组件。
这次写组件重点在于参考cfWeb来写出自己的组件。
首先先把结构做出来。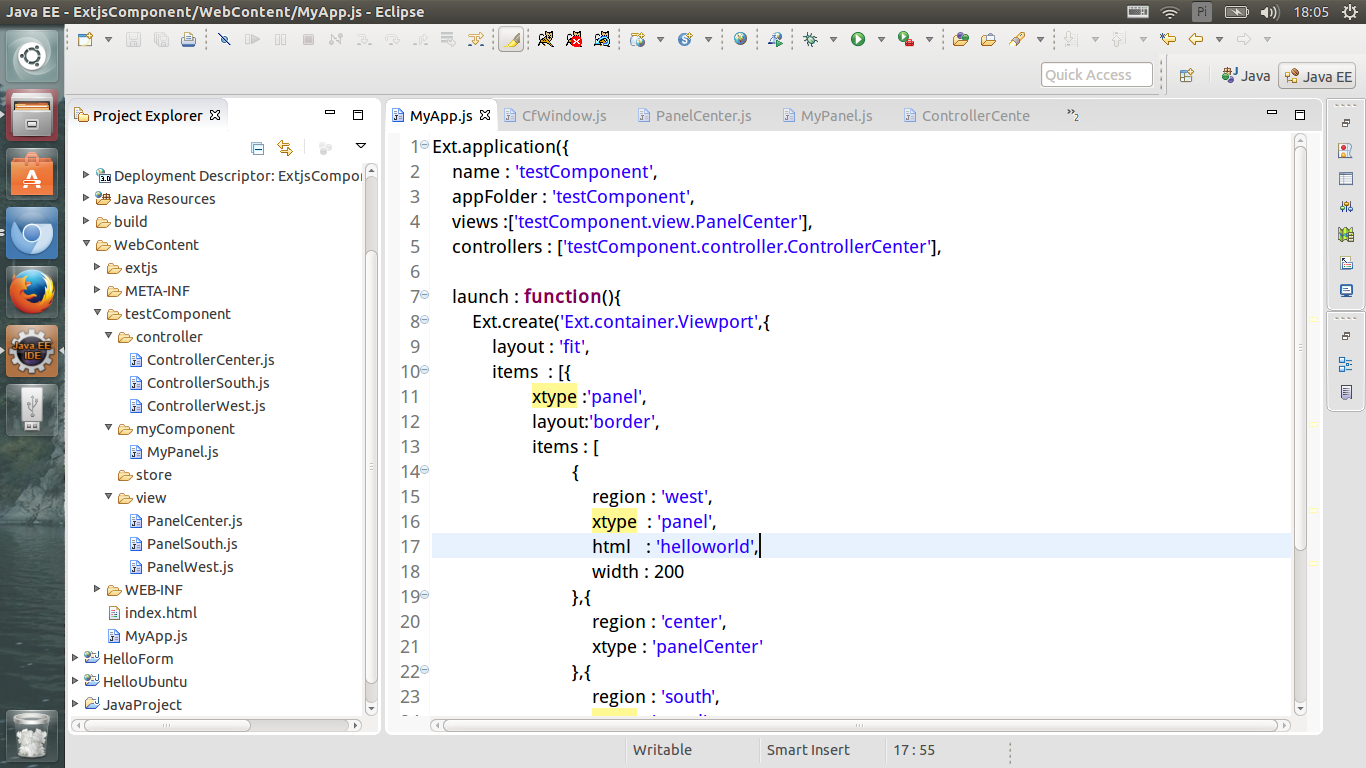

对于这次的自定义组件,现在所做的事情关键在于上面四个文件。于是将上面四个文件贴出来。
MyApp.js
Ext.application({
    name : 'testComponent',
    appFolder : 'testComponent',
    views :['testComponent.view.PanelCenter'],
    controllers : ['testComponent.controller.ControllerCenter'],

    launch : function(){
        Ext.create('Ext.container.Viewport',{
            layout : 'fit',
            items  : [{
                    xtype :'panel',
                    layout:'border',
                    items : [
                            {
                                region : 'west',
                                xtype  : 'panel',
                                html   : 'helloworld',
                                width : 200
                            },{
                                region : 'center',
                                xtype : 'panelCenter'
                            },{
                                region : 'south',
                                xtype : 'panel',
                                html : 'hellosouth',
                                height : 150
                            }
                ]
            }]
        });
    }
});
PanelCenter.js
Ext.define('testComponent.view.PanelCenter',{
    extend : 'Ext.panel.Panel',
    alias : 'widget.panelCenter',
    layout : 'fit',
    items :[{
        xtype : 'myPanel'
    }],

    initComponent : function(){
        this.callParent(arguments);
    }
});
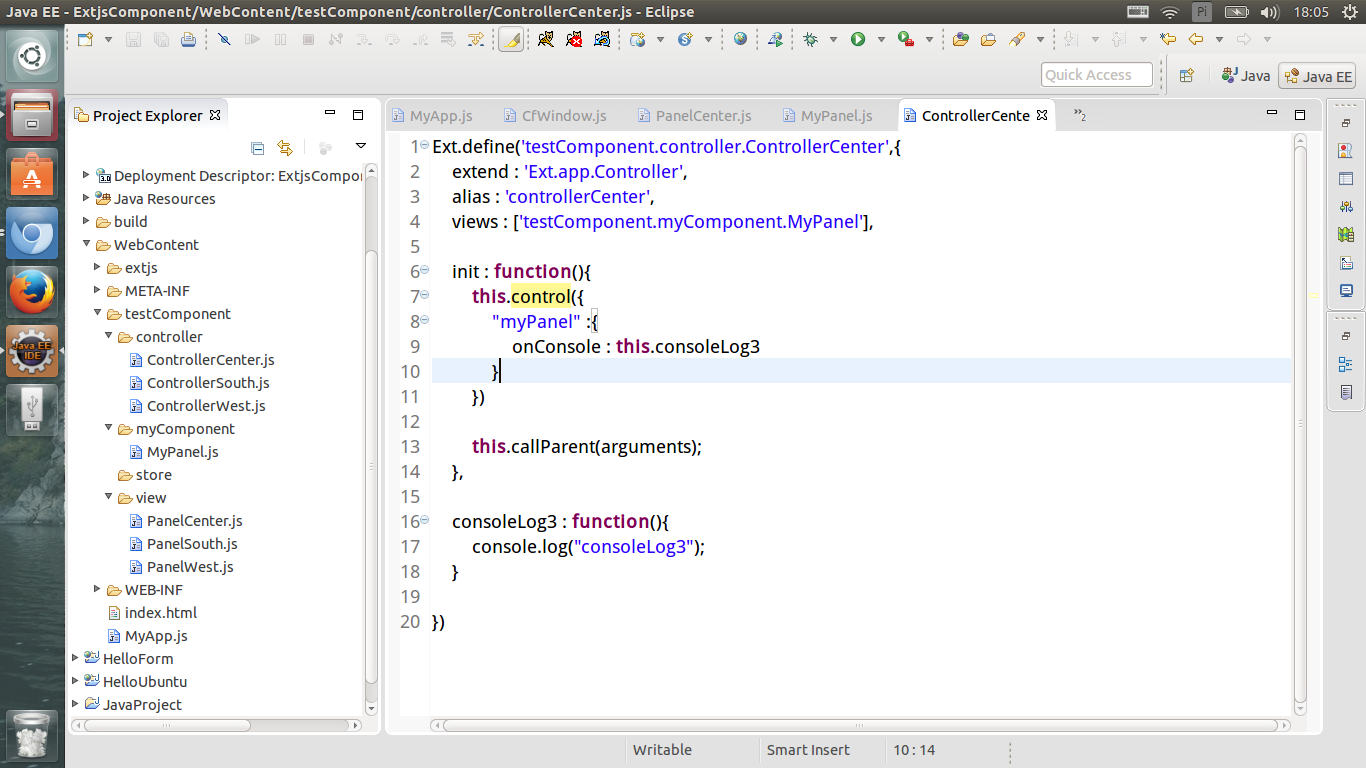
ControllerCenter.js
Ext.define('testComponent.controller.ControllerCenter',{
    extend : 'Ext.app.Controller',
    alias : 'controllerCenter',
    views : ['testComponent.myComponent.MyPanel'],

    init : function(){
        this.control({
            "myPanel" :{
                onConsole : this.consoleLog3
            }
        })

        this.callParent(arguments);
    },

    consoleLog3 : function(){
        console.log("consoleLog3");
    }

})
接下来主要内容
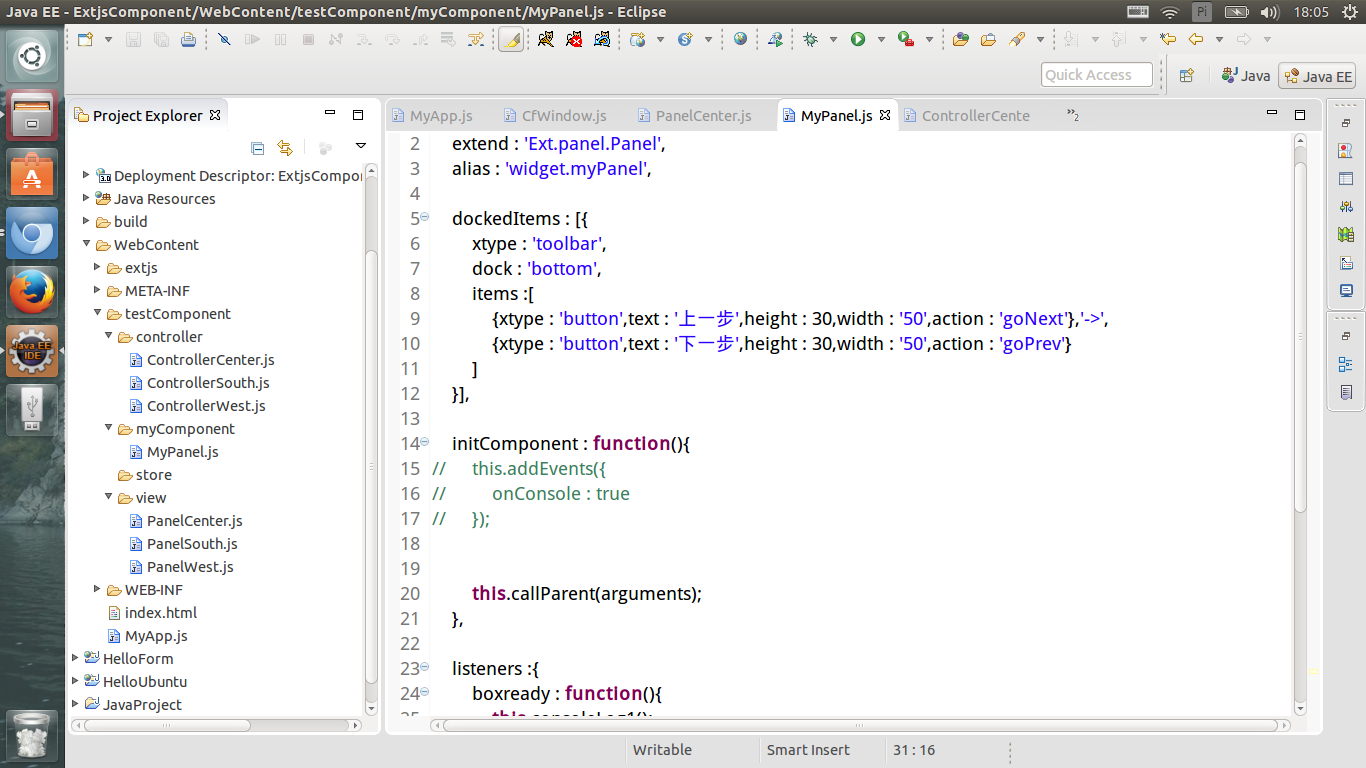
MyPanel.js
Ext.define('testComponent.myComponent.MyPanel',{
    extend : 'Ext.panel.Panel',
    alias : 'widget.myPanel',

    dockedItems : [{
        xtype : 'toolbar',
        dock : 'bottom',
        items :[
            {xtype : 'button',text : '上一步',height : 30,width : '50',action : 'goNext'},'->',
            {xtype : 'button',text : '下一步',height : 30,width : '50',action : 'goPrev'}
        ]
    }],

    initComponent : function(){
//        this.addEvents({//            onConsole : true//        });//是否注释掉这一行结果没有太大的变化


        this.callParent(arguments);
    },

    listeners :{
        boxready : function(){
            this.consoleLog1();
            this.consoleLog2();
        }
    },

    consoleLog1 : function(){
        console.log("consoleLog1");
    },
    consoleLog2 : function(){
        console.log("consoleLog22");
        this.fireEvent("onConsole",this);
    }
});
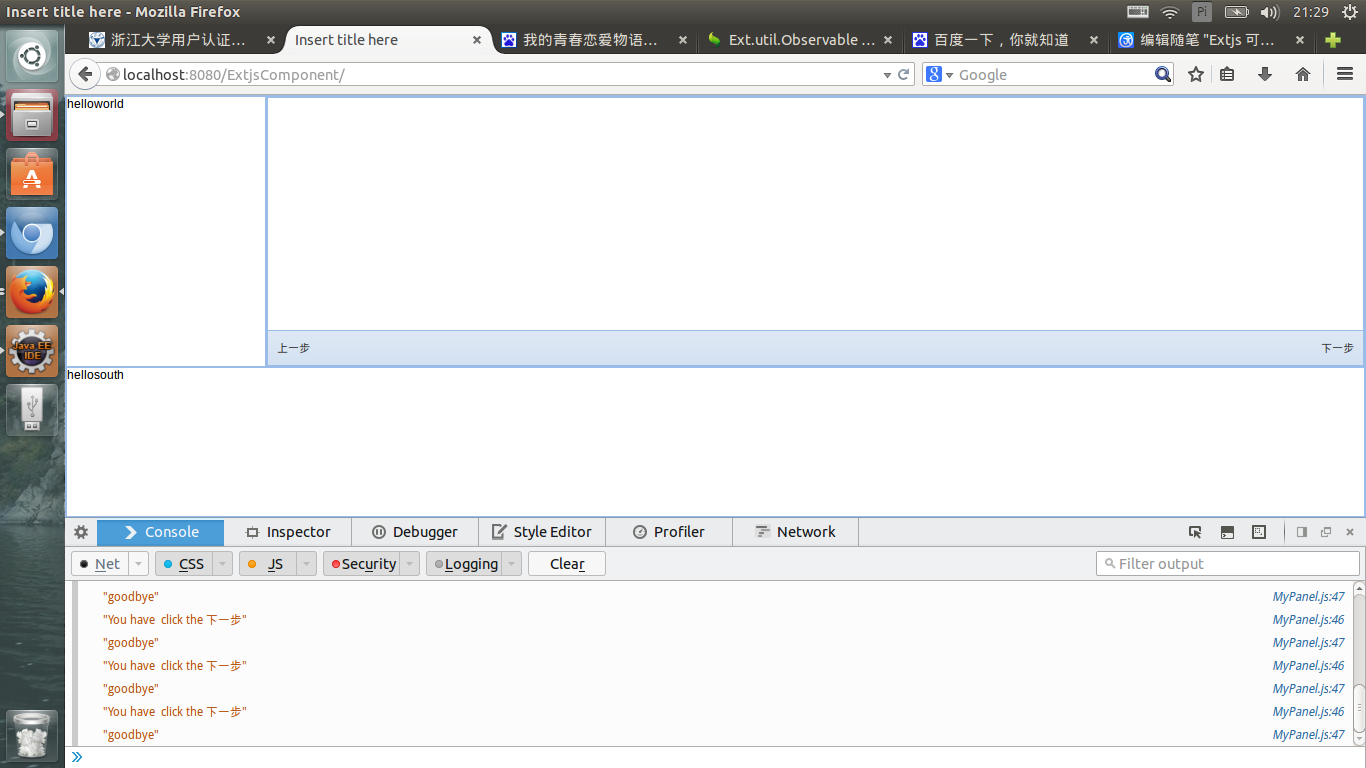
运行结果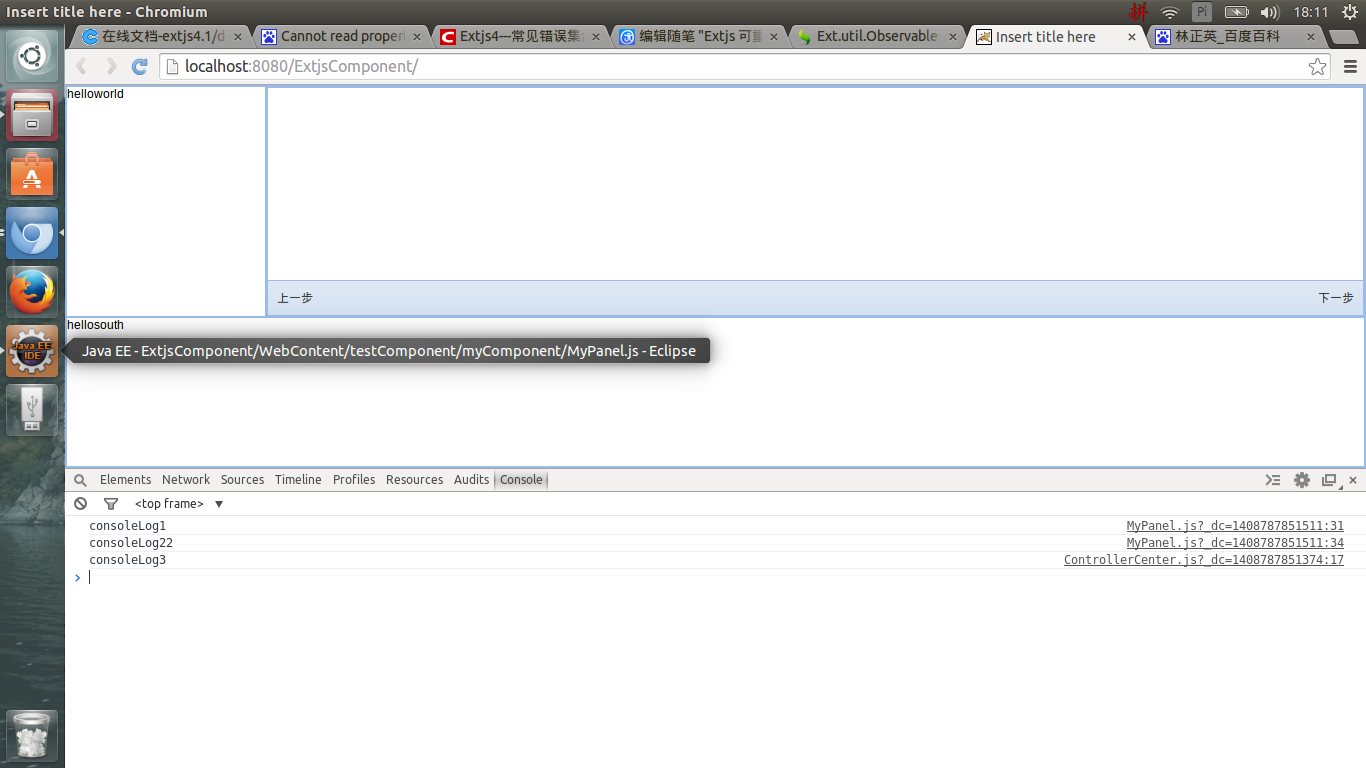
上面的MyPanel还是相当简单的,这里的重点是通过这个demo看MyPanel中的方法如何执行以及如何抛出事件。
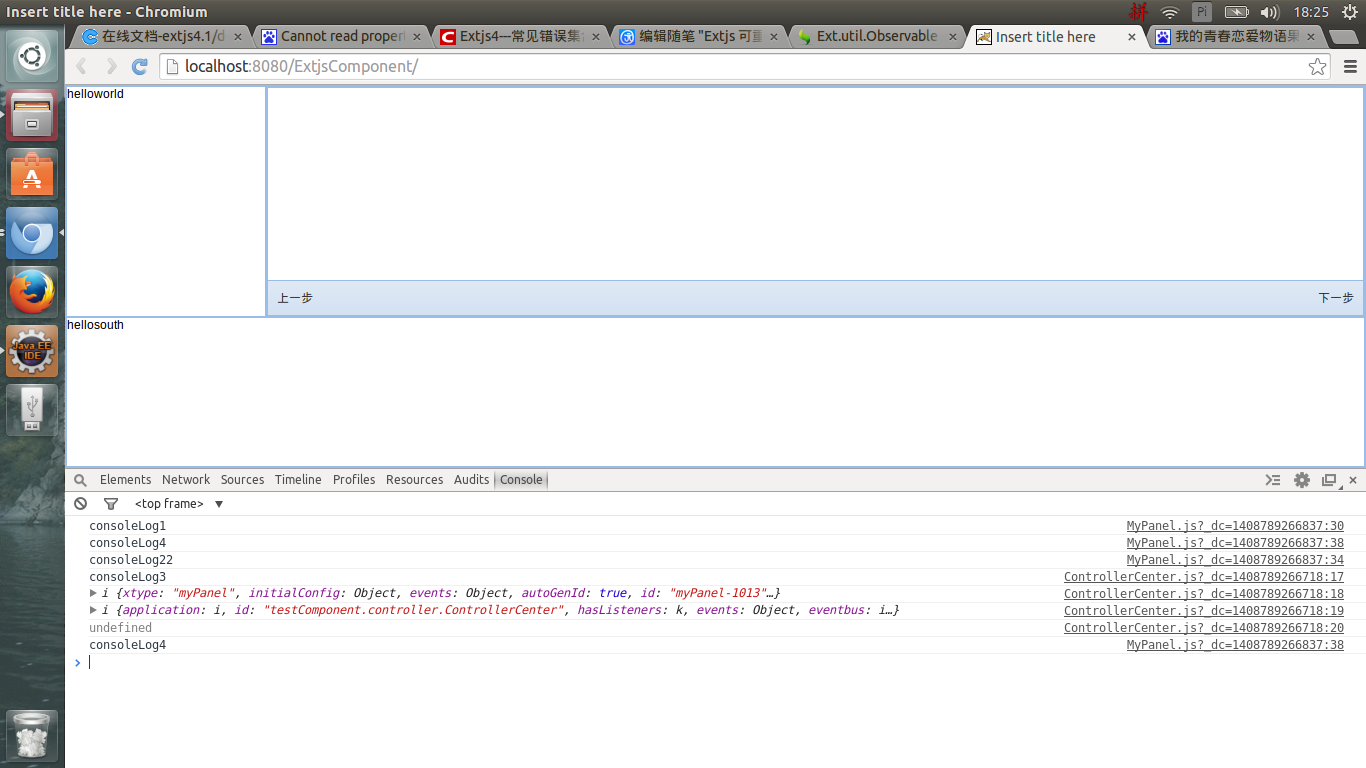
现在将MyPanel、contorller稍微进行修改,则更能够明白MyPanel中的方法是怎么回事以及抛出事件时的参数是什么。
修改后的MyPanel.js
Ext.define('testComponent.myComponent.MyPanel',{
    extend : 'Ext.panel.Panel',
    alias : 'widget.myPanel',

    dockedItems : [{
        xtype : 'toolbar',
        dock : 'bottom',
        items :[
            {xtype : 'button',text : '上一步',height : 30,width : '50',action : 'goNext'},'->',
            {xtype : 'button',text : '下一步',height : 30,width : '50',action : 'goPrev'}
        ]
    }],

    initComponent : function(){
//        this.addEvents({
//            onConsole : true
//        });

        this.callParent(arguments);
    },

    listeners :{
        boxready : function(){
            this.consoleLog1();
            this.consoleLog2();
        }
    },

    consoleLog1 : function(){
        console.log("consoleLog1");
        this.consoleLog4();
    },
    consoleLog2 : function(){
        console.log("consoleLog22");
        this.fireEvent("onConsole",this);
    },
    consoleLog4: function(){
        console.log("consoleLog4");
    }
});
修改后的ControllerCenter.js
Ext.define('testComponent.controller.ControllerCenter',{
    extend : 'Ext.app.Controller',
    alias : 'controllerCenter',
    views : ['testComponent.myComponent.MyPanel'],

    init : function(){
        this.control({
            "myPanel" :{
                onConsole : this.consoleLog3
            }
        })

        this.callParent(arguments);
    },

    consoleLog3 : function(me,you){
        console.log("consoleLog3");
        console.log(me);
        console.log(this);
        console.log(you);
        me.consoleLog4();
    }

})
在chrome中的运行结果
自定义组件的一个相当重要的作用就是满足开发的过程中不同的需求。
作为一个前端,能够改变自定义组件的样式是一种相当必要的能力。必须要有有一定的CSS基础。
现在对MyPanel中的next进行监听,并处理监听事件。(这里就是on的用法,使用on后组件一直监听并触发方法,当然也可以在方法中抛出事件)
MyPanel.js
Ext.define('testComponent.myComponent.MyPanel',{
    extend : 'Ext.panel.Panel',
    alias : 'widget.myPanel',

    dockedItems : [{
        xtype : 'toolbar',
        dock : 'bottom',
        items :[
            {xtype : 'button',text : '上一步',height : 30,width : '50',action : 'goPrev'},'->',
            {xtype : 'button',text : '下一步',height : 30,width : '50',action : 'goNext'}
        ]
    }],

    initComponent : function(){
//        this.addEvents({
//            onConsole : true
//        });

        this.callParent(arguments);
    },

    listeners :{
        boxready : function(){
            this.consoleLog1();
            this.consoleLog2();
        }
    },

    consoleLog1 : function(){
        console.log("consoleLog1");

        var obj=this.down("button[action=goNext]");
        console.log(obj);
        obj.on("click",this.goNextClick,this);//设置监听事件

        this.consoleLog4();
    },
    consoleLog2 : function(){
        console.log("consoleLog22");
        this.fireEvent("onConsole",this);
    },
    consoleLog4: function(){
        console.log("consoleLog4");
    },
    goNextClick : function(){//处理监听事件的方法,并扔出事件
        console.log("You have  click the 下一步");
        console.log("goodbye");
        this.fireEvent("onGoNextClick",this);
    }
});
ControllerCenter.js
Ext.define('testComponent.controller.ControllerCenter',{
    extend : 'Ext.app.Controller',
    alias : 'controllerCenter',
    views : ['testComponent.myComponent.MyPanel'],

    init : function(){
        this.control({
            "myPanel" :{
                onConsole : this.consoleLog3,
                onGoNextClick : this.goNextClick //捕捉点击扔出的事件
            }
        })

        this.callParent(arguments);
    },

    consoleLog3 : function(me,you){
        console.log("consoleLog3");
        console.log(me);
        console.log(this);
        console.log(you);
        me.consoleLog4();
    },
    goNextClick : function(me,you){ //在controller中处理点击的方法
        console.log(me);
        console.log("你没有点击上一步");
    }
})
运行结果,点击了两次“下一次”按钮