码云,git使用 教程
code cloud, git use tutorials
作者:韩梦飞沙
Author:han_meng_fei_sha
邮箱:313134555@qq.com
E-mail: 313134555 @qq.com

新建项目
new project
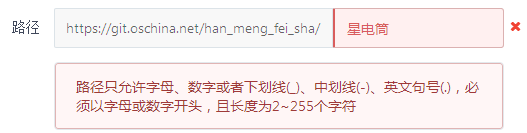
路径没办法用中文哦。
There is no way to use Chinese.
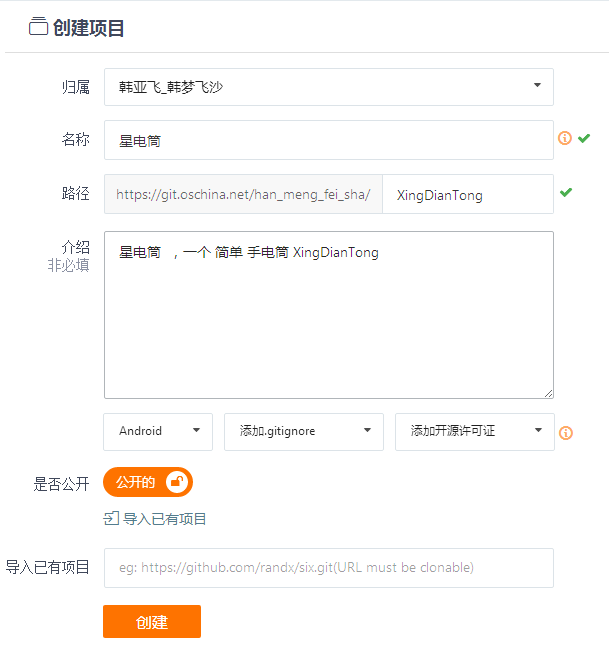
类似这样创建一个项目
Create a project like this
需要下载 安装git。不会git 就有些烦了。
You need to download and install git.Not git is a bit boring.
网上大多教程是命令的方式,感觉好烦。
Most of the tutorials on the web are the way to command, and it's annoying.
这里用的是 可视化的界面,简单,体验好。
This is a visual interface, simple, good experience.
电脑是64位, 所以
The computer is 64 bits, so
百度搜索Git-2.8.2-64-bit.exe 下载 安装【一路默认即可】。
Baidu search Git - 2.82-64-bit.exe for download installation. [all the way by default]
搜索 TortoiseGit-2.1.0.0-64bit.msi 下载 安装【一路默认即可】。
Search for TortoiseGit - 2.1.0.0-64bit. Msi download installation [all the way by default]
安装语言包TortoiseGit-LanguagePack-2.1.0.0-64bit-zh_CN.msi【一路默认即可】。
Install the language pack tortoisegit-languagepack-2.1.0.0-64bit-zh_cn.msi. [all the way by default]
安装完tortoiseGIT不需要重启电脑。
After installing tortoiseGIT, you do not need to restart your computer.
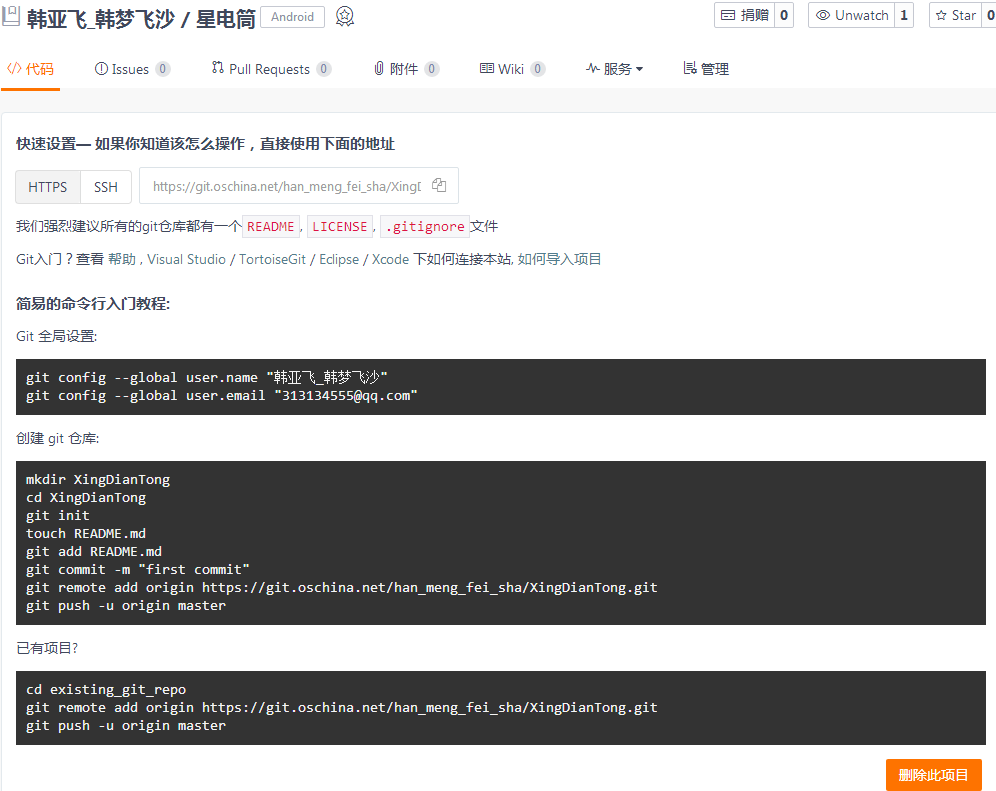
安装完Git-2.8.2-64-bit.exe之后 可以发现 有Git Bash 这个功能,这个就可以敲写 教程上的那些命令。
After you have installed Git - 2.8.2-64-bit.exe, you can find that you have Git Bash, which can be used to write the commands in the tutorial.
安装完tortoiseGIT ,需要在设置里改一下,切换语言,为简体中文。
After installing tortoiseGIT, I need to change it in the Settings to switch the language to simplified Chinese.
这里 可以用 可视化的界面,不用敲命令。
Here you can use a visual interface without typing.
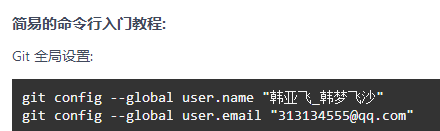
我们可以用命令来操作。
复制这两行命令。
We can operate with commands.
Copy these two line commands.
git config --global user.name "韩亚飞_韩梦飞沙"
git config --global user.email "313134555@qq.com"
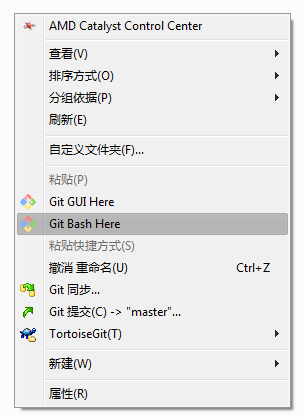
在我们的工程目录下。选择 git bash here
It's in our engineering catalogue 。Select git bash here

粘贴 命令
Paste command
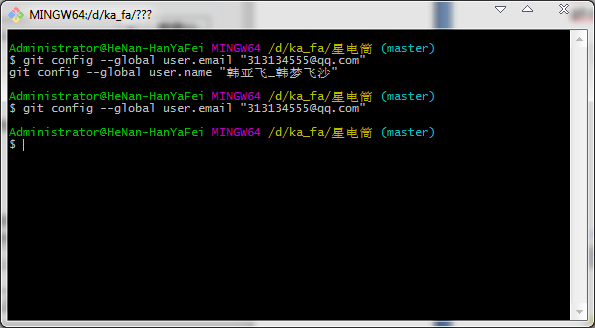
然后就像这样,命令直接就执行成功了。
Then, like this, the command executes directly.
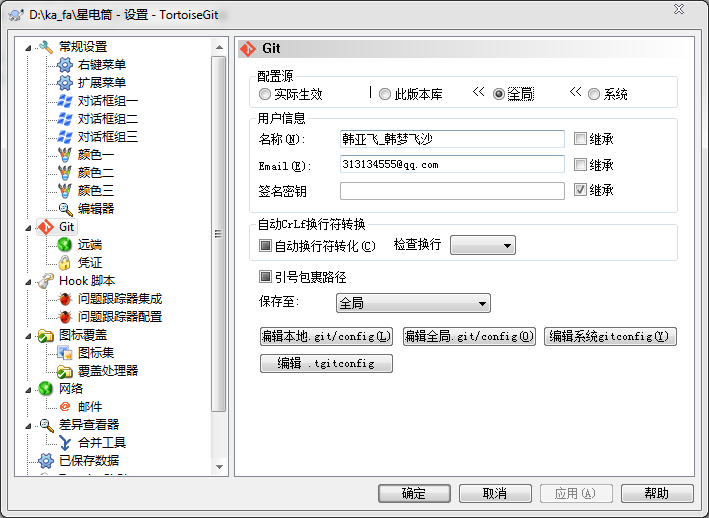
我们可以在 设置中看到 全局 已经有命令执行后的数据了。
We can see in Settings that the global command has been executed.
这两个数据,我们可以在提交的时候用到。 用来设置作者。
These two data, we'll use it at the time of submission.Used to set the author.
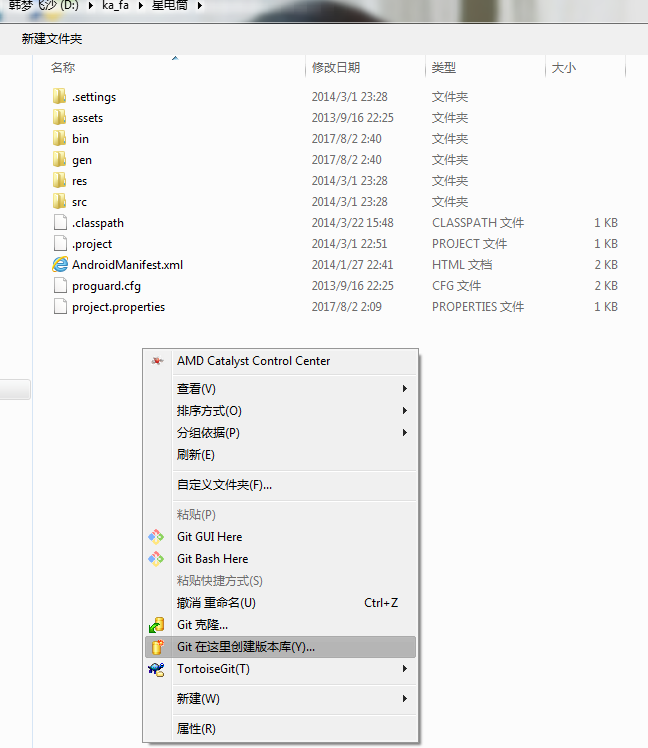
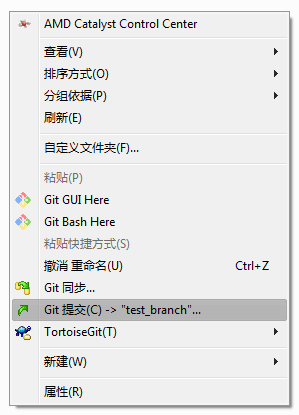
选择 Git 在这里创建版本库
Select Git submission (C) - > "master"...

点击确定 确定
Click ok
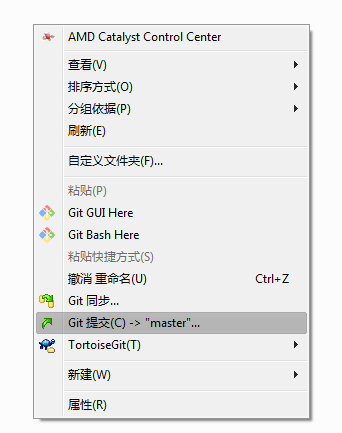
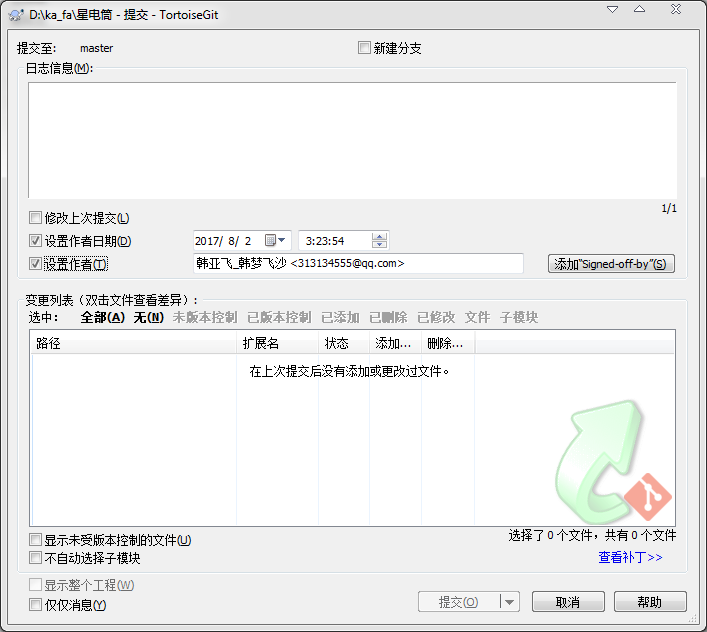
选择 Git 提交(C)->”master”…
Select Git submission (C) - > "master"...
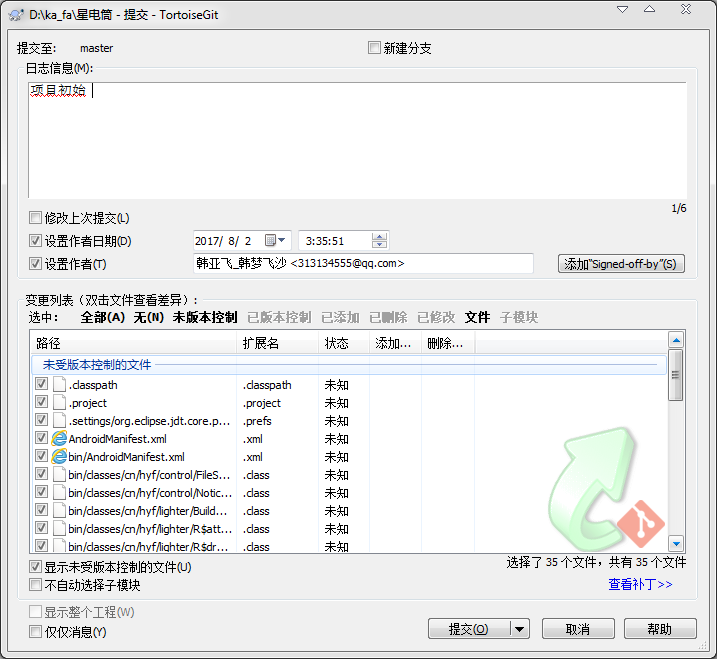
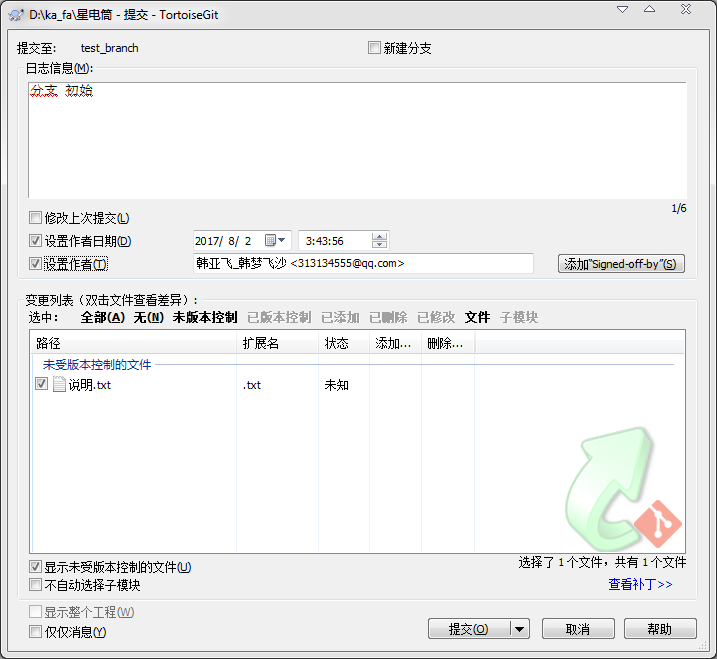
在这个页面可以选择 未版本控制, 选中全部文件,然后提交。
On this page you can select the unversioned control, select all the files, and submit.
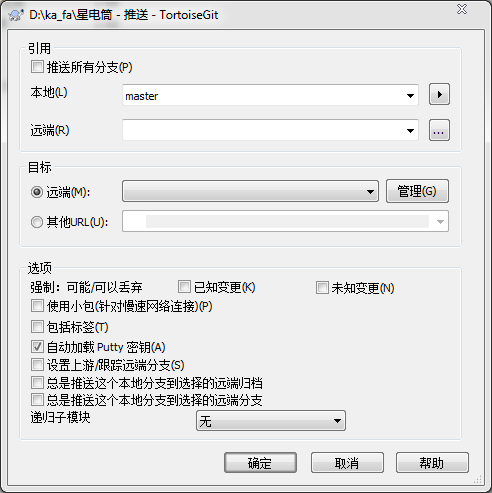
提交成功后,我们可以点击推送。
After the submission is successful, we can click on the push.
选择 管理
Choose management
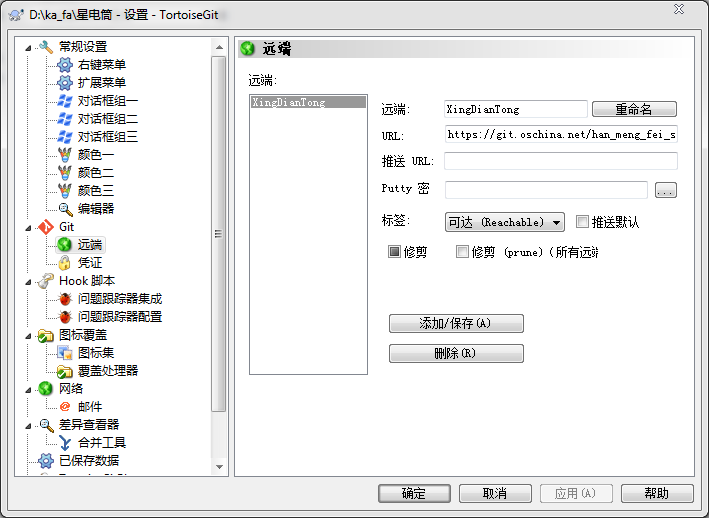
弹出这样的窗口。 我们填写 远程项目的url 地址。可以起个名字。类似这样。
Pop-up Windows like this.We fill in the url of the remote project.You can have a name.Like this
打开网站。复制 远程项目的url 地址 链接。类似我这个
Open the site. Copy the url of the remote project url. Like me
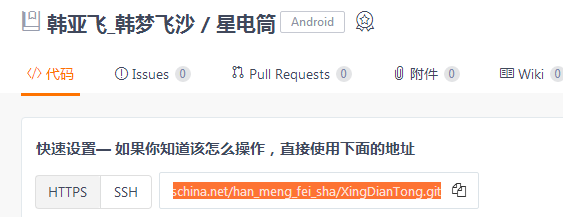
https://git.oschina.net/han_meng_fei_sha/XingDianTong.git
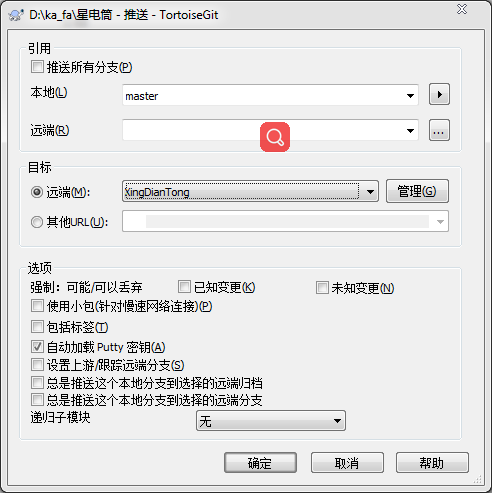
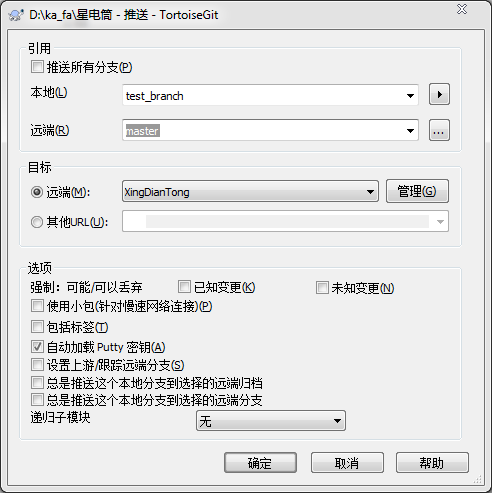
添加好了,然后选择 远端的 项目。
Add it, and then select the remote project.
点击确定。我们推送到 远端 。
Click ok.We push it to the far end.
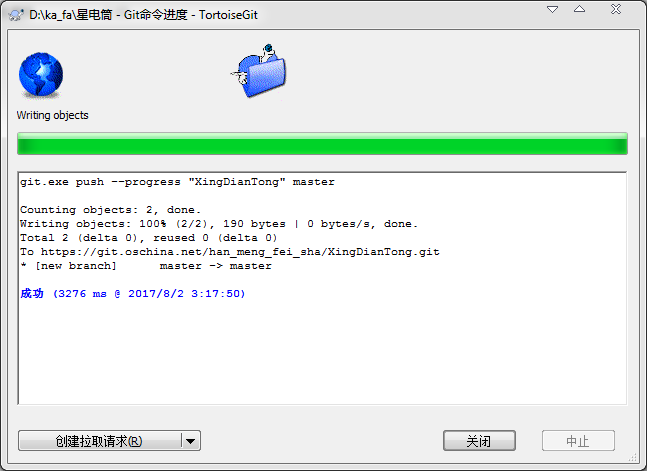
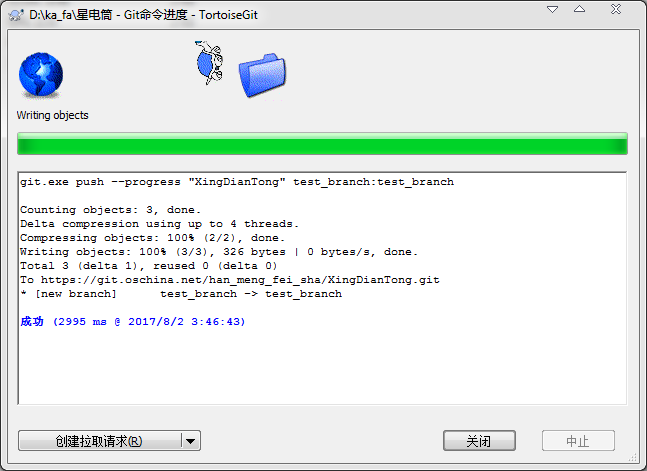
然后像这样 代表成功了。这个信息框里面的内容 注意一下。
And then it would be successful.Notice the contents of this information box.
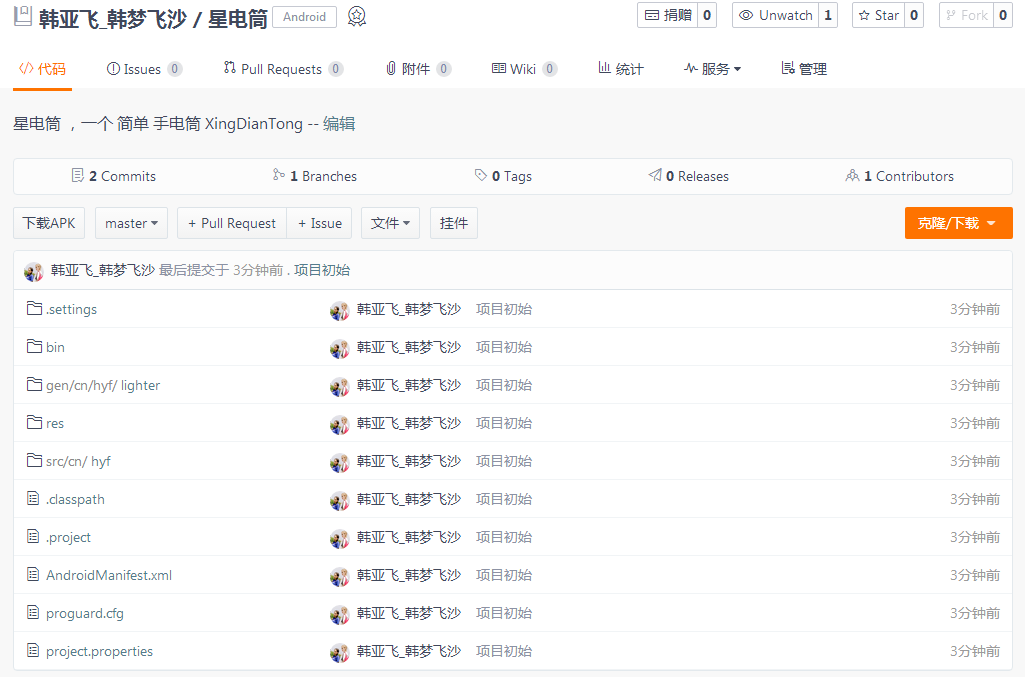
推送成功后,我们可以在网站上刷新后 看到类似这样的效果。
After the push is successful, we can see similar results after we refresh the site.
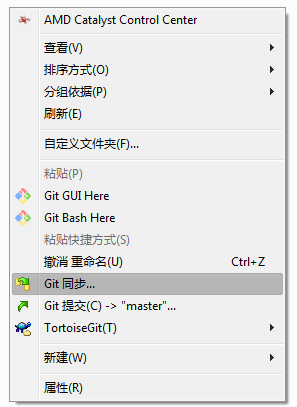
我们可以也选择git同步… 来 提交,推送 等。
We can choose git synchronization... To submit, push, etc.

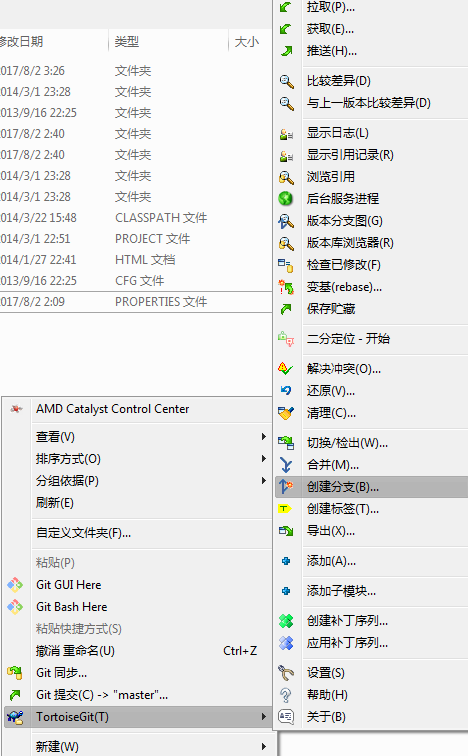
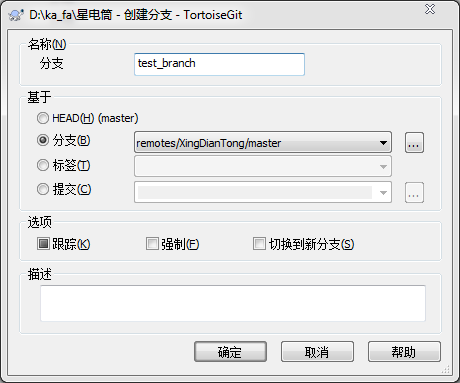
创建分支 。 类似这样
Create a branch.Like this

切换分支。 类似这样。
Switch branches.Something like that.
现在提交 变成了提交到我们新创建的那个分支。 类似这样。
Now the submission becomes the branch submitted to our newly created branch.Something like that.
提交到分支。
Commit to the branch.

提交成功。我们可以点击推送,更新我们的网站上项目的对应分支。
Submission of success.We can click on the push to update the corresponding branch of the project on our website.
引用框 下的 远端 填写 我们要在远端 用的分支 名字。
The far end of the reference box fills out the branch name we want to use at the remote end.
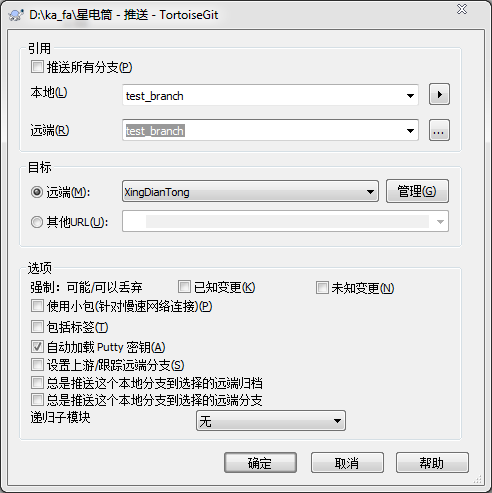
像这样。
Like this.
成功了。我们看一下网站有没有效果。
A success.Let's see if the site works.
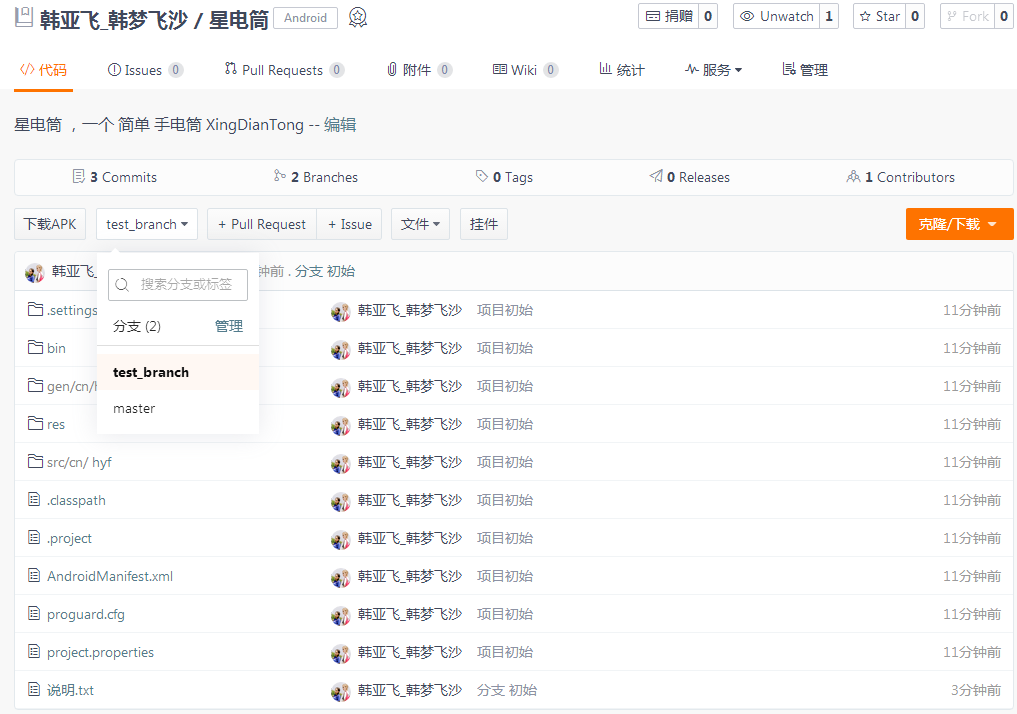
网站 有这样的效果。成功。
The website has this effect.Success.
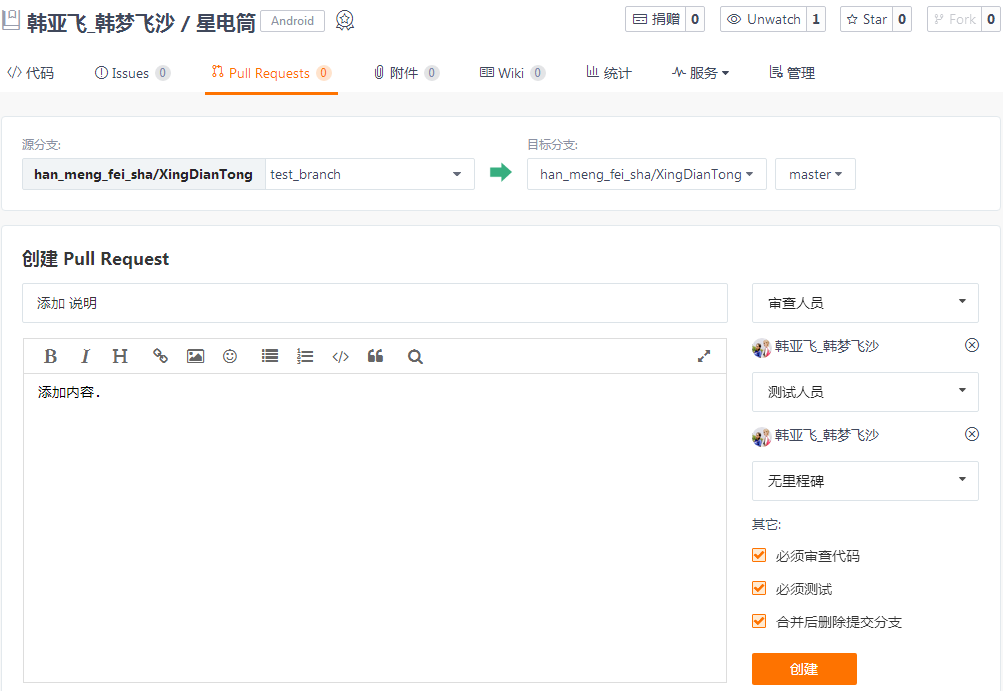
拉请求 我们用网站上的 就行了。不用软件上的 拉请求。
We use the pull request on the website.No software pull requests.
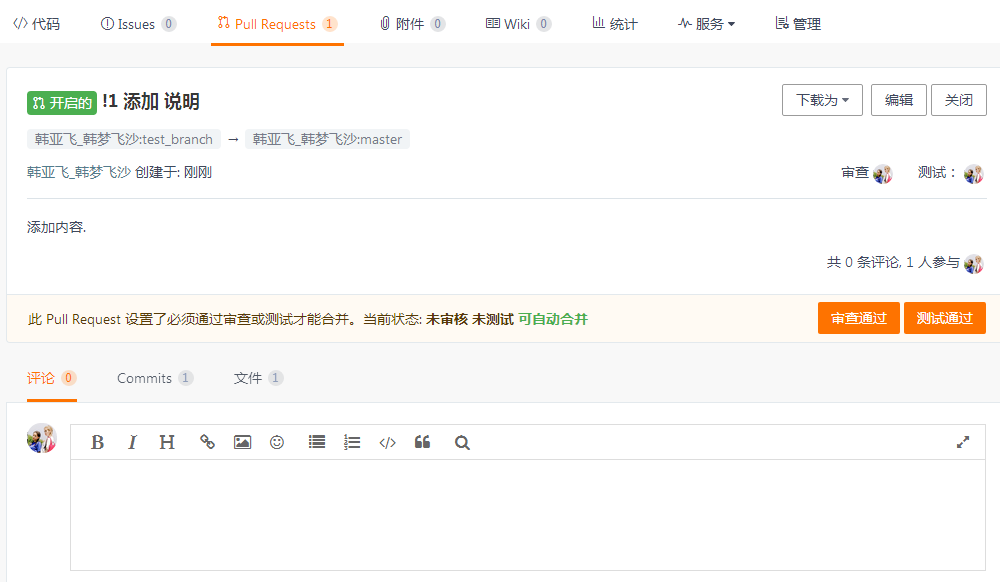
像这样已经创建好了一个 拉请求。
A pull request has been created like this.


拉请求,就是创建一个 请求,用于将某个分支合并到另一个分支上。 请求通过之后,就合并了。 像这样。
The pull request is to create a request to merge one branch to another.After the request is passed, the merge is done.Like this.
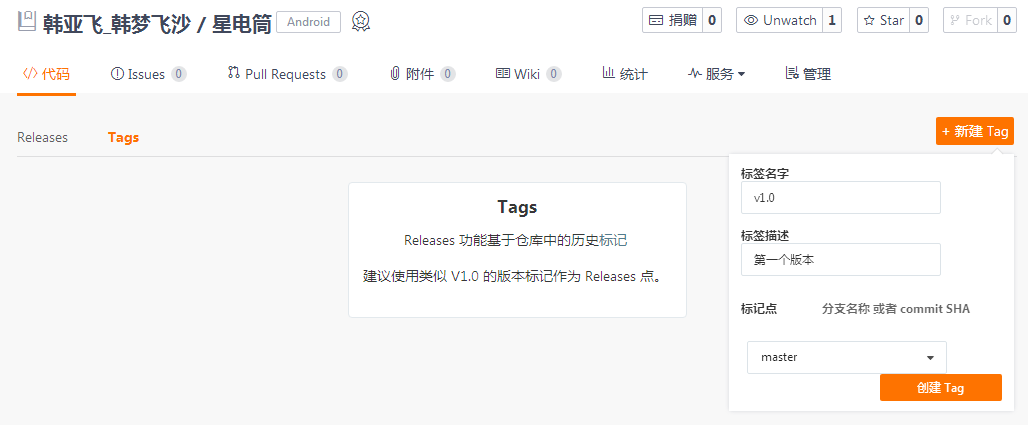
Tags 我们也用网站上的就行了。不用软件上的标签。
Tags we use the website.Don't use software labels.
标签就是版本号。
我们创建一个标签,名字是v1.0.
The label is the version number.
We create a label, which is v1.0.

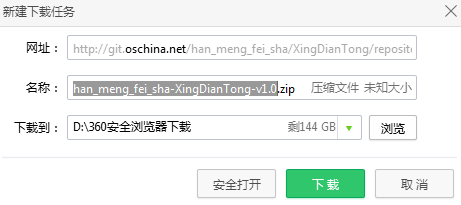
创建完成之后我们下载。发现它的结尾默认是这样的。我们需要这个效果。
After the creation is complete, we download it.The default is this.We need this effect.
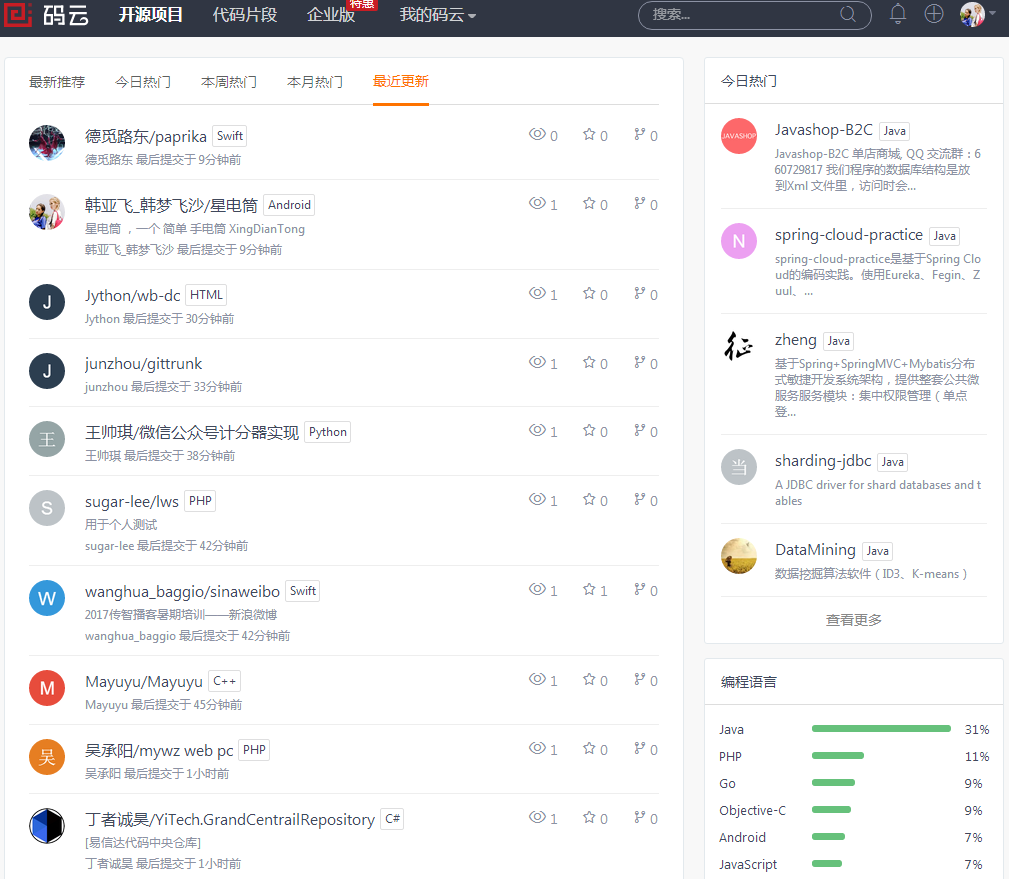
在网站的 开源项目 下,我们可以选择 最新更新, 看到我们的项目。
Under the open source project of the website, we can choose the latest update and see our project.

通过 码云 我们可以查看动态。
We can view the dynamic through the code cloud.