总览
属于RPM (Fedora/openSUSE)系,这一家族有Fedora/RedHat/CentOS/OpenSUSE
Opensuse 选择中文时,自带中文输入法(搜狗也有)
安装
当然我是直接通过 Ventoy 启动 opensuse Tumbleweed 的网络安装版本ISO文件
然后直接分区(吐槽一下 OpenSuse 的专家分区,分到心慌)
/boot (挂载到ESP分区上,不格式化)
/      80G
swap   内存x2
/home  135G

修改镜像源
官方文档-镜像
清华镜像源(说明很全): https://mirrors.tuna.tsinghua.edu.cn/help/opensuse/
CQU大学镜像源:
- LEAP版本: https://mirrors.cqu.edu.cn/wiki/mirror-wiki/opensuse/leap/
- Tumbleweed: https://mirrors.cqu.edu.cn/wiki/mirror-wiki/opensuse/tumbleweed/
我是使用 Tumbleweed 的,所以用如图的方法
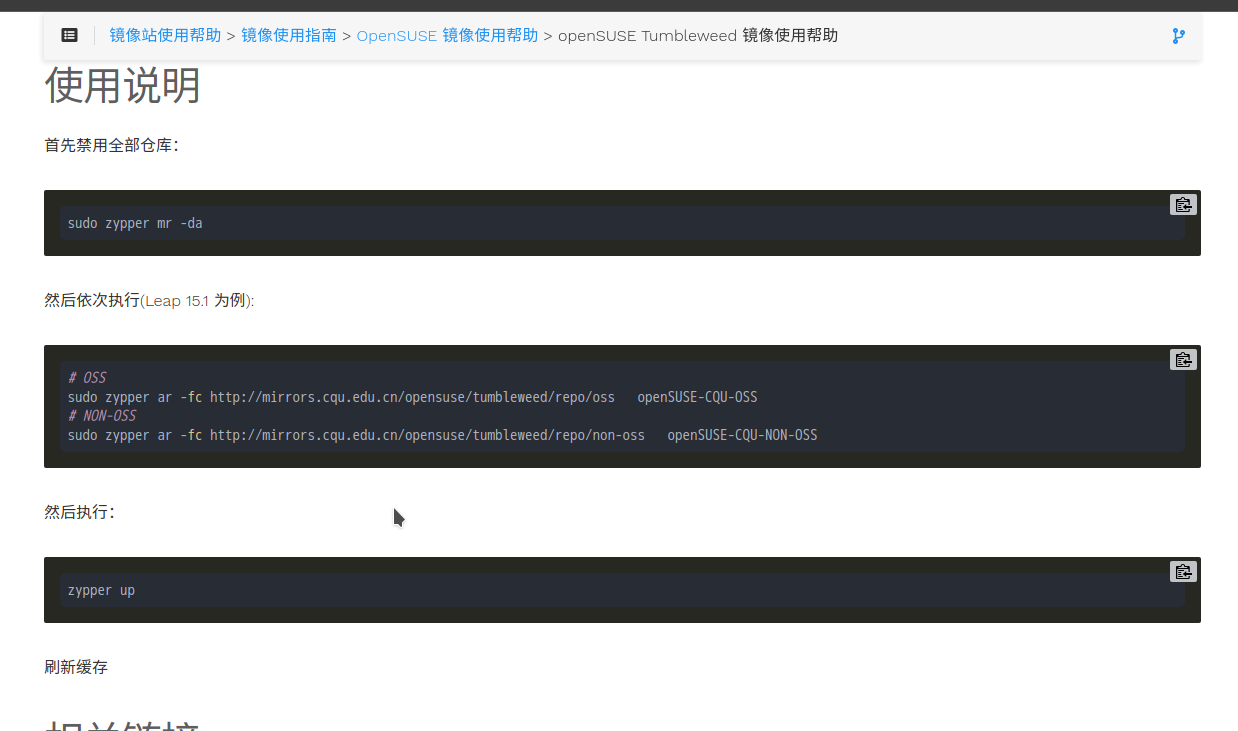
主要是禁用并修改仓库地址,然后启用
可选修改的地址一般有
	OSS
	NON-OSS
	update:OSS						x(LEAP特有)
	update:NON-OSS				x(LEAP特有)
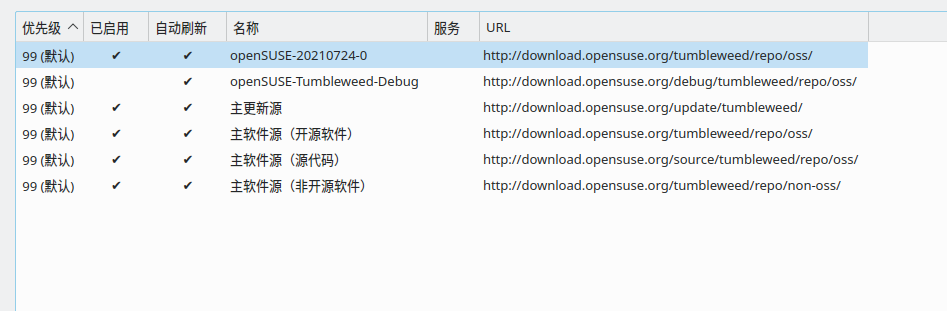
中文图
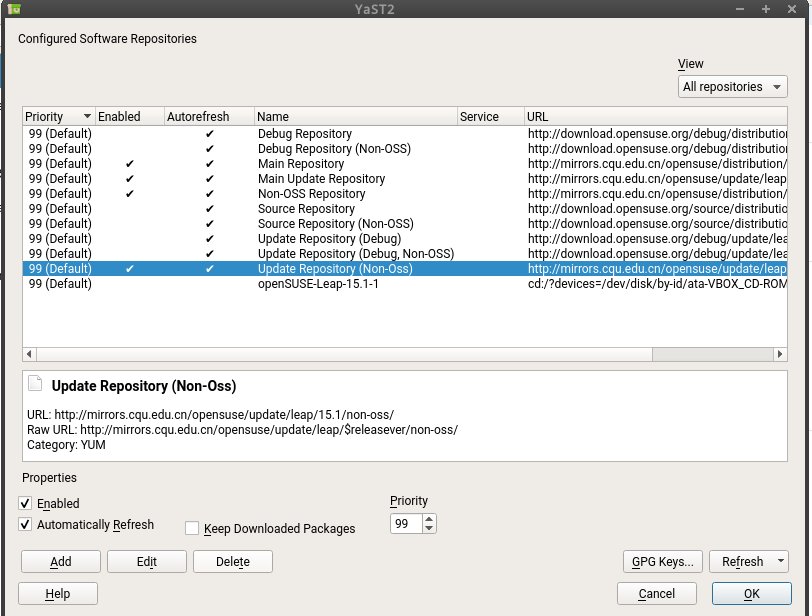
英文图
当然你可以不禁用,改为设置优先级。
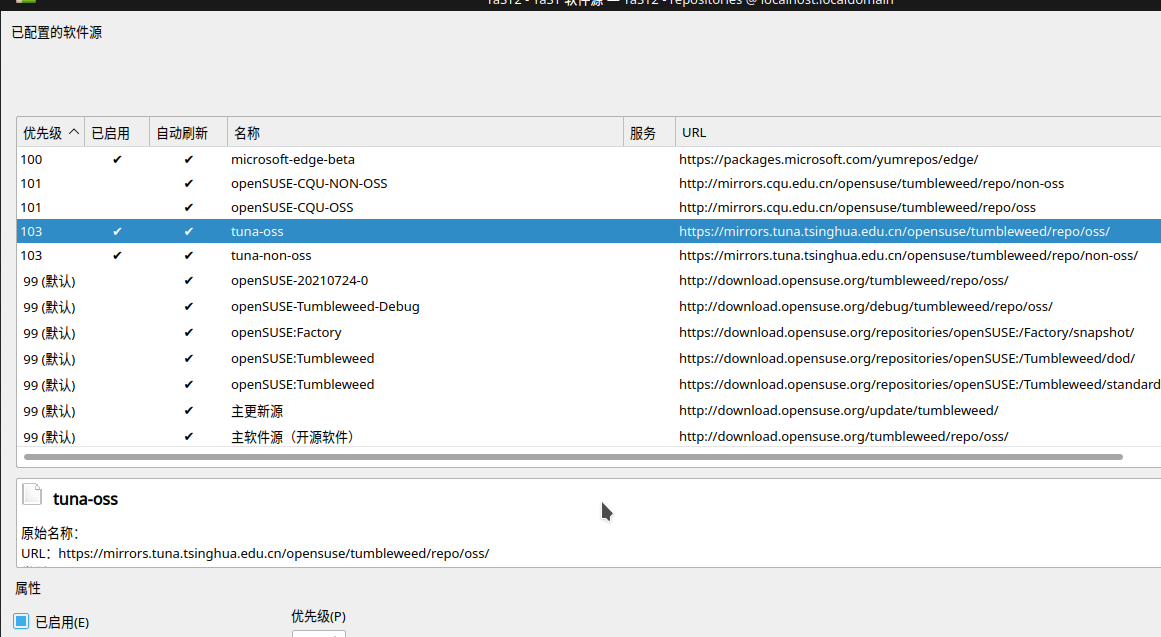
另外,修改镜像源教程里的命令sudo zypper mr -da会禁用所有镜像源,所以第三方的源(如微软EDGE浏览器的软件源也会被禁用,所以建议修改之后去YAST软件源管理界面看看,如果你想要的第三方软件源被禁用了请自行启用)
包管理 zypper
https://cn.opensuse.org/Zypper/Usage
## 通过软件名字搜索其包名
sudo zypper search 软件名
## 安装某包
sudo zypper install 软件包
例子如下
sudo zypper search libappindicator3
## 搜索后会得到包名为 libappindicator3-1,然后即可安装
sudo zypper in libappindicator3-1
username@localhost:~/下载> ./Clash_For_Flutter-0.0.7-x86_64.AppImage
./build/clash_for_flutter: error while loading shared libraries: libappindicator3.so.1: cannot open shared object file: No such file or directory
username@localhost:~/下载> sudo zypper in libappindicator3
[sudo] root 的密码:
正在加载软件源数据...
正在读取已安装的软件包...
在软件包名中未找到 'libappindicator3'。正在尝试在功能中查找。
未找到 'libappindicator3' 的提供者。
正在解决软件包依赖关系...
无事可做。
username@localhost:~/下载> sudo zypper search libappindicator3
正在加载软件源数据...
正在读取已安装的软件包...

S | Name                   | Summary                                  | Type
--+------------------------+------------------------------------------+-------
  | libappindicator3-1     | Application indicators library for GTK+3 | 软件包
  | libappindicator3-devel | Development files for libappindicator    | 软件包
username@localhost:~/下载> sudo zypper in libappindicator3-1
正在加载软件源数据...
正在读取已安装的软件包...
正在解决软件包依赖关系...

将安装以下 4 个新软件包:
  libappindicator3-1 libdbusmenu-glib4 libdbusmenu-gtk3-4 libindicator3-7

略
MicroSoft Edge Browser
https://www.microsoftedgeinsider.com/zh-cn/
选择RPM (Fedora/openSUSE)
安装命令
sudo rpm -ivh microsoft-edge-*.rpm
发现报错,依赖缺失
警告:microsoft-edge-beta-92.0.902.55-1.x86_64.rpm: 头V4 RSA/SHA256 Signature, 密钥 ID be1229cf: NOKEY
错误:依赖检测失败:
        libatomic.so.1()(64bit) 被 microsoft-edge-beta-92.0.902.55-1.x86_64 需要
        libatomic.so.1(LIBATOMIC_1.0)(64bit) 被 microsoft-edge-beta-92.0.902.55-1.x86_64 需要
sudo zypper search libatomic
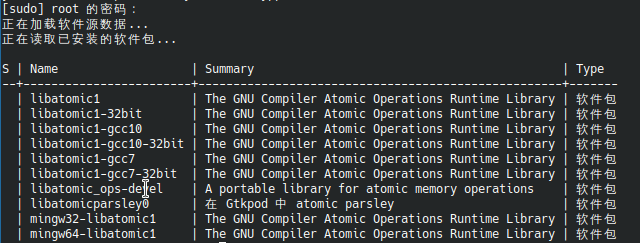
看得出这是个GNU C的原子函数运行库,而且缺失的是64位的,而且EDGE是新出的,不太可能使用GCC7那么老的版本,所以根据经验我们选择 libatomic1
## in是install的简拼
sudo zypper in libatomic1
## 然后安装即可
sudo rpm -ivh microsoft-edge-*.rpm
网易云音乐
- 官方 Opensuse-ZH组织打包的 官方网易云音乐
https://software.opensuse.org//download.html?project=home%3Aopensuse_zh&package=netease-cloud-music
# 添加软件源并手动安装
## 对于 openSUSE Tumbleweed,请以根用户 root 运行下面命令:
zypper addrepo https://download.opensuse.org/repositories/home:opensuse_zh/openSUSE_Tumbleweed/home:opensuse_zh.repo
zypper refresh
zypper install netease-cloud-music

## 对于 openSUSE Leap 15.2,请以根用户 root 运行下面命令:
zypper addrepo https://download.opensuse.org/repositories/home:opensuse_zh/openSUSE_Leap_15.2/home:opensuse_zh.repo
zypper refresh
zypper install netease-cloud-music

## 对于 openSUSE Factory ARM,请以根用户 root 运行下面命令:
zypper addrepo https://download.opensuse.org/repositories/home:opensuse_zh/openSUSE_Factory_ARM/home:opensuse_zh.repo
zypper refresh
zypper install netease-cloud-music

- 开源的RUST语言GTK版,简陋简陋不推荐
https://software.opensuse.org/package/netease-cloud-music-gtk?search_term=netease-cloud-music-gtk
sudo zypper in netease-cloud-music-gtk

v
方案一 Clash
界面更好,但是现在还有点问题,流量经常转发不到Clash
https://github.com/Fndroid/clash_for_windows_pkg/releases
ln -sf 无空格完整路径$(readlink -f 文件) /usr/local/bin
cfw &
方案二 Qv2r
see: https://qv2ray.net/lang/zh/getting-started/step1.html#linux-opensuse-fedora-centos
zypper addrepo https://download.opensuse.org/repositories/home:zzndb:Qv2ray/openSUSE_Tumbleweed/home:zzndb:Qv2ray.repo
zypper refresh
sudo zypper search libgrpc
sudo zypper in libgrpc18
sudo zypper in libgrpc++1
sudo zypper install Qv2ray-preview
## select 2    解决方案 2: 通过忽略一些依赖关系来断开
qv2ray
# you would see the note: `qv2ray: error while loading shared libraries: libgrpc++.so.1.38: cannot open shared object file: No such file or directory`

# but we had installed libgrpc++, so it maybe the version problem
find /usr -name *libgrpc++*

cp /usr/lib64/libgrpc++.so.1.39 /usr/lib64/libgrpc++.so.1.38
qv2ray
Python3
python3.8就是
username@localhost:~/soft/Clash_For_Linux-main> py<TAB>
pydoc3     pydoc3.8   python3    python3.8
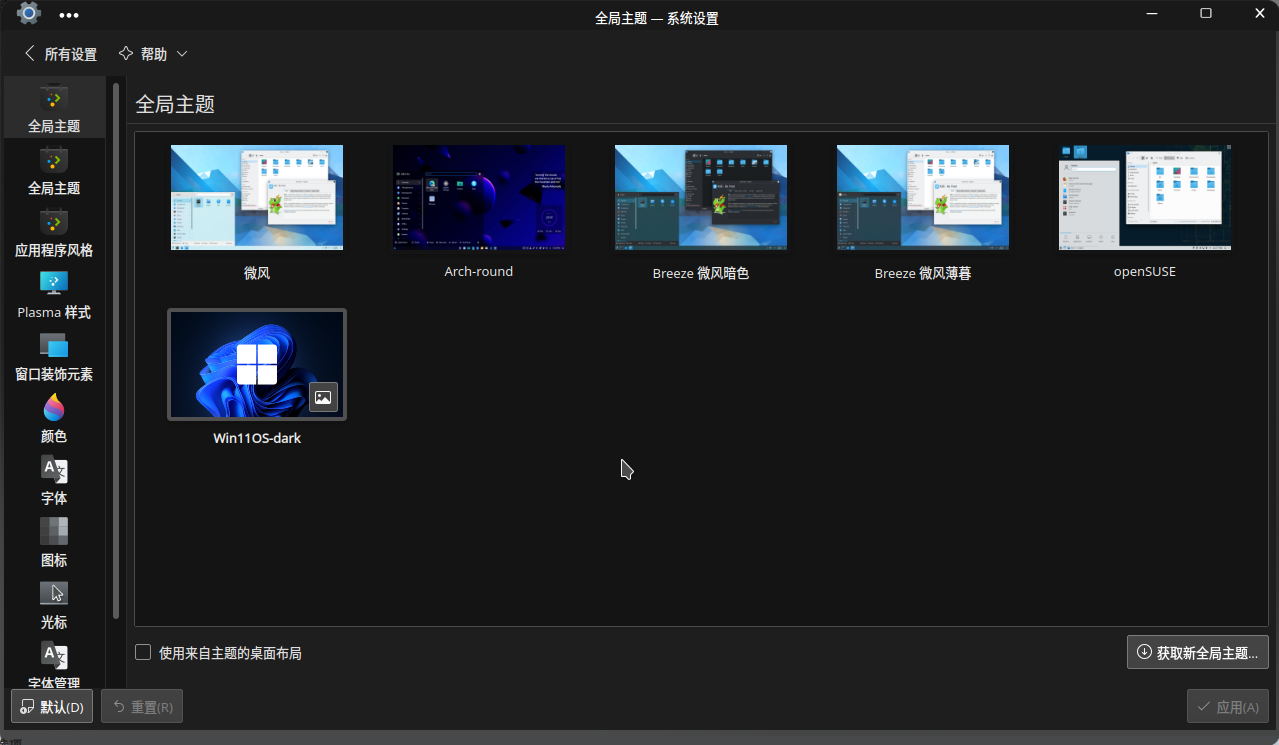
美化
直接搜索安装 Win11OS
KDE CONNECT
算是一个手机助手了
https://kdeconnect.kde.org/download.html
通过KDE桌面商店Discover安装:appstream://org.kde.kdeconnect.kcm.desktop
安卓手机APK下载链接:https://f-droid.org/packages/org.kde.kdeconnect_tp/
如果前面官方的方案下不动,请如下操作
sudo zypper in kdeconnect-kde
安卓APK则通过我博客下载org.kde.kdeconnect_tp_11700.apk
APK说明:
版本 1.17.0 (11700) 推荐 更新日期:2021-05-11
该版本需要 Android 4.0 及以上版本。
此安装包由 F-Droid 编译并签名,且保证与此源代码 tarball 保持一致。
双拼输入法配置(不会双拼请勿使用)
不需要安装任何输入法,都自带了
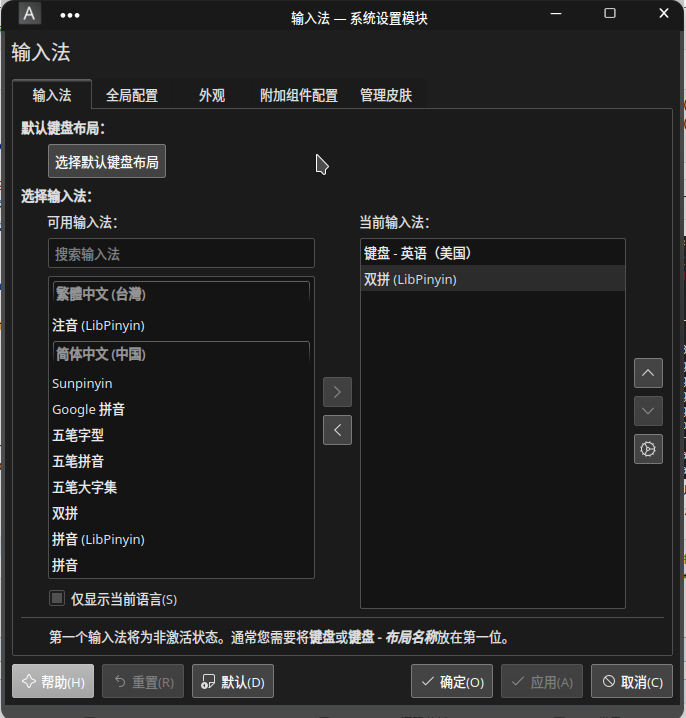
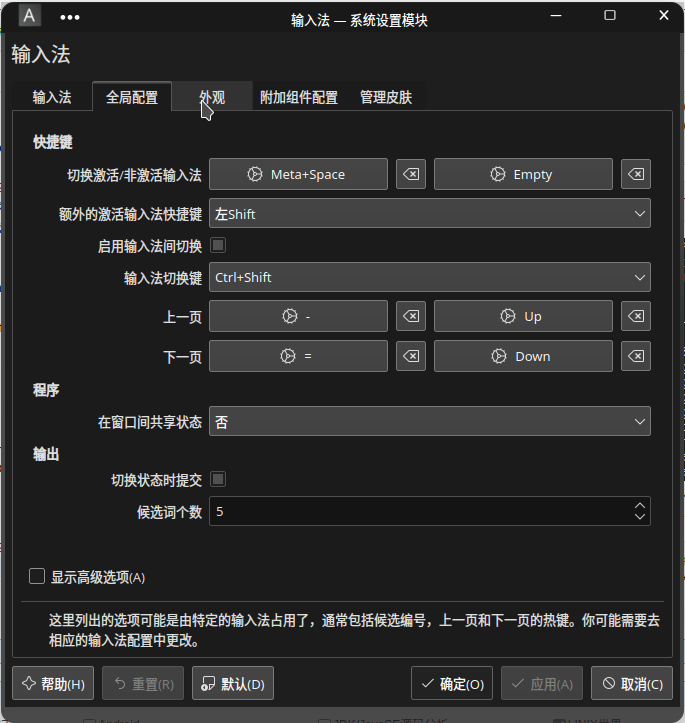
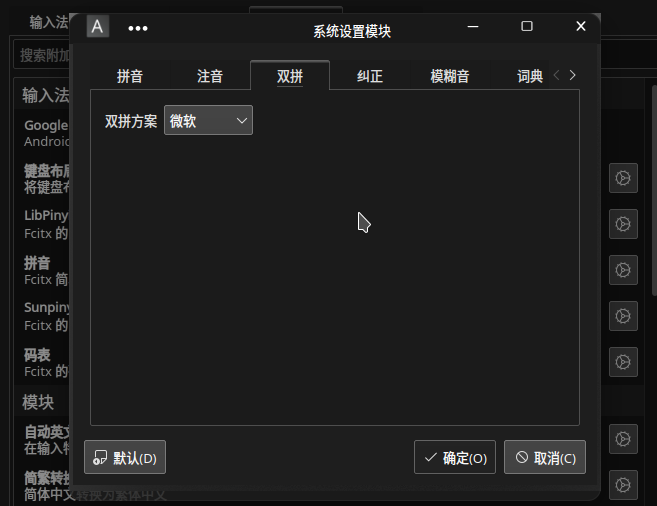
附加组件配置-LibPinyin后面的设置按钮-双拼-方案为微软双拼
当然如果你用的不是LibPinyin,那么请选另外一个并配置方案
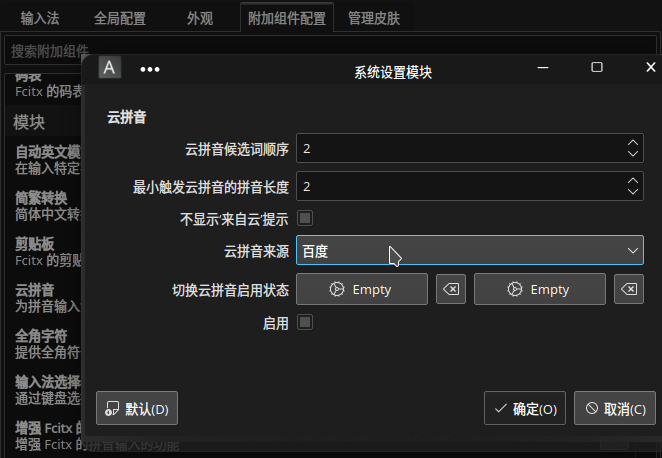
云拼音来源选择百度
KDE设置修改家目录(下载、文档之类)为英文
因为中文不方便补全,而且有些程序不支持全角路径,因此改为英文是最合适的
## 安装目录改名工具
sudo zypper in xdg-user-dirs-gtk
export LANG=en_US
xdg-user-dirs-gtk-update
然后会有个窗口提示语言更改,更新名称即可

export LANG=zh_CN.UTF-8
然后重启电脑如果提示语言更改,保留旧的名称即可
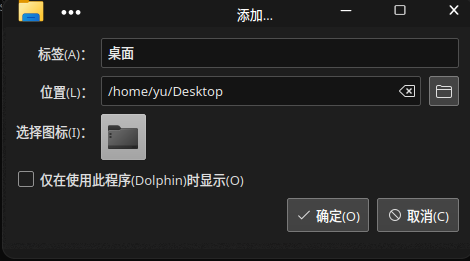
然后右击这些
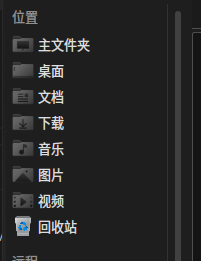
点编辑,修改位置
Docker+Wine Wechat
安装 Docker CE
见: https://zh.opensuse.org/Docker#.E4.BD.BF.E7.94.A8.E5.91.BD.E4.BB.A4.E8.A1.8C.E5.AE.89.E8.A3.85
使用命令行安装
## 安装 docker 和 docker-compose 包:
zypper install docker python3-docker-compose

## 在启动时启动 docker 守护进程:
sudo systemctl enable docker

## 加入允许使用 docker 守护进程的 docker 用户组:
sudo usermod -G docker -a $USER

## 重新启动 docker 守护进程:
sudo systemctl restart docker

## 验证 docker 是否在运行:
docker version

## 这将拉下并运行 dockerhub 的 "Hello World " docker 容器:
docker run --rm hello-world

## 清理并删除我们拉下的 docker 镜像:
docker images
docker rmi -f IMAGE_ID
###其中 "IMAGE_ID" 是 "Hello World" 容器的ID值。
使用 Docker
如果你遵循了这些说明,你的 openSUSE 就可以使用 docker 容器了。潜入伟大的 docker 文档,并享受很多乐趣......
修改 Docker Hub 镜像源
https://mirrors.ustc.edu.cn/help/dockerhub.html?highlight=docker#linux
sudo vi /etc/docker/daemon.json
加上
,
"registry-mirrors": ["https://docker.mirrors.ustc.edu.cn/"]
安装 微信
https://github.com/huan/docker-wechat
如果无反应,建议为curl 加上v参数,
然后如果是网络问题,请先把那个脚本下载到本地再手动执行
安装 GCC + VSCode
1. GCC
sudo zypper install gcc
当然如果你想安装其他版本的,可以看官方商店 https://software.opensuse.org/search?utf8=✓&baseproject=ALL&q=gcc
另外还有 Discover 这个自带的商店软件
2. VSCode
https://code.visualstudio.com/Download
选择RPM (RedHat/Fedora/SUSE) 下载
安装命令
sudo rpm -ivh <VSCode文件名>.rpm
配置环境请见 [全网最全 C语言] VSCode 安装与配置(MSYS2的mingw-w64/GCC 编译环境)
gcc -v -x c -E /dev/null
把输出的 #include <...> 搜索从这里开始:删掉行前面的空格复制下来,如我的是
/usr/lib64/gcc/x86_64-suse-linux/11/include
/usr/local/include
/usr/lib64/gcc/x86_64-suse-linux/11/include-fixed
/usr/lib64/gcc/x86_64-suse-linux/11/../../../../x86_64-suse-linux/include
/usr/include
打开VSCode插件商店,搜索并安装 c/c++

如果 VSCode插件商店提示 we cannot connect to the extensions marketplace,请看下一部分的问题解决
然后打开一个目录,新建文件 hello.c 并写代码
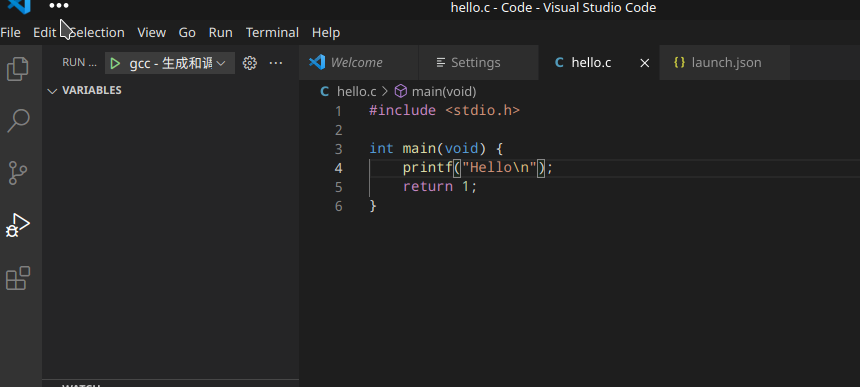
按下F5调试,第一次会让你选择工程的配置,我们选 GDB - gcc
然后按下 左CTRL+左SHIFT+P,搜索并选择
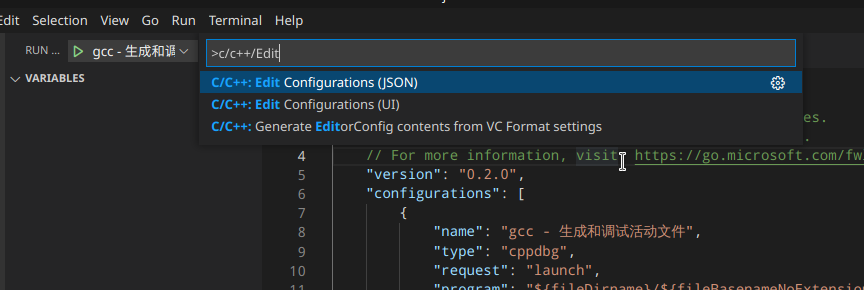
再把前面我们拿到的include复制进去即可
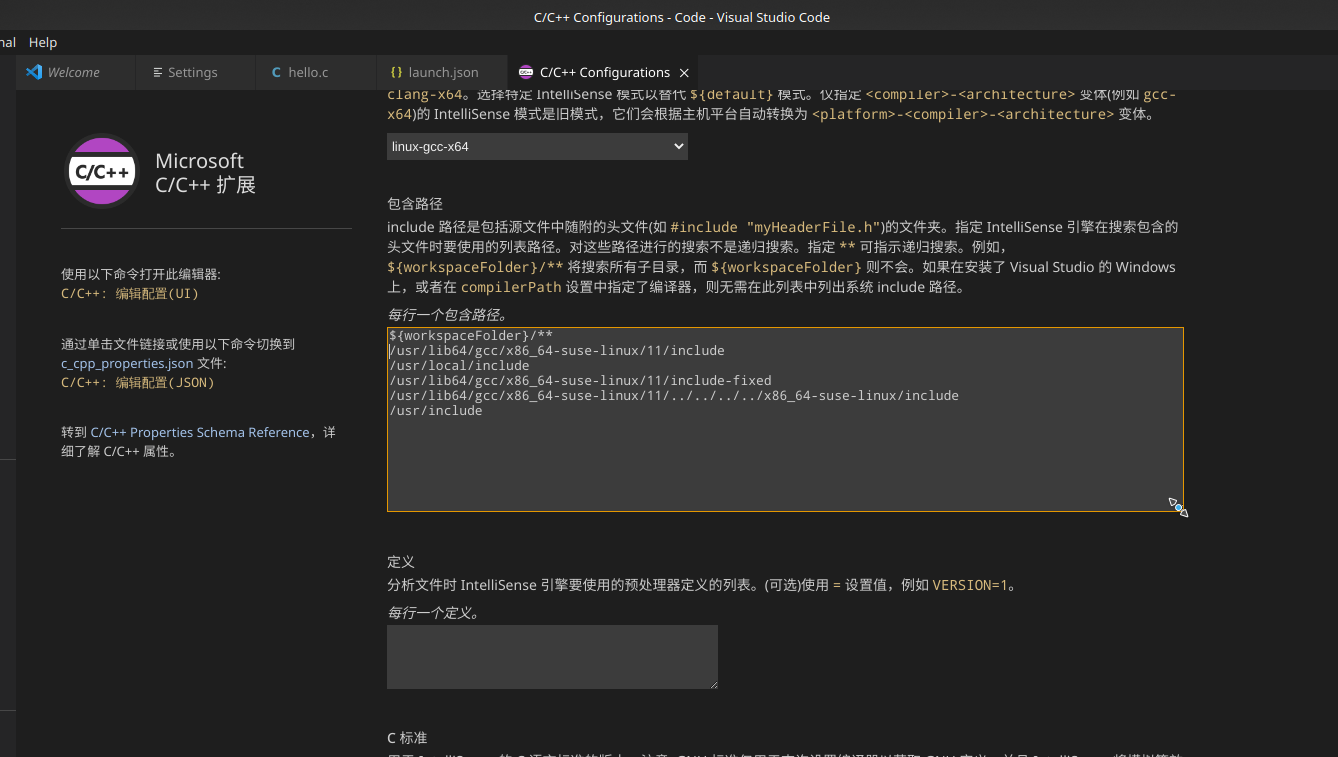
好了,环境搭建完成,VSCode请自己熟悉使用,编译参数和配置也都在这个 C/C++ Edit Configuration(UI) 界面里
另外,如果需要MakeFile工程,可以安装插件 Makefile Tools
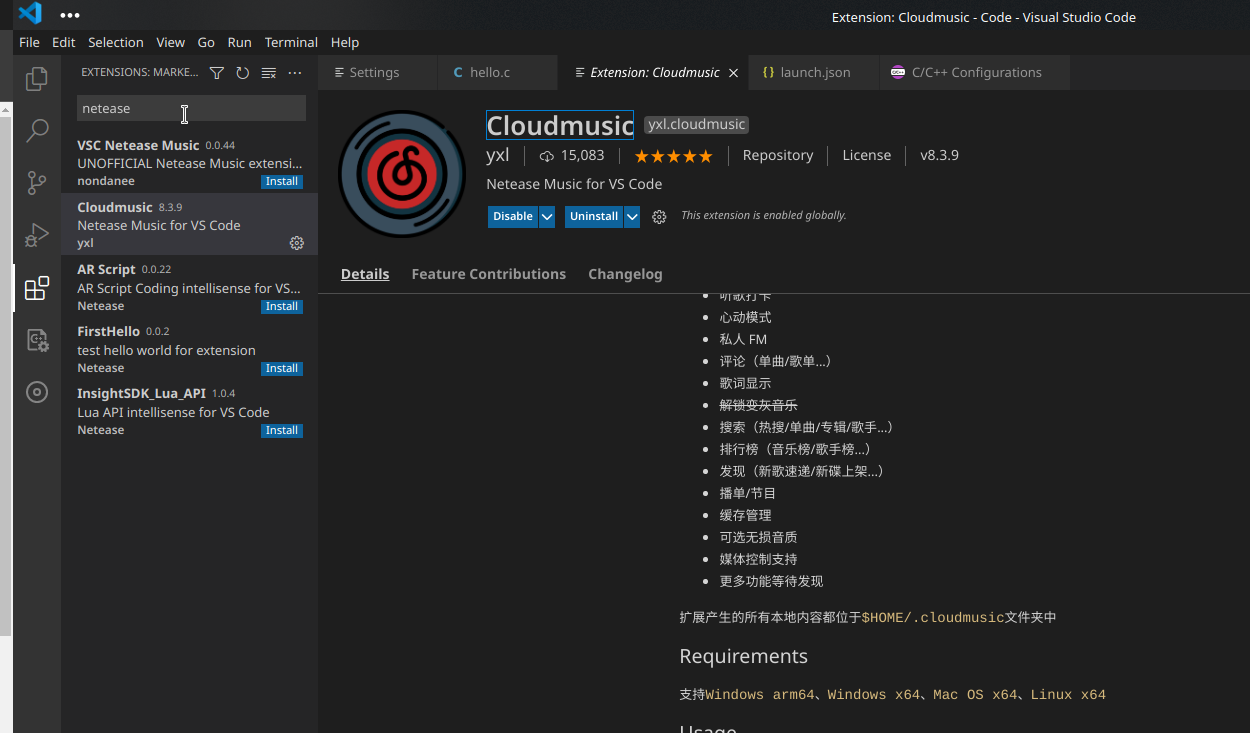
如果想听歌,可以安装 CloudMusic 插件
一些快捷键
CTRL+鼠标单击 可查看源码定义(包括库函数)
ALT+方向键 可前进后退
鼠标侧键(有的鼠标没有,一般游戏鼠标都有) 可前进后退
设置里可以搜Save,可以设置 文件自动保存
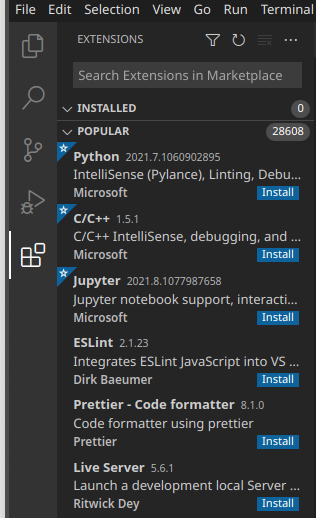
问题解决:VSCode插件商店提示 we cannot connect to the extensions marketplace
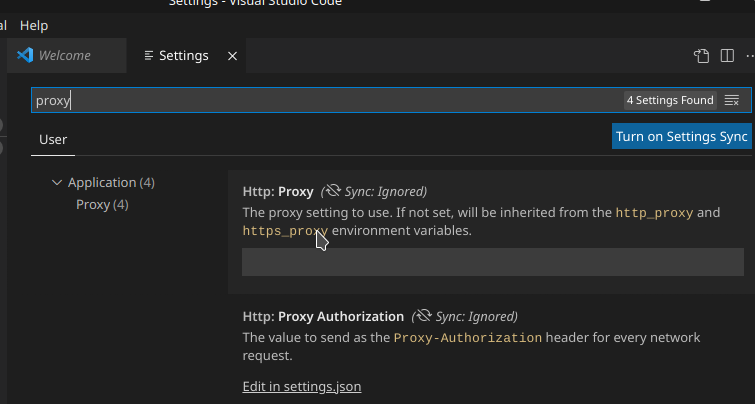
如果你曾经设置过代理,那么这个文章适合你,否则不适用
但是用浏览器打开VSCode插件商店网页版又是正常的
推断,VSCode使用了代理的环境变量,这点可以从设置里验证
所以我们用终端取消代理环境变量,然后测试一下
## 查看环境变量相关的代理值
env | grep -i proxy

## 取消代理
unset http_proxy
unset https_proxy
unset no_proxy
unset HTTP_PROXY
unset HTTPS_PROXY
unset NO_PROXY

## 以当前终端窗口生效的无代理启动VSCode
code
然后发现插件商店正常了
证明了我的推断完全正确
PS. 由于VSCode设置配置了代理off也依然使用代理变量,因此我把这个bug反馈给官方了
NOTE: 请不要设置代理变量
我之前在 /etc/profile 里设置了这些变量,Linux应用会默认使用 http_proxy 和 https_proxy等,然后这是Linux世界的一个大坑,因为应用默认使用这些变量,却没有给你取消的操作。这个代理设计思路脑子多少有点问题
export proxy="http://127.0.0.1:7890"
export HTTP_PROXY=$proxy
export HTTPS_PROXY=$HTTP_PROXY
export SOCKET5_PROXY="socks5://127.0.0.1:7890"
export NO_PROXY="localhost, 127.0.0.1, ::1, 1.1.1.1"

export http_proxy=$HTTP_PROXY
export https_proxy=$HTTPS_PROXY
export socket5_proxy=$SOCKET5_PROXY
export no_proxy=$NO_PROXY
## 临时设置
export mixedPort=7890; export https_proxy=http://127.0.0.1:$mixedPort;export http_proxy=http://127.0.0.1:$mixedPort;export all_proxy=socks5://127.0.0.1:$mixedPort

echo $all_proxy
如果有类似这些,请删除,除非你能保证代理一直24小时后台运行可用.........................
Nvidia 独显驱动(闭源
通过软件源安装:
see: https://en.opensuse.org/SDB:NVIDIA_Bumblebee#Install_bumblebee
`
或者官网下载安装:
https://www.nvidia.cn/Download/index.aspx?lang=cn
选好型号下载获得一个 NVIDIA-Linux-x86_*.run
不过得禁用 开源驱动,我不想搞。。。
cat /var/log/nvidia-installer.log
nvidia-installer log file '/var/log/nvidia-installer.log'
creation time: Tue Aug 24 22:46:06 2021
installer version: 470.63.01

PATH: /usr/sbin:/usr/bin:/sbin:/bin:/usr/local/bin:/usr/local/sbin

nvidia-installer command line:
    ./nvidia-installer

Using: nvidia-installer ncurses v6 user interface
-> Detected 8 CPUs online; setting concurrency level to 8.
-> Installing NVIDIA driver version 470.63.01.
-> Running distribution scripts
   executing: '/usr/lib/nvidia/pre-install'...
   grep: /etc/sysconfig/kernel: No such file or directory
-> done.
-> The distribution-provided pre-install script completed successfully. If this is the first time you have run the installer, this script may have helped disable Nouveau, but a reboot may be required first.  Would you like to continue, or would you prefer to abort installation to reboot the system? (Answer: Continue installation)
ERROR: The Nouveau kernel driver is currently in use by your system.  This driver is incompatible with the NVIDIA driver, and must be disabled before proceeding.  Please consult the NVIDIA driver README and your Linux distribution's documentation for details on how to correctly disable the Nouveau kernel driver.
WARNING: One or more modprobe configuration files to disable Nouveau are already present at: /usr/lib/modprobe.d/nvidia-installer-disable-nouveau.conf, /etc/modprobe.d/nvidia-installer-disable-nouveau.conf.  Please be sure you have rebooted your system since these files were written.  If you have rebooted, then Nouveau may be enabled for other reasons, such as being included in the system initial ramdisk or in your X configuration file.  Please consult the NVIDIA driver README and your Linux distribution's documentation for details on how to correctly disable the Nouveau kernel driver.
ERROR: Installation has failed.  Please see the file '/var/log/nvidia-installer.log' for details.  You may find suggestions on fixing installation problems in the README available on the Linux driver download page at www.nvidia.com.
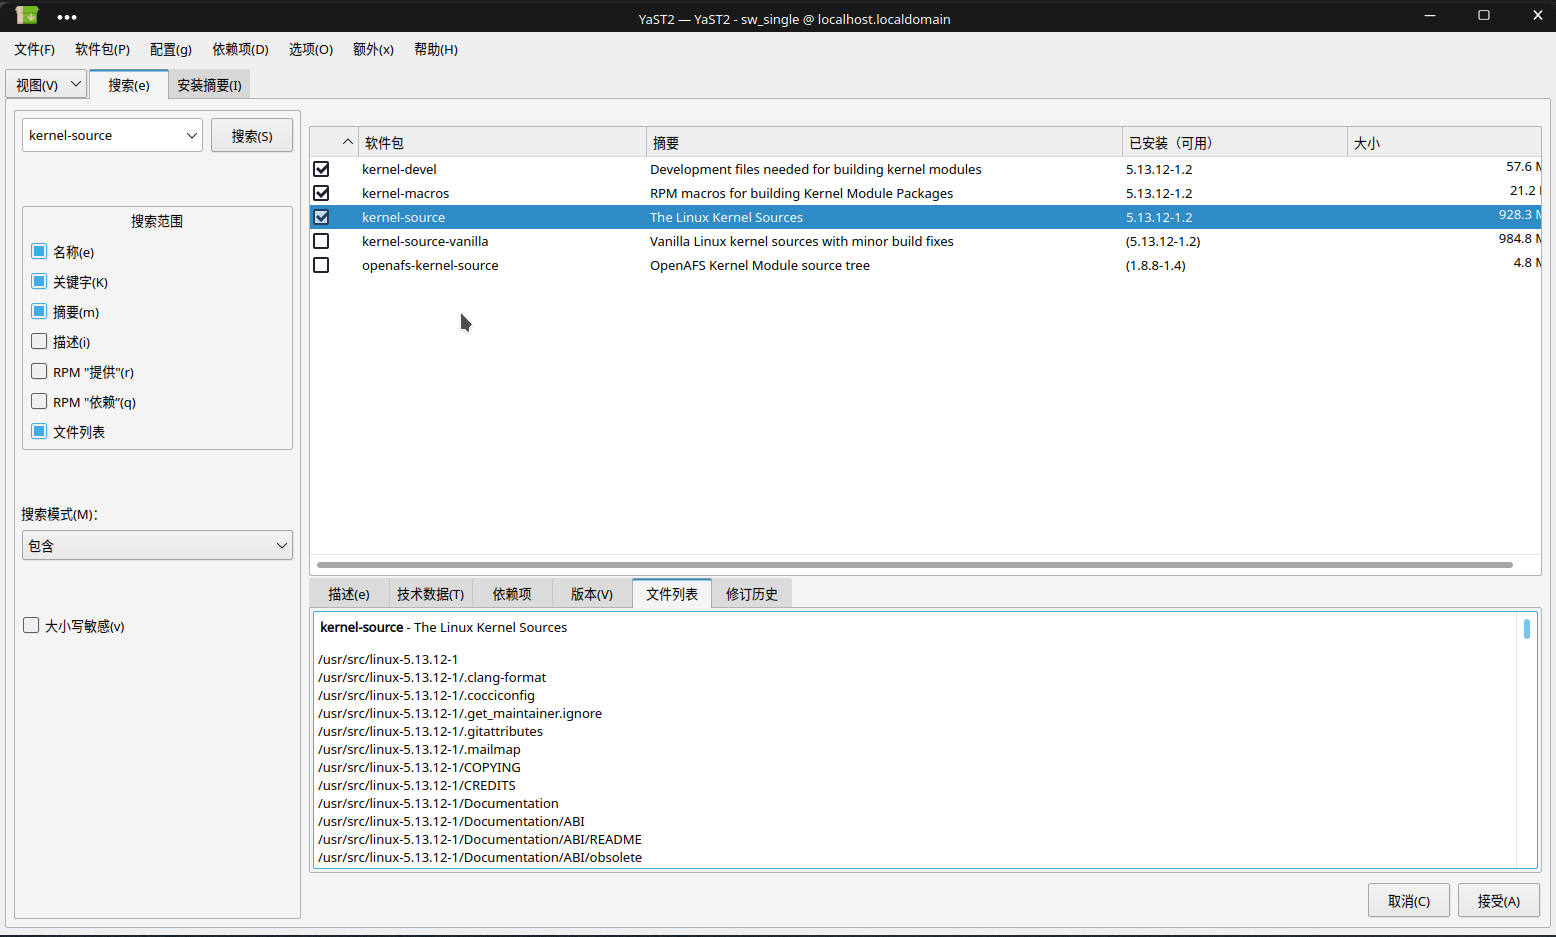
安装当前版本的 OpenSuse Linux Kernel 内核源码
由于我想要在 OpenSuse 上进行驱动编写,所以需要对应版本的内核源码
zypper se kernel
sudo zypper in kernel-source
然后通过 YaSt Software 商店查看 kernel-source 包里的文件列表即可得到安装的内核源码位于 /usr/src/linux-版本号