基于第二讲,这一讲我们主要讲解包含以下内容
- springBoot添加对freemarker的支持
- 使用@RestController处理ajax请求
- 使用@PathVariable注解获取url参数
- 使用@RequestParam注解获取请求参数
(一)springBoot添加对freemarker的支持
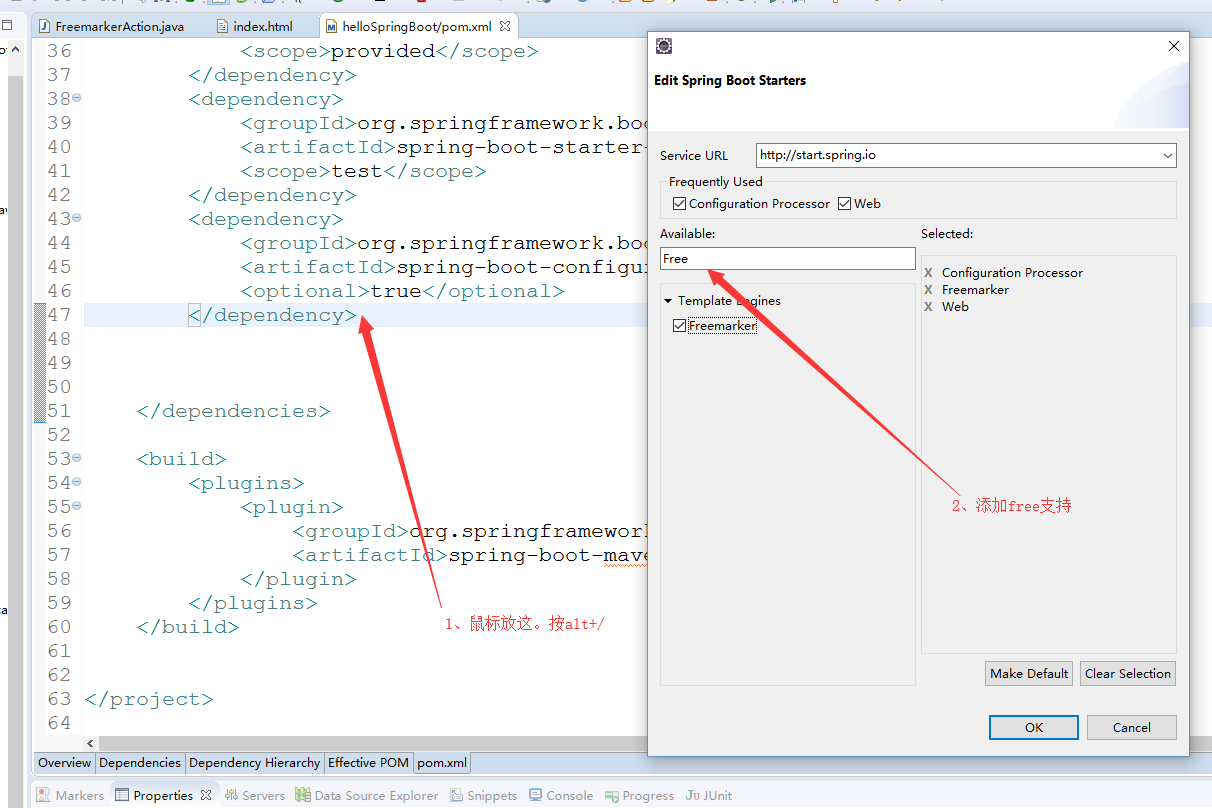
(1)首先要使用freemarker,我们需要添加对freemarker的支持,需要在pom.xml中添加依赖,操作如下
(2)编写FreemarkerAction,返回数据视图
package com.example.demo;

import org.springframework.stereotype.Controller;
import org.springframework.web.bind.annotation.RequestMapping;
import org.springframework.web.servlet.ModelAndView;

@Controller
@RequestMapping("/freemarker")
public class FreemarkerAction {

    @RequestMapping("/say")
    public ModelAndView say() {
        ModelAndView modelAndView = new ModelAndView();
        modelAndView.addObject("msg", "hello freemarker");
        modelAndView.setViewName("index");
        return modelAndView;
    }
}
(3)在templates目录下新建index.html,更改名为index.ftl,这个是Freemarker的格式要求,内容如下
<!DOCTYPE html>
<html>
<head>
<meta charset="UTF-8">
<title>Insert title here</title>
</head>
<body>
msg show :${msg}
</body>
</html>
(3)重启服务,访问http://localhost:8888/hello/freemarker/say,结果如下

(二)使用@RestController处理ajax请求
(1)在webapp目录下新增index.html,同时引用的是官网的jquery-2.1.1.min.js,内容如下
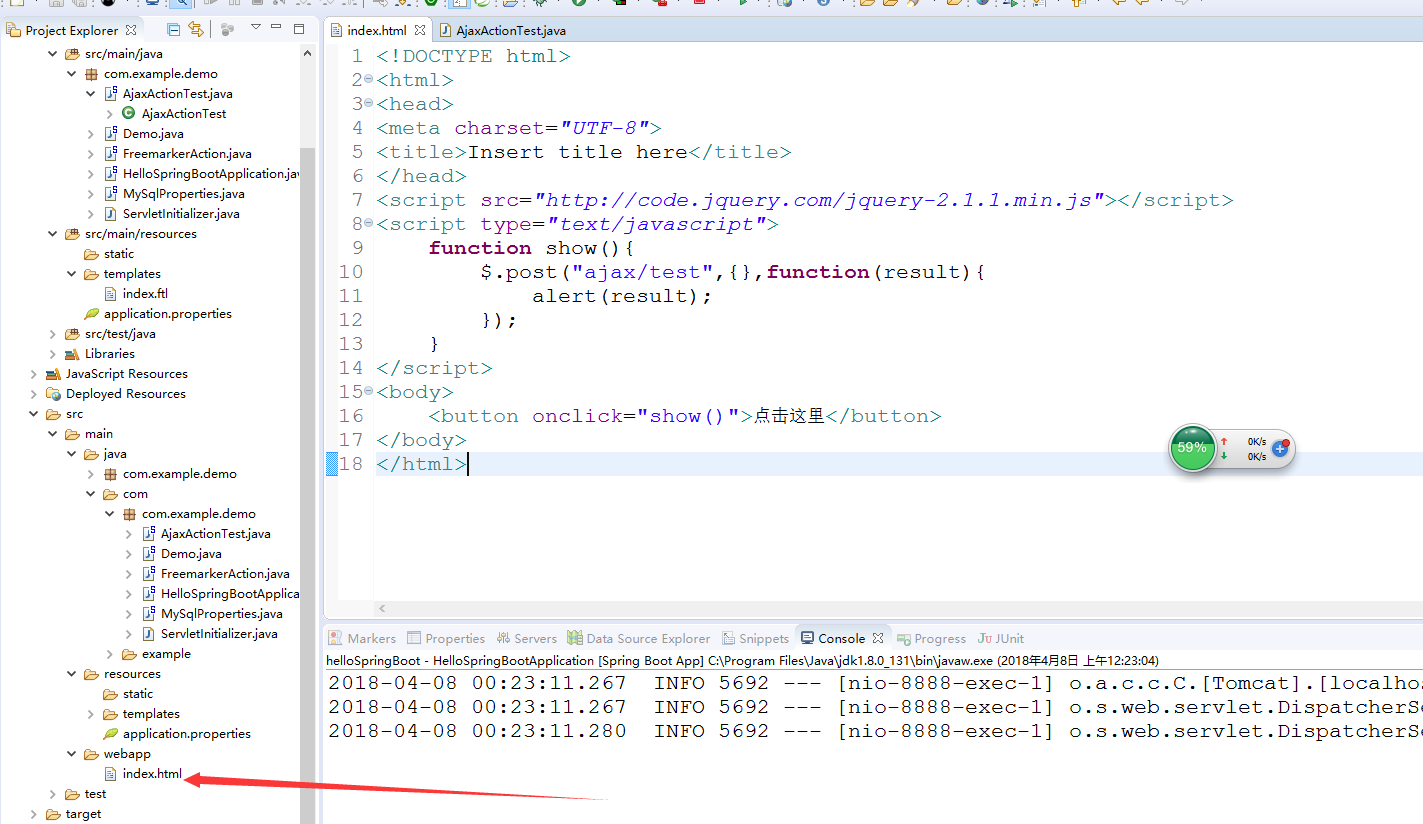
<!DOCTYPE html>
<html>
<head>
<meta charset="UTF-8">
<title>Insert title here</title>
</head>
<script src="http://code.jquery.com/jquery-2.1.1.min.js"></script>
<script type="text/javascript">
    function show(){
        $.post("ajax/test",{},function(result){
            alert(result);
        });
    }
</script>
<body>
    <button onclick="show()">点击这里</button>
</body>
</html>
(2)新增AjaxActionTest。内容如下:
package com.example.demo;

import org.springframework.web.bind.annotation.RequestMapping;
import org.springframework.web.bind.annotation.RestController;

@RestController
@RequestMapping("/ajax")
public class AjaxActionTest {

    @RequestMapping("/test")
    public String test() {

        return "{'name':'李四','age':'24'}";
    }
}
(3)重启服务。浏览器访问:http://localhost:8888/hello/

(三)使用@PathVariable注解获取url参数
(1)在类FreemarkerAction类中,新增方法say2,如下:
package com.example.demo;

import org.springframework.stereotype.Controller;
import org.springframework.web.bind.annotation.PathVariable;
import org.springframework.web.bind.annotation.RequestMapping;
import org.springframework.web.servlet.ModelAndView;

@Controller
@RequestMapping("/freemarker")
public class FreemarkerAction {

    @RequestMapping("/say")
    public ModelAndView say() {
        ModelAndView modelAndView = new ModelAndView();
        modelAndView.addObject("msg", "hello freemarker");
        modelAndView.setViewName("index");
        return modelAndView;
    }

    @RequestMapping("/{msg}")
    public ModelAndView say2(@PathVariable("msg") String msg) {
        ModelAndView modelAndView = new ModelAndView();
        modelAndView.addObject("msg", msg);
        modelAndView.setViewName("index");
        return modelAndView;
    }
}
(1)浏览器访问:http://localhost:8888/hello/freemarker/hellorestful,结果如下图:这种风格类似于restful的支持

(四)使用@RequestParam注解获取请求参数
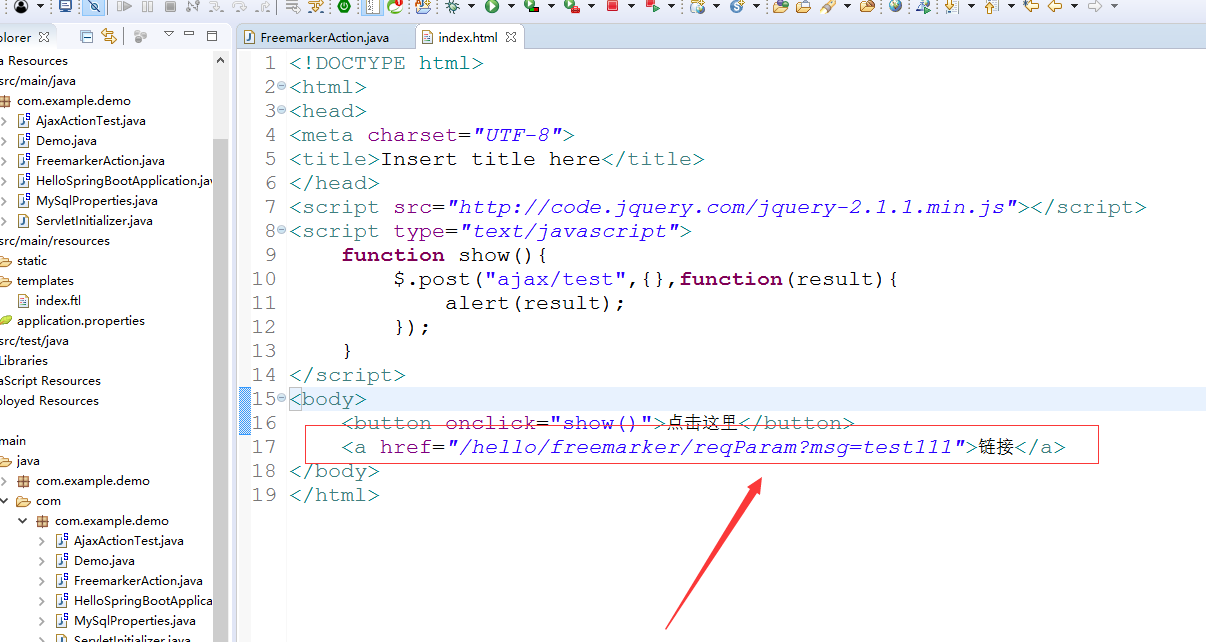
(1)在index.html中新增一个链接,如下图
(2)在FreemarkerAction新增方法 say3
package com.example.demo;

import org.springframework.stereotype.Controller;
import org.springframework.web.bind.annotation.PathVariable;
import org.springframework.web.bind.annotation.RequestMapping;
import org.springframework.web.bind.annotation.RequestParam;
import org.springframework.web.servlet.ModelAndView;

@Controller
@RequestMapping("/freemarker")
public class FreemarkerAction {

    @RequestMapping("/say")
    public ModelAndView say() {
        ModelAndView modelAndView = new ModelAndView();
        modelAndView.addObject("msg", "hello freemarker");
        modelAndView.setViewName("index");
        return modelAndView;
    }

    @RequestMapping("/{msg}")
    public ModelAndView say2(@PathVariable("msg") String msg) {
        ModelAndView modelAndView = new ModelAndView();
        modelAndView.addObject("msg", msg);
        modelAndView.setViewName("index");
        return modelAndView;
    }

    @RequestMapping("/reqParam")
    public ModelAndView say3(@RequestParam(value="msg",required=false) String msg) {
        ModelAndView modelAndView = new ModelAndView();
        modelAndView.addObject("msg", msg);
        modelAndView.setViewName("index");
        return modelAndView;
    }
}
(2)浏览器上访问http://localhost:8888/hello/ 点击链接 ,结果如下
