前言
首先我们说一下整体思路,如图
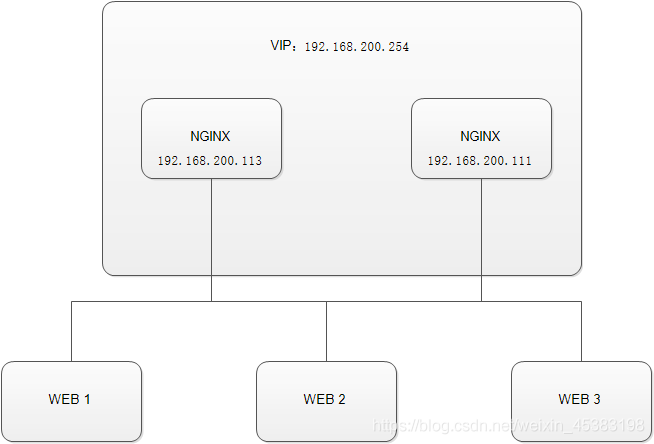
每个NGINX都有个自己的IP地址,但是让他俩来共同轮流使用一个VIP,以便主(MASTER)宕机后备(BACKUP)来接替VIP来继续提供服务。
这里我们用四台虚拟机,来分别代表NGINX1、NGINX2、WEB1、WEB2,WEB3忽略就好。
准备工作
关闭所有机器的防火墙等安全机制
[root@localhost ~]# systemctl stop firewalld
[root@localhost ~]# iptables -F
[root@localhost ~]# setenforce 0
NGINX测试机安装keepalived
[root@nginx ~]# yum -y install keepalived ipvsadm
WEB测试机安装apache,这里直接用yum安装
[root@node ~]# yum -y install httpd
NGINX1配置
首先修改主配置文件
[root@nginx1 ~]# vim /usr/local/nginx/conf/nginx.conf
**
    http{
    ***略***
    upstream apache_pool {
        server 192.168.200.11:80 weight=1;
        server 192.168.200.112:80 weight=1;
    }
    server {
        ***略***
        location / {
            root   html;
            index  index.html index.htm;
            proxy_pass http://apache_pool;
            proxy_set_header Host $http_host;
        }
    }
}
**
keepalived配置文件修改
global_defs {
   notification_email {
     acassen@firewall.loc
     failover@firewall.loc
     sysadmin@firewall.loc
   }
   notification_email_from Alexandre.Cassen@firewall.loc
   smtp_server 192.168.200.1
   smtp_connect_timeout 30
   router_id LVS_DEVEL
   vrrp_skip_check_adv_addr
   vrrp_strict
   vrrp_garp_interval 0
   vrrp_gna_interval 0
}

vrrp_script chk_http_port {
        script "/check/chk_nginx"   #通过此脚本检测
        interval 2                    #执行时间间隔,默认单位秒
        weight -20                    #脚本执行成功后降低的优先级,这里是-5
        fall 2                        #检测两次失败后才确定失败
        rise 1                        #检测一次成功即成功
}

vrrp_instance VI_1 {
    state MASTER
    interface eno16777728
    virtual_router_id 51
    priority 100
    advert_int 1

    authentication {
        auth_type PASS
        auth_pass 1111
    }
    virtual_ipaddress {
        192.168.200.254
    }

    track_script {                    #引用VRRP脚本,即在 vrrp_script 部分指定的名字。
        chk_http_port
    }
}
写一个检测NGINX状态的脚步,如果NGINX出现问题的话,停止keepalived服务,让出VIP。
[root@nginx ~]# mkdir /check
[root@nginx ~]# vim /check/chk_nginx
***
#bin/bash

ps -C nginx --no-heading >/dev/null
if [ $? -ne 0 ]
then
        /usr/local/nginx/sbin/nginx -c /usr/local/nginx/conf/nginx.conf
        sleep 2
        ps -C nginx --no-heading >/dev/null
            if [ $? -ne 0 ]
            then
                systemctl stop keepalived
                #killall -9 keepalived
            fi
fi
***
[root@nginx ~]# chmod +x /chech/chk_nginx
NGINX2的配置与1相同,这里就不做多解释了
开启网络服务
[root@node1 ~]# systemctl start httpd
测试
NGINX测试机开启keepalived服务
[root@nginx ~]# systemctl start keepalived
用网页查看
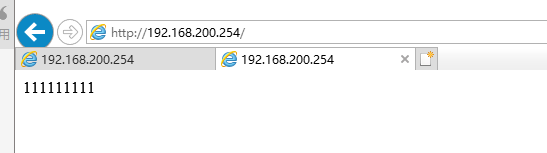

当主动关闭NGINX1服务是,我们可以看到VIP跑到了NGINX2上,因为脚本的原因,我们可以选择关闭NGINX1的网卡来进行故障测试
首先我们看到2没有 VIP地址
关闭1的网卡后
我们可以看到2上已经获取到了VIP地址