下载地址:https://github.com/fex-team/ueditor/releases/tag/v1.4.3.3
应用服务器使用:weblogic
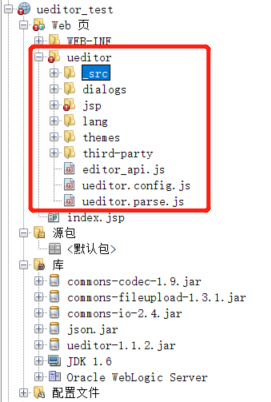
源码下载后,将ueditor相关文件放置到Web目录
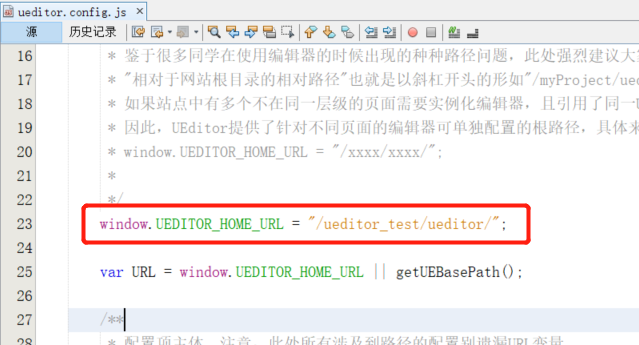
(1)修改ueditor.config.js配置文件
增加以下配置:
window.UEDITOR_HOME_URL = "/ueditor_test/ueditor/";
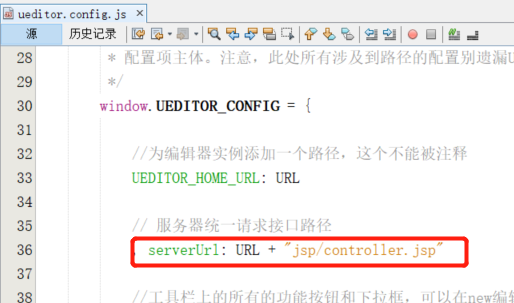
修改服务器统一请求接口路径:
serverUrl: URL + "jsp/controller.jsp"
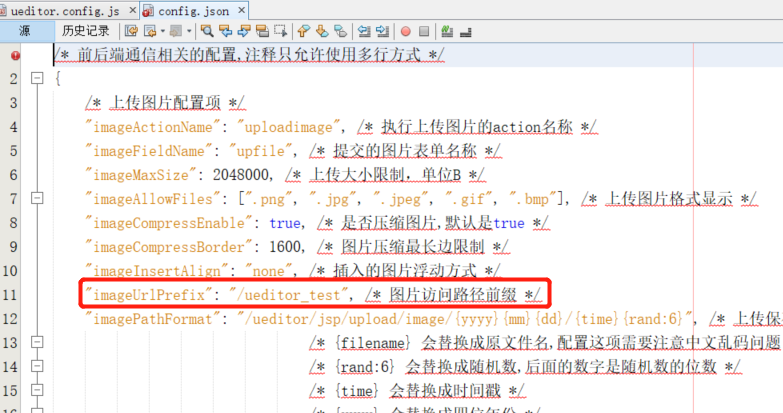
(2)修改config.json配置文件
"imageUrlPrefix": "/ueditor_test"
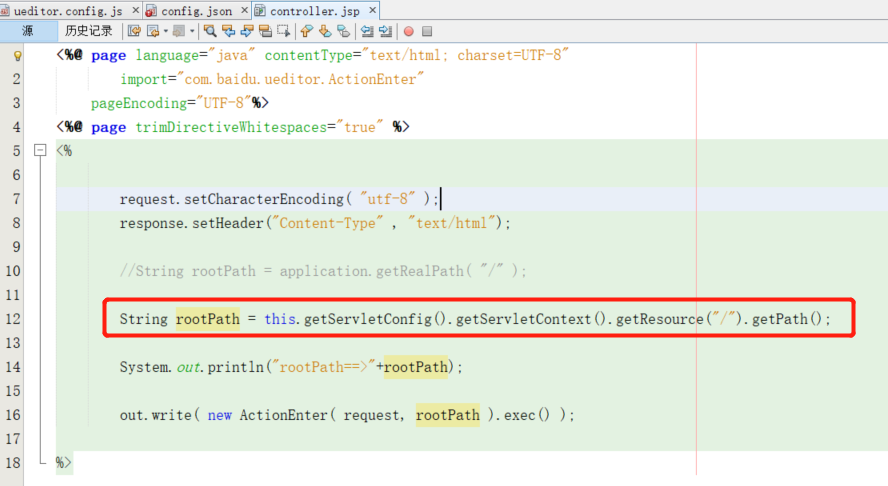
(3)修改controller.jsp中的rootPath
String rootPath = this.getServletConfig().getServletContext().getResource("/").getPath();
(4)新建index.jsp测试界面
<%@page contentType="text/html" pageEncoding="GBK"%>
<!DOCTYPE html>
<html>
    <head>
        <meta http-equiv="Content-Type" content="text/html; charset=GBK">
        <title>JSP Page</title>

        <script type="text/javascript" charset="utf-8" src="ueditor/ueditor.config.js"></script> <!--ueditor的配置文件-->
        <script type="text/javascript" charset="utf-8" src="ueditor/editor_api.js"></script> <!--ueditor核心文件-->
        <script type="text/javascript" charset="utf-8" src="ueditor/lang/zh-cn/zh-cn.js"></script> <!--ueditor语言文件-->

        <style type="text/css">
            div{
                width:100%;
            }
        </style>
    </head>
    <body>
        <div>
            <script id="editor" type="text/plain" style="800px;height:300px;"></script>
        </div>

        <div>
            <button onclick="getContent()">获得内容</button>
        </div>

        <script type="text/javascript">
            var ue = UE.getEditor('editor');

            function getContent() {

                var content = UE.getEditor('editor').getContent();

                alert(content);
            }
        </script>
    </body>
</html>
注意:修改editor_api.js中的ueditor源码路径:baseURL = 'ueditor/_src/';
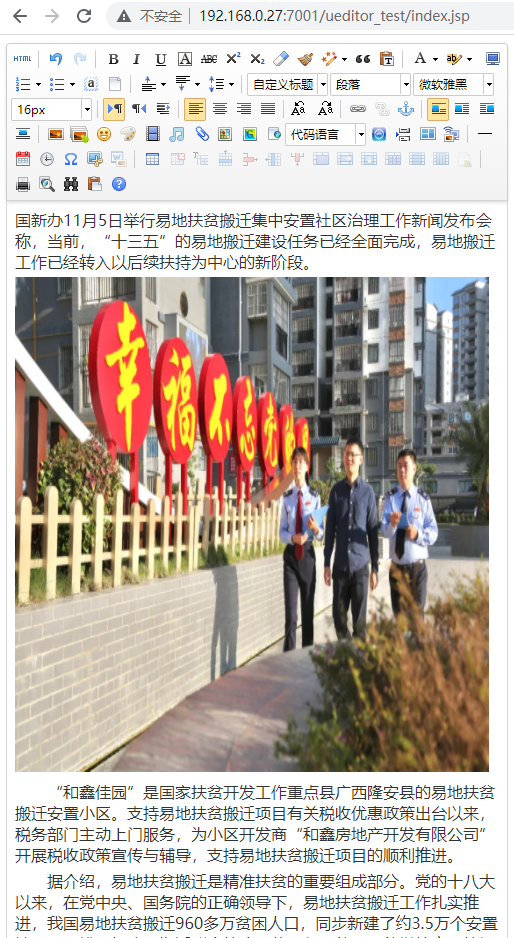
(5)应用效果