seata官网:http://seata.io/zh-cn/docs/user/registry/nacos.html
本次采用,将容器的文件复制到容器外,在容器外修改完成后,再复制进去。这里要修改的文件有:registry.conf和file.conf。 容器内部不能容vim 懒得执行apt-get update和apt-get install vim ,因为很慢
在mysql5.7数据库中创建一个名称为seata的数据库,脚本可以在Seata的GitHub地址获取,找到https://github.com/seata/seata/blob/162f83ea851edff801bcdeb3f9ecd018db7e284d/script/server/db/mysql.sql文件,在seata数据库里执行SQL完成初始化操作
docker pull seataio/seata-server:1.2.0 # 下载seata-server 1.2.0的镜像
docker run -d --name seata-server -e SEATA_IP=192.168.100.132 -e SEATA_PORT=8091 -p 8091:8091 seataio/seata-server:1.2.0
在usr/local 下创建文件夹seata
docker cp c02504e4eb14:/seata-server/resources/file.conf /usr/local/seata/file.conf #拷贝容器内文件file.conf到容器外的/usr/local/seata径下
docker cp c02504e4eb14:/seata-server/resources/registry.conf /usr/local/seata/registry.conf #拷贝容器内文件registry.conf到容器外的/usr/local/seata径下
vim file.conf 修改模式为db 修改数据库连接信息
store {
  ## store mode: file、db
  mode = "db"

  ## file store property
  file {
    ## store location dir
    dir = "sessionStore"
    # branch session size , if exceeded first try compress lockkey, still exceeded throws exceptions
    maxBranchSessionSize = 16384
    # globe session size , if exceeded throws exceptions
    maxGlobalSessionSize = 512
    # file buffer size , if exceeded allocate new buffer
    fileWriteBufferCacheSize = 16384
    # when recover batch read size
    sessionReloadReadSize = 100
    # async, sync
    flushDiskMode = async
  }

  ## database store property
  db {
    ## the implement of javax.sql.DataSource, such as DruidDataSource(druid)/BasicDataSource(dbcp) etc.
    datasource = "druid"
    ## mysql/oracle/postgresql/h2/oceanbase etc.
    dbType = "mysql"
    driverClassName = "com.mysql.jdbc.Driver"
    url = "jdbc:mysql://192.168.100.132:3306/seata"
    user = "root"
    password = "123456"
    minConn = 5
    maxConn = 30
    globalTable = "global_table"
    branchTable = "branch_table"
    lockTable = "lock_table"
    queryLimit = 100
    maxWait = 5000
  }
}
vim registry.conf 将seata 注册进nacos中
registry {
  # file 、nacos 、eureka、redis、zk、consul、etcd3、sofa
  type = "nacos"

  nacos {
    application = "seata-server"
    serverAddr = "192.168.100.132:80"
    namespace = ""
    cluster = "default"
    username = ""
    password = ""
  }
  eureka {
    serviceUrl = "http://localhost:8761/eureka"
    application = "default"
    weight = "1"
  }
  redis {
    serverAddr = "localhost:6379"
    db = 0
    password = ""
    cluster = "default"
    timeout = 0
  }
  zk {
    cluster = "default"
    serverAddr = "127.0.0.1:2181"
    sessionTimeout = 6000
    connectTimeout = 2000
    username = ""
    password = ""
  }
  consul {
    cluster = "default"
    serverAddr = "127.0.0.1:8500"
  }
  etcd3 {
    cluster = "default"
    serverAddr = "http://localhost:2379"
  }
  sofa {
    serverAddr = "127.0.0.1:9603"
    application = "default"
    region = "DEFAULT_ZONE"
    datacenter = "DefaultDataCenter"
    cluster = "default"
    group = "SEATA_GROUP"
    addressWaitTime = "3000"
  }
  file {
    name = "file.conf"
  }
}

config {
  # file、nacos 、apollo、zk、consul、etcd3
  type = "file"

  nacos {
    serverAddr = "localhost"
    namespace = ""
    group = "SEATA_GROUP"
    username = ""
    password = ""
  }
  consul {
    serverAddr = "127.0.0.1:8500"
  }
  apollo {
    appId = "seata-server"
    apolloMeta = "http://192.168.1.204:8801"
    namespace = "application"
  }
  zk {
    serverAddr = "127.0.0.1:2181"
    sessionTimeout = 6000
    connectTimeout = 2000
    username = ""
    password = ""
  }
  etcd3 {
    serverAddr = "http://localhost:2379"
  }
  file {
    name = "file.conf"
  }
}
配置文件已经修改完了,我们将文件再复制到容器里面。
docker cp file.conf c02504e4eb14:/seata-server/resources/file.conf
docker cp registry.conf c02504e4eb14:/seata-server/resources/registry.conf
重启容器
docker restart c02504e4eb14
查看启动日志 看有没有报错
docker logs -f c02504e4eb14
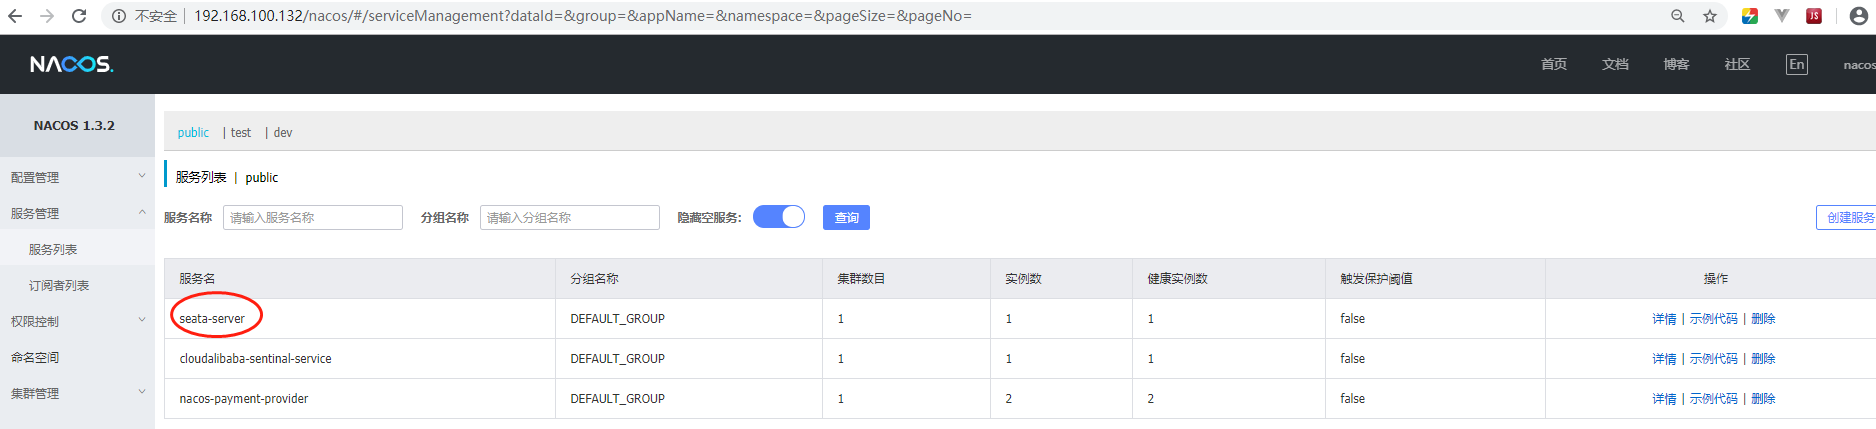
查看nacos服务列表 注册成功
tar包下载地址:https://github.com/seata/seata/releases
百度盘:https://pan.baidu.com/s/1vfxi1ozW8gxN3zFW4Sdofg 提取码:acmo