0. 准备工作
硬件:
- 树莓派 1个
- 网线 1根
- 电脑 1个
- TF卡 1张 (推荐16G及以上)
- 读卡器 1个
软件
- advanced_ip_scanner.exe IP检索软件
- win32diskimager.exe 烧写软件
- putty.exe 远程登录软件
- tightvncviewer.exe 远程桌面软件
1. 下载镜像
登录树莓派官网,下载官方镜像,并解压为 .img 文件

注:DESKTOP 版本是有桌面环境的,Lite 版本没有桌面环境
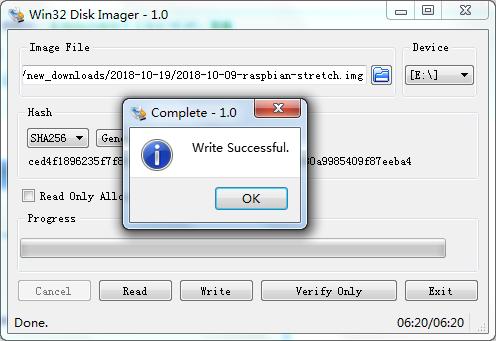
2. 烧写镜像

win32diskimager 是镜像读写软件,使用此软件烧录树莓派系统。

由于后续需要远程登录系统,需要开启系统的ssh服务,默认是未开启的。
操作:打开读卡器根路径,新建文本文档并改名为 ssh (无后缀),即可。

3. 连接网络
注意:此处默认PC机都是有无线网络和有线网络的,如果是台式机,没有无线网络。需要通过手机的USB共享网络功能,让树莓派连接到手机网络中,通过juiceSSH等软件进行远程登录操作,可查阅相关资料,在此不做赘述。
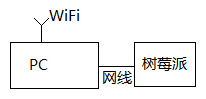
由于需要树莓派和PC机同网络,因此,将无线网络分享给有线网络,然后用网线将PC和树莓派连接起来。
连接图如下:
在电脑上设置把无线网络共享给有线网络(以win7为例):
打开控制面板,找到网络连接,右击 无线网络连接-属性,点击共享选项卡,选择共享到本地连接,勾选允许,确定。

打开命令行工具(win徽标键+R,输入cmd)。输入ipconfig 查看本地网络ip

此时的树莓派和PC机是共享了同样的有线网,但是如何知道树莓派的地址呢?
下面就要使用 advance_ip_scanner.exe 查看树莓派的IP地址了。

查看结果如下图:

制造商带有 Raspberry Pi 字样的 IP地址就是我们要找的IP。
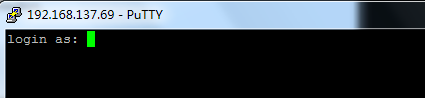
4. 远程登录树莓派
上述中,192.168.137.69 就是我们要登录的IP地址。此处我们使用putty登录IP地址。
当然也可以使用其他的远程登录软件,只是putty轻便小巧,无记录。


首次登录,弹出安全警告,点击确认。

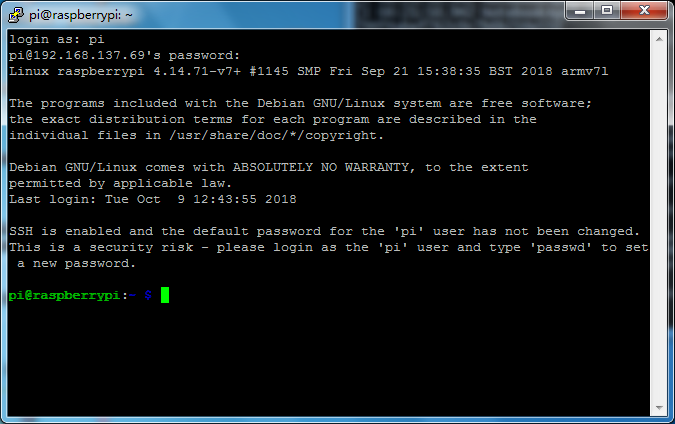
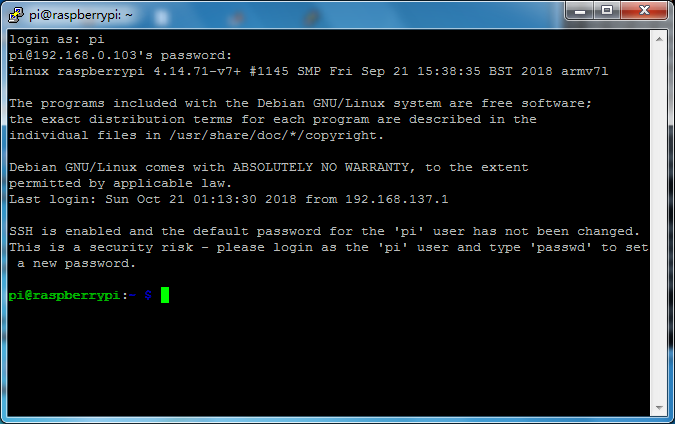
默认的用户名是 pi
密码是 raspberry (注意:linux系统中,密码都是不可见的,不要以为没有输入进去而多次输入。)
回车后,登录成功。
5. 设置WiFi网络
此处选择最简单的设置方法,因此使用树莓派自带的配置界面进行网络设置。
命令行中输入 sudo raspi-config
pi@raspberrypi:~ $ sudo raspi-config
弹出设置GUI界面如下:

选择 2 NetWork Options ,回车。

选择 N2 Wi-fi ,回车。

选择国家,输入 C ,定位到 CN China ,回车。
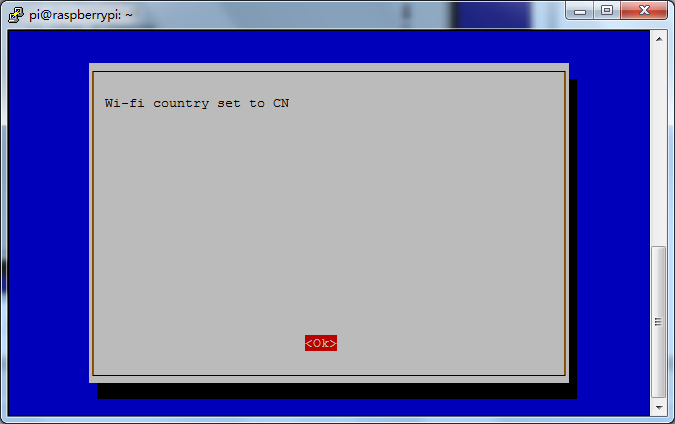
点击OK。

输入wifi名称,按↓箭头,选择OK,回车。
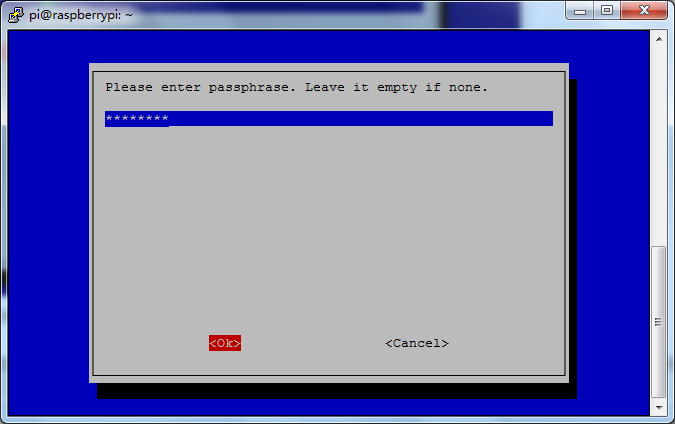
输入密码,选择OK,回车。

返回菜单首页,tab键选择Finish。回车。完成设置。
输入 ifconfig 。查看当前网络。
pi@raspberrypi:~ $ ifconfig
eth0: flags=4163<UP,BROADCAST,RUNNING,MULTICAST>  mtu 1500
        inet 192.168.137.69  netmask 255.255.255.0  broadcast 192.168.137.255
        inet6 fe80::ebcd:2a3e:5a3e:d31  prefixlen 64  scopeid 0x20<link>
        ether b8:27:eb:ca:cd:4e  txqueuelen 1000  (Ethernet)
        RX packets 3197  bytes 196291 (191.6 KiB)
        RX errors 0  dropped 0  overruns 0  frame 0
        TX packets 970  bytes 247748 (241.9 KiB)
        TX errors 0  dropped 0 overruns 0  carrier 0  collisions 0

lo: flags=73<UP,LOOPBACK,RUNNING>  mtu 65536
        inet 127.0.0.1  netmask 255.0.0.0
        inet6 ::1  prefixlen 128  scopeid 0x10<host>
        loop  txqueuelen 1000  (Local Loopback)
        RX packets 0  bytes 0 (0.0 B)
        RX errors 0  dropped 0  overruns 0  frame 0
        TX packets 0  bytes 0 (0.0 B)
        TX errors 0  dropped 0 overruns 0  carrier 0  collisions 0

wlan0: flags=4163<UP,BROADCAST,RUNNING,MULTICAST>  mtu 1500
        inet 192.168.0.103  netmask 255.255.255.0  broadcast 192.168.0.255
        inet6 fe80::e91c:4f1e:5794:fc0a  prefixlen 64  scopeid 0x20<link>
        ether b8:27:eb:9f:98:1b  txqueuelen 1000  (Ethernet)
        RX packets 38  bytes 5328 (5.2 KiB)
        RX errors 0  dropped 0  overruns 0  frame 0
        TX packets 36  bytes 5971 (5.8 KiB)
        TX errors 0  dropped 0 overruns 0  carrier 0  collisions 0

pi@raspberrypi:~ $
找到wlan0,会发现网络已连接,IP为192.168.0.103
再打开putty,输入192.168.0.103 发现已经可以正常连接。
终于,我们可以拔掉网线,放飞树莓派,让它自由飞翔。(大雾)
至此,我们可以随心所欲的操作我们的raspberry pi了。但是,丑媳妇总要见公婆的。我们没有显示屏,也想看看这媳妇怎么办?
6. 换源并更新软件
树莓派软件源地址在国外,由于大家都懂的原因,想要下载顺畅丝滑,需要更换国内源,此处以阿里云的源为例更改。
6.1 修改源列表
命令行中输入:
pi@raspberrypi:~ $ sudo nano /etc/apt/sources.list
修改文本内容:
# deb http://raspbian.raspberrypi.org/raspbian/ stretch main contrib non-free rpi
# Uncomment line below then 'apt-get update' to enable 'apt-get source'
#deb-src http://raspbian.raspberrypi.org/raspbian/ stretch main contrib non-free rpi
deb http://mirrors.aliyun.com/raspbian/raspbian/ stretch main contrib non-free rpi
命令行中输入:
pi@raspberrypi:~ $ sudo nano /etc/apt/sources.list.d/raspi.list
修改文本内容:
# deb http://archive.raspberrypi.org/debian/ stretch main ui
# Uncomment line below then 'apt-get update' to enable 'apt-get source'
#deb-src http://archive.raspberrypi.org/debian/ stretch main ui
deb http://mirrors.aliyun.com/raspbian/raspbian/ stretch main ui
注意:可以使用以下任意源,但是需要明确自己是什么版本的系统,此处的树莓派系统是 stretch 相应更换此代号即可。
感谢: 此博客[1] 提供的源。
目前最新的树莓派中国大陆地区的软件源:

中国科学技术大学
Raspbian http://mirrors.ustc.edu.cn/raspbian/raspbian/

阿里云
Raspbian http://mirrors.aliyun.com/raspbian/raspbian/

清华大学
Raspbian http://mirrors.tuna.tsinghua.edu.cn/raspbian/raspbian/

华中科技大学
Raspbian http://mirrors.hustunique.com/raspbian/raspbian/
Arch Linux ARM http://mirrors.hustunique.com/archlinuxarm/

华南农业大学(华南用户)
Raspbian http://mirrors.scau.edu.cn/raspbian/

大连东软信息学院源(北方用户)
Raspbian http://mirrors.neusoft.edu.cn/raspbian/raspbian/

重庆大学源(中西部用户)
Raspbian http://mirrors.cqu.edu.cn/Raspbian/raspbian/

新加坡国立大学
Raspbian http://mirror.nus.edu.sg/raspbian/raspbian

牛津大学
Raspbian http://mirror.ox.ac.uk/sites/archive.raspbian.org/archive/raspbian/

韩国KAIST大学
Raspbian http://ftp.kaist.ac.kr/raspbian/raspbian/
6.2 换取最新软件包
输入 sudo apt-get update 命令,获取最先软件包。
pi@raspberrypi:~ $ sudo apt-get update
Get:1 http://mirrors.aliyun.com/raspbian/raspbian stretch InRelease [15.0 kB]
Get:2 http://mirrors.aliyun.com/raspbian/raspbian stretch/main armhf Packages [11.7 MB]
Get:3 http://mirrors.aliyun.com/raspbian/raspbian stretch/contrib armhf Packages [56.9 kB]
Get:4 http://mirrors.aliyun.com/raspbian/raspbian stretch/non-free armhf Packages [95.2 kB]
Get:5 http://mirrors.aliyun.com/raspbian/raspbian stretch/rpi armhf Packages [1,360 B]
Fetched 11.8 MB in 10s (1,151 kB/s)
Reading package lists... Done
W: Target Packages (main/binary-armhf/Packages) is configured multiple times in /etc/apt/sources.list:4 and /etc/apt/sources.list.d/raspi.list:4
W: Target Packages (main/binary-all/Packages) is configured multiple times in /etc/apt/sources.list:4 and /etc/apt/sources.list.d/raspi.list:4
W: Target Translations (main/i18n/Translation-en_GB) is configured multiple times in /etc/apt/sources.list:4 and /etc/apt/sources.list.d/raspi.list:4
W: Target Translations (main/i18n/Translation-en) is configured multiple times in /etc/apt/sources.list:4 and /etc/apt/sources.list.d/raspi.list:4
6.3 升级并安装所有软件包
pi@raspberrypi:~ $ sudo apt-get upgrade
Reading package lists... Done
Building dependency tree
Reading state information... Done
Calculating upgrade... Done
The following packages will be upgraded:
  libjavascriptcoregtk-4.0-18 libruby2.3 libssh-gcrypt-4 libwebkit2gtk-4.0-37 ruby2.3
5 upgraded, 0 newly installed, 0 to remove and 0 not upgraded.
Need to get 14.8 MB of archives.
After this operation, 2,301 kB of additional disk space will be used.
Do you want to continue? [Y/n] y
Get:1 http://mirrors.aliyun.com/raspbian/raspbian stretch/main armhf libwebkit2gtk-4.0-37 armhf 2.18.6-1~deb9u1+rpi1 [9,709 kB]
Get:2 http://mirrors.aliyun.com/raspbian/raspbian stretch/main armhf libjavascriptcoregtk-4.0-18 armhf 2.18.6-1~deb9u1+rpi1 [1,846 kB]
Get:3 http://mirrors.aliyun.com/raspbian/raspbian stretch/main armhf libruby2.3 armhf 2.3.3-1+deb9u3+rpi1 [2,865 kB]
Get:4 http://mirrors.aliyun.com/raspbian/raspbian stretch/main armhf libssh-gcrypt-4 armhf 0.7.3-2+deb9u1 [144 kB]
Get:5 http://mirrors.aliyun.com/raspbian/raspbian stretch/main armhf ruby2.3 armhf 2.3.3-1+deb9u3+rpi1 [188 kB]
Fetched 14.8 MB in 4s (3,348 kB/s)
Reading changelogs... Done
(Reading database ... 105923 files and directories currently installed.)
Preparing to unpack .../libwebkit2gtk-4.0-37_2.18.6-1~deb9u1+rpi1_armhf.deb ...
Unpacking libwebkit2gtk-4.0-37:armhf (2.18.6-1~deb9u1+rpi1) over (2.16.6-0+deb9u1+rpi1) ...
Preparing to unpack .../libjavascriptcoregtk-4.0-18_2.18.6-1~deb9u1+rpi1_armhf.deb ...
Unpacking libjavascriptcoregtk-4.0-18:armhf (2.18.6-1~deb9u1+rpi1) over (2.16.6-0+deb9u1+rpi1) ...
Preparing to unpack .../libruby2.3_2.3.3-1+deb9u3+rpi1_armhf.deb ...
Unpacking libruby2.3:armhf (2.3.3-1+deb9u3+rpi1) over (2.3.3-1+deb9u1+rpi1) ...
Preparing to unpack .../libssh-gcrypt-4_0.7.3-2+deb9u1_armhf.deb ...
Unpacking libssh-gcrypt-4:armhf (0.7.3-2+deb9u1) over (0.7.3-2) ...
Preparing to unpack .../ruby2.3_2.3.3-1+deb9u3+rpi1_armhf.deb ...
Unpacking ruby2.3 (2.3.3-1+deb9u3+rpi1) over (2.3.3-1+deb9u1+rpi1) ...
Setting up libssh-gcrypt-4:armhf (0.7.3-2+deb9u1) ...
Processing triggers for libc-bin (2.24-11+deb9u3) ...
Processing triggers for man-db (2.7.6.1-2) ...
Setting up libjavascriptcoregtk-4.0-18:armhf (2.18.6-1~deb9u1+rpi1) ...
Setting up libruby2.3:armhf (2.3.3-1+deb9u3+rpi1) ...
Setting up libwebkit2gtk-4.0-37:armhf (2.18.6-1~deb9u1+rpi1) ...
Setting up ruby2.3 (2.3.3-1+deb9u3+rpi1) ...
Processing triggers for libc-bin (2.24-11+deb9u3) ...
pi@raspberrypi:~ $ sudo apt-get upgrade
Reading package lists... Done
Building dependency tree
Reading state information... Done
Calculating upgrade... Done
0 upgraded, 0 newly installed, 0 to remove and 0 not upgraded.
7. 安装VNC Server
想看“丑媳妇”,就需要借助vnc工具了。
VNC(Virtual Network Console)虚拟网络控制台,原理是在我们的Pi上安装Server,然后在PC上安装Viewer,通过网络,实现显示内容的传输。
7.1 安装 tightvncserver
命令行中执行:sudo apt-get install tightvncserver
pi@raspberrypi:~ $ sudo apt-get install tightvncserver
Reading package lists... Done
Building dependency tree
Reading state information... Done
The following additional packages will be installed:
  libxfont1 xfonts-base xfonts-encodings xfonts-utils
Suggested packages:
  tightvnc-java
The following packages will be REMOVED:
  realvnc-vnc-server
The following NEW packages will be installed:
  libxfont1 tightvncserver xfonts-base xfonts-encodings xfonts-utils
0 upgraded, 5 newly installed, 1 to remove and 0 not upgraded.
Need to get 7,225 kB of archives.
After this operation, 24.0 MB disk space will be freed.
Do you want to continue? [Y/n] y
Get:1 http://mirrors.aliyun.com/raspbian/raspbian stretch/main armhf libxfont1 armhf 1:1.5.2-4 [120 kB]
Get:2 http://mirrors.aliyun.com/raspbian/raspbian stretch/main armhf tightvncserver armhf 1:1.3.9-9 [550 kB]
Get:3 http://mirrors.aliyun.com/raspbian/raspbian stretch/main armhf xfonts-encodings all 1:1.0.4-2 [574 kB]
Get:4 http://mirrors.aliyun.com/raspbian/raspbian stretch/main armhf xfonts-utils armhf 1:7.7+4 [70.4 kB]
Get:5 http://mirrors.aliyun.com/raspbian/raspbian stretch/main armhf xfonts-base all 1:1.0.4+nmu1 [5,911 kB]
Fetched 7,225 kB in 3s (2,155 kB/s)
(Reading database ... 105924 files and directories currently installed.)
Removing realvnc-vnc-server (6.3.1.36657) ...
Selecting previously unselected package libxfont1:armhf.
(Reading database ... 105847 files and directories currently installed.)
Preparing to unpack .../libxfont1_1%3a1.5.2-4_armhf.deb ...
Unpacking libxfont1:armhf (1:1.5.2-4) ...
Selecting previously unselected package tightvncserver.
Preparing to unpack .../tightvncserver_1%3a1.3.9-9_armhf.deb ...
Unpacking tightvncserver (1:1.3.9-9) ...
Selecting previously unselected package xfonts-encodings.
Preparing to unpack .../xfonts-encodings_1%3a1.0.4-2_all.deb ...
Unpacking xfonts-encodings (1:1.0.4-2) ...
Selecting previously unselected package xfonts-utils.
Preparing to unpack .../xfonts-utils_1%3a7.7+4_armhf.deb ...
Unpacking xfonts-utils (1:7.7+4) ...
Selecting previously unselected package xfonts-base.
Preparing to unpack .../xfonts-base_1%3a1.0.4+nmu1_all.deb ...
Unpacking xfonts-base (1:1.0.4+nmu1) ...
Processing triggers for mime-support (3.60) ...
Processing triggers for desktop-file-utils (0.23-1) ...
Setting up tightvncserver (1:1.3.9-9) ...
update-alternatives: using /usr/bin/tightvncserver to provide /usr/bin/vncserver (vncserver) in auto mode
update-alternatives: using /usr/bin/Xtightvnc to provide /usr/bin/Xvnc (Xvnc) in auto mode
update-alternatives: using /usr/bin/tightvncpasswd to provide /usr/bin/vncpasswd (vncpasswd) in auto mode
Setting up xfonts-encodings (1:1.0.4-2) ...
Setting up libxfont1:armhf (1:1.5.2-4) ...
Processing triggers for libc-bin (2.24-11+deb9u3) ...
Processing triggers for man-db (2.7.6.1-2) ...
Processing triggers for shared-mime-info (1.8-1+deb9u1) ...
Processing triggers for gnome-menus (3.13.3-9) ...
Processing triggers for hicolor-icon-theme (0.15-1) ...
Processing triggers for fontconfig (2.11.0-6.7) ...
Setting up xfonts-utils (1:7.7+4) ...
Setting up xfonts-base (1:1.0.4+nmu1) ...
7.2 执行 tightvncserver
命令行中输入:tightvncserver
pi@raspberrypi:~ $ tightvncserver

You will require a password to access your desktops.

Password:输入密码
Warning: password truncated to the length of 8.
Verify:再次输入密码
Would you like to enter a view-only password (y/n)? n # 此处问是否需要创建可远观而不可亵玩的密码,我选择否,如果需要给别人开放一个查看密码,选择y

New 'X' desktop is raspberrypi:1

Creating default startup script /home/pi/.vnc/xstartup
Starting applications specified in /home/pi/.vnc/xstartup
Log file is /home/pi/.vnc/raspberrypi:1.log
7.3 PC端登录
可以使用 tightvncviewer 软件。
打开软件,输入IP地址和端口(端口默认为5901)点击Connect连接。
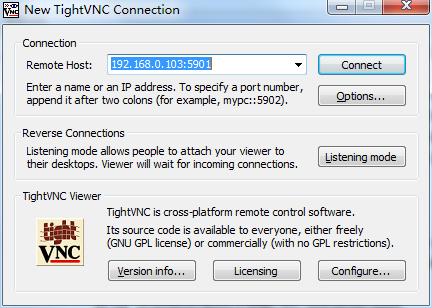
输入刚才填写的密码,OK确认。

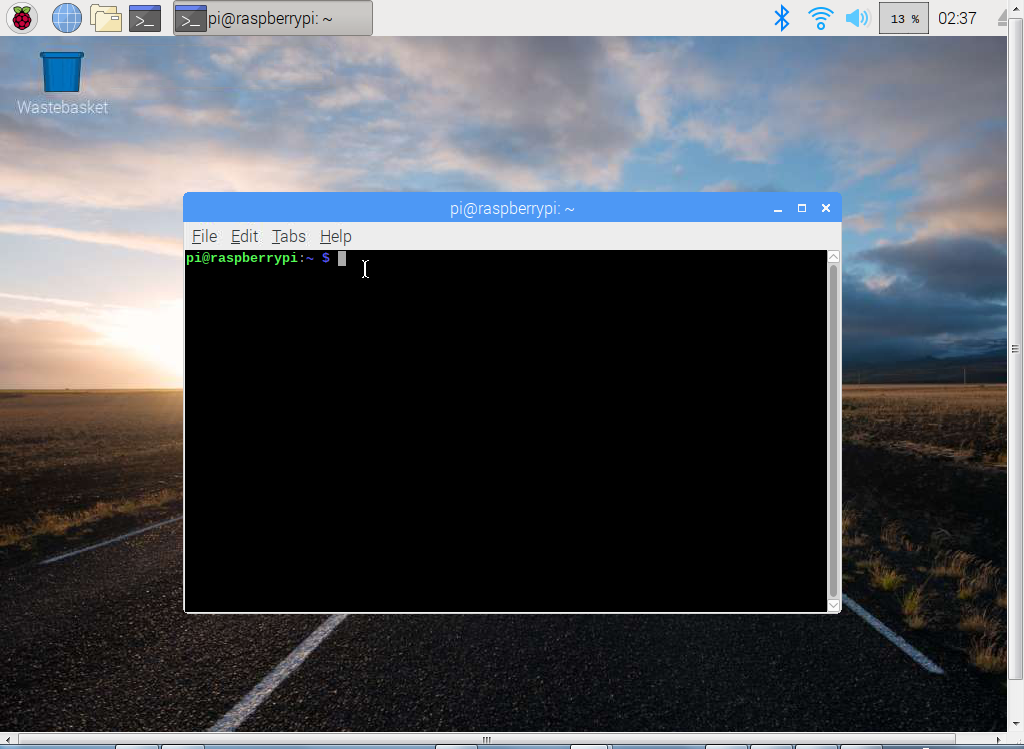
终于让我们揭开了儿媳妇的面纱(这媳妇还挺俊hhhhhh)。
然后,我们就可以任意的操作树莓派的系统了。
本文已完。。。。。。。。那是不可能的。
一旦我们重启树莓派,再次登录,就没法登入vnc界面了。

这是为什么呢?
因为我们没有让 tightvncserver 开机自启动。
7.4 让 tightvncserver 开启自启动[2]
7.4.1 新建脚本
pi@raspberrypi:~ $ sudo nano /etc/init.d/tightvncserver
编辑输入:
#!/bin/sh
### BEGIN INIT INFO
# Provides: tightvncserver
# Required-Start: $syslog $remote_fs $network
# Required-Stop: $syslog $remote_fs $network
# Default-Start: 2 3 4 5
# Default-Stop: 0 1 6
# Short-Description: Starts VNC Server on system start.
# Description: Starts tight VNC Server. Script written by James Swineson.
### END INIT INFO
# /etc/init.d/tightvncserver
VNCUSER='pi'
case "$1" in
        start)
                su $VNCUSER -c '/usr/bin/tightvncserver :1'
                echo "Starting TightVNC Server for $VNCUSER"
        ;;
        stop)
                pkill Xtightvnc
                echo "TightVNC Server stopped"
        ;;
        *)
                echo "Usage: /etc/init.d/tightvncserver {start|stop}"
                exit 1
        ;;
esac
exit 0
7.4.3 依次执行
pi@raspberrypi:~ $ sudo chmod 755 /etc/init.d/tightvncserver # 添加执行权限
pi@raspberrypi:~ $ sudo update-rc.d tightvncserver defaults # 设置开启启动
pi@raspberrypi:~ $ sudo reboot # 重启
7.4.5 取消开机启动
pi@raspberrypi:~ $ sudo update-rc.d -f tightvncserver remove
至此,本文真的药丸了。
关于其他的关于树莓派的食用记录:

参考文献:
[1]: 树莓派更换中国大陆地区软件源