一、临时关闭防火墙
#查看防火墙状态
systemctl status firewalld
如果Active后面是 inactive 表示已经是关闭状态了
#开启状态下临时关闭防火墙
systemctl stop firewalld
#永久关闭防火墙
systemctl disable firewalld
二、关闭SELinux
#查看SELinux状态
getenforce
--如果SELinux状态参数是Disabled,则SELinux为关闭状态。
--如果SELinux状态参数是Enforcing,则SELinux为开启状态。
#临时关闭SELinux
setenforce 0
#永久关闭SELinux
vim /etc/selinux/config
将SELINUX=enforcing 修改为SELINUX=disabled
三、安装nginx
#使用dnf安装
dnf -y install http://nginx.org/packages/centos/8/x86_64/RPMS/nginx-1.16.1-1.el8.ngx.x86_64.rpm
#查看nginx版本
nginx -v
四、安装mysql
#使用 dnf 安装mysql
dnf -y install @mysql
#查看mysql版本
mysql -V
五、安装PHP
dnf -y install epel-releasednf update epel-release
启用PHP 7.3模块
dnf module enable php:7.3
安装PHP相应的模块
dnf install php php-curl php-dom php-exif php-fileinfo php-fpm php-gd php-hash php-json php-mbstring php-mysqli php-openssl php-pcre php-xml libsodium
查看PHP版本
php -v
六、配置Nginx
#进入配置文件目录
cd /etc/nginx/conf.dcp default.conf default.conf.bak
vi default.conf
修改内容
location / {
#将该路径替换为您的网站根目录。
root /usr/share/nginx/html;
#添加默认首页信息index.php。
index index.html index.htm index.php;
}
去掉注释并根据提示修改
location ~ .php$ {
#将该路径替换为您的网站根目录。
root /usr/share/nginx/html;
#Nginx通过unix套接字与PHP-FPM建立联系,该配置与/etc/php-fpm.d/www.conf文件内的listen配置一致。
fastcgi_pass unix:/run/php-fpm/www.sock;
fastcgi_index index.php;
#将/scripts$fastcgi_script_name修改为$document_root$fastcgi_script_name。
fastcgi_param SCRIPT_FILENAME $document_root$fastcgi_script_name;
#Nginx调用fastcgi接口处理PHP请求。
include fastcgi_params;
}
#启动nginx:
systemctl start nginx
#设置开机启动nginx
systemctl enable nginx
七、配置Mysql
#运行以下命令启动MySQL,并设置为开机自启动
systemctl enable --now mysqld
#查看mysql是否已启动
systemctl status mysqld
#设置mysql安全性,并设置密码
mysql_secure_installation
#设置如下
1、输入Y并回车开始相关配置。
2、选择密码验证策略强度,输入2并回车。
策略0表示低,1表示中,2表示高。建议您选择高强度的密码验证策略。
3、输入Y并回车继续使用提供的密码。
4、输入Y并回车移除匿名用户。
5、设置是否允许远程连接MySQL。
不需要远程连接时,输入Y并回车。
需要远程连接时,输入N或其他任意非Y的按键,并回车。
6、输入Y并回车删除test库以及对test库的访问权限。
7、输入Y并回车重新加载授权表。
八、配置PHP
#运行以下命令打开配置文件
vi /etc/php-fpm.d/www.conf
找到user = apache和group = apache,
将apache修改为nginx
#运行PHP
systemctl start php-fpm
#设置开机启动PHP
systemctl enable php-fpm
九、测试nginx环境
打开浏览器。在地址栏输入
http://<ECS实例公网IP地址>/phpinfo.php
如果能成功展示 phpinfo 信息,则表示安装成功
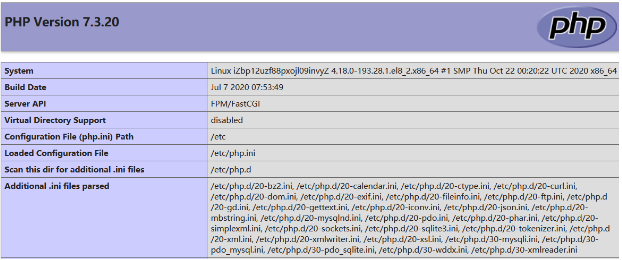
然后需要删除phpinfo.php 文件消除安全隐患
rm -rf /usr/share/nginx/html/phpinfo.php