cas也搞得差不多了,一直使用的是默认登录页面,这样是肯定不行的,企业级登录页面,一般都是自定义的,页面上有广告或者公司的logo等,
下面开始进行自定义登录页面,查看官方文档,发现有动态主题和静态主题,下面只介绍静态主题模式。
主题
主题意味着风格不一样,目的就是不同的接入端,显示不同的登录页面,就像阿里旗下的各种登录,支付宝登录,淘宝,天猫,用的可能就是同一个sso,但是各自的登录主题不一样。
简略看完后,会有以下的规范:
● 静态资源(js,css)存放目录为src/main/resources/static
● html资源存(thymeleaf)放目录为src/main/resources/templates
● 主题配置文件存放在src/main/resources并且命名为[theme_name].properties
● 主题页面html存放目录为src/main/resources/templates/
主题的配置
登录页渲染文件为casLoginView.html,还记得我们之前配置客户端注册的时候的json文件,这个文件中还可以添加一个属性theme对应自己的主题,具体看下面的例子,cas也可以设置一个默认主题,如果service注册的时候没有指明主题,就使用默认的主题。
具体操作实战
第一步:在客户端注册的json文件中添加theme属性
客户端app1
{
"@class" : "org.apereo.cas.services.RegexRegisteredService",
"serviceId" : "^(https|imaps|http)://app1.cas.com.*",
"name" : "测试客户端app1",
"id" : 1000,
"description" : "这是app1的客户端",
"evaluationOrder" : 10,
"theme" : "app1"
}
客户端app2
{
"@class" : "org.apereo.cas.services.RegexRegisteredService",
"serviceId" : "^(https|imaps|http)://app2.cas.com.*",
"name" : "测试客户端app2",
"id" : 1001,
"description" : "这是app2的客户端",
"evaluationOrder" : 11,
"theme" : "app2"
}
第二步:在src/main/resources下创建app1.properties 和 app2.properties
根据官网文档,需要在src/main/resources文件夹的根目录下创建 与 json文件中theme属性值 对应的properties
所以要在src/main/resources新建app1.properties 和 app2.properties 这只是demo,所以以下内容相似。
#原cas默认的css样式,如果更改了,某些页面样式将丢失。
cas.standard.css.file=/css/cas.css
#自己的样式
cas.myself.css=/themes/app1/css/cas.css
cas.javascript.file=/themes/app1/js/jquery-1.4.2.min.js
cas.page.title=app1的主题
在app1.properties 和 app2.properties 中的属性值都是随便起,只要在html中指明引用的key就可以了,例如:properties中指明css和js文件地址,然后在html中用下面的方式使用。
<link rel="stylesheet" th:href="@{${#themes.code('cas.myself.css')}}"/>
<script th:src="@{${#themes.code('cas.javascript.file')}}"></script>
注意:上面配置文件中有cas.standard.css.file属性,这个属性默认就是指向/css/cas.css也就是cas默认的css文件,这个我们要指明,否则你只是自定义了登录页面,其他页面的样式将丢失。我们在自定义的登录页面使用自己的css文件,不跟cas的默认css混淆。
第三步:根据第二步创建cas.css文件
客户端1
h2 {
color: red;
}
客户端2
h2 {
color: pink;
}
第四步:在application.properties中添加以下属性,配置默认主题
# 默认主题
cas.theme.defaultThemeName=app2
第五步:配置不同客户端的登录页面
这是只给出app1的页面,页面都是一样的,只是根据在properties中的title属性来区分不同的客户端,app2粘贴就行了。
注意要点:from表单的内容需要遵循一定的标准th:object等.
<!DOCTYPE html PUBLIC "-//W3C//DTD XHTML 1.0 Transitional//EN" "http://www.w3.org/TR/xhtml1/DTD/xhtml1-transitional.dtd">
<html xmlns:th="http://www.thymeleaf.org">
<head>
<meta http-equiv="Content-Type" content="text/html; charset=utf-8" />
<title th:text="${#themes.code('cas.page.title')}"></title>
<link rel="stylesheet" th:href="@{${#themes.code('cas.myself.css')}}"/>
<script th:src="@{${#themes.code('cas.javascript.file')}}"></script>
</head>

<body>
<h2 th:text="${#themes.code('cas.page.title')}"></h2>
<div>
<form method="post" th:object="${credential}">
<div th:if="${#fields.hasErrors('*')}">
<span th:each="err : ${#fields.errors('*')}" th:utext="${err}" style="color: red" />
</div>
<h4 th:utext="#{screen.welcome.instructions}"></h4>
<section class="row">
<label for="username" th:utext="#{screen.welcome.label.netid}" />
<div th:unless="${openIdLocalId}">
<input class="required" id="username" size="25" tabindex="1" type="text"
th:disabled="${guaEnabled}"
th:field="*{username}"
th:accesskey="#{screen.welcome.label.netid.accesskey}"
autocomplete="off"
th:value="admin" />
</div>
</section>
<section class="row">
<label for="password" th:utext="#{screen.welcome.label.password}"/>
<div>
<input class="required" type="password" id="password" size="25" tabindex="2"
th:accesskey="#{screen.welcome.label.password.accesskey}"
th:field="*{password}"
autocomplete="off"
th:value="123456" />
</div>
</section>
<section>
<input type="hidden" name="execution" th:value="${flowExecutionKey}" />
<input type="hidden" name="_eventId" value="submit" />
<input type="hidden" name="geolocation" />
<input class="btn btn-submit btn-block" name="submit" accesskey="l" th:value="#{screen.welcome.button.login}" tabindex="6" type="submit" />
</section>
</form>
</div>
</body>
</html>
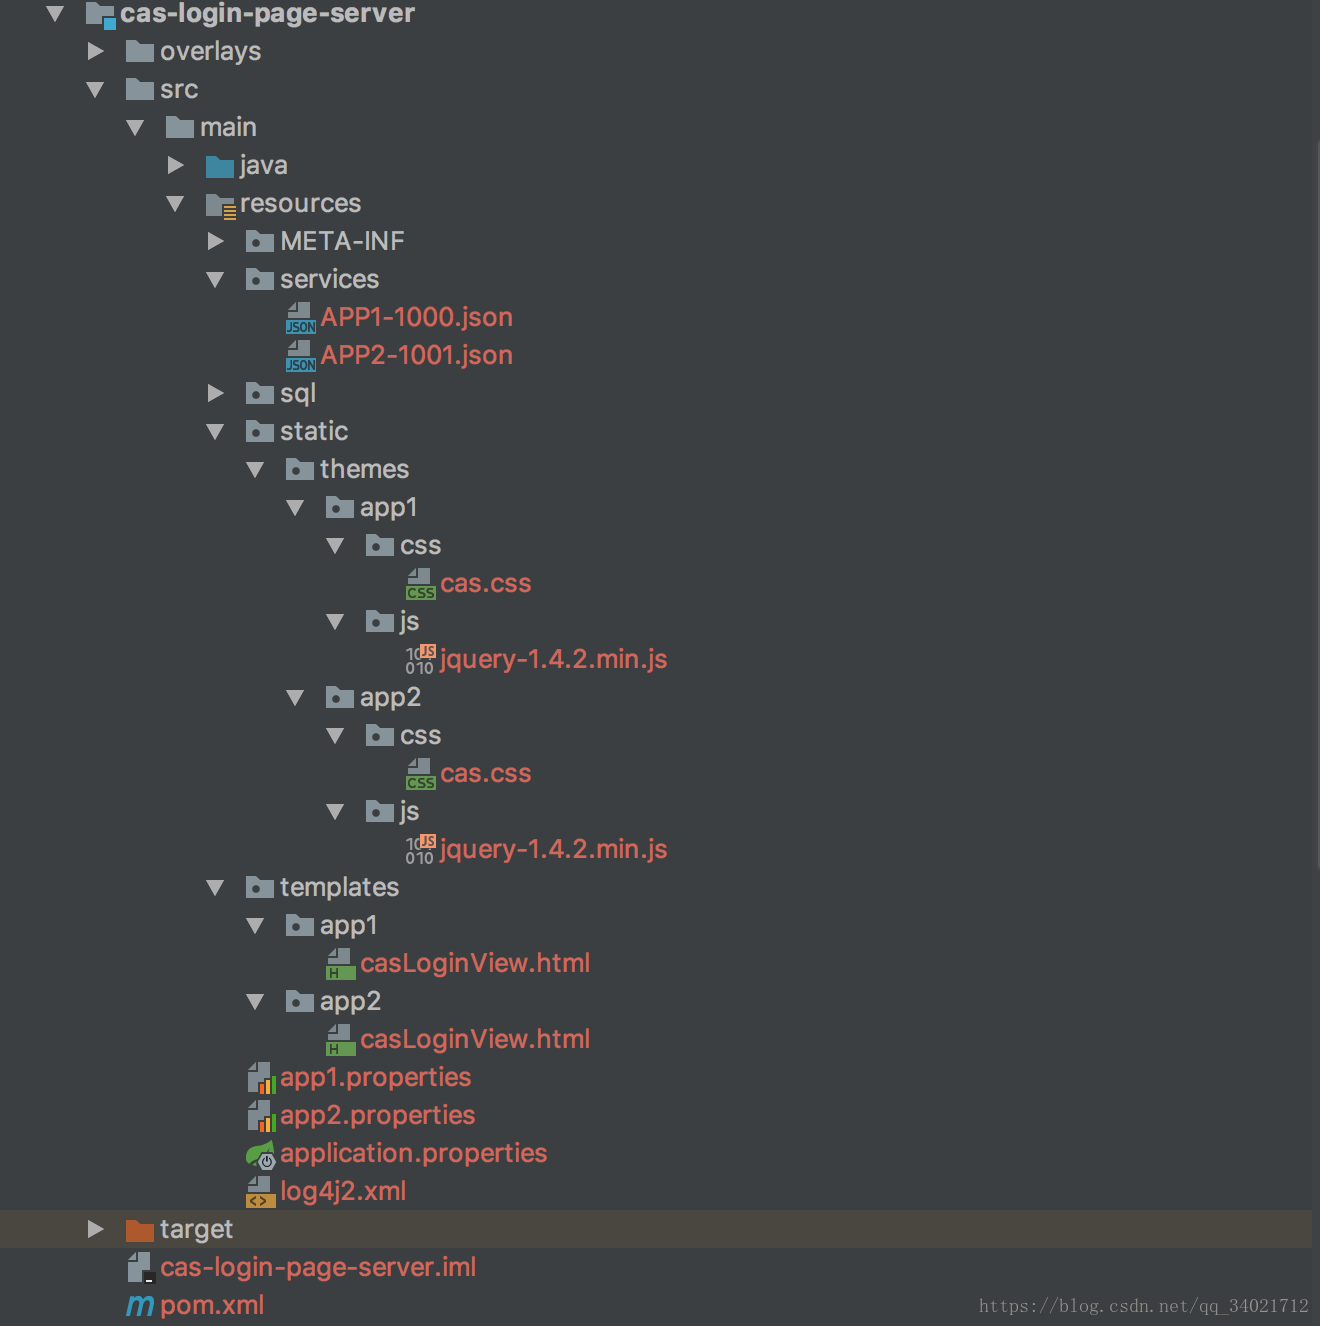
搭建完成之后的目录图如下:
测试
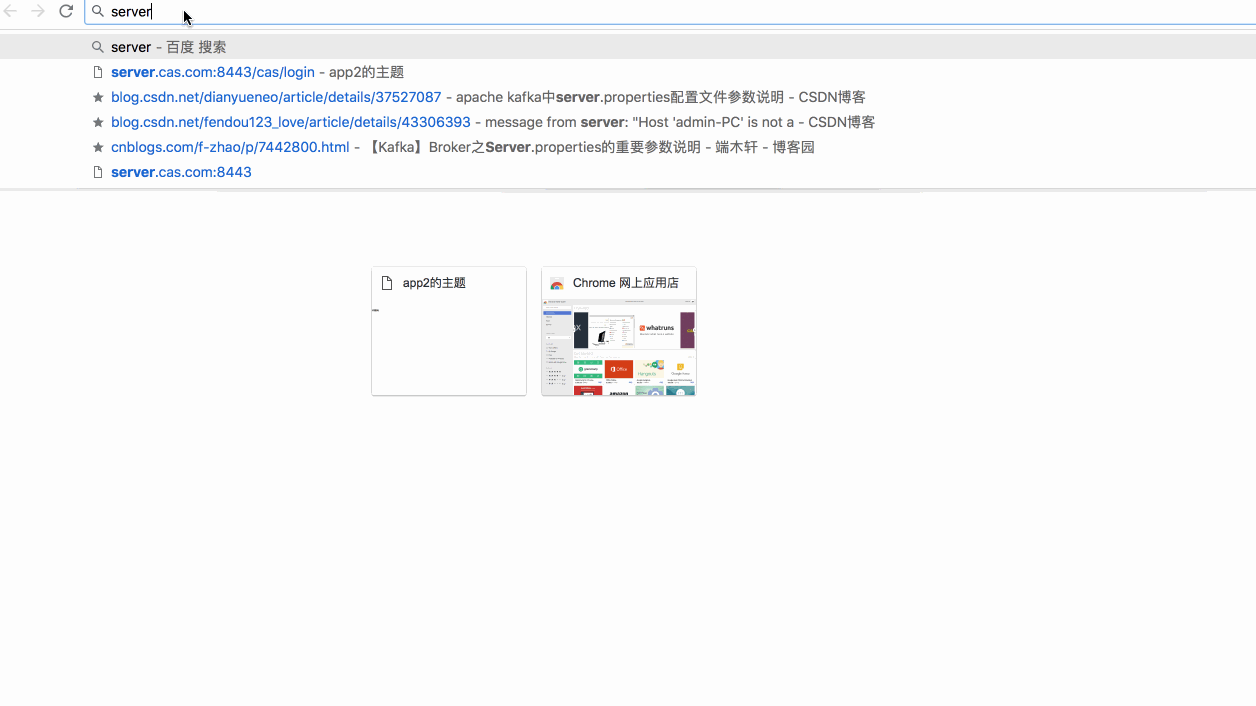
第一步:先直接登录cas服务,默认使用的是app2的主题
第二步:访问app1.cas.com客户端1 显示客户端1的主题。
第三步:访问app2.cas.com客户端2 显示客户端2的主题。
第四步:登录 登出测试 没有问题。效果如下图:
————————————————
版权声明:本文为CSDN博主「这个名字想了很久」的原创文章,遵循CC 4.0 BY-SA版权协议,转载请附上原文出处链接及本声明。
原文链接:https://blog.csdn.net/qq_34021712/article/details/82186067