上次说到了用wpf做表格,其实工作实际上却转移到字体上。
1、字体,在选择字体的时候,搞了一些想法。但是wpf字体的下滑选项上是没有中文名称的,就是说,像word那样选择字体在wpf中无法实现。也很奇怪的是,刚开始接触wpf,不知道它的FontFamily的参数有哪些,也不知道适合的字体有哪些。
刚开始默认的黑体还是比较丑陋的,所以要选择字体,获得有三:
1)现阶段最流行的中文字体是,微软雅黑。行间距1.5 ,字体大小17px附近。(记忆模糊了 待考)
2)楷体作为正文其实是最好的,但是楷体的英文显示很差。
3)要是用英文字体就选择,arial。
下面就是找了半天的东西,对我来说这个比较有用,虽然最终只用 FontFamily = "微软雅黑"
|
常见中文字体与FontFamily映射表 |
|
|
宋体(英文不等宽) |
Simsun |
|
宋体(英文等宽) |
NSimsun |
|
楷体 |
KaiTi |
|
黑体 |
SimHei |
|
仿宋 |
FangSong |
|
微软正黑体 |
Microsoft JhengHei |
|
细明体 |
MingLiu |
|
微软雅黑 |
Microsoft YaHei |
|
隶书 |
LiSu(只能打包,不支持本地系统引用) |
|
华文彩云 |
STCaiyun(只能打包,不支持本地系统引用) |
|
华文琥珀 |
STHupo(只能打包,不支持本地系统引用) |
|
华文隶书 |
STLiti(只能打包,不支持本地系统引用) |
|
华文新魏 |
STXinwei(只能打包,不支持本地系统引用) |
|
华文行楷 |
STXingkai(只能打包,不支持本地系统引用) |
|
幼圆 |
YouYuan(只能打包,不支持本地系统引用) |
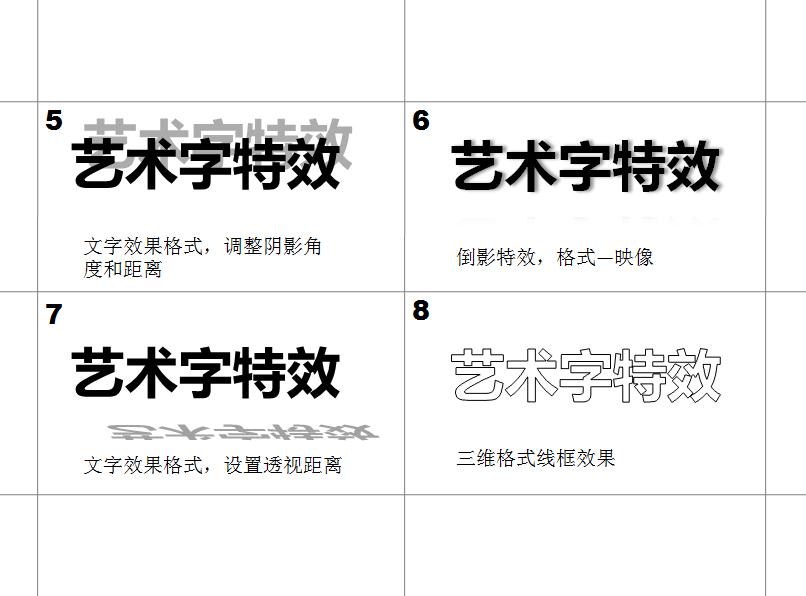
剩下的就是选择字体的样式了:在网上找了一些格式,与其说是格式,不如说是。。。word实现的艺术字。
2、花样字体


剩下的就是具体实现了。
1)
<TextBlock Height="200" Width="200" FontFamily="微软雅黑" FontSize="48" TextWrapping="Wrap">具体测试文本 </TextBlock>
2)
<TextBlock Height="200" Width="200" FontWeight="Bold" FontFamily="微软雅黑" FontSize="48" TextWrapping="Wrap">具体测试文本 </TextBlock>
3) 来源 :http://msdn.microsoft.com/zh-cn/library/ms748273.aspx 如何建立阴影文字
<TextBlock
  Text="Shadow Text"
  Foreground="Teal">
  <TextBlock.Effect>
    <DropShadowEffect
      ShadowDepth="4"
      Direction="330"
      Color="Black"
      Opacity="0.5"
     BlurRadius="4"/>
  </TextBlock.Effect>
</TextBlock>
虽然即使是这样可以,但是往往需要的是加入到资源字典里,这个就是有一个style 的问题了,感谢@WuRang,他的回答让我明白了。
<Window x:Class="WpfApplication32.Window1"
        xmlns="http://schemas.microsoft.com/winfx/2006/xaml/presentation"
        xmlns:x="http://schemas.microsoft.com/winfx/2006/xaml"
        Title="Window1" Height="300" Width="300">
    <Window.Resources>
        <ResourceDictionary>
            <Style x:Key="shadow" TargetType="TextBlock">
                <Setter Property="Effect" >
                    <Setter.Value>
                        <DropShadowEffect  ShadowDepth="4"
                    Direction="330"
                    Color="Black"
                    Opacity="0.5"
                    BlurRadius="4"/>
                    </Setter.Value>
                </Setter>
                <Setter Property="FontSize" Value="24"/>
                <Setter Property="FontFamily" Value="微软雅黑"/>
                <Setter Property="Foreground" Value="Blue"/>
            </Style>
        </ResourceDictionary>
    </Window.Resources>
    <Grid>
        <TextBlock Text="Shadow Text"   Foreground="Teal" Style="{StaticResource shadow}" >

        </TextBlock>
    </Grid>
</Window>
4)内阴影镂空字效果,让我很费解,我不知道这个内阴影能否在wpf实现,只是我觉得,这可以在一个背景色和字体色反差明显的,实现这个效果,个人觉得比较山寨。
<TextBlock Height="200" Width="200" FontWeight="Bold" FontFamily="微软雅黑" FontSize="48" Foreground="White" Background="Black" TextWrapping="Wrap">具体测试文本 </TextBlock>
但是觉得这样挺山寨的。
5)6)7)其实跟4)一样的
8)就复杂一些 也是靠 @WuRang 的解决方法,有用了blend来搞了个渐变笔刷
using System;
using System.Collections.Generic;
using System.Linq;
using System.Text;
using System.Windows;
using System.Windows.Controls;
using System.Windows.Data;
using System.Windows.Documents;
using System.Windows.Input;
using System.Windows.Media;
using System.Windows.Media.Imaging;
using System.Windows.Navigation;
using System.Windows.Shapes;
using System.Globalization;
namespace ziti
{
    /// <summary>
    /// MainWindow.xaml 的交互逻辑
    /// </summary>
    public partial class MainWindow : Window
    {
        public MainWindow()
        {

            InitializeComponent();
            CreateText();


        }
        public void CreateText()
        {
            System.Windows.FontStyle fontStyle = FontStyles.Normal;
            FontWeight fontWeight = FontWeights.Medium;

            //if (Bold == true) fontWeight = FontWeights.Bold;
            //if (Italic == true) fontStyle = FontStyles.Italic;

            // Create the formatted text based on the properties set.
            FormattedText formattedText = new FormattedText(
                "测试文本",
                CultureInfo.GetCultureInfo("en-us"),
                FlowDirection.LeftToRight,
                new Typeface(
                    new FontFamily("Lisu"),
                    fontStyle,
                    fontWeight,
                    FontStretches.Normal),
                48,
                System.Windows.Media.Brushes.Black // This brush does not matter since we use the geometry of the text.
                );

            // Build the geometry object that represents the text.
            Geometry _textGeometry = formattedText.BuildGeometry(new System.Windows.Point(0, 0));

            // Build the geometry object that represents the text hightlight.
            //if (Highlight == true)
            //{
            //    _textHighLightGeometry = formattedText.BuildHighlightGeometry(new System.Windows.Point(0, 0));
            //}
            myGeo.AddGeometry(_textGeometry);
            Geometry _textHighLightGeometry = formattedText.BuildHighlightGeometry(new System.Windows.Point(0, 0));
           // myGeo.AddGeometry(_textHighLightGeometry);
        }
    }
}
<Window x:Class="ziti.MainWindow"
        xmlns="http://schemas.microsoft.com/winfx/2006/xaml/presentation"
        xmlns:x="http://schemas.microsoft.com/winfx/2006/xaml"
        Title="MainWindow" Height="350" Width="525">
    <Grid>
        <Canvas Height="300" Width="300">
            <Path StrokeThickness="2" >
                <Path.Data>
                    <PathGeometry x:Name="myGeo">

                    </PathGeometry>
                </Path.Data>

                <Path.Stroke>
                    <LinearGradientBrush ColorInterpolationMode="SRgbLinearInterpolation">

                        <GradientStop Offset="0" Color="Red"/>

                        <GradientStop Offset="0.2" Color="Red"/>

                        <GradientStop Offset="0.2" Color="Red"/>

                        <GradientStop Offset="0.8" Color="Yellow"/>

                        <GradientStop Offset="0.8" Color="Yellow"/>

                        <GradientStop Offset="1" Color="Green"/>

                    </LinearGradientBrush>

                </Path.Stroke>

            </Path>

        </Canvas>

    </Grid>

</Window>
9) 10) 11) 12)这些都跟8)类似
剩下的的4个用不到,也就没有实现,估计,用8)这种方法是可以实现的,但是8)这种我也不是很懂,所以
就先这样了。