mod_dav_svn是apache连接svn的模块
yum install subversion mod_dav_svn httpd
配置文件简单说明,
SVNParentPath 说明可以在指定的目录下,创建多个SVN项目
-----------------------
vim /etc/httpd/conf.d/subversion.conf
LoadModule dav_svn_module modules/mod_dav_svn.so
LoadModule authz_svn_module modules/mod_authz_svn.so
#
# Example configuration to enable HTTP access for a directory
# containing Subversion repositories, "/var/www/svn". Each repository
# must be readable and writable by the 'apache' user. Note that if
# SELinux is enabled, the repositories must be labelled with a context
# which httpd can write to; this will happen by default for
# directories created in /var/www. Use "restorecon -R /var/www/svn"
# to label the repositories if upgrading from a previous release.
#
#
# To create a new repository "http://localhost/repos/stuff" using
# this configuration, run as root:
#
# # cd /var/www/svn
# # svnadmin create stuff
# # chown -R apache.apache stuff
#
<Location /repos>
DAV svn
SVNParentPath /var/www/svn
#
# # Limit write permission to list of valid users.
# <LimitExcept GET PROPFIND OPTIONS REPORT>
# # Require SSL connection for password protection.
# # SSLRequireSSL
#
AuthType Basic
AuthName "Authorization Realm"
AuthUserFile /etc/subversion/passwdfile
Require valid-user
# </LimitExcept>
</Location>
-----------------------------
用apache自带的命令添加密码
[root@master1 www]# htpasswd -c /etc/subversion/passwdfile admin
New password:
Re-type new password:
Adding password for user admin
创建SVN的版本库
cd /var/www/svn
svnadmin create mytest0531
配置版本库相关文件
[root@master1 conf]# pwd
/var/www/svn/mytest0531/conf
[root@master1 conf]# ll
总计 24
-rw-r--r-- 1 root root 1080 05-31 16:05 authz
-rw-r--r-- 1 root root 309 05-31 16:05 passwd
-rw-r--r-- 1 root root 2279 05-31 16:05 svnserve.conf
配置文件说明
svnserve.conf 文件, 该文件配置项分为以下5项:
anon-access: 控制非鉴权用户访问版本库的权限。
auth-access: 控制鉴权用户访问版本库的权限。
password-db: 指定用户名口令文件名。
authz-db:指定权限配置文件名,通过该文件可以实现以路径为基础的访问控制。
realm:指定版本库的认证域,即在登录时提示的认证域名称。若两个版本库的认证域相同,建议使用相同的用户名口令数据文件
passwd文件
password-db = passwd
authz-db = authz
authz文件
[users]
harry = harryssecret
sally = sallyssecret
authz文件
[groups]
harry_and_sally = harry,sally
[testsvn:/]
@harry_and_sally = rw
* = r
testsvn对应版本库名称,/对应svn的目录,/var/www/svn
启动svn
svnserve -d -r /var/www/svn
测试访问
http://192.168.0.209/svn/mytest0531
=======================================================================
SVN关于权限的测试
一个疑问:web访问的用户,具有什么权限??
httpd目录下关于svn的配置文件,admin测试用户只具有浏览权限。
subversion.conf,提供svn客户端访问svn的方式。
权限测试:
web用户
admin
svn客户端用户(svn配置文件中设置的用户)
user01
user02
user03
配置内容如下
[root@master1 conf]# cat svnserve.conf |grep -v '^#'|sed /^$/d
[general]
anon-access = none
auth-access = write
password-db = passwd
authz-db = authz
------------------------------
anon-access: 控制非鉴权用户访问版本库的权限。可以设置为write、read、none
auth-access: 控制鉴权用户访问版本库的权限。
password-db: 指定用户名口令文件名。
authz-db:指定权限配置文件名,通过该文件可以实现以路径为基础的访问控制。
realm:指定版本库的认证域,即在登录时提示的认证域名称。若两个版本库的认证域相同,建议使用相同的用户名口令数据文件
[root@master1 conf]# cat passwd |grep -v '^#'|sed /^$/d
[users]
user01 = user01
user02 = user02
user03 = user03
格式:用户名 = 密码
[root@master1 conf]# cat authz |grep -v '^#'|sed /^$/d
[aliases]
[groups]
user01 = user01
user02_03 = user02,user03
[mytest0531:/]
@user01 = wr
@user02_03 =r
[groups]分组选项
[mytest0531:/]对于mytest0531下的所有目录,user01具有读写权限,user02、user03具有读权限。
测试工具TortoiseSVN
1·安装TortoiseSVN
2·连接,在文件夹中右键,选择SVN Checkout...

3·选择OK

4·提示输入用户名和密码

5·输入不正确,不会有提示,但是也连接不上。可以重新输入。
6·用测试账号user02登录

7·将SVN的文件下载到本地的C:UsersNinglianjiemytest0531目录下
8·将“新建文本文档.txt”删除,然后用user02上传,看结果如下:

选择SVN Commit,输入user02密码user02

9·用user01密码user01提交之后,结果如下

则可以正常删除。
10·用web浏览器浏览,如下
输入地址http://192.168.0.209/svn/mytest0531/
用户名admin,密码admin,“新建文本文档.txt”已经删除

4.建立启动svn的用户
|
1
2
3
4
|
[root@moshi ~]# useradd svn #如果提示svn账户已存在,则执行以下命令[root@moshi ~]# passwd svn ##根据提示修改下密码,不能过于简单,可使用常用密码[root@moshi ~]# chown -R svn:svn /home/svn/ ##允许用户svn访问版本库[root@moshi ~]# chmod –R o+rw /home/svn ##解决windows检出提交提示/home/svn/db/txn-current-lock’错误 |
5.配置svn的端口
|
1
|
[root@moshi ~]# vi /etc/httpd/conf/httpd.conf |
找到
#Listen 12.34.56.78:80这一行,
Listen 9999 ##9999就是svn的端口,默认是80,你可以修改成你自己想要的。不建议使用默认80端口
5.配置httpd
|
1
|
[root@moshi ~]# vi /etc/httpd/conf.d/subversion.conf |
修改文件内容为:
<Location /svn>
DAV svn
SVNListParentPath on
SVNParentPath /home/svn
AuthType Basic
AuthName "Authorization"
AuthUserFile /home/svn/conf/pwd.conf ##对应你的用户配置文件
AuthzSVNAccessFile /home/svn/conf/authz.conf ##对应你的权限配置文件
Require valid-user
</Location>
保存退出!
重启httpd服务。
|
1
2
3
|
[root@moshi ~]# service httpd restart停止 httpd: [确定]正在启动 httpd: [确定] |
出现以上字样,表名httpd的配置已经成功启动成功。
6.启动svn
|
1
|
[root@moshi ~]# svnserve -d -r /home/svn/ |
7.查看svn服务是否正常
|
1
2
3
4
|
[root@moshi ~]# ps aux|grep svn##出现以下内容说明svn服务已经成功启动root 8610 0.0 0.0 152864 740 ? Ss 11:25 0:00 svnserve -d -r /home/svn/repos1/root 13128 0.0 0.0 103252 876 pts/0 S+ 14:00 0:00 grep svn |
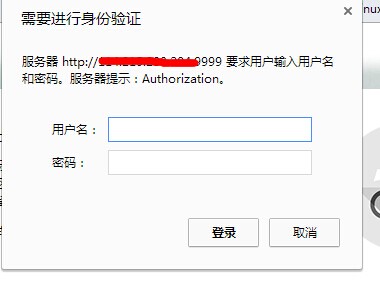
8.进入浏览器访问。
在浏览器中输入:服务器Ip+端口+httpd配置中的<Location /svn>。
会提示你输入用户名密码。
9.总结
嗯,没啥太多总结,这些内容都是我从网上综合多个帖子试验出来的结果,希望能给你一些帮助。