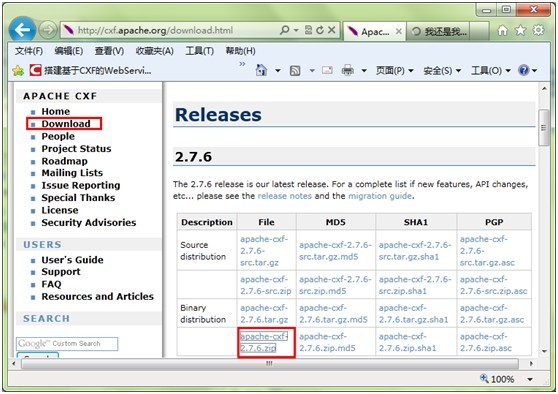
首先,下载CXF,官网(http://cxf.apache.org/),具体位置如下图:
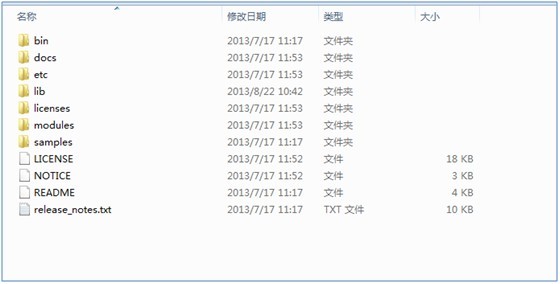
解压后,得到以下目录
下面,我们开始建立工程,在新建的工程lib目录下复制上述lib中的所有文件,特别是endorsed文件夹也要原样复制。
1 WebService的服务器端
1) 创建工程
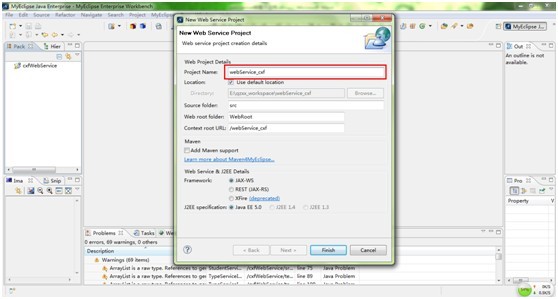
在eclipse/myEclipse中建立web工程webService_cxf,创建方式点击菜单项“File”—“New”—“Web Service Project”,如下图:

弹出窗体,工程名名为webService_cxf,如下图:
2) 新建接口TypeService.java
package com.flageader.service;
import java.util.Date;
import java.util.List;
import java.util.Map;
import javax.jws.WebService;
//必须有@WebService
@WebService
public interface TypeService {
//基本类型
public int testInt(short short1, short short2);
//数组
public String testArray(int[] int1,char[] char1, byte[] byte1) ;
//集合 list
public List testList(List list) ;
//集合 list<String>
public List<String> testListString(String[] str1) ;
//集合 map
public Map testMap(int id, String name, int age, char sex, String grade,String remark) ;
//日期
public Date testDate(Date date) ;
}
3) 新建实现类TypeServiceImpl.java
package com.flageader.service;
import java.util.ArrayList;
import java.util.Date;
import java.util.HashMap;
import java.util.List;
import java.util.Map;
public class TypeServiceImpl implements TypeService {
/**
* 常见类型 int
*/
public int testInt(short short1, short short2) {
int int1 = short1 + short2;
return int1;
}
/**
* 数组
*/
public String testArray(int[] int1, char[] char1, byte[] byte1) {
String str = "";
str+="<int[]={";
for (int i = 0; i < int1.length; i++) {
str += int1[i] + ",";
}
str+="}> <char[]={";
for (int i = 0; i < char1.length; i++) {
str += char1[i] + ",";
}
str+="}> <byte[]={";
for (int i = 0; i < byte1.length; i++) {
str += byte1[i] + ",";
}
str+="}";
return str;
}
/**
* 集合 list
*/
public List testList(List list) {
return list;
}
/**
* 集合 list<String>
*/
public List<String> testListString(String[] str1) {
List<String> list = new ArrayList<String>();
for (int i = 0; i < str1.length; i++) {
list.add(str1[i]);
}
return list;
}
/**
* 集合 map
*/
public Map testMap(int id, String name, int age, char sex, String grade,
String remark) {
Map map = new HashMap();
map.put("id", id);
map.put("name", name);
map.put("age", age);
map.put("sex", sex);
map.put("grade", grade);
map.put("remark", remark);
return map;
}
/**
* 时间
*/
public Date testDate(Date date) {
return date;
}
}
4) 新建applicationContext.xml
<?xml version="1.0" encoding="UTF-8"?>
<beans xmlns="http://www.springframework.org/schema/beans"
xmlns:xsi="http://www.w3.org/2001/XMLSchema-instance" xmlns:jaxws="http://cxf.apache.org/jaxws"
xmlns:jaxrs="http://cxf.apache.org/jaxrs"
xmlns:util="http://www.springframework.org/schema/util"
xsi:schemaLocation="
http://www.springframework.org/schema/beans
http://www.springframework.org/schema/beans/spring-beans.xsd
http://cxf.apache.org/jaxws
http://cxf.apache.org/schemas/jaxws.xsd
http://cxf.apache.org/jaxrs
http://cxf.apache.org/schemas/jaxrs.xsd
http://www.springframework.org/schema/util
http://www.springframework.org/schema/util/spring-util-2.0.xsd"
default-lazy-init="false">
<import resource="classpath:META-INF/cxf/cxf.xml" />
<import resource="classpath:META-INF/cxf/cxf-extension-soap.xml" />
<import resource="classpath:META-INF/cxf/cxf-servlet.xml" />
<!-- implementor:为实现类的完整路径名 -->
<jaxws:endpoint id="typeService" implementor="com.flageader.service.TypeServiceImpl" address="/typeService" />
</beans>
5) 配置web.xml
<?xml version="1.0" encoding="UTF-8"?>
<web-app version="2.5"
xmlns="http://java.sun.com/xml/ns/javaee"
xmlns:xsi="http://www.w3.org/2001/XMLSchema-instance"
xsi:schemaLocation="http://java.sun.com/xml/ns/javaee
http://java.sun.com/xml/ns/javaee/web-app_2_5.xsd">
<listener> <listener-class>org.springframework.web.context.ContextLoaderListener</listener-class>
</listener>
<context-param>
<param-name>contextConfigLocation</param-name>
<param-value>classpath:applicationContext.xml</param-value>
</context-param>
<servlet>
<servlet-name>CXFServlet</servlet-name>
<servlet-class>
org.apache.cxf.transport.servlet.CXFServlet
</servlet-class>
<load-on-startup>1</load-on-startup>
</servlet>
<servlet-mapping>
<servlet-name>CXFServlet</servlet-name>
<url-pattern>/webServices/*</url-pattern>
</servlet-mapping>
<welcome-file-list>
<welcome-file>index.jsp</welcome-file>
</welcome-file-list>
<welcome-file-list>
<welcome-file>index.jsp</welcome-file>
</welcome-file-list>
</web-app>
这样webService编程完成了,为了能知道创建的方法是否存在着问题,我们需要进行测试。
1.1 测试
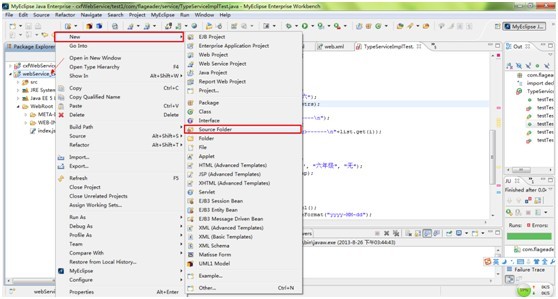
点击工程“webService_cxf”—“New”—“Source Folder”,如下图:
将其命名为test,如下图:

在点击实现类“TypeServiceImpl”—“New”—“Other...”,如下图:
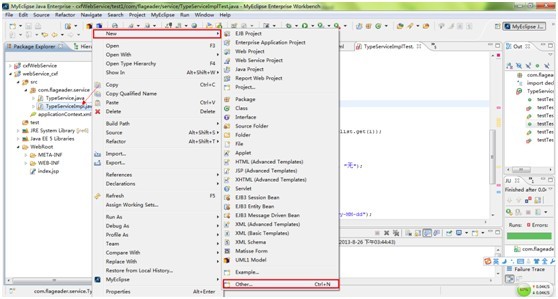
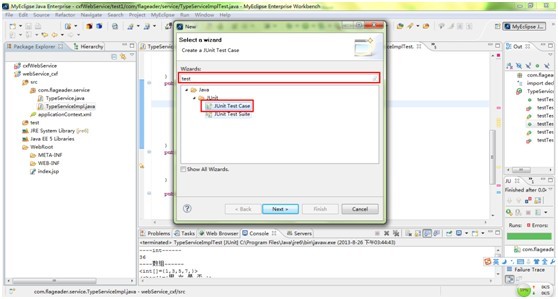
弹出窗体,在窗体中的文本框中输入“test”,在点击“Junit Test Case”,如下图:
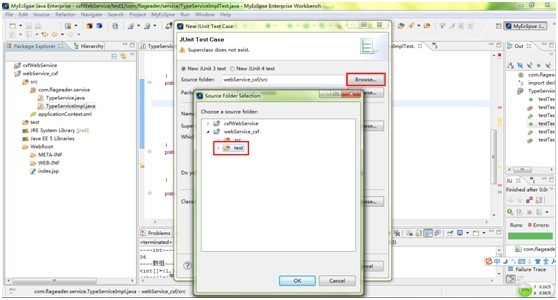
弹出窗体“Junit Test Case”,点击“Browse...”,弹出窗体“Source Folder Selection”,选择“webService_cxf”—“Test”,如下图:
点击下一步,如下图:

选择方法,如下图:

这样创建了测试类TypeServiceImplTest.java。
1) 测试类TypeServiceImplTest.java
package com.flageader.service;
import java.text.ParseException;
import java.text.SimpleDateFormat;
import java.util.ArrayList;
import java.util.Date;
import java.util.List;
import java.util.Map;
import junit.framework.TestCase;
public class TypeServiceImplTest extends TestCase {
public void testTestInt() {
TypeService test=new TypeServiceImpl();
short short1=12;
short short2=24;
System.out.println("----int------ "+test.testInt(short1, short2));
}
public void testTestArray() {
TypeService test=new TypeServiceImpl();
int[] int1={1,3,5,7};
char[] char1={'男','女','是','否'};
byte[] byte1={0,1};
System.out.println("----数组------ "+test.testArray(int1,char1, byte1));
}
public void testTestList() {
TypeService test=new TypeServiceImpl();
List list=new ArrayList();
list.add("ddd");
list.add(3.4);
List list1=test.testList(list);
System.out.println("----list------");
for (int i = 0; i < list.size(); i++) {
System.out.println(list.get(i));
}
}
public void testTestListString() {
TypeService test=new TypeServiceImpl();
String[] strs={"张三","李四","王五","赵六"};
List<String> list=test.testListString(strs);
System.out.println("----list<String>------ ");
for (int i = 0; i < list.size(); i++) { System.out.println("----list<String>------ "+list.get(i));
}
}
public void testTestMap() {
TypeService test=new TypeServiceImpl();
Map map=test.testMap(1, "李丽", 12, '男', "六年级", "无");
System.out.println("----map------ "+map);
}
public void testTestDate() {
try {
TypeService test=new TypeServiceImpl();
SimpleDateFormat sim=new SimpleDateFormat("yyyy-MM-dd");
Date date =test.testDate(sim.parse("2004-09-02"));
System.out.println("----date------ "+date);
} catch (ParseException e) {
e.printStackTrace();
}
}
}
2) 测试结果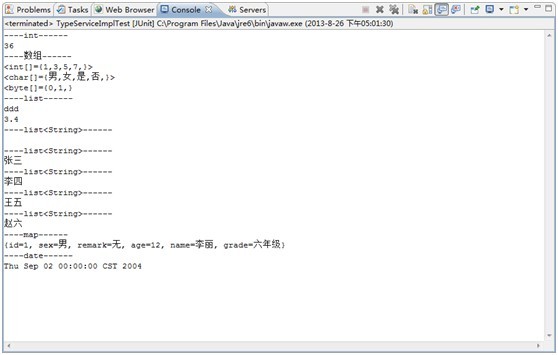
1.2 发布工程
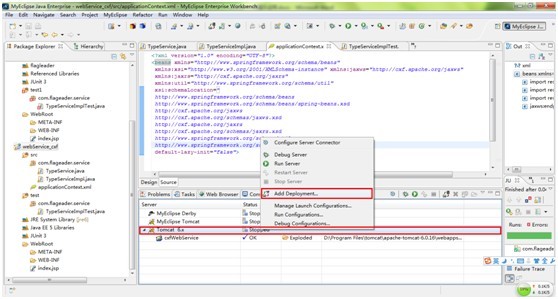
myEclispe/Eclispe已经配置好Tomcat(如果没有请配置好),点击“Tomcat 6.x”—“Add Deployment...”,如下图:
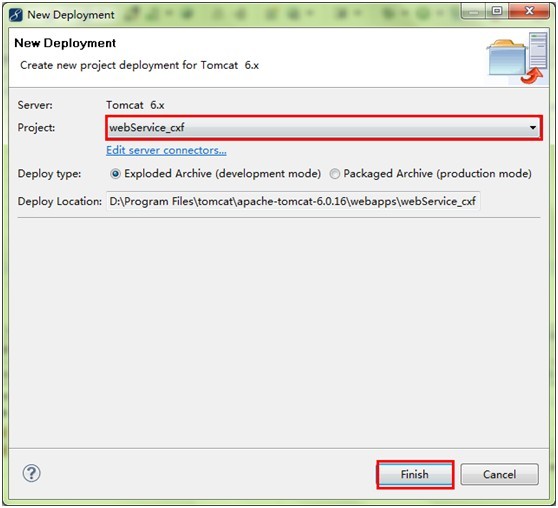
弹出窗体,选择工程“webService_cxf”,如下图:
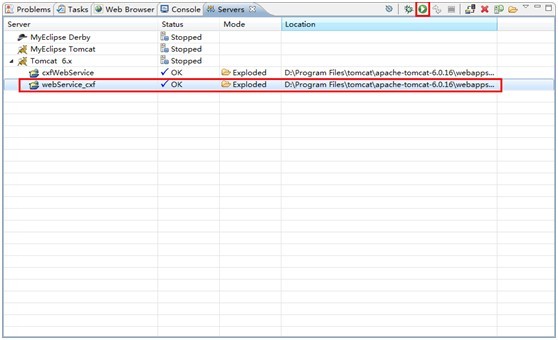
这样就发布了“webService_cxf”工程。
1) 启动tomcat
2) 访问
访问路径:http://localhost/webService_cxf/webServices/typeService?wsdl
a) 怎样知道访问路径
- localhost— ip地址
- 在此tomcat端口号为80,可省略,其他端口号是不能省略的,如http://localhost:8080
- webService_cxf—工程名
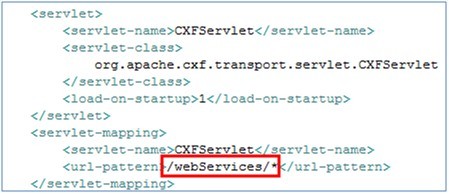
- webServices是由web.xml配置文件决定,如下图:
- Typeservice是由applicationContext.xml配置文件决定,如下图:

- wsdl—web接口定义语言,在最后需要问号传参,即:?wsdl
b) 访问
http://localhost/webService_cxf/webServices/typeService?wsdl
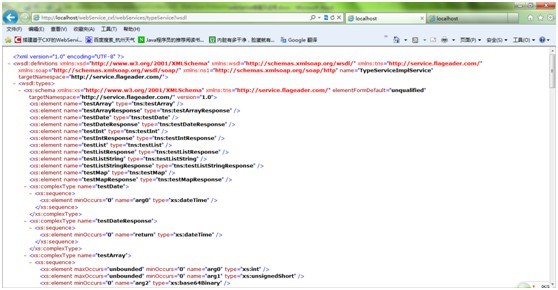
完成。