
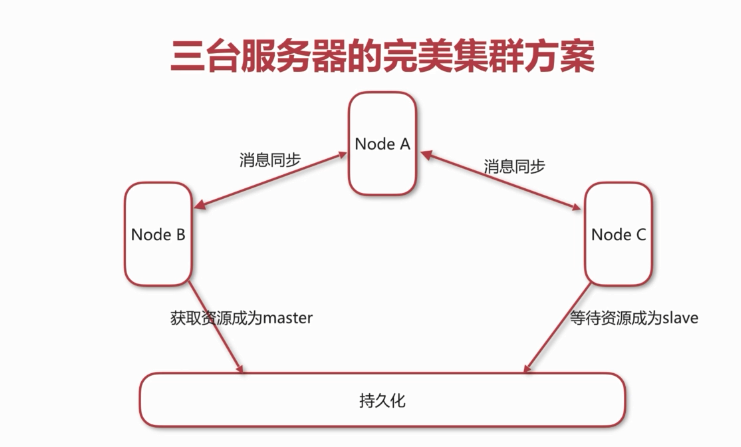
三台服务器搭建如下的集群,达到了高可用、也同时达到了负载的目的:
/******************************************************************下面就来搭建这样的集群服务 Linux环境下************************************************************************/
本次模拟环境在一台机器上完成,实际中是三台服务器上配置,多台linux服务器之间设置共赏文件夹 设置不在本例子考虑之中
如下的 activeMQ-A 代表 A机器、 activeMQ-B代表 B机器、 activeMQ-C 代表C机器
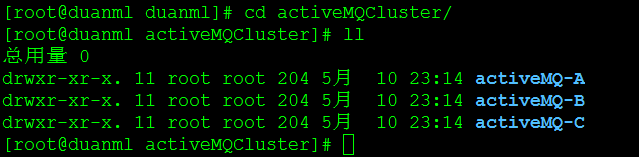
1、创建集群的目录文件夹 activeMQCluster
2、复制解压的apache-activemq-5.15.3文件到activeMQCluster 文件夹下,并且复制三份分别为:activeMQ-A、activeMQ-B、activeMQ-C
如果是三台服务器,则分别安装ActiveMQ,并取名即可。

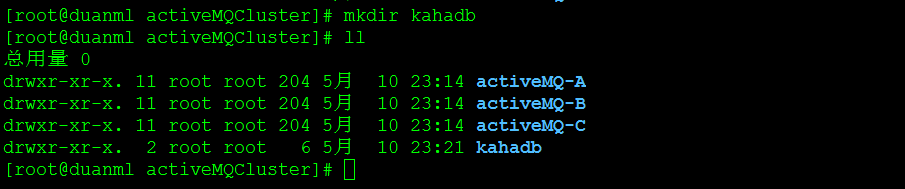
3、创建共享文件夹 kahadb
4、开始配置各个节点服务器,先配置A节点 分别进入
cd activeMQ-A/
cd conf/
编辑 VI activemq.xml

a、修改 activemq.xml 文件中的内容
1 <transportConnectors> 2 <!-- DOS protection, limit concurrent connections to 1000 and frame size to 100MB --> 3 <transportConnector name="openwire" uri="tcp://0.0.0.0:61616?maximumConnections=1000&wireFormat.maxFrameSize=104857600"/> 4 <transportConnector name="amqp" uri="amqp://0.0.0.0:5672?maximumConnections=1000&wireFormat.maxFrameSize=104857600"/> 5 <transportConnector name="stomp" uri="stomp://0.0.0.0:61613?maximumConnections=1000&wireFormat.maxFrameSize=104857600"/> 6 <transportConnector name="mqtt" uri="mqtt://0.0.0.0:1883?maximumConnections=1000&wireFormat.maxFrameSize=104857600"/> 7 <transportConnector name="ws" uri="ws://0.0.0.0:61614?maximumConnections=1000&wireFormat.maxFrameSize=104857600"/> 8 </transportConnectors>
为下面这样,并增加网络配置相关内容 其中标红的为增加的内容
1 <transportConnectors> 2 <!-- DOS protection, limit concurrent connections to 1000 and frame size to 100MB --> 3 <transportConnector name="openwire" uri="tcp://0.0.0.0:61616?maximumConnections=1000&wireFormat.maxFrameSize=104857600"/> 4 <!-- <transportConnector name="amqp" uri="amqp://0.0.0.0:5672?maximumConnections=1000&wireFormat.maxFrameSize=104857600"/> 5 <transportConnector name="stomp" uri="stomp://0.0.0.0:61613?maximumConnections=1000&wireFormat.maxFrameSize=104857600"/> 6 <transportConnector name="mqtt" uri="mqtt://0.0.0.0:1883?maximumConnections=1000&wireFormat.maxFrameSize=104857600"/> 7 <transportConnector name="ws" uri="ws://0.0.0.0:61614?maximumConnections=1000&wireFormat.maxFrameSize=104857600"/> --> 8 </transportConnectors> 9 10 <networkConnectors> 11 <networkConnector name="local_network" uri="static:(tcp://192.168.0.106:61617,tcp://192.168.0.106:61618)"/> 12 </networkConnectors>
5、开始配置各个节点服务器,配置B节点
进入B节点的conf文件夹下

a、修改配置文件activemq.xml 的内容 按照A节点一样的配置 ,注释掉不需要的端口服务,同时修改 端口为 61617、添加网络连接配置
具体如下:
1 <transportConnectors> 2 <!-- DOS protection, limit concurrent connections to 1000 and frame size to 100MB --> 3 <transportConnector name="openwire" uri="tcp://0.0.0.0:61617?maximumConnections=1000&wireFormat.maxFrameSize=104857600"/> 4 <!-- <transportConnector name="amqp" uri="amqp://0.0.0.0:5672?maximumConnections=1000&wireFormat.maxFrameSize=104857600"/> 5 <transportConnector name="stomp" uri="stomp://0.0.0.0:61613?maximumConnections=1000&wireFormat.maxFrameSize=104857600"/> 6 <transportConnector name="mqtt" uri="mqtt://0.0.0.0:1883?maximumConnections=1000&wireFormat.maxFrameSize=104857600"/> 7 <transportConnector name="ws" uri="ws://0.0.0.0:61614?maximumConnections=1000&wireFormat.maxFrameSize=104857600"/> --> 8 </transportConnectors> 9 10 <networkConnectors> 11 <networkConnector name="network_a" uri="static:(tcp://192.168.0.106:61616)"/> 12 </networkConnectors>
b、修改数据共赏存储的目录 B 和 C 节点采用共赏文件夹的方式来
找到 persistenceAdapter 属性 修改为:
1 <persistenceAdapter>
2             <kahaDB directory="/duanml/activeMQCluster/kahadb"/>
3         </persistenceAdapter>
c、修改jetty.xml 文件
找到 bean 为 id="jettyPort" 修改属性port 为:8162
1 <bean id="jettyPort" class="org.apache.activemq.web.WebConsolePort" init-method="start">
2              <!-- the default port number for the web console -->
3         <property name="host" value="0.0.0.0"/>
4         <property name="port" value="8162"/>
5     </bean>
6、开始配置各个节点服务器,配置C节点
进入C节点的conf文件夹下

a、修改配置文件activemq.xml 的内容 按照A节点一样的配置 ,注释掉不需要的端口服务,同时修改 端口为 61618、添加网络连接配置
具体如下:
1 <transportConnectors> 2 <!-- DOS protection, limit concurrent connections to 1000 and frame size to 100MB --> 3 <transportConnector name="openwire" uri="tcp://0.0.0.0:61618?maximumConnections=1000&wireFormat.maxFrameSize=104857600"/> 4 <!-- <transportConnector name="amqp" uri="amqp://0.0.0.0:5672?maximumConnections=1000&wireFormat.maxFrameSize=104857600"/> 5 <transportConnector name="stomp" uri="stomp://0.0.0.0:61613?maximumConnections=1000&wireFormat.maxFrameSize=104857600"/> 6 <transportConnector name="mqtt" uri="mqtt://0.0.0.0:1883?maximumConnections=1000&wireFormat.maxFrameSize=104857600"/> 7 <transportConnector name="ws" uri="ws://0.0.0.0:61614?maximumConnections=1000&wireFormat.maxFrameSize=104857600"/> --> 8 </transportConnectors> 9 10 <networkConnectors> 11 <networkConnector name="network_a" uri="static:(tcp://192.168.0.106:61616)"/> 12 </networkConnectors>
b、修改数据共赏存储的目录 B 和 C 节点采用共赏文件夹的方式来
找到 persistenceAdapter 属性 修改为:
1 <persistenceAdapter>
2             <kahaDB directory="/duanml/activeMQCluster/kahadb"/>
3         </persistenceAdapter>
c、修改jetty.xml 文件
找到 bean 为 id="jettyPort" 修改属性port 为:8163
1 <bean id="jettyPort" class="org.apache.activemq.web.WebConsolePort" init-method="start">
2              <!-- the default port number for the web console -->
3         <property name="host" value="0.0.0.0"/>
4         <property name="port" value="8163"/>
5     </bean>
以上所有节点A、B、C都已经配置完成了
分别启动所有的节点验证 集群的搭建
启动A节点

启动B节点

启动C节点

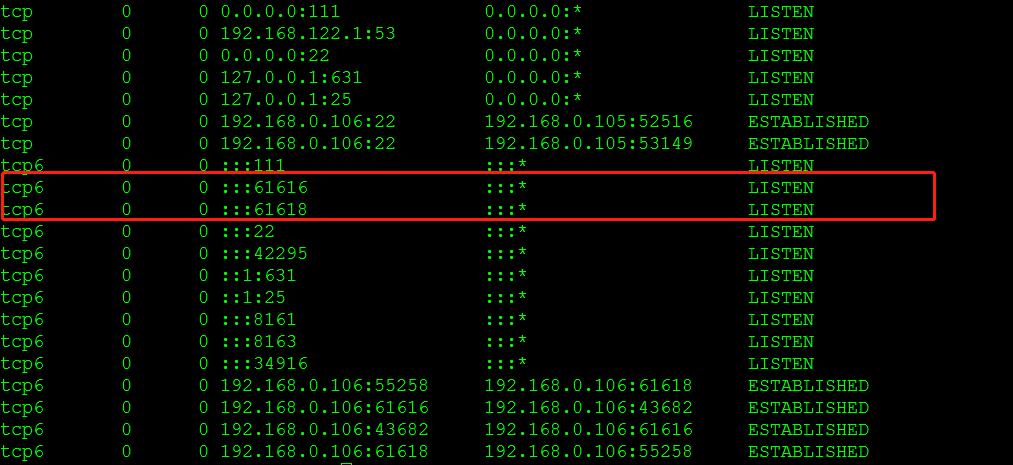
查看端口启动情况:netstat -ant
其中可以看到 A节点 61616 和 B节点 61617 处于 listen状态 而C节点为slave 处于阻塞状态

下面我们来停止B节点,假设B节点挂了,看看我们的集群是否可以使用,达到高可用

再次查看端口的情况 可以看到 A节点 61616 和 C节点 61618 处于 listen状态 而B节点为slave 处于阻塞状态