本示例使用HTML5 canvas,简单的编写了装载图片效果, 请使用支持HTML5的浏览器预览效果:
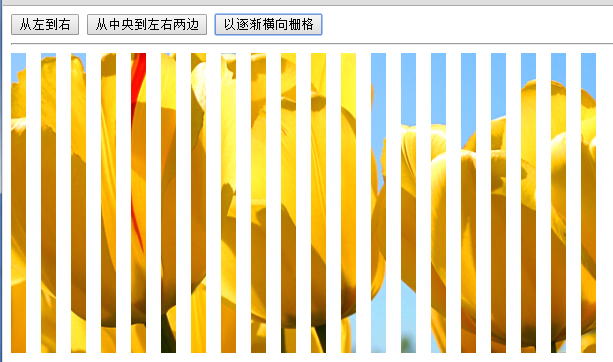
下图为以逐渐横向栅格的效果图
html部分:
<!DOCTYPE html>
<html lang="en">
<head>
    <meta charset="UTF-8">
    <title>html5 装载图片</title>
</head>
<body>
<button onclick="drawImg1()">从左到右</button>
<button onclick="drawImg2()">从中央到左右两边</button>
<button onclick="drawImg3()">以逐渐横向栅格</button>
<hr/>
<canvas class="canvas" id="canvas" width="600" height="300"></canvas>
</body>
</html>
JavaScript部分:
  //初始化
    var canvas = document.getElementById("canvas"),
        context = canvas.getContext("2d"),
        image = new Image();
        image.src = "img/test.jpg";

    //从左到右加载方法
    function drawImg1(){
        var drawWidth = 0,
            interval = setInterval(function(){
                context.drawImage(image, 0, 0, drawWidth, image.height, 0, 0, drawWidth, image.height);
                drawWidth += 20;
                if(drawWidth > canvas.width) clearInterval(interval);
            },100);
    }

    //从中央向左右两边拉开加载方法
    function drawImg2(){
        var drawWidth = 0,
            drawLeft = canvas.width/2,
            interval = setInterval(function(){
                context.drawImage(image, drawLeft, 0, drawWidth, image.height, drawLeft, 0, drawWidth, image.height);
                drawWidth += 20;
                drawLeft -= 10;
                if(drawLeft < 0) clearInterval(interval);
            },100);
    }

    //以逐渐横向栅格加载方法
    function drawImg3(){
        var drawWidth = 0,
            spaceWidth = canvas.width/20,  //10指分割的块数
            interval = setInterval(function(){
                for(var i = 0;i<20;i++){
                    context.drawImage(image, i*spaceWidth, 0, drawWidth, image.height, i*spaceWidth, 0, drawWidth, image.height);
                }
                drawWidth += 5;
                if(drawWidth > spaceWidth) clearInterval(interval);
            },100);
    }