1、模块打包的整个流程图

2、注册仓库帐号
https://pypi.org/account/register/
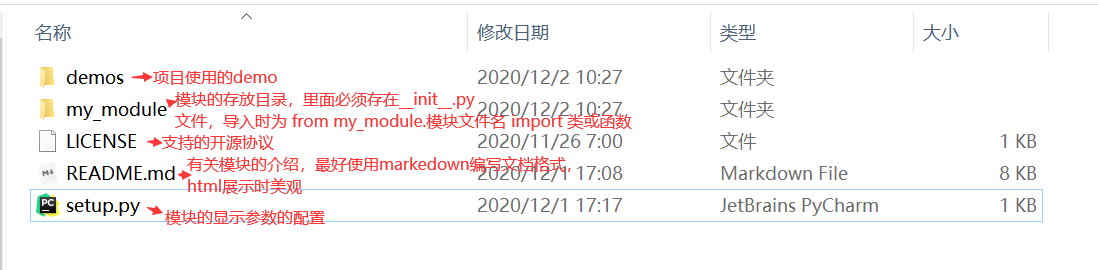
3、准备模块的目录


#!/usr/bin/env python
# -*- coding: utf-8 -*-
import setuptools
with open("README.md", "r",encoding='utf-8') as fh:
    long_description = fh.read()
setuptools.setup(
    name="my_module",# 搜索时,唯一的名字
    version="0.0.1",
    author="my_auth",
    url="https://gitee.com/xx/xxx.git",
    author_email="xxxx@qq.com",
    description="模块简介",
    long_description=long_description,
    long_description_content_type="text/markdown",
    packages=setuptools.find_packages(),  # 自动找到项目中导入的模块
    # 模块相关的元数据
    classifiers=[
        "Programming Language :: Python :: 3",
        "License :: OSI Approved :: MIT License",
        "Operating System :: OS Independent",
    ],
    # 依赖模块
    install_requires=[
        'django==2.2.2',
    ],
    python_requires='>=3',
)
4、安装打包工具
python -m pip install --upgrade setuptools wheel
5、打包模块
# 创建存放模块的目录,执行如下命令
python setup.py sdist bdist_wheel
6、上传模块
6.1、安装用于发布模块的工具:twine 【已安装无需重复安装】
python -m pip install --upgrade twine
或
pip install --upgrade twine
# 提示:python -m 的作用是 run library module as a script (terminates option list)[作为脚本运行库模块(终止选项列表)]
6.2、发布(上传)
python -m twine upload --repository-url https://upload.pypi.org/legacy/  dist/*
或
twine upload --repository-url https://upload.pypi.org/legacy/  dist/*
注意:上传时,提示需要输入PyPI的用户名和密码.
7、测试在线安装模块
pip install 模块
8、使用方法
跟其它安装模块一样