1.Spring Boot
1.1.什么是Spring Boot
Java是静态语言,先变异后运行都是静态语言,不编译直接运行是动态语言(js是动态语言不需要编译,因为浏览器可以直接解析)。Java笨重是因为开发一个功能需要导入很多的配置。Spring-boot整合了当前流行的一系列第三方框架,并且做了一系列默认的配置拿来就用,不需要额外的配置。Spring-boot是运行jar并且内嵌了servlet容器(虽然运行的是一个jar,但是内嵌了tomcat,不需要再次部署到tomcat里面去了)。但是并不适合生产环境,生成环境还是可以将工程打成war包去发布,但是在开发阶段只需要打成jar包就可以了。
微服务:把一个个的子功能拆分成一个个的jar包去运行。

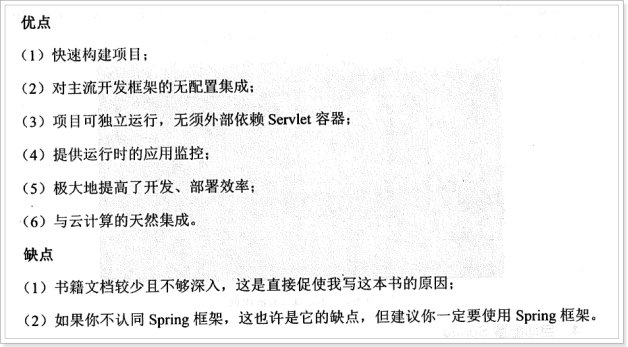
Spring Boot的优缺点
1.1.快速入门
1.1.1.设置spring boot的parent
Spring-boot是spring整合了很多第三方的技术的框架。parent是必须要用的是硬性要求。
<parent>
        <groupId>org.springframework.boot</groupId>
        <artifactId>spring-boot-starter-parent</artifactId>
        <version>1.5.2.RELEASE</version>
    </parent>

说明:Spring boot的项目必须要将parent设置为spring boot的parent,该parent包含了大量默认的配置,大大简化了我们的开发。最新版。
1.1.2.导入spring boot的web支持
因为要开发web项目。
<dependency>
            <groupId>org.springframework.boot</groupId>
            <artifactId>spring-boot-starter-web</artifactId>
        </dependency>
1.1.3.添加Spring boot的插件
这个插件可有可无。
<plugin>
                <groupId>org.springframework.boot</groupId>
                <artifactId>spring-boot-maven-plugin</artifactId>
            </plugin>
1.1.4.编写第一个Spring Boot的应用
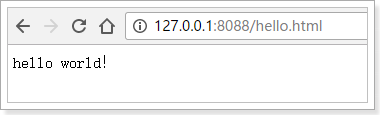
package cn.itcast.springboot.demo;//这个包跟下面的包是没有关系的,各自独立的。

import java.nio.charset.Charset;

import org.springframework.boot.Banner.Mode;
import org.springframework.boot.SpringApplication;
import org.springframework.boot.autoconfigure.SpringBootApplication;
import org.springframework.boot.autoconfigure.data.redis.RedisAutoConfiguration;
import org.springframework.context.annotation.Bean;
import org.springframework.context.annotation.Configuration;
import org.springframework.http.converter.StringHttpMessageConverter;
import org.springframework.stereotype.Controller;
import org.springframework.web.bind.annotation.RequestMapping;
import org.springframework.web.bind.annotation.ResponseBody;

//这个类既是一个控制器也是一个spring-boot应用也是一个配置文件
@Controller//一个控制器
//exclude = { RedisAutoConfiguration.class }不想redis自动配置
@SpringBootApplication(exclude = { RedisAutoConfiguration.class })//一个spring-boot应用
@Configuration//一个xml配置文件
public class HelloApplication {//spring-boot的入口类是XXXApplication类。

    @RequestMapping("hello")
    @ResponseBody
    public String hello() {
        return "hello world!!";
    }

    // 自定义消息转化器的第一种方法
    @Bean
    public StringHttpMessageConverter stringHttpMessageConverter() {
        StringHttpMessageConverter converter = new StringHttpMessageConverter(Charset.forName("ISO-8859-1"));
        return converter;
    }

    public static void main(String[] args) {
        // SpringApplication.run(HelloApplication.class, args);  要运行run的应用的类HelloApplication一定要包含@SpringBootApplication注解。有参数指定参数没有参数是args。
        SpringApplication application = new SpringApplication(HelloApplication.class);
        application.setBannerMode(Mode.OFF);
        application.run(args);
    }

}
代码说明:
1、@SpringBootApplication:Spring Boot项目的核心注解,主要目的是开启自动配置。不用配置tomcat。
2、@Configuration:这是一个配置Spring的配置类;
3、@Controller:标明这是一个SpringMVC的Controller控制器;
4、main方法:在main方法中启动一个应用,即:这个应用的入口;
package cn.itcast.springboot.demo;
import java.nio.charset.Charset;
import java.util.List;

import javax.servlet.http.HttpServletRequest;
import javax.servlet.http.HttpServletResponse;

import org.springframework.context.annotation.Configuration;
import org.springframework.http.converter.HttpMessageConverter;
import org.springframework.http.converter.StringHttpMessageConverter;
import org.springframework.web.servlet.HandlerInterceptor;
import org.springframework.web.servlet.ModelAndView;
import org.springframework.web.servlet.config.annotation.InterceptorRegistry;
import org.springframework.web.servlet.config.annotation.WebMvcConfigurerAdapter;

//这个类跟HelloApplication是同级目录,会扫描到,生效。

@Configuration //申明这是一个配置,加入到spring的容器。
public class MySrpingMVCConfig extends WebMvcConfigurerAdapter{

    // 自定义拦截器,所有请求都拦截
    @Override
    public void addInterceptors(InterceptorRegistry registry) {
        HandlerInterceptor handlerInterceptor = new HandlerInterceptor() {
            @Override
            public boolean preHandle(HttpServletRequest request, HttpServletResponse response, Object handler)
                    throws Exception {
                System.out.println("自定义拦截器............");
                return true;
            }

            @Override
            public void postHandle(HttpServletRequest request, HttpServletResponse response, Object handler,
                    ModelAndView modelAndView) throws Exception {
            }

            @Override
            public void afterCompletion(HttpServletRequest request, HttpServletResponse response, Object handler,
                    Exception ex) throws Exception {
            }
        };
        registry.addInterceptor(handlerInterceptor).addPathPatterns("/**");//所有的请求都拦截
    }

    // 自定义消息转化器的第二种方法
    @Override
    public void configureMessageConverters(List<HttpMessageConverter<?>> converters) {
        StringHttpMessageConverter converter  = new StringHttpMessageConverter(Charset.forName("UTF-8"));
        converters.add(converter);
    }

}
application.properties:
server.port=8088
server.servlet-path=/

spring.resources.static-locations=classpath:/public/

logging.level.org.springframework=DEBUG

jdbc.properties:
jdbc.driverClassName=com.mysql.jdbc.Driver
jdbc.url=jdbc:mysql://127.0.0.1:3306/taotao?useUnicode=true&characterEncoding=utf8&autoReconnect=true&allowMultiQueries=true
jdbc.username=root
jdbc.password=root
1.1.1.启动应用
在Spring Boot项目中,启动的方式有两种,一种是直接run Java Application另外一种是通过Spring Boot的Maven插件运行(spring-boot-maven-plugin)。

第一种:
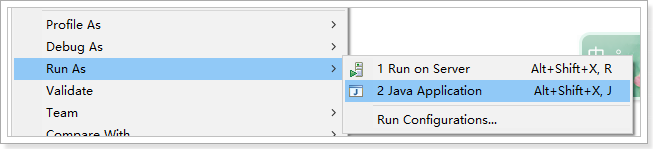
第二种:

启动效果:
看到如下信息就说明启动成功了:
INFO 6188 --- [ main] c.i.springboot.demo.HelloApplication : Started HelloApplication in 3.281 seconds (JVM running for 3.601)
1.1. Spring Boot的核心
1.1.1. 入口类和@SpringBootApplication
Spring Boot的项目一般都会有XXXXXXApplication的入口类,入口类中会有main方法,这是一个标准的Java应用程序的入口方法。
@SpringBootApplication注解是Spring Boot的核心注解,它其实是一个组合注解:

该注解主要组合了以下注解:
@SpringBootConfiguration:这是Spring Boot项目的配置注解,这也是一个组合注解:

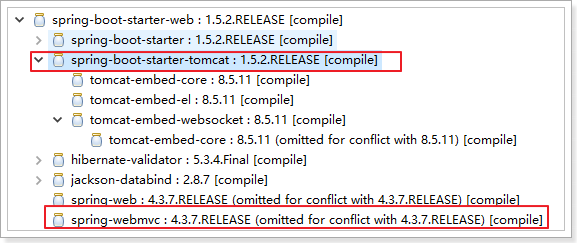
在Spring Boot项目中推荐使用@ SpringBootConfiguration替代@Configuration
1.@EnableAutoConfiguration:启用自动配置,该注解会使Spring Boot根据项目中依赖的jar包自动配置项目的配置项:
如:我们添加了spring-boot-starter-web的依赖,项目中也就会引入SpringMVC的依赖,Spring Boot就会自动配置tomcat和SpringMVC,他会导入一系列相关的依赖和自动完成配置。
2.@ComponentScan:默认扫描@SpringBootApplication注解所在类的同级目录以及它的子目录。
1.1.1.关闭自动配置
通过上述,我们得知,Spring Boot会根据项目中的jar包依赖,自动做出配置,Spring Boot支持的自动配置如下(非常多):

如果我们不需要Spring Boot自动配置,想关闭某一项的自动配置,该如何设置呢?

比如:我们不想自动配置Redis,想手动配置。

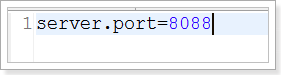
1.1.1.全局配置文件
Spring Boot项目使用一个全局的配置文件application.properties或者是application.yml,在resources目录下或者类路径下的/config下,一般我们放到resources下。

修改tomcat的端口为8088
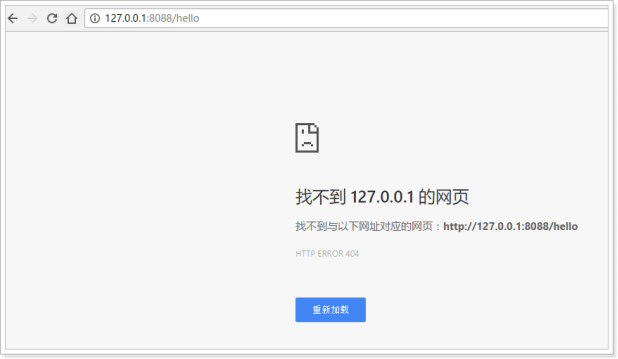
修改进入DispatcherServlet的规则为:*.html

测试: