绘图功能
使用 opencv 绘制各种形状,简单用法示例
import cv2 as cv
import numpy as np

img = np.random.randint(0, 255, size=(1280, 1280, 3)).astype(np.uint8)

### 画线
## def line(img, pt1, pt2, color, thickness=None, lineType=None, shift=None)
# thickness 厚,粗
cv.line(img, (1, 1), (20, 500), (255, 0, 0), 5)

### 画圆
## def circle(img, center, radius, color, thickness=None, lineType=None, shift=None)
cv.circle(img, (770, 600), 50, (180, 118, 10), 8)

### 画椭圆
## def ellipse(img, center, axes, angle, startAngle, endAngle, color, thickness=None, lineType=None, shift=None)
# cv.ellipse(img, (150, 250))

### 画矩形框
## def rectangle(img, pt1, pt2, color, thickness=None, lineType=None, shift=None)
cv.rectangle(img, (220, 230), (330, 840), (100, 99, 88), 20)

### 画多边形

### 写字
## def putText(img, text, org, fontFace, fontScale, color, thickness=None, lineType=None, bottomLeftOrigin=None)
# cv.putText(img, '我爱你中国', (500, 500), cv.FONT_ITALIC, 2, (222, 111, 0), 10)  # 中文自己解决吧
cv.putText(img, 'sss', (500, 500), cv.FONT_ITALIC, 2, (222, 111, 0), 10)


cv.imshow('t', img)
cv.waitKey(0)
后续补充吧,都是不太常用的玩意
鼠标事件
首先打印鼠标事件,看看都支持哪些事件
events = [i for i in dir(cv) if 'EVENT' in i]
print(events)

# EVENT_FLAG_LBUTTON 1         #左鍵拖曳
# EVENT_FLAG_RBUTTON 2         #右鍵拖曳
# EVENT_FLAG_MBUTTON 4         #中鍵拖曳
# EVENT_FLAG_CTRLKEY 8         #(8~15)按Ctrl不放事件
# EVENT_FLAG_SHIFTKEY 16       #(16~31)按Shift不放事件
# EVENT_FLAG_ALTKEY 32         #(32~39)按Alt不放事件
#
# EVENT_MOUSEMOVE 0            #滑动
# EVENT_LBUTTONDOWN 1          #左键点击
# EVENT_RBUTTONDOWN 2          #右键点击
# EVENT_MBUTTONDOWN 3          #中键点击
# EVENT_LBUTTONUP 4            #左键放开
# EVENT_RBUTTONUP 5            #右键放开
# EVENT_MBUTTONUP 6            #中键放开
# EVENT_LBUTTONDBLCLK 7        #左键双击
# EVENT_RBUTTONDBLCLK 8        #右键双击
# EVENT_MBUTTONDBLCLK 9        #中键双击
鼠标事件操作步骤
1. 创建回调函数
- 必须 5 个参数
- 在回调函数内 可获取 鼠标事件,点击坐标
- 鼠标点击次数 需要 自己判断
- 注意 回调函数 是 单线程,因为鼠标只能一个人操作,这样很多变量就好控制了
2. 创建窗口,把窗口与回调函数绑定
- 一个窗口只能绑定一个回调函数
- 绑定多个 以 最后一个 为准
3. 延迟显示图像
waitKey
示例
### 回调函数
#定义全局变量
n = 0    # 定义鼠标按下的次数
ix = 0   # x,y 坐标的临时存储
iy = 0

def draw_rectangle(event, x, y, flags, param):
    # 鼠标回调函数
    global n, ix, iy
    if event == cv.EVENT_LBUTTONDOWN:       # 左击
        if n == 0:    # 首次按下保存坐标值
            n += 1
            ix, iy = x, y
            cv.circle(img, (x, y), 2, (255, 255, 255), -1)   # 第一次打点
        else:        # 第二次按下显示矩形
            n = 0
            cv.rectangle(img, (ix, iy), (x, y), (255, 255, 255), 3)   # 第二次画矩形

def draw_circle(event, x, y, flags, param):
    global n, ix, iy
    if event == cv.EVENT_LBUTTONDOWN:       # 左击
        if n == 0:    # 首次按下保存坐标值
            cv.putText(img, 's', (x, y), cv.FONT_ITALIC, 1, (255, 255, 255), 1)   # 第一次打点

def draw(event, x, y, flags, param):
    # flags, param 两个参数虽然没用到,但必须有,入参必须 5 个
    global n, ix, iy
    if event == cv.EVENT_LBUTTONDOWN:       # 左击
        if n == 0:    # 首次按下保存坐标值
            n += 1
            ix, iy = x, y
            cv.circle(img, (x, y), 2, (255, 255, 255), -1)   # 第一次打点
        else:        # 第二次按下显示矩形
            n = 0
            cv.rectangle(img, (ix, iy), (x, y), (255, 255, 255), 3)   # 第二次画矩形
    if event == cv.EVENT_LBUTTONDBLCLK:
        cv.putText(img, 's', (x, y), cv.FONT_ITALIC, 1, (255, 255, 255), 1)
        n = 0

### 创建图像与窗口,并将窗口与回调函数绑定
img = np.zeros((512, 512, 3), np.uint8)
cv.namedWindow('image')
cv.setMouseCallback('image', draw_circle)       # 只能绑定一个回调
cv.setMouseCallback('image', draw_rectangle)    # 以后者为准
cv.setMouseCallback('image', draw)

### 显示并延时
while(1):
    cv.imshow('image', img)
    if cv.waitKey(20) & 0xFF == 27:
        break

# 销毁所有窗口
cv.destroyAllWindows()
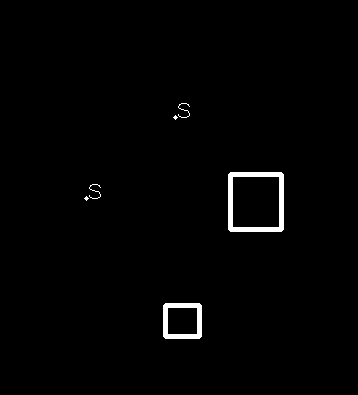
回调函数为 draw 时,双击 写 S,两次单击 画矩形框,效果如下图
参考资料:
https://www.jb51.net/article/152062.htm 对python opencv 添加文字 cv2.putText 的各参数介绍
https://blog.csdn.net/hijacklei/article/details/116010860 python opencv cv2.putText()显示中文问题
https://blog.csdn.net/qq_40344307/article/details/90107157 OpenCV - 处理鼠标事件(Python实现)