aaaaa
我用的是python27版本,
在opencv上 https://opencv.org/releases/page/6/
下载这个版本的:opencv-2.4.10.exe
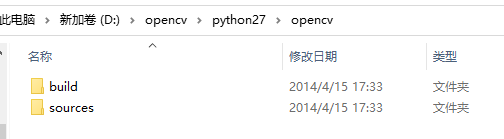
解压到一个文件夹,如 D:opencvpython27
再添加到环境变量里新建了个 OpenCv

再安装 numpy这是opencv默认依赖的。
版本:numpy-1.12.1.zip
其他高一些版本安装后也有问题。比如像这个
ImportError: numpy.core.multiarray failed to import
只好从1.13,1.15,换到1.12版本的。


//var filename = @"E:	estamap-binary.bmp";
//读取灰度图
using (Mat src = new Mat(filename, ImreadModes.Grayscale))
{
//Cv2.ImShow("Demo", src);

//1.Sobel算子,x方向求梯度
Mat sobel = new Mat();
Cv2.Sobel(src, sobel, MatType.CV_8U, 1, 0, 3);

//2.二值化
Mat binary = new Mat();
Cv2.Threshold(sobel, binary, 0, 255, ThresholdTypes.Otsu | ThresholdTypes.Binary);

//3. 膨胀和腐蚀操作的核函
数
Mat element1 = new Mat();
Mat element2 = new Mat();
OpenCvSharp.Size size1 = new OpenCvSharp.Size(30, 9);
OpenCvSharp.Size size2 = new OpenCvSharp.Size(24, 6);

element1 = Cv2.GetStructuringElement(MorphShapes.Rect, size1);
element2 = Cv2.GetStructuringElement(MorphShapes.Rect, size2);

//4. 膨胀一次,让轮廓突出
Mat dilation = new Mat();
Cv2.Dilate(binary, dilation, element2);

//5. 腐蚀一次,去掉细节,如表格线等。注意这里去掉的是竖直的线
Mat erosion = new Mat();
Cv2.Erode(dilation, erosion, element1);

//6. 再次膨胀,让轮廓明显一些
Mat dilation2 = new Mat();
Cv2.Dilate(erosion, dilation2, element2, null, 2);


OpenCvSharp.Point[][] contours;
HierarchyIndex[] hierarchly;
Cv2.FindContours(dilation2, out contours, out hierarchly, RetrievalModes.Tree, ContourApproximationModes.ApproxSimple, new OpenCvSharp.Point(0, 0));

//Mat dst_Image = Mat.Zeros(src.Size(), src.Type());
Mat dst_Image = src.Clone();
string pts = "";
for (int i = 0; i < contours.Length; i++)
{
    Scalar color = new Scalar(0, 255, 255);//
    //Cv2.DrawContours(dst_Image, contours, i, color, 1, LineTypes.Link8, hierarchly);

    double area = Cv2.ContourArea(contours[i]);
    if (area < 1000)
        continue;

    var epsilon = 0.001 * Cv2.ArcLength(contours[i], true);
    var approx = Cv2.ApproxPolyDP(contours[i], epsilon, true);
    //找到最小矩形,可能有方向
    var rect2 = Cv2.MinAreaRect(contours[i]);
    var box = rect2.Points();

    //筛选那些太细的矩形,留下扁的
    var height = Math.Abs(box[0].Y - box[2].Y);
    var width = Math.Abs(box[0].X - box[2].X);
    if (height > width * 1.2)
        continue;

    pts += rect2.Center.X.ToString() + "," + rect2.Center.Y.ToString() + ";";
    Cv2.DrawContours(dst_Image, contours, i, color, 1, LineTypes.Link8, hierarchly);
}

Cv2.ImShow(pts, dst_Image);
Cv2.WaitKey(0);
#coding=utf-8
import sys
import cv2
import numpy as np

# img = cv2.imread(r'E:	estamap-binary.bmp')
# cv2.namedWindow("Image")
# cv2.imshow("Image", img)
# cv2.waitKey (0)
# cv2.destroyAllWindows()


def preprocess(gray):
    # 1. Sobel算子,x方向求梯度
    sobel = cv2.Sobel(gray, cv2.CV_8U, 1, 0, ksize = 3)
    # 2. 二值化
    ret, binary = cv2.threshold(sobel, 0, 255, cv2.THRESH_OTSU+cv2.THRESH_BINARY)

    # 3. 膨胀和腐蚀操作的核函数
    element1 = cv2.getStructuringElement(cv2.MORPH_RECT, (30, 9))
    element2 = cv2.getStructuringElement(cv2.MORPH_RECT, (24, 6))

    # 4. 膨胀一次,让轮廓突出
    dilation = cv2.dilate(binary, element2, iterations = 1)

    # 5. 腐蚀一次,去掉细节,如表格线等。注意这里去掉的是竖直的线
    erosion = cv2.erode(dilation, element1, iterations = 1)

    # 6. 再次膨胀,让轮廓明显一些
    dilation2 = cv2.dilate(erosion, element2, iterations = 2)

    # 7. 存储中间图片
    cv2.imwrite("binary.png", binary)
    cv2.imwrite("dilation.png", dilation)
    cv2.imwrite("erosion.png", erosion)
    cv2.imwrite("dilation2.png", dilation2)
    return dilation2


def findTextRegion(img):
    region = []
    # 1. 查找轮廓
    contours, hierarchy = cv2.findContours(img, cv2.RETR_TREE, cv2.CHAIN_APPROX_SIMPLE)
    # 2. 筛选那些面积小的
    for i in range(len(contours)):
        cnt = contours[i]
        # 计算该轮廓的面积
        area = cv2.contourArea(cnt)

        # 面积小的都筛选掉
        if(area < 1000):
            continue

        # 轮廓近似,作用很小
        epsilon = 0.001 * cv2.arcLength(cnt, True)
        approx = cv2.approxPolyDP(cnt, epsilon, True)

        # 找到最小的矩形,该矩形可能有方向
        rect = cv2.minAreaRect(cnt)
        print "rect is: "
        print rect

        # box是四个点的坐标
        box = cv2.cv.BoxPoints(rect)
        box = np.int0(box)

        # 计算高和宽
        height = abs(box[0][1] - box[2][1])
        width = abs(box[0][0] - box[2][0])

        # 筛选那些太细的矩形,留下扁的
        if(height > width * 1.2):
            continue

        region.append(box)
    return region


def detect(img):
    # 1.  转化成灰度图
    gray = cv2.cvtColor(img, cv2.COLOR_BGR2GRAY)

    # 2. 形态学变换的预处理,得到可以查找矩形的图片
    dilation = preprocess(gray)

    # 3. 查找和筛选文字区域
    region = findTextRegion(dilation)

    # 4. 用绿线画出这些找到的轮廓
    for box in region:
        cv2.drawContours(img, [box], 0, (0, 255, 0), 2)

    cv2.namedWindow("img", cv2.WINDOW_NORMAL)
    cv2.imshow("img", img)

    # 带轮廓的图片
    cv2.imwrite("contours.png", img)

    cv2.waitKey(0)
    cv2.destroyAllWindows()


if __name__ == '__main__':
    # 读取文件
    imagePath = r'E:	estamap-binary.bmp'
    img = cv2.imread(imagePath)
    detect(img)