测试环境搭建: 本次搭建是基于springboot来实现的,代码在码云的链接:https://gitee.com/yangxioahui/thymeleaf.git
DispatcherServlet核心流程在上一篇源码分析已经做了详细讲解 了,参考: https://www.cnblogs.com/yangxiaohui227/p/13229413.html
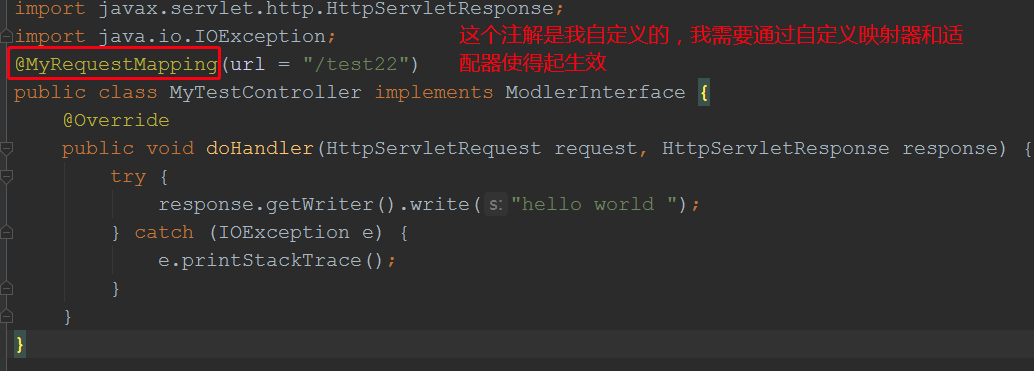
1. 自定义处理器映射器和处理器适配器:
本次目标是使得我自定义的controller生效


//自定义映射器,使得springmvc 可以通过/test22 找到我的MyTestController
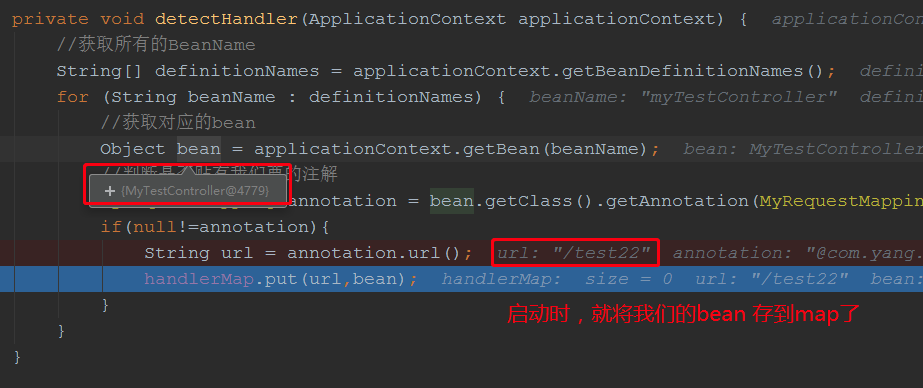
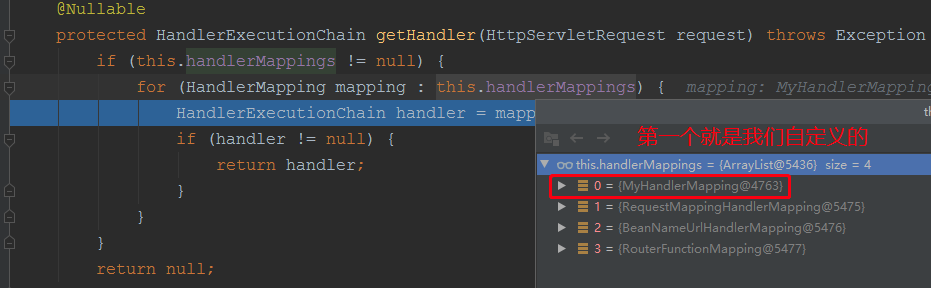
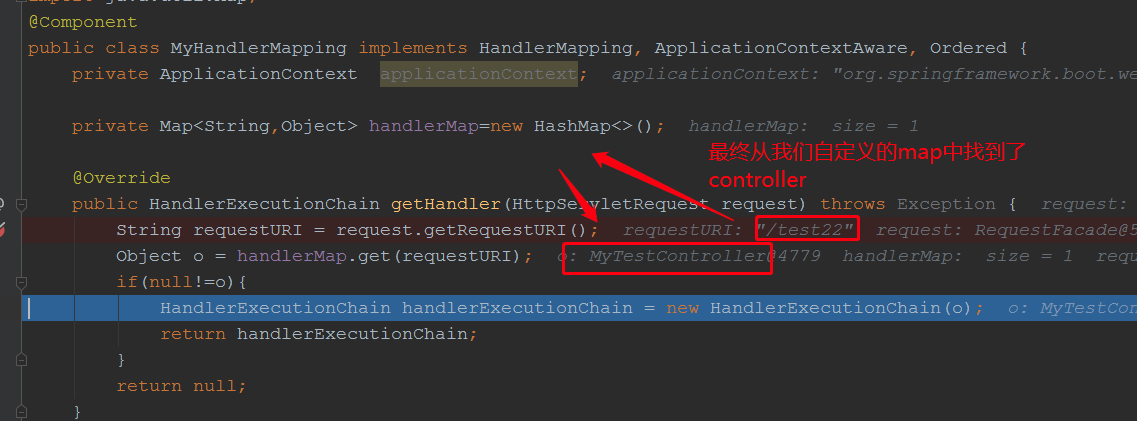
@Component
public class MyHandlerMapping implements HandlerMapping, ApplicationContextAware, Ordered {
    private ApplicationContext  applicationContext;

    private Map<String,Object> handlerMap=new HashMap<>();  //spring 在启动时,会将所有被我的@MyRequestMapping注解标注的bean 存到这里,例如我们定义的MyTestController

    @Override
    public HandlerExecutionChain getHandler(HttpServletRequest request) throws Exception {
        String requestURI = request.getRequestURI(); //从请求参数中拿到对应的url
        Object o = handlerMap.get(requestURI); //通过url或者handler
        if(null!=o){
            HandlerExecutionChain handlerExecutionChain = new HandlerExecutionChain(o);
            return handlerExecutionChain;
        }
        return null;
    }

    @Override
    public void setApplicationContext(ApplicationContext applicationContext) throws BeansException {
        this.applicationContext=applicationContext;
        this.detectHandler(applicationContext); //spring 容器创建该bean时会回调该方法

    }

    private void detectHandler(ApplicationContext applicationContext) {
        //获取所有的BeanName
        String[] definitionNames = applicationContext.getBeanDefinitionNames();
        for (String beanName : definitionNames) {
            //获取对应的bean
            Object bean = applicationContext.getBean(beanName);
            //判断是否贴有我们要的注解
            MyRequestMapping annotation = bean.getClass().getAnnotation(MyRequestMapping.class);
            if(null!=annotation){
                String url = annotation.url();
                handlerMap.put(url,bean);
            }
        }
    }

    @Override
    public int getOrder() {  //因为springmvc 中有很多HandlerMapping,只要其中一个匹配到对应的url,就会返回,所以我们要将这里的优先级设置最高
        return Ordered.HIGHEST_PRECEDENCE;
    }
}
自定义适配器:
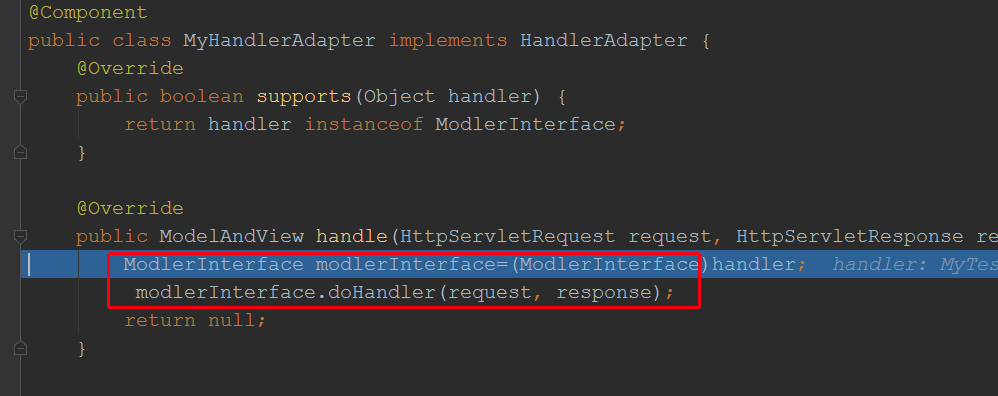
@Component
public class MyHandlerAdapter implements HandlerAdapter {
    @Override
    public boolean supports(Object handler) {
        return handler instanceof ModlerInterface; //我们定义的适配器,处理的类型就是ModlerInterface
    }

    @Override
    public ModelAndView handle(HttpServletRequest request, HttpServletResponse response, Object handler) throws Exception {
        ModlerInterface modlerInterface=(ModlerInterface)handler;
         modlerInterface.doHandler(request, response); //直接调用目标方法
        return null;
    }

    @Override
    public long getLastModified(HttpServletRequest request, Object handler) {
        return 0;
    }
}
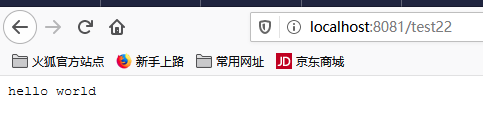
浏览器调用:
原理分析:
自定义映射器和自定义适配器添加到DispatcherServlet原理:
DispatcherServlet 的List<HandlerMapping> handlerMappings 初始化方法:

DispatcherServlet的List<HandlerAdapter> handlerAdapters 的原理同上;
我们再debug调试下自定义HandlerMapping的过程:
启动项目:

浏览器debug 调用我们的目标方法:
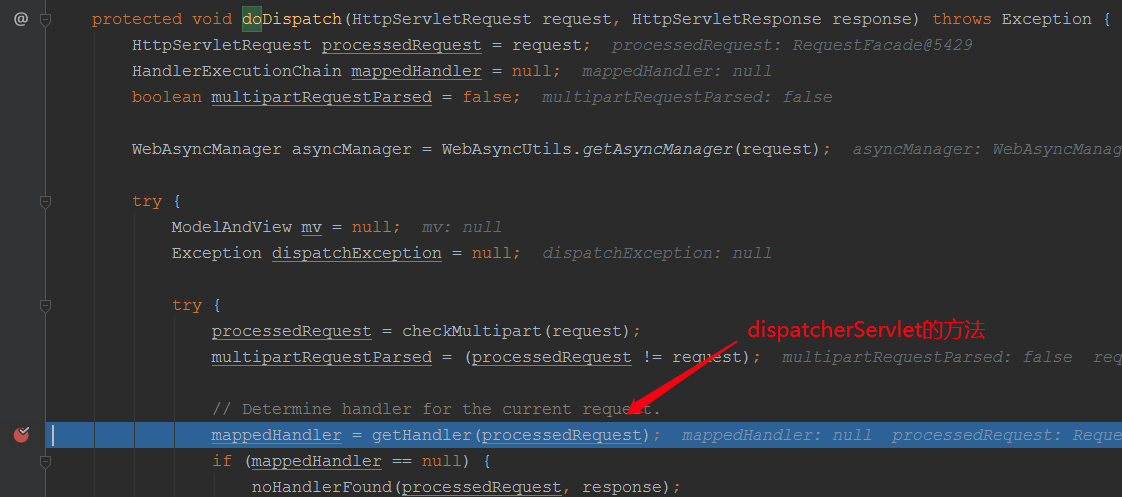

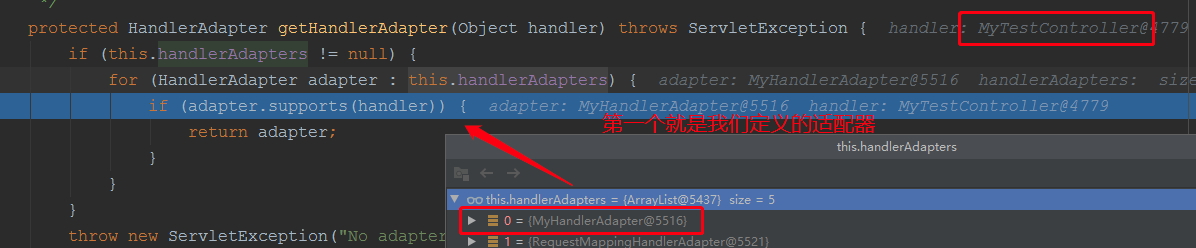

这样就找到我们的适配器了,之后通过适配器调用目标方法:


至此,我们自定义映射器和适配器原理完成了;
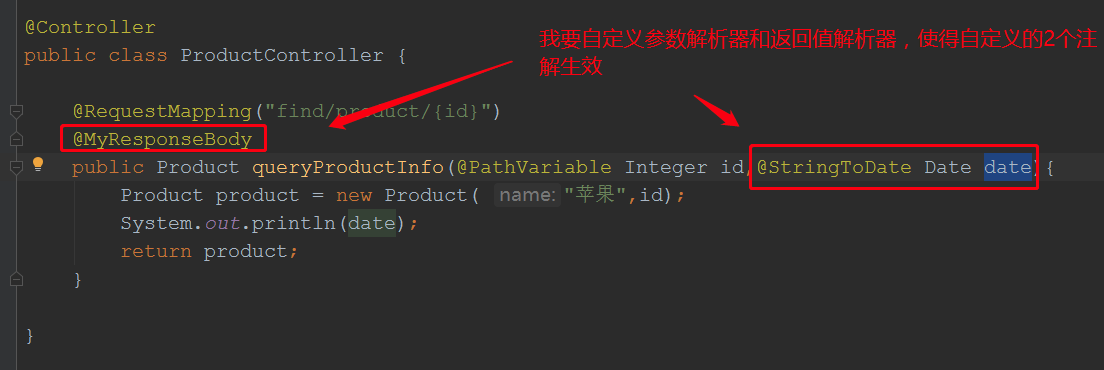
2. 自定义参数解析器: 针对的是普通使用@RequestMaping实现的controller
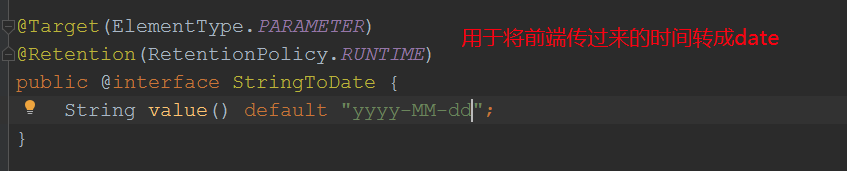
// 自定义参数解析器:
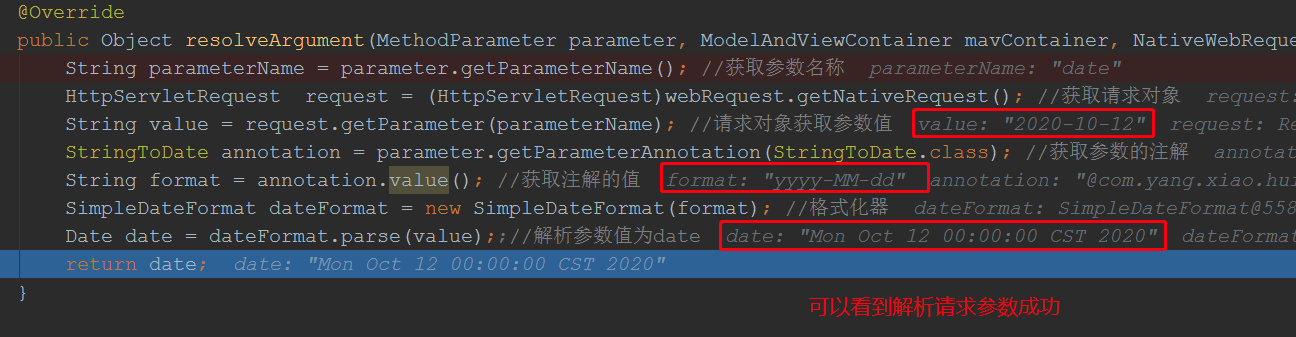
package com.yang.xiao.hui.thymeleaf.resovler;


import org.springframework.core.MethodParameter;
import org.springframework.web.bind.support.WebDataBinderFactory;
import org.springframework.web.context.request.NativeWebRequest;
import org.springframework.web.method.support.HandlerMethodArgumentResolver;
import org.springframework.web.method.support.ModelAndViewContainer;

import javax.servlet.http.HttpServletRequest;
import java.text.SimpleDateFormat;
import java.util.Date;
public class StringToDateResovler implements HandlerMethodArgumentResolver{

    @Override
    public boolean supportsParameter(MethodParameter parameter) { //@RequsetMapping注解标注的方法参数有没指定注解
        StringToDate annotation = parameter.getParameter().getAnnotation(StringToDate.class);
        if(null!=annotation){
            return true;
        }
        return false;
    }

    @Override
    public Object resolveArgument(MethodParameter parameter, ModelAndViewContainer mavContainer, NativeWebRequest webRequest, WebDataBinderFactory binderFactory) throws Exception {
        String parameterName = parameter.getParameterName(); //获取参数名称
        HttpServletRequest  request = (HttpServletRequest)webRequest.getNativeRequest(); //获取请求对象
        String value = request.getParameter(parameterName); //请求对象获取参数值
        StringToDate annotation = parameter.getParameterAnnotation(StringToDate.class); //获取参数的注解
        String format = annotation.value(); //获取注解的值
        SimpleDateFormat dateFormat = new SimpleDateFormat(format); //格式化器
        Date date = dateFormat.parse(value);;//解析参数值为date
        return date;
    }
}
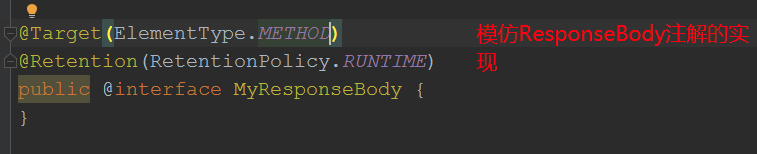
//自定定义返回值解析器
public class MyReturnValueHandler implements HandlerMethodReturnValueHandler {
    @Override
    public boolean supportsReturnType(MethodParameter returnType) { //判断@RequestMapping注解标注的方法有没有我们定义的注解
        MyResponseBody annotation = returnType.getMethod().getAnnotation(MyResponseBody.class);
        if(null!=annotation){
            return true;
        }
        return false;
    }

    @Override
    public void handleReturnValue(Object returnValue, MethodParameter returnType, ModelAndViewContainer mavContainer, NativeWebRequest webRequest) throws Exception {
        mavContainer.setRequestHandled(true);//不会进行视图解析了
        HttpServletResponse response = webRequest.getNativeResponse(HttpServletResponse.class);
        response.getWriter().write(returnValue.toString());
    }
}
//根据之前的源码分析知道,@RequestMapping 注解实现controller的方式,最终是由RequestMappingHandlerAdapter处理的,因此我们要将自定义的解析器加到RequestMappingHandlerAdapter中去;
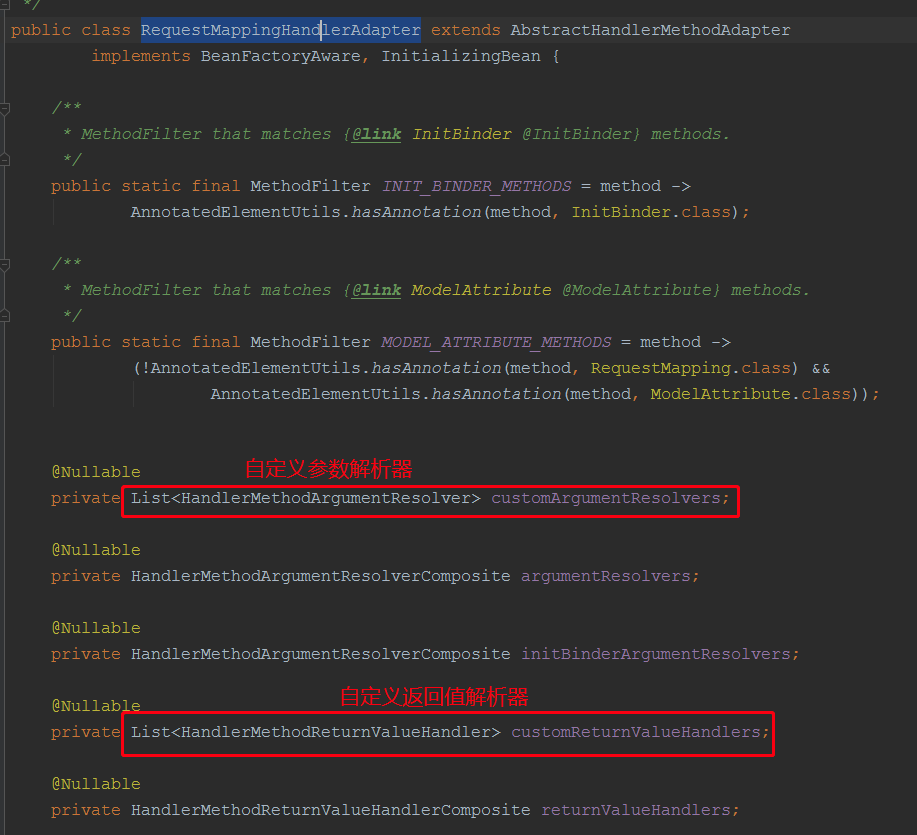
而RequestMappingHandlerAdapter这个bean的创建是通过WebMvcConfigurationSupport这个配置类来创建的,我们看看它的创建源码

所以我们分析下: getArgumentResolvers()方法

到此,我们发现,自定义的参数解析器和返回值解析器生效的话,要继承WebMvcConfigurationSupport这个类,并重写相应方法:
@Configuration //重写父类的方法可以实现很多功能
public class MyWebMvcConfiguration extends WebMvcConfigurationSupport {
    @Override
    protected void addArgumentResolvers(List<HandlerMethodArgumentResolver> argumentResolvers) {
        argumentResolvers.add(new StringToDateResovler()); //添加我们自定义的参数解析器
    }

    @Override
    protected void addReturnValueHandlers(List<HandlerMethodReturnValueHandler> returnValueHandlers) {
        returnValueHandlers.add(new MyReturnValueHandler());//添加我们自定义的返回值解析器
    }
}
启动代码测试: 浏览器输入: http://localhost:8081/find/product/3?date=2020-10-12
debug 调试,中间省略n步骤:下图在(InvocableHandlerMethod类中)

下图是我们自定义的参数解析器


浏览器拿到了结果:

至此,我们自定义参数解析器和参数返回值解析器完成,springmvc很多自带的解析器用于解析一些常用注解,如@ResponseBody,@ModlerAttribute@RequestBody等,他们的原理跟我们自定义的是一样的
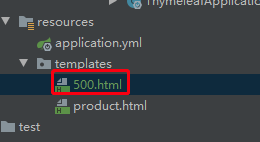
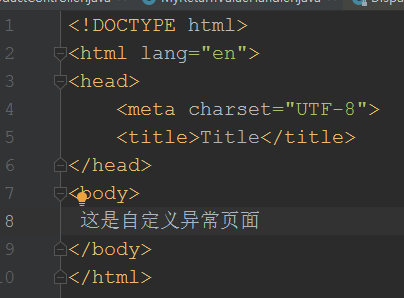
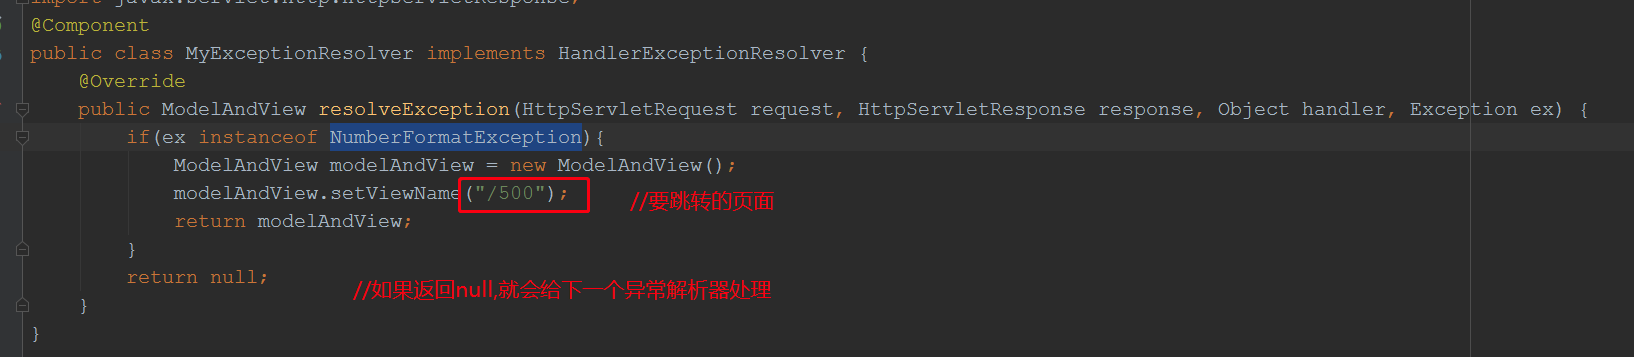
3. 自定义异常处理器: 我们希望指定的异常,跳到指定的页面 : 需求,我们希望NumberFormatException异常,跳到500.html这个页面:
我们自定义异常解析器,跟映射器和适配器一样,只要注入spring容器即可,DispacherServlet中有个异常解析器集合:

下面我们自定义异常解析器:
我们定义一个测试Controller:

//浏览器调用该方法:http://localhost:8081/test/error
