前言
啦啦啦~(博主每次开篇都要卖个萌,大家是不是都厌倦了呢~)
本篇博文希望帮助大家掌握 Broadcast 编程基础,实现动态注册 Broadcast 和静态注册 Broadcast 的方式以及学会使用Notification。
基础知识
BraodcastReceiver(广播接收器)是为了实现系统广播(Notification)而提供的一种组件, 它和事件处理机制类似,但是事件处理机制是程序组件级别的,而广播事件处理 机制是系统级别的。比如,我们可以发出一种广播来测试手机电量的变化,这时候就可以定义一个 BraodcastReceiver 来接受广播,当手机电量较低时提示用户。它是一个系统全局的监听器,用于监听系统全局的Broadcast消息,所以它可以很方便的进行系统组件之间的通信。
BroadcastReceiver虽然是一个监听器,但是它和之前用到的OnXxxListener不同,那些只是程序级别的监听器,运行在指定程序的所在进程中,当程序退出的时候,OnXxxListener监听器也就随之关闭了,但是BroadcastReceiver属于系统级的监听器,它拥有自己的进程,只要存在与之匹配的Broadcast被以Intent的形式发送出来,BroadcastReceiver就会被激活。
虽然同属Android的四大组件,BroadcastReceiver也有自己独立的声明周期,但是和Activity、Service又不同。当在系统注册一个BroadcastReceiver之后,每次系统以一个Intent的形式发布Broadcast的时候,系统都会创建与之对应的BroadcastReceiver广播接收者实例,并自动触发它的onReceive()方法,当onReceive()方法被执行完成之后,BroadcastReceiver的实例就会被销毁。虽然它独自享用一个单独的进程,但也不是没有限制的,如果BroadcastReceiver.onReceive()方法不能在10秒内执行完成,Android系统就会认为该BroadcastReceiver对象无响应,然后弹出ANR(Application No Response)对话框,所以不要在BroadcastReceiver.onReceive()方法内执行一些耗时的操作。
如果需要根据广播内容完成一些耗时的操作,一般考虑通过Intent启动一个Service来完成该操作,而不应该在BroadcastReceiver中开启一个新线程完成耗时的操作,因为BroadcastReceiver本身的生命周期很短,可能出现的情况是子线程还没有结束,BroadcastReceiver就已经退出的情况,而如果BroadcastReceiver所在的进程结束了,该线程就会被标记为一个空线程,根据Android的内存管理策略,在系统内存紧张的时候,会按照优先级,结束优先级低的线程,而空线程无异是优先级最低的,这样就可能导致BroadcastReceiver启动的子线程不能执行完成。
BroadcastReceiver本质上还是一个监听器,所以使用BroadcastReceiver的方法也是非常简单,只需要继承BroadcastReceiver,在其中重写onReceive(Context context,Intent intent)即可。一旦实现了BroadcastReceiver,并部署到系统中后,就可以在系统的任何位置,通过sendBroadcast、sendOrderedBroadcast方法发送Broadcast给这个BroadcastReceiver。
我们既可以用 Intent 来启动一个组件,也可以用 sendBroadcast()方法发起一个系统级别的事件广播来传递消息。我们同样可以在自己的应用程序中实现 BroadcastReceiver 来监听和响应广播的Intent。在程序中使用 BraodcastReceiver 是比较简单的。首先要定义一个类继承 BraodcastReceiver,并且覆盖 onReceiver()方法来响应事件。然后注册在程序中 BraodcastReceiver。最后构建 Intent 对象调用 sendBroadcast()方法将广播发出。
包含静态注册方式和动态注册方式:
1.静态广播部分
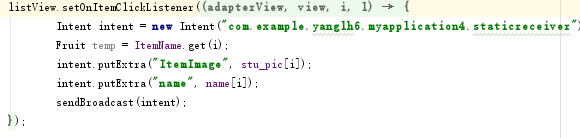
静态广播部分首先需要后设置 setOnItemClickListener,利用 bundle 和 intent 将图片与文字内容发送出去。

参考代码中的 STATICATION 为自己设定的广播名称。由于是静态注册所以需要在 AndroidMainfest.xml 中进行注册(右击New->other->Broadcast Receiver创建一个Receiver类后,AS将自动在AndroidMainfest.xml 中进行注册,我们只需要添加自己设定的广播名称):
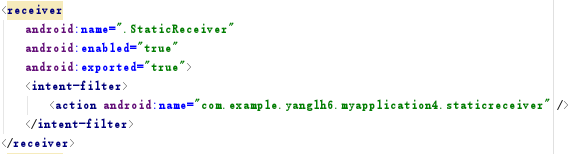
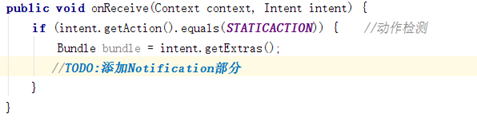
在静态广播类 StaticReceiver 中重写 onReceive 方法,当接收到对应广播时进行数据 处理,产生通知。
2.动态注册部分
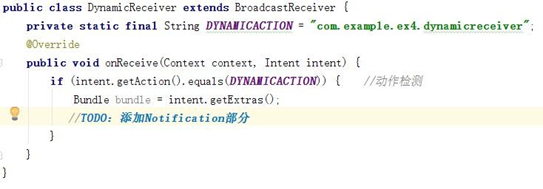
(1) 实现 BroadcastReceiver 子类(这里命名为 DynamicReceiver),并且重写 onReceive 方法,修改方法与静态广播类中类似。

(2)创建主页面,设置注册和注销按钮(set OnClickListener),使其能够注册或者注销广 播器。
注册关键代码:

注销关键代码:

其中 dynamicReceiver 为我们之前创建的 DynamicReceiver 类。用 registerReceiver 与 unregisterReceiver 分别对其进行注册与注销。
(3)设置 Send 按钮点击事件,如果广播注册,则能够点击后发送广播。发送方法与静态注 册时一直,仅需修改广播名称即可。(使用 sendBroadcast(intent))
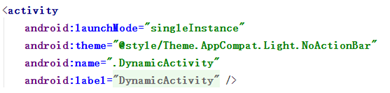
(4)注意在 Android 主界面中将 launchMode 设置为 singleInstance,使得点击 Notification 后不会另外新建一个 MainActivity:
3.Notification 的使用
Notification 可以提供持久的通知,位于手机最上层的状态通知栏中。用手指按下状 态栏,并从手机上方向下滑动,就可以打开状态栏查看提示消息。
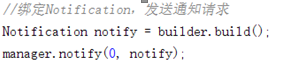
通知一般通过NotificationManager服务发送一个Notification对象来完成通知,NotificationManager是一个重要的系统级服务,该对象位于应用程序的框架层中,应用程序可以通过它向系统发送全局的通知。使用通知的时候,需要创建一个Notification对象用来承载通知的内容,但是一般不会直接通过Notification的构造方法来得到对象,而是使用它的内部类Notification.Builder来实例化一个Builder对象,并设置通知的各项属性,最后通过Notification.Builder.builder()方法得到一个Notification对象,当获得这个Notification对象之后,就可以使用NotificationManager.notify()方法发送通知。
开发 Notification 主要 涉及以下 3 个类:
(1)Notification.Builder:用于动态的设置 Notification 的一些属性。

这里LargeIcon获取的参数通过以下方式来设定(获取图片资源的方式):

虽然通知中提供了各种属性的设置,但是一个通知对象,有几个属性是必须要设置的,其他的属性均是可选的,必须设置的属性如下:
-
-
- 小图标,使用setSamllIcon()方法设置。
- 标题,使用setContentTitle()方法设置。
- 文本内容,使用setContentText()方法设置。
-
(2)NotificationManager:负责将 Notification 在状态显示出来和取消;

NotificationManager类是一个通知管理器类,这个对象是由系统维护的服务,是以单例模式的方式获得,所以一般并不直接实例化这个对象。在Activity中,可以使用Activity.getSystemService(String)方法获取NotificationManager对象,Activity.getSystemService(String)方法可以通过Android系统级服务的句柄,返回对应的对象。在这里需要返回NotificationManager,所以直接传递Context.NOTIFICATION_SERVICE即可。
(3)Notification:设置 Notification 的相关属性。
(4)点击 notification,就可以跳转到我们 intent 中指定的 activity。主要使用到setContentIntent 与 PendingIntent。
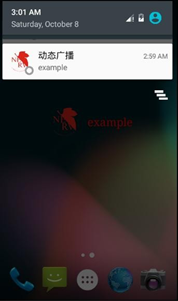
关于 Notification,不同版本的 API 显示可能会有所不同。本次实验中必须实现的部 分是标题、大图标、内容、小图标。其中标题为静态广播或动态广播;大图标与广播发送的内容相关,为对应水果或者动态图 dynamic;内容为水果名称或动态广播发送的内容; 小图标与大图标内容一样。
图片的使用方面请尽量使用 mipmap 目录下的 image asset。否则在某些 API 中可能会 出现 Icon 过大的情况。
实验内容
实现一个 Android 应用,实现静态广播、动态广播两种改变 Notification 内容的方法。 具体要求:
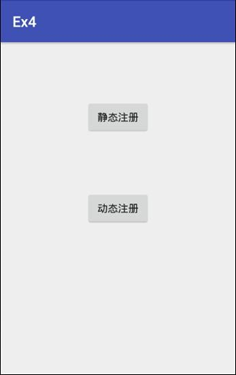
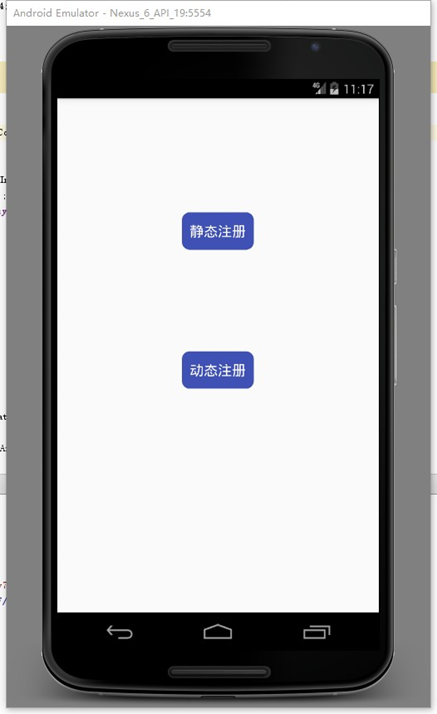
(1)该界面为应用启动后看到的界面。
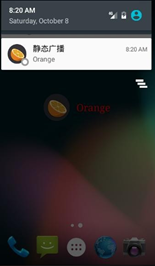
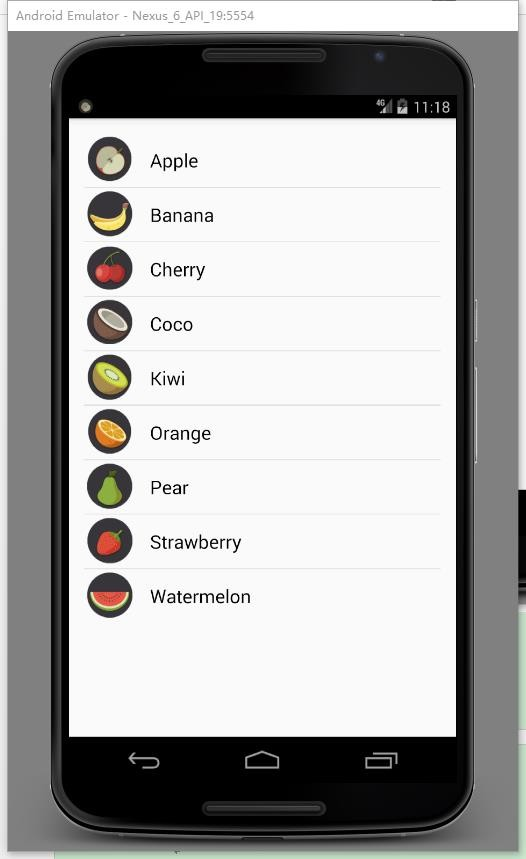
(2)点击静态注册按钮,跳转至如下界面。

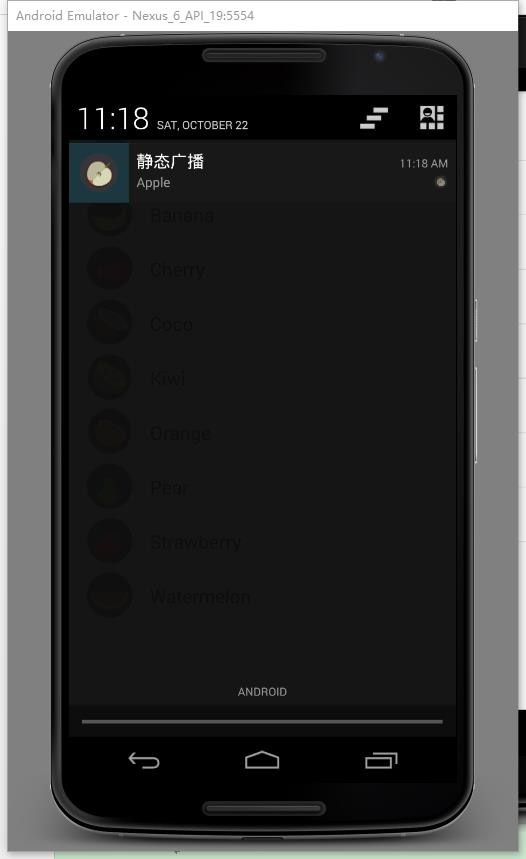
点击表单项目。如 orange。会有对应通知产生,点击通知返回主界面:
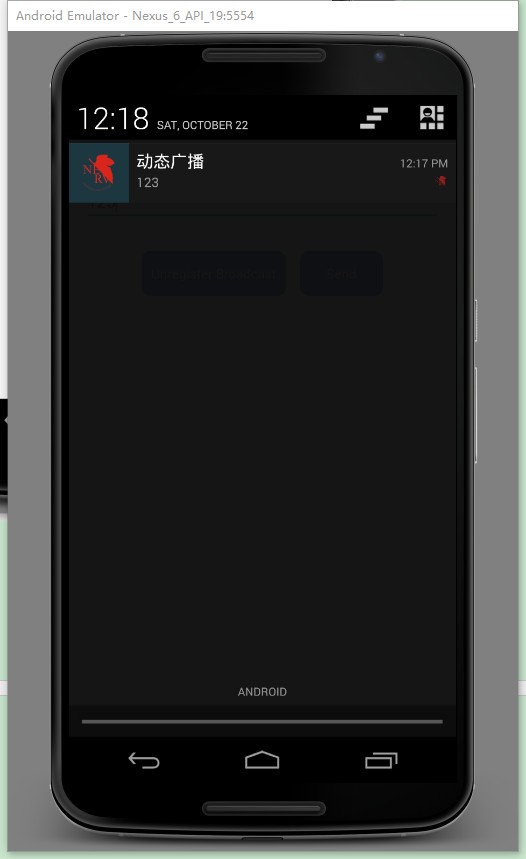
(3)点击动态注册按钮,跳转至如下界面。
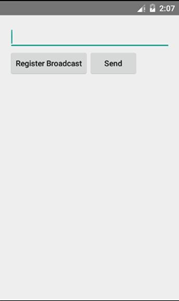
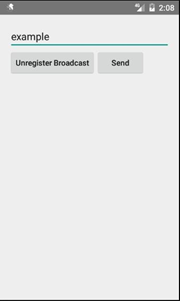
(未注册广播) (已注册广播) (已注册后点击发送)
实现以下功能:
a)可以编辑广播的信息,点击 Send 按钮发送广播。 b)设置一个按钮进行广播接收器的注册与注销。 c)广播接收器若已被注册,发送出的广播信息会产生一个对应通知。 d)点击 Notification 可以跳转回主界面。
注:在设置按钮内容的时候注意大小写问题(使用android:textAllCaps="false"属性)。
实验步骤
1.XML 布局
本实验初始界面的 XML 布局是比较简单的,包括初始界面的两个按钮、静态 注册布局中的 ListView 及其每一栏中的 ImageView TextView、动态布局中的 EditText Button。
2.静态注册部分
在一个 xml 布局文件中写好一个 ListView(这样就创建了一个空的列表, 然后在.java 文件中再填充数据),在每一栏中的 ImageView TextView 使用线 性结构,分别用来存放图片背景及联系人的姓名。这里和第三次实验类似。 在 MainActivity.java 文件中,我们获取到初始界面的两个按钮并使用 Intent 设置相应的点击跳转事件。
在 StaticActivity.java 文件中, 我们需要获取到静态注册布局中的 ListView 并使用 Adapter 为这个 ListView 填充数据。我们需要获取图片和名称 两个参数,与实验三不同的是每一栏中的图片背景都不同。首先,我们创建一个Fruit 类,来存储名称数据,初始化一些变量,并使用 get 和 Set 方法来获得或 者更改相应的数据。
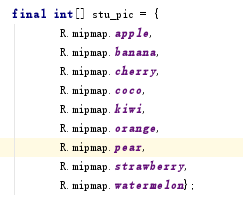
接下来在 StaticActivity.java 文件中为每一项名称数据创建一个对象,并 添加在 List 中,方便之后传递数据的操作。这里我们通过获取图片命名将图片 素材绑定在一个 int 类型的数组中:
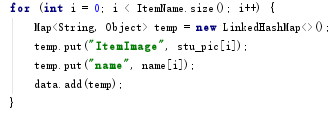
首先构建好数据,把数据以 Map 键值对的形式添加到 list 中。然后创建Listview 的 Adapter。
在 ListView 单击事件中,利用 bundle 和 intent 将图片与文字内容发送出去:
创建一个 Broadcast Receiver 类,并在 AndroidMainfest.xml 中进行注册。 然后在静态广播类 StaticReceiver 中重写 onReceive 方法,当接收到对应广 播时进行数据 处理,产生通知。
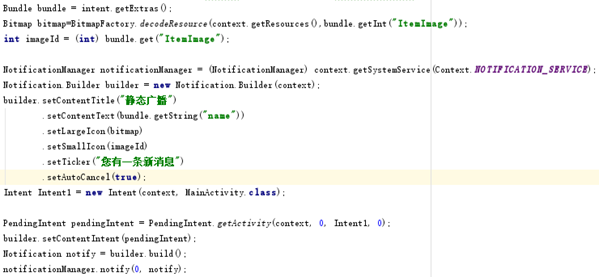
这里我们获取到点击产生的图片和文字信息,并使用 Notification(可以 提供持久的通知,位于手机最上层的状态通知栏中。用手指按下状态栏,并从手 机上方向下滑动,就可以打开状态栏查看提示消息)。设置好 Notification 涉 及的 3 个类: Notification.Builder(用于动态的设置)、 NotificationManager (负责将 Notification 在状态显示出来和取消)、Notification(设置 Notification 的相关属性),然后使用 setContentIntent 与 PendingIntent 使得点击 notification,就可以跳转到我们 intent 中指定的 activity:
3.动态注册部分:
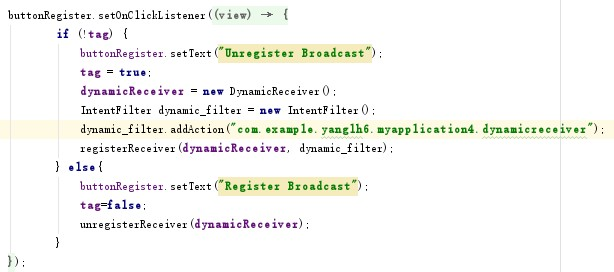
在这一部分中有两个按钮,Register Broadcast 按钮再按下后将会变换按 钮文本并实现一些按钮事件,并且再次按下时的事件也会有所改变。受实验三中 星星切换的启发,这里我们可以使用 tag,每个 View 都可以设置 tag,通过 tag 可以用来判断该 View 现在的状态。在初始化的时候,将 tag 设置为 0。然后在 相应位置完成注册和注销按钮功能的设置:
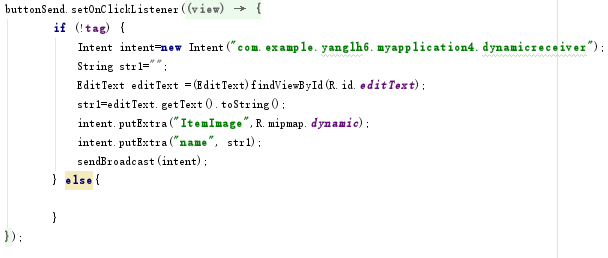
在 send 按钮事件中,也要注意此时 Register Broadcast 按钮的状态问题, 所以也需要使用 tag 来进行判断(设置 Send 按钮点击事件,如果广播注册,则 能够点击后发送广播。发送方法与静态注册时一致,仅需修改广播名称即可。在 这里我们也需获取到 EditText 中获取到的文本,作为传递的参数之一):
相应的,创建一个 Broadcast Receiver 类,并在 AndroidMainfest.xml 中进行 注册。然后在动态广播类中重写 onReceive 方法,当接收到对应广播时进行数 据处理,产生通知。
完成实验~
此外:
在 Android 主界面中将 launchMode 设置为 singleInstance,使得点击 Notification 后不会另外新建一个 MainActivity;
为了防止缩图在 mipmap 里新建 image assert,将所有使用的图片都进行创 建。
实验关键代码
StaticActivity.java
package com.example.yanglh6.myapplication4;

import android.content.Intent;
import android.os.Bundle;
import android.support.v7.app.AppCompatActivity;
import android.view.View;
import android.widget.AdapterView;
import android.widget.ListView;
import android.widget.SimpleAdapter;

import java.util.ArrayList;
import java.util.LinkedHashMap;
import java.util.List;
import java.util.Map;

/**
 * Created by lenovo on 2016/10/21.
 */

public class StaticActivity extends AppCompatActivity {

    @Override
    protected void onCreate(Bundle savedInstanceState) {
        super.onCreate(savedInstanceState);
        setContentView(R.layout.static_layout);

        final int[] stu_pic = {
                R.mipmap.apple,
                R.mipmap.banana,
                R.mipmap.cherry,
                R.mipmap.coco,
                R.mipmap.kiwi,
                R.mipmap.orange,
                R.mipmap.pear,
                R.mipmap.strawberry,
                R.mipmap.watermelon};

        final List<Map<String, Object>> data = new ArrayList<>();
        /*生成动态数组,加入数据*/
        final List<Fruit> ItemName = new ArrayList<Fruit>();
        ItemName.add(new Fruit("Apple"));
        ItemName.add(new Fruit("Banana"));
        ItemName.add(new Fruit("Cherry"));
        ItemName.add(new Fruit("Coco"));
        ItemName.add(new Fruit("Kiwi"));
        ItemName.add(new Fruit("Orange"));
        ItemName.add(new Fruit("Pear"));
        ItemName.add(new Fruit("Strawberry"));
        ItemName.add(new Fruit("Watermelon"));

        final String[] name = new String[ItemName.size()];
        for (int i = 0; i < ItemName.size(); i++) {
            String x = ItemName.get(i).getItemName();
            name[i] = x;
        }
        for (int i = 0; i < ItemName.size(); i++) {
            Map<String, Object> temp = new LinkedHashMap<>();
            temp.put("ItemImage", stu_pic[i]);
            temp.put("name", name[i]);
            data.add(temp);
        }

        ListView listView = (ListView) findViewById(R.id.staticStart);
        final SimpleAdapter simpleAdapter = new SimpleAdapter(this, data, R.layout.item,
                new String[]{"ItemImage", "name"}, new int[]{R.id.ItemImage, R.id.ItemName});
        listView.setAdapter(simpleAdapter);

        /*  ListView单击事件  */
        listView.setOnItemClickListener(new AdapterView.OnItemClickListener() {
            public void onItemClick(AdapterView<?> adapterView, View view, int i, long l) {
                Intent intent = new Intent("com.example.yanglh6.myapplication4.staticreceiver");
                Fruit temp = ItemName.get(i);
                intent.putExtra("ItemImage", stu_pic[i]);
                intent.putExtra("name", name[i]);
                sendBroadcast(intent);
            }
        });

    }
}
StaticReciver.java
package com.example.yanglh6.myapplication4;

import android.app.Notification;
import android.app.NotificationManager;
import android.app.PendingIntent;
import android.content.BroadcastReceiver;
import android.content.Context;
import android.content.Intent;
import android.graphics.Bitmap;
import android.graphics.BitmapFactory;
import android.os.Bundle;

public class StaticReceiver extends BroadcastReceiver {

    @Override
    public void onReceive(Context context, Intent intent) {
        if (intent.getAction().equals("com.example.yanglh6.myapplication4.staticreceiver")) {
            Bundle bundle = intent.getExtras();
            Bitmap bitmap=BitmapFactory.decodeResource(context.getResources(),bundle.getInt("ItemImage"));
            int imageId = (int) bundle.get("ItemImage");

            NotificationManager notificationManager = (NotificationManager) context.getSystemService(Context.NOTIFICATION_SERVICE);
            Notification.Builder builder = new Notification.Builder(context);
            builder.setContentTitle("静态广播")
                    .setContentText(bundle.getString("name"))
                    .setLargeIcon(bitmap)
                    .setSmallIcon(imageId)
                    .setTicker("您有一条新消息")
                    .setAutoCancel(true);
            Intent Intent1 = new Intent(context, MainActivity.class);

            PendingIntent pendingIntent = PendingIntent.getActivity(context, 0, Intent1, 0);
            builder.setContentIntent(pendingIntent);
            Notification notify = builder.build();
            notificationManager.notify(0, notify);
        }


    }
}
DynamicActivity.java
package com.example.yanglh6.myapplication4;

import android.content.Intent;
import android.content.IntentFilter;
import android.os.Bundle;
import android.support.v7.app.AppCompatActivity;
import android.view.View;
import android.widget.Button;
import android.widget.EditText;

/**
 * Created by lenovo on 2016/10/21.
 */

public class DynamicActivity extends AppCompatActivity {
    private boolean tag = false;
    private DynamicReceiver dynamicReceiver = null;

    @Override
    protected void onCreate(Bundle savedInstanceState) {
        super.onCreate(savedInstanceState);
        setContentView(R.layout.dynamic_layout);

        final Button buttonRegister = (Button) findViewById(R.id.register);
        Button buttonSend = (Button) findViewById(R.id.send);

        buttonRegister.setOnClickListener(new Button.OnClickListener() {
            @Override
            public void onClick(View view) {
                if (!tag) {
                    buttonRegister.setText("Unregister Broadcast");
                    tag = true;
                    dynamicReceiver = new DynamicReceiver();
                    IntentFilter dynamic_filter = new IntentFilter();
                    dynamic_filter.addAction("com.example.yanglh6.myapplication4.dynamicreceiver");
                    registerReceiver(dynamicReceiver, dynamic_filter);
                } else {
                    buttonRegister.setText("Register Broadcast");
                    tag = false;
                    unregisterReceiver(dynamicReceiver);
                }
            }
        });

        buttonSend.setOnClickListener(new Button.OnClickListener() {
            @Override
            public void onClick(View view) {
                if (!tag) {

                } else {
                    Intent intent = new Intent("com.example.yanglh6.myapplication4.dynamicreceiver");
                    String str1 = "";
                    EditText editText = (EditText) findViewById(R.id.editText);
                    str1 = editText.getText().toString();
                    intent.putExtra("ItemImage", R.mipmap.dynamic);
                    intent.putExtra("name", str1);
                    sendBroadcast(intent);
                }
            }
        });
    }
}
DynamicReceiver.java
package com.example.yanglh6.myapplication4;

import android.app.Notification;
import android.app.NotificationManager;
import android.app.PendingIntent;
import android.content.BroadcastReceiver;
import android.content.Context;
import android.content.Intent;
import android.graphics.Bitmap;
import android.graphics.BitmapFactory;
import android.os.Bundle;

public class DynamicReceiver extends BroadcastReceiver {
    public DynamicReceiver() {
    }

    @Override
    public void onReceive(Context context, Intent intent) {
        if (intent.getAction().equals("com.example.yanglh6.myapplication4.dynamicreceiver")) {
            Bundle bundle = intent.getExtras();
            Bitmap bitmap = BitmapFactory.decodeResource(context.getResources(), bundle.getInt("ItemImage"));
            int imageId = (int) bundle.get("ItemImage");

            NotificationManager notificationManager = (NotificationManager) context.getSystemService(Context.NOTIFICATION_SERVICE);
            Notification.Builder builder = new Notification.Builder(context);
            builder.setContentTitle("动态广播")
                    .setContentText(bundle.getString("name"))
                    .setLargeIcon(bitmap)
                    .setSmallIcon(imageId)
                    .setTicker("您有一条新消息")
                    .setAutoCancel(true);
            Intent mIntent = new Intent(context, MainActivity.class);

            PendingIntent pendingIntent = PendingIntent.getActivity(context, 0, mIntent, 0);
            builder.setContentIntent(pendingIntent);
            Notification notify = builder.build();
            notificationManager.notify(0, notify);
        }
    }
}
实验截图

总结
BraodcastReceiver(广播接收器)是为了实现系统广播而提供的一种组件, 它和事件处理机制类似,但是事件处理机制是程序组件级别的,而广播事件处理 机制是系统级别的。比如,我们可以发出一种广播来测试手机电量的变化,这时 候就可以定义一个 BraodcastReceiver 来接受广播,当手机电量较低时提示用 户。我们既可以用 Intent 来启动一个组件,也可以用 sendBroadcast()方法发 起一个系统级别的事件广播来传递消息。我们同样可以在自己的应用程序中实现 BroadcastReceiver 来监听和响应广播的 Intent。
在程序中使用 BraodcastReceiver 是比较简单的。首先要定义一个类继承 BraodcastReceiver,并且覆盖 onReceiver()方法来响应事件。然后注册在程序 中 BraodcastReceiver。最后构建 Intent 对象调用 sendBroadcast()方法将广播 发出。
包含静态注册方式和动态注册方式:
(1)静态注册方式
静态注册方式是在 AndroidManifest.xml 的 application 里面定义 receiver 并设置要接收的 action。静态注册方式的特点:不管改应用程序是否 处于活动状态,都会进行监听,比如某个程序时监听内存的使用情况的,当 在手机上安装好后,不管改应用程序是处于什么状态,都会执行改监听方法中的内容。
(2)动态注册方式
在 activity 里面调用函数来注册,和静态的内容差不多。一个形参是 receiver, 另一个是 IntentFilter,其中里面是要接收的 action。动态注册方式特点:在 代码中进行注册后,当应用程序关闭后,就不再进行监听。当然,也可手工调用unregisterReceiver()进行销毁。
(3)BroadcastReceiver 的生命周期
一个BroadcastReceiver 对象只有在被调用onReceive(Context, Intent)的才有效的,当从该函数返回后,该对象就无效的了,结束生命周期。
(4)Notification
Notification 可以提供持久的通知,位于手机最上层的状态通知栏中。用手指按下状 态栏,并从手机上方向下滑动,就可以打开状态栏查看提示消息。
通知一般通过NotificationManager服务发送一个Notification对象来完成通知,NotificationManager是一个重要的系统级服务,该对象位于应用程序的框架层中,应用程序可以通过它向系统发送全局的通知。使用通知的时候,需要创建一个Notification对象用来承载通知的内容,但是一般不会直接通过Notification的构造方法来得到对象,而是使用它的内部类Notification.Builder来实例化一个Builder对象,并设置通知的各项属性,最后通过Notification.Builder.builder()方法得到一个Notification对象,当获得这个Notification对象之后,就可以使用NotificationManager.notify()方法发送通知。
源码下载
源码下载点击这里~
注
1、本实验实验环境:
操作系统 Windows 10
实验软件 Android Studio 2.2.1
虚拟设备:Nexus_6
API:19(其他高版本的API可能会将提示图表显示成一个白圆点,API19测试可正常显示)
2、贴代码的时候由于插入代码框的大小问题,代码格式不太严整,望见谅~