ZeroMQ官网
linux平台
一、安装libzmq
1、下载代码:git clone https://github.com/zeromq/libzmq.git
2、切换到最新的tag,目前是v4.3.3:git checkout v4.3.3
3、配置:cd libzmq && ./configure --prefix=/home/xxx/libzmq/_install
4、编译并安装:make -j4 && sudo make install
在配置时根据需求更改安装目录,如果是安装在linux平台上可以直接安装到/usr
若是交叉编译到ARM-LINUX上,要在Makefile中修改编译工具链,并安装到自己指定的目录下
只需要安装libzmq就可以使用ZeroMQ的通信功能了,但是由于libzmq本身是用C写的,为了方便C++用户,官方有做了一个针对C++的接口封装,方便C++用户使用C++类和对象进行编程。可以下载和编译cppzmq或在zmqpp库。
二、安装zmqpp
因为zmqpp是对libzmq接口的高层次的封装,是c++接口中最好用的一个,所以选择了zmqpp库
1、下载代码:git clone https://github.com/zeromq/zmqpp.git
2、切换到最新的tag,目前是v4.2.0:git checkout v4.2.0
3、编译并安装:make -j4 && sudo make install
同样需要安装到指定目录或在交叉编译,在Makefile中指定
三、在cmake工程中使用zmqpp
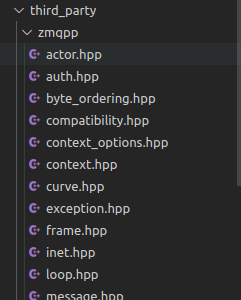
1. 在third_party添加zmqpp相关头文件
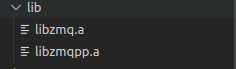
2. 在lib目录下添加静态库zmq, zmqpp
3. 在cmakelists中添加配置
...
include_directories(net lib)

link_libraries(
    ${CMAKE_CURRENT_SOURCE_DIR}/lib/libzmq.a
    ${CMAKE_CURRENT_SOURCE_DIR}/lib/libzmqpp.a
    pthread )

add_executable(server server.cpp)

add_executable(client client.cpp)

target_link_libraries(server pthread  zmqpp zmq)
...
4. 在源码中添加头文件


 1 #include "third_party/zmqpp/zmqpp.hpp"
 2 #include <string>
 3 #include <iostream>
 4 #include <chrono>
 5 #include <thread>
 6
 7 using namespace std;
 8
 9 int main(int argc, char *argv[]) {
10   const string endpoint = "tcp://*:5555";
11
12   // initialize the 0MQ context
13   zmqpp::context context;
14
15   // generate a pull socket
16   zmqpp::socket_type type = zmqpp::socket_type::reply;
17   zmqpp::socket socket (context, type);
18
19   // bind to the socket
20   socket.bind(endpoint);
21   while (1) {
22     // receive the message
23     zmqpp::message message;
24     // decompose the message
25     socket.receive(message);
26     string text;
27     message >> text;
28
29     //Do some 'work'
30     std::this_thread::sleep_for(std::chrono::seconds(1));
31     cout << "Received Hello" << endl;
32     socket.send("World");
33   }
34
35 }
 1 #include "third_party/zmqpp/zmqpp.hpp"
 2 #include <string>
 3 #include <iostream>
 4
 5 using namespace std;
 6
 7 int main(int argc, char *argv[]) {
 8   const string endpoint = "tcp://localhost:5555";
 9
10   // initialize the 0MQ context
11   zmqpp::context context;
12
13   // generate a push socket
14   zmqpp::socket_type type = zmqpp::socket_type::req;
15   zmqpp::socket socket (context, type);
16
17   // open the connection
18   cout << "Connecting to hello world server…" << endl;
19   socket.connect(endpoint);
20   int request_nbr;
21   for (request_nbr = 0; request_nbr != 10; request_nbr++) {
22     // send a message
23     cout << "Sending Hello " << request_nbr <<"…" << endl;
24     zmqpp::message message;
25     // compose a message from a string and a number
26     message << "Hello";
27     socket.send(message);
28     string buffer;
29     socket.receive(buffer);
30
31     cout << "Received World " << request_nbr << endl;
32   }
33 }
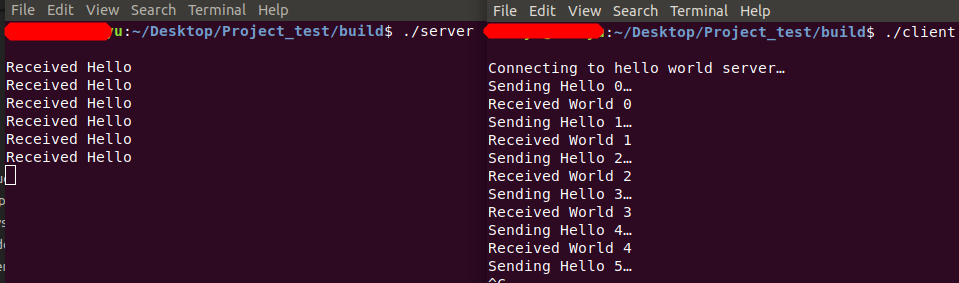
5. 测试
参考:
跟我一起学习ZeroMQ(3):安装libzmq和zmqpp(接下来基于zmqpp实现多种zmq通讯模式)
ZeroMQ推荐博客: