一、配置spring-mvc
    <!-- 配置多媒体文件解析器 -->
    <bean id="multipartResolver"
        class="org.springframework.web.multipart.commons.CommonsMultipartResolver">
        <!-- 设定默认编码 -->
        <property name="defaultEncoding" value="UTF-8"></property>
        <!-- 设定文件上传的最大值2MB, 2*1024*1024 -->
        <property name="maxUploadSize" value="2097152"></property>
        <!--resolveLazily属性启用是为了推迟文件解析,以便在UploadAction 中捕获文件大小异常-->
        <property name="resolveLazily" value="true"/>
    </bean>
实现文件上传和下载需要添加依赖
<!-- 文件上传 -->
<dependency>
<groupId>commons-fileupload</groupId>
<artifactId>commons-fileupload</artifactId>
<version>1.3</version>
</dependency>
<!-- 文件上传 -->
<dependency>
<groupId>commons-io</groupId>
<artifactId>commons-io</artifactId>
<version>1.3.2</version>
</dependency>
二、实现文件上传
1、文件上传Controller
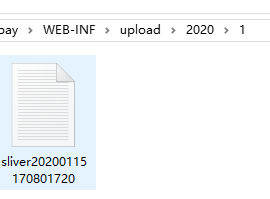
    /**
                   * 文件上传功能
      * @param file
      * @return
      * @throws IOException
      */
    @RequestMapping(value="/upload",method=RequestMethod.POST)
    public @ResponseBody  ModelAndView upload(@RequestParam("file")MultipartFile file, HttpServletRequest request) throws IOException {
       ModelAndView mv = new ModelAndView("message");
        SimpleDateFormat sdf = new SimpleDateFormat("yyyyMMddHHmmssSS");
        String res = sdf.format(new Date());

        // uploads文件夹位置
        String rootPath = request.getSession().getServletContext().getRealPath("WEB-INF/upload");
        // 原始名称
        String originalFileName = file.getOriginalFilename();
        // 新文件名
        String newFileName = "sliver" + res + originalFileName.substring(originalFileName.lastIndexOf("."));
        // 创建年月文件夹
        Calendar date = Calendar.getInstance();
        File dateDirs = new File(date.get(Calendar.YEAR) + File.separator + (date.get(Calendar.MONTH)+1));

        // 新文件
        File newFile = new File(rootPath + File.separator + dateDirs + File.separator + newFileName);
        // 判断目标文件所在目录是否存在
        if( !newFile.getParentFile().exists()) {
            // 如果目标文件所在的目录不存在,则创建父目录
            newFile.getParentFile().mkdirs();
        }
        System.out.println(newFile);
        // 将内存中的数据写入磁盘
        file.transferTo(newFile);
        // 完整的url

       String fileUrl = date.get(Calendar.YEAR) + "/" + (date.get(Calendar.MONTH)+1) + "/" + newFileName;
       mv.addObject("path", fileUrl);
       return  mv;
    }
2、fileupoad.jsp
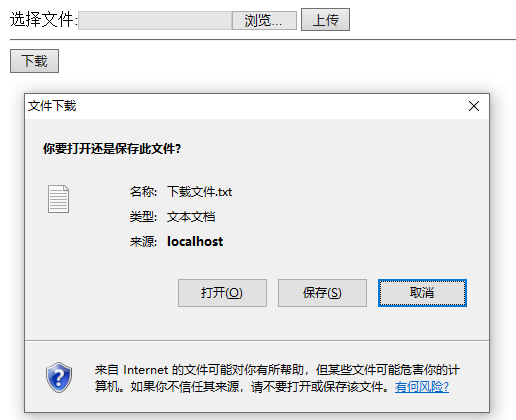
<%@ page language="java" contentType="text/html; charset=utf-8"
    pageEncoding="utf-8"%>
<!DOCTYPE html PUBLIC "-//W3C//DTD HTML 4.01 Transitional//EN" "http://www.w3.org/TR/html4/loose.dtd">
<html>
<head>
<meta http-equiv="Content-Type" content="text/html; charset=ISO-8859-1">
<title>文件上传下载</title>
</head>
<body>
    <form action="user/upload.action" method="post" enctype="multipart/form-data">
        选择文件:<input type="file" name="file" width="120px">
        <input type="submit" value="上传">
    </form>
    <hr>
    <form action="user/down.action" method="get">
        <input type="submit" value="下载">
    </form>
</body>
</html>
3、实现结果

三、实现文件下载
1、下载的controller
     /**
     * 文件下载功能
     * @param request
     * @param response
     * @throws Exception
     */
    @RequestMapping("/down")
    public void down(HttpServletRequest request,HttpServletResponse response) throws Exception{
        //模拟文件,myfile.txt为需要下载的文件
        String fileName = request.getSession().getServletContext().getRealPath("WEB-INF/upload/2020/1")+"/sliver20200115164910583.txt";
        //获取输入流
        InputStream bis = new BufferedInputStream(new FileInputStream(new File(fileName)));
        //假如以中文名下载的话
        String filename = "下载文件.txt";
        //转码,免得文件名中文乱码
        filename = URLEncoder.encode(filename,"UTF-8");
        //设置文件下载头
        response.addHeader("Content-Disposition", "attachment;filename=" + filename);
        //1.设置文件ContentType类型,这样设置,会自动判断下载文件类型
        response.setContentType("multipart/form-data");
        BufferedOutputStream out = new BufferedOutputStream(response.getOutputStream());
        int len = 0;
        while((len = bis.read()) != -1){
            out.write(len);
            out.flush();
        }
        out.close();
    }
2、实现过程
每天学一点、日后往学习深点的实现过程。