过程:
1. https://common-buy.aliyun.com/?commodityCode=cas#/buy # 转到 云盾证书服务的购物车
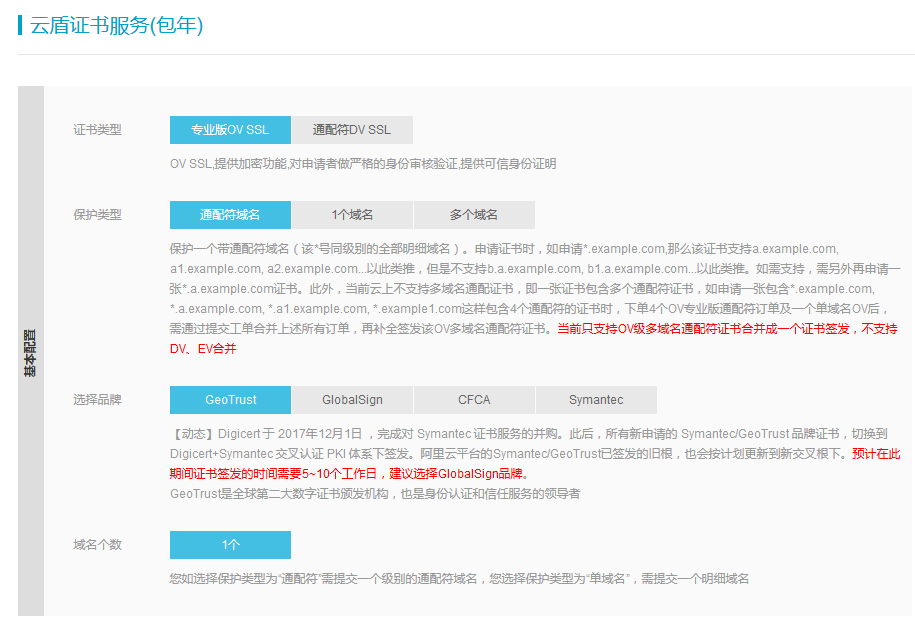
2. 默认当前购物车仅显示“专业版OV SSL”和“通配符DV SSL”,请点击“选择品牌”中的“Symantec” ;点击“保护类型”中的“1个域名”
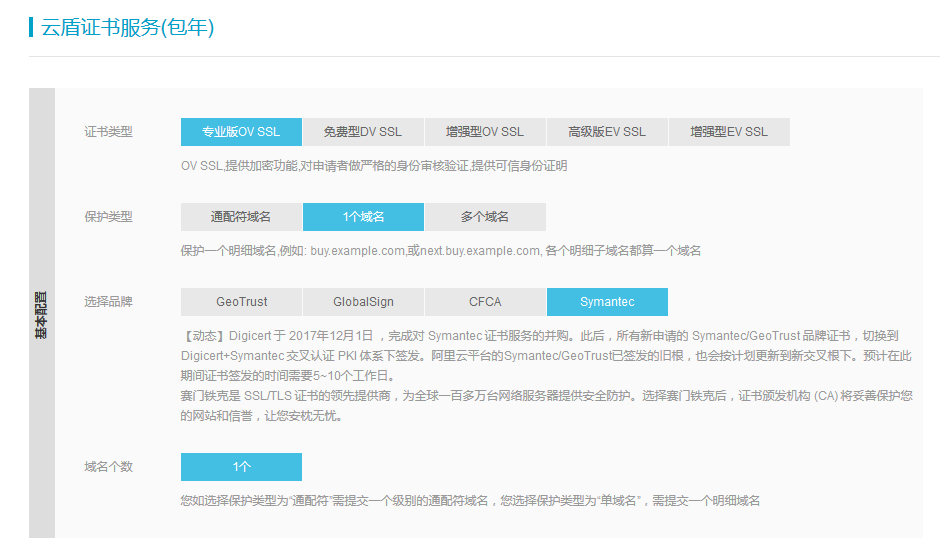
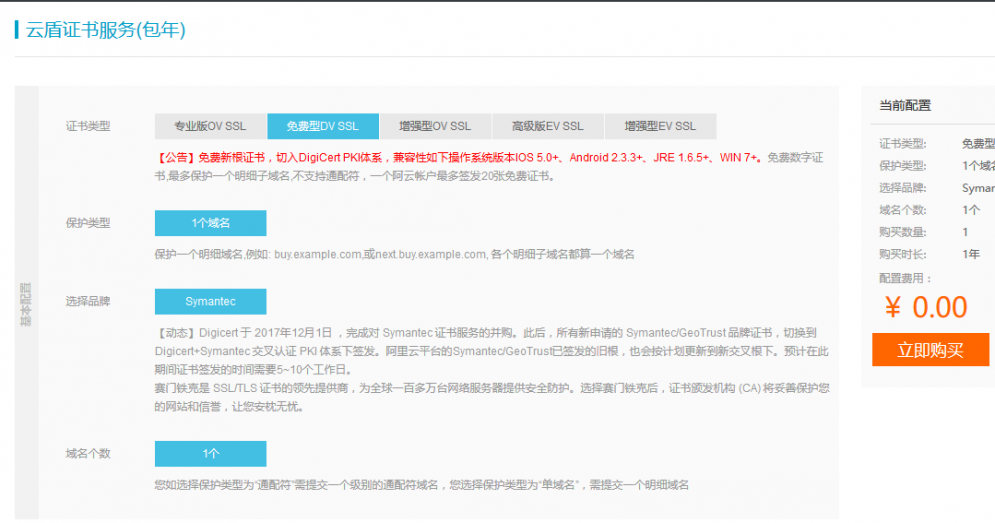
3. 之后,就可以选中“证书类型”中的“免费型DV SSL”来提交订单了
nginx使用阿里云的免费ssl证书
重点内容:服务器要把443端口打开!!!
重点内容:服务器要把443端口打开!!!
重点内容:服务器要把443端口打开!!!
三遍说完开搞。
1.把443端口打开,就像打开8080/8081那些端口一样。具体的请百度。
2.到阿里云申请免费的证书(需要有服务器和已备案的域名),申请过程:控制台–安全(云盾)–CA证书,按照阿里云的提示操作即可。
3.申请成功之后,在证书后面有个“下载”选项。点击下载压缩包,解压后将压缩包内的xxxx.key文件和xxxx.pem文件上传至服务器nginx的目录中。
具体:在nginx/conf文件夹下新建cert文件夹,放到cert中。
4.将HTTPS server中的配置修改如下
server {
listen 443;
server_name 我的域名;
ssl on;
root html;
index index.html index.htm;
ssl_certificate cert/我的证书.pem;
ssl_certificate_key cert/我的证书.key;
ssl_session_timeout 5m;
ssl_ciphers ECDHE-RSA-AES128-GCM-SHA256:ECDHE:ECDH:AES:HIGH:!NULL:!aNULL:!MD5:!ADH:!RC4;
ssl_protocols TLSv1 TLSv1.1 TLSv1.2;
ssl_prefer_server_ciphers on;
location / {
root 我的首页;
index index.html index.htm;
}
}
5.重启nginx。如果出现“[emerg] 10464#0: unknown directive “ssl” 。。。”则说明在编译nginx的时候没有将ssl模块编译进nginx,在./configure的时候加上“–with-http_ssl_module”
6.重新访问站点。之前的站点访问方式是http的!!!别偷懒,在地址栏输入一遍https://站点名称
二、tomcat 配置server.xml
先把domains.jks证书上传到Tomcat的conf文件夹下:
执行命令: cd /usr/tomcat/apache-tomcat-8.5.11/conf
vim server.xml
找到
<!--
<Connector port="8443" protocol="HTTP/1.1" SSLEnabled="true"
maxThreads="150" scheme="https" secure="true"
clientAuth="false" sslProtocol="TLS"/>
-->
去掉注释,修改为:(443为https默认访问端口)
<Connector port="443" protocol="HTTP/1.1" SSLEnabled="true"
maxThreads="150" scheme="https" secure="true"
keystoreFile="conf/domains.jks" //证书地址
keystorePass="582629" //证书密钥
clientAuth="false" sslProtocol="TLS" />
为了让http访问自动跳转为https访问这里顺便把这两个标签也改了,
找到
<Connector port="8080" protocol="HTTP/1.1"
connectionTimeout="20000"
redirectPort="8443" />
修改为:
<Connector port="8080" protocol="HTTP/1.1"
connectionTimeout="20000"
redirectPort="443" />
找到
<Connector port="8009" enableLookups="false" protocol="AJP/1.3" redirectPort="8443" />
修改为:
<Connector port="8009" enableLookups="false" protocol="AJP/1.3" redirectPort="443" />
保存退出。
三、配置web.xml
执行命令: vim web.xml
在该文件</welcome-file-list>标签(一般在文件最末尾)后面加上这样一段:
<login-config>
<!-- Authorization setting for SSL -->
<auth-method>CLIENT-CERT</auth-method>
<realm-name>Client Cert Users-only Area</realm-name>
</login-config>
<security-constraint>
<!-- Authorization setting for SSL -->
<web-resource-collection >
<web-resource-name >SSL</web-resource-name>
<url-pattern>/*</url-pattern>
</web-resource-collection>
<user-data-constraint>
<transport-guarantee>CONFIDENTIAL</transport-guarantee>
</user-data-constraint>
</security-constraint>
保存退出。所有配置完毕。重启Tomcat即可。证书生效,并且http访问会自动转为https访问。