1、controller或service组件中,直接使用@Value获取
2、@Component和@Value将属性封装成实体类,在使用的类中注入
3、@Component扫描成bean,并使用@ConfigurationProperties进行普通属性注入
4、通过 Environment 获取
需求:获取配置文件中的属性
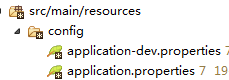
application.properties
server.port=8089
server.servlet.context-path=/HelloWorld

user.username=u5F20u4E09
user.password=123

spring.profiles.active=dev
application-dev.properties
mysql.jdbcName=com.mysql.jdbc.Driver
mysql.dbUrl=jdbc:mysql://localhost:3306/db_boot
mysql.userName=root
mysql.password=123456
1、controller或service组件中,直接使用@Value获取 <-返回目录
/**
 * 测试从application.properties中获取参数
 *
 * @author oy
 * @version 1.0
 * @date 2018年12月23日
 * @time 下午9:17:54
 */
@Controller
//@RestController 使用该注解后,@ResponseBody注解可以省略
public class HelloWorldController {

    /**
     * 注入自定义属性
     */
    @Value("${user.username}")
    private String username;

    @Value("${user.password}")
    private String password;

    @RequestMapping("/showUsernamePassword")
    @ResponseBody
    public String showUsernamePassword() {
        return "用户名:" + username + "<br/>"
                + "密码:" + password;
    }

}
2、@Component和@Value将属性封装成实体类,在使用的类中注入 <-返回目录
@Controller
public class HelloWorldController {

    @Autowired
    // User类通过@Component扫描成bean,并使用@Value进行普通属性注入
    private User user;/**
     * 测试:User类通过@Component扫描成bean,并使用@Value进行普通属性注入
     *
     * @return
     */
    @RequestMapping("/showUser")
    @ResponseBody
    public String showUser() {
        return "用户名:" + user.getUsername() + "<br/>"
                + "密码:" + user.getPassword();
    }

}
User实体类
package com.oy.entity;

import org.springframework.beans.factory.annotation.Value;
import org.springframework.stereotype.Component;

/**
 * @author oy
 * @version 1.0
 * @date 2018年12月23日
 * @time 下午10:17:27
 */
@Component
public class User {
    @Value("${user.username}")
    private String username;

    @Value("${user.password}")
    private String password;

    public String getUsername() {
        return username;
    }

    public void setUsername(String username) {
        this.username = username;
    }

    public String getPassword() {
        return password;
    }

    public void setPassword(String password) {
        this.password = password;
    }

}
3、@Component扫描成bean,并使用@ConfigurationProperties进行普通属性注入 <-返回目录
使用@ConfigurationProperties进行普通属性注入。需要添加依赖:
<dependency>
    <groupId>org.springframework.boot</groupId>
    <artifactId>spring-boot-configuration-processor</artifactId>
    <optional>true</optional>
</dependency>
@Controller
public class HelloWorldController {

    @Autowired
    // MysqlProperties类通过@Component扫描成bean,并使用@ConfigurationProperties进行普通属性注入
    private MysqlProperties mysqlProperties;
   /**
     * 测试: MysqlProperties类通过@Component扫描成bean,并使用@ConfigurationProperties进行普通属性注入
     * @return
     */
    @RequestMapping("/showJdbc")
    @ResponseBody
    public String showJdbc() {
        return "驱动类:" + mysqlProperties.getJdbcName() + "<br/>"
                + "URL:" + mysqlProperties.getDbUrl() + "<br/>"
                + "用户名:" + mysqlProperties.getUserName() + "<br/>"
                + "密码:" + mysqlProperties.getPassword() + "<br/>";
    }

}
MysqlProperties实体类
package com.oy.entity;

import org.springframework.boot.context.properties.ConfigurationProperties;
import org.springframework.stereotype.Component;

/**
 * 注解@Component表明本类会被扫描,生成bean
 *
 * 扫描该组件时,发现有@ConfigurationProperties(prefix = "mysql"),
 * 会结合前缀"mysql" + 属性名去application.properties找对应的值进行注入。
 *
 * @author oy
 * @version 1.0
 * @date 2018年12月23日
 * @time 下午10:13:56
 */
@Component
@ConfigurationProperties(prefix = "mysql")
public class MysqlProperties {
    private String jdbcName;
    private String dbUrl;
    private String userName;
    private String password;

    public String getJdbcName() {
        return jdbcName;
    }

    public void setJdbcName(String jdbcName) {
        this.jdbcName = jdbcName;
    }

    public String getDbUrl() {
        return dbUrl;
    }

    public void setDbUrl(String dbUrl) {
        this.dbUrl = dbUrl;
    }

    public String getUserName() {
        return userName;
    }

    public void setUserName(String userName) {
        this.userName = userName;
    }

    public String getPassword() {
        return password;
    }

    public void setPassword(String password) {
        this.password = password;
    }
}
4、通过 Environment 获取 <-返回目录
另外参考:视频《一起学Beetl》记录3.1
@Controller
public class HelloWorldController {
  /**
     * 注入环境变量
     */
    @Value("${USERDOMAIN}")
    private String userdomain;

  /**
     * 浏览器输入:http://localhost:8089/HelloWorld/helloworld
     * @return
     */
    @RequestMapping("/helloworld")
    @ResponseBody
    public String sayHello() {
        return "hello world!!!" + userdomain; // hello world!!!oy-PC
    }

    @Autowired
    private Environment env;

    @RequestMapping("/ent")
    @ResponseBody
    public String ent() {
        return env.getProperty("user.username");
    }

}
---