---恢复内容开始---
一、前言
1、底部导航(两种做法)
2、轮播图
3、九宫格
二、主要内容
1、底部导航
方式一:借用mint-ui, 这里实现tab切换时高亮可以给每个tab双向绑定一个值
(1)html结构代码如下
 <!--底部-->
    <mt-tabbar v-model="selected" fixed>
    <mt-tab-item id="home">
      <img slot="icon" src="./assets/index.png">
      首页
    </mt-tab-item>
    <mt-tab-item id="vip">
      <img slot="icon" src="./assets/vip.png">
      会员
    </mt-tab-item>
    <mt-tab-item id="shopcart">
      <img slot="icon" src="./assets/shopcart.png">
      购物车
    </mt-tab-item>
    <mt-tab-item id="search">
      <img slot="icon" src="./assets/search.png">
      查找
    </mt-tab-item>
  </mt-tabbar>
(2)实现点击时切换,并且当前的背景为高亮
mint-ui官方说了tabBar有value属性值,就是id值,
export default {
  name: 'App',
  data(){
    return {
      selected:''

    }
  },

 watch:{
  selected:function(newV,oldV){

    console.log(newV);
    console.log(oldV);
    console.log(this.selected);// 官方文档已经说明了,tabbar 有 value属性是 选中的项的id值,点击的时候会给selected进行赋值,也就将id值赋给selected,根据selected的值为点击的那个添加一个is-selected样式,你可以更改这个样式,或者绑定一个点击事件判断selected的值,添加样式,原理是一样的
    this.$router.push({name:this.selected});//这里进行路由跳转,跳到当前点击这里

  }
 }
}
方式二:vue-router中给我们提供了linkactiveclass,用这种方式可以自定义导航
(1)html结构代码
   <!--底部-->
    <div class="tabBar">
      <ul>
        <li v-for="(tab, index) in tabs">
          <router-link :to="tab.routerName">
            <img :src="tab.imgSrc">
            <p>{{tab.title}}</p>
          </router-link>
        </li>
      </ul>

    </div>
(2)将tab用到的图片定义到下面的data中
 import index from './assets/index.png'
  import vip from './assets/vip.png'
  import shopcart from './assets/shopcart.png'
  import search from './assets/search.png'

  let tabs = [
    {id:1, title:"首页", imgSrc:index, routerName:{name:'home'}},
    {id:2, title:"会员", imgSrc:vip, routerName:{name:'vip'}},
    {id:3, title:"购物车", imgSrc:shopcart, routerName:{name:'cart'}},
    {id:4, title:"查找", imgSrc:search, routerName:{name:'search'}}


  ]
export default {
  name: 'App',
  data(){
    return {

      tabs

    }
  },
(3)自己定义tab样式

.tabBar{
   100%;
  height: 55px;
  background-color: #ccc;
  position: absolute;
  bottom: 0;
  left: 0;
  background-image: linear-gradient(180deg, #d9d9d9, #d9d9d9 50%, transparent 50%);
   background-size: 100% 1px;
  background-repeat: no-repeat;/*做一像素渐变线*/
  background-position: top left;
  background-color: #fafafa;
}

.tabBar ul{
   100%;
  overflow: hidden;
}

.tabBar ul li{
  float: left;
   25%;
  height: 55px;
  text-align: center;
}

.tabBar ul li a{
  display: inline-block;
   100%;
  height: 100%;
 padding-top: 10px;

}
.tabBar ul li a.link-active{
  background-color: pink;
}
.tabBar ul li a img{
   25px;
  height: 25px;
}
.tabBar ul li a p{
  font-size: 12px;
}
2、轮播图
轮播图的做法比较简单,
(1)直接用mint-ui 到官网找到swiper,
(2)在首页(home组件创建好后),发送axios请求,拿到接口里面 的图片,
 //在组件被创建好之后,请求轮播图图片
created(){
            //api/index?type=top&key=79b64827a7a0f95504dfb2f7e903208d
            this.$axios.get('api/index?type=top&key=79b64827a7a0f95504dfb2f7e903208d')
            .then(res=>{
                console.log(res.data.result);
                this.imgslist= res.data.result.data
            })
            .catch(err=>{
                console.log('轮播图异常',err);
            })
        }
(3)然后进行图片渲染
 <!--这是轮播图-->
         <mt-swipe :auto='4000' class='swiper' style="height: 200px;background-color: red;">
           <mt-swipe-item v-for="(item, index) in filterImgs" :key="index">
            <img :src="item.thumbnail_pic_s">
           </mt-swipe-item>
         </mt-swipe>
(4)有时候我们并不会将请求到的所有数据渲染完,这里可以在computed函数监听
  computed:{
           filterImgs: function(){   //上面渲染时就用这个filterImgs
            //只返回数组从0-3的数据
           return this.imgslist.slice(0,2);
          }
       },
3、九宫格
(1)html代码
 <!--这是九宫格-->
         <div class="list">
             <ul >
                 <li v-for="(grid, index) in grids">
                    <!--这里是点击时要跳转的路由-->
                     <router-link :to="grid.router">
                         <img :src="grid.src">
                         <p>{{grid.title}}</p>
                     </router-link>
                     <router-view></router-view>
                 </li>
             </ul>
         </div>
(2)将九宫格里面的图片信息,路由信息存放在一个数组中
var grids = [
        {id:1, src:'../../../static/img/news.png',title:'新闻资讯', router:{name:'news.list'}},
        {id:2, src:'../../../static/img/news.png',title:'图文分享',router:{name:'news.list'}},
        {id:3, src:'../../../static/img/news.png',title:'商品展示',router:{name:'news.list'}},
        {id:4, src:'../../../static/img/news.png',title:'资讯',router:{name:'news.list'}},
        {id:5, src:'../../../static/img/news.png',title:'联系我们',router:{name:'news.list'}},
        {id:6, src:'../../../static/img/news.png',title:'新闻资讯',router:{name:'news.list'}},

    ]
    export default {
        name:'Home',
        data(){
            return {
                imgslist:[],
                grids

            }
        }
}
(3)九宫格样式
.list{
     100%;
    height: 100%;
}

.list ul{/*他里面的li在必要时拆航*/
    display: flex;
    flex-wrap: wrap;
}

.list ul li{
     33%;
    height: 100px;
    text-align: center;
    font-size: 12px;
    margin-top: 15px;
}

.list ul li a{
    display: inline-block;
     50px;
    height: 50px;
    margin: 0 auto;
}

.list ul li a img{
     50px;
}
三、总结
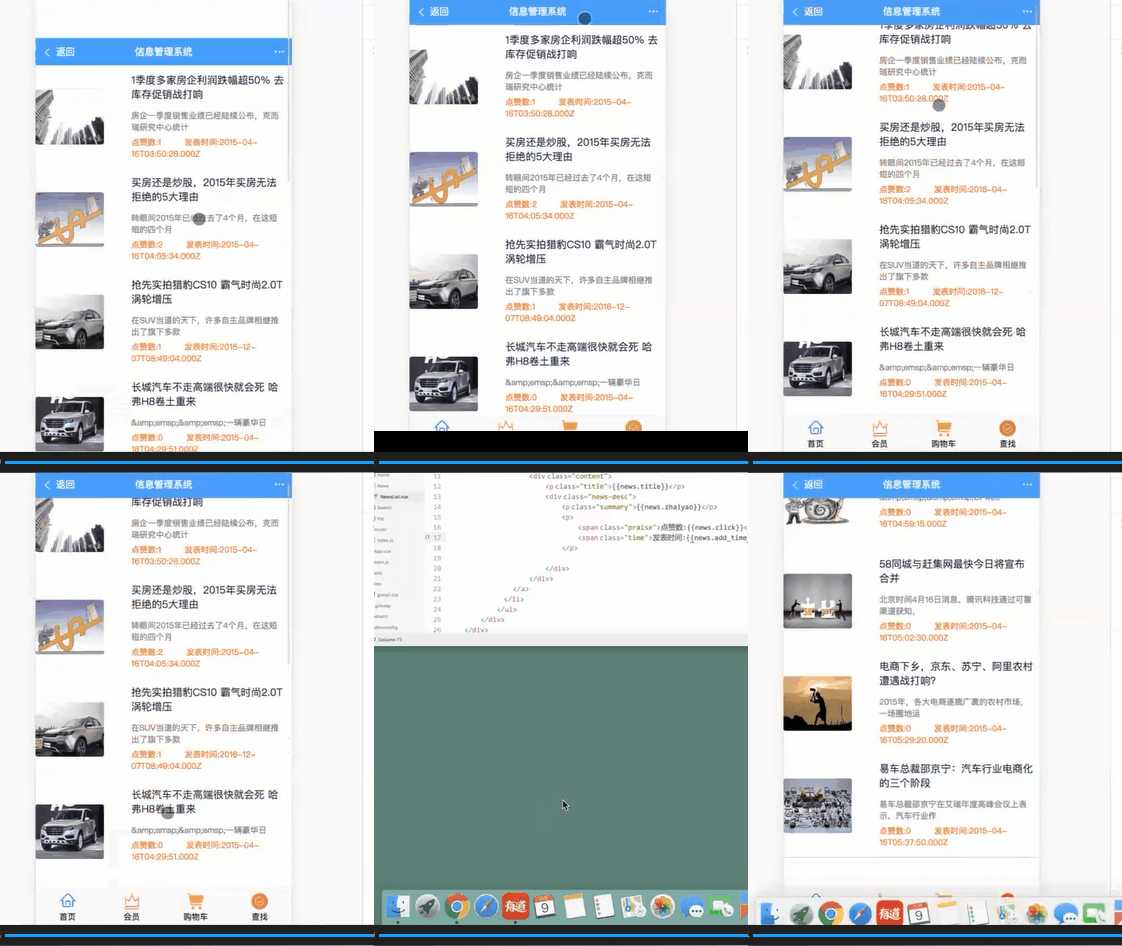
1.当滑动页面的时候,会拽着底部导航滑动如下

2.解决上面的问题加全局样式:
html{
     100%;
    height: 100%;
    overflow: hidden;
}

body{
    padding-top: 41px;
     100%;
    height: 100%;
    overflow: auto;
}
3.这是有多久没有写项目了::
https://www.jianshu.com/p/1ee1c410dc67
---恢复内容结束---
