一、CardView
<android.support.v7.widget.CardView
    xmlns:android="http://schemas.android.com/apk/res/android"
    xmlns:app="http://schemas.android.com/apk/res-auto"
    android:layout_width="match_parent"
    android:layout_height="wrap_content"
    android:layout_margin="5dp"
    app:cardCornerRadius="4dp">

        <TextView
            android:id="@+id/overwatch_name"
            android:layout_width="wrap_content"
            android:layout_height="wrap_content"
            android:layout_gravity="center_horizontal"
            android:layout_margin="5dp"
            android:textSize="16sp"/>

</android.support.v7.widget.CardView>
这是一个CardView的简单布局,app:cardCornerRadius这个属性指定了卡片圆角的弧度,另外还可以通过app:elevation指定卡片的高度,改变卡片的阴影效果。
要使用CardView需要添加相应的库,在app/build.gradle中:
    compile 'com.android.support:recyclerview-v7:26.+'
    compile 'com.android.support:cardview-v7:26.+'
    compile 'com.github.bumptech.glide:glide:4.0.0'
第一行是RecyclerView需要的库,第二行就是CardView,第三行是一个Glide的库,Glide是一个超级强大的图片加载库,一行代码就能实现图片加载功能。
首先在主活动的布局中加入RecyclerView:
        <android.support.v7.widget.RecyclerView
            android:id="@+id/recycler_view"
            android:layout_height="match_parent"
            android:layout_width="match_parent" />
然后为RecyclerView的子项指定一个自定义的布局,在layout目录下新建overwatch_item.xml:
<android.support.v7.widget.CardView
    xmlns:android="http://schemas.android.com/apk/res/android"
    xmlns:app="http://schemas.android.com/apk/res-auto"
    android:layout_width="match_parent"
    android:layout_height="wrap_content"
    android:layout_margin="5dp"
    app:cardCornerRadius="4dp">

    <LinearLayout
        android:orientation="vertical"
        android:layout_width="match_parent"
        android:layout_height="wrap_content">

        <ImageView
            android:id="@+id/overwatch_image"
            android:layout_width="match_parent"
            android:layout_height="100dp"
            android:scaleType="centerCrop"/>

        <TextView
            android:id="@+id/overwatch_name"
            android:layout_width="wrap_content"
            android:layout_height="wrap_content"
            android:layout_gravity="center_horizontal"
            android:layout_margin="5dp"
            android:textSize="16sp"/>
    </LinearLayout>
</android.support.v7.widget.CardView>
然后新建一个OverWatch类:
public class OverWatch {

    private String name;

    private int imageID;

    public OverWatch(String name, int imageID) {
        this.imageID = imageID;
        this.name = name;
    }

    public String getName() {
        return name;
    }

    public int getImageID() {
        return imageID;
    }
}
这个类就是每个卡片的内容了。name代表名字,imageID代表图片资源ID。
然后就需要为RecyclerView准备一个适配器:
 1 public class OverWatchAdapter extends RecyclerView.Adapter<OverWatchAdapter.ViewHolder> {
 2
 3     private Context mContext;
 4
 5     private List<OverWatch> mOverWatch;
 6
 7     static class ViewHolder extends RecyclerView.ViewHolder{
 8
 9         CardView cardView;
10         ImageView overwatchImage;
11         TextView overwatchName;
12
13         public ViewHolder(View view){
14             super(view);
15             cardView = (CardView) view;
16             overwatchImage = (ImageView) view.findViewById(R.id.overwatch_image);
17             overwatchName = (TextView) view.findViewById(R.id.overwatch_name);
18         }
19     }
20
21     public OverWatchAdapter(List<OverWatch> OverWatchList){
22         mOverWatch = OverWatchList;
23     }
24
25     public ViewHolder onCreateViewHolder(ViewGroup parent, int viewType) {
26         if(mContext == null){
27             mContext = parent.getContext();
28         }
29         View view = LayoutInflater.from(mContext).inflate(R.layout.overwatch_item,parent,false);
30         return  new ViewHolder(view);
31     }
32     public void onBindViewHolder(ViewHolder viewHolder, int position) {
33         OverWatch overWatch = mOverWatch.get(position);
34         viewHolder.overwatchName.setText(overWatch.getName());
35         Glide.with(mContext).load(overWatch.getImageID()).into(viewHolder.overwatchImage);
36     }
37
38     public int getItemCount() {
39         return mOverWatch.size();
40     }
41 }
第35行就是Glide加载图片的方法,首先是调用Glide.with()方法传入一个Context参数,然后调用load()方法去加载图片,参数可以是URI,也可以使一个本地路径,或者是一个资源ID,然后再调用into()方法将图片设置到某一个ImageView中去。
然后就是主活动的java代码:
 1 public class MainActivity extends AppCompatActivity {
 2
 3     private DrawerLayout mDrawerLayout;
 4
 5     private OverWatch[] overWatches = {new OverWatch("猎空",R.drawable.img_1),new OverWatch("猎空",R.drawable.img_2),
 6             new OverWatch("猎空",R.drawable.img_3),new OverWatch("猎空",R.drawable.img_5),
 7             new OverWatch("猎空",R.drawable.img_6),new OverWatch("猎空",R.drawable.img_7),
 8             new OverWatch("猎空",R.drawable.img_8),new OverWatch("猎空",R.drawable.img_9),
 9             new OverWatch("猎空",R.drawable.img_10),new OverWatch("猎空",R.drawable.img_11)};
10
11     private List<OverWatch> overWatchList = new ArrayList<>();
12
13     private OverWatchAdapter overWatchAdapter;
14     @Override
15     protected void onCreate(Bundle savedInstanceState) {
16         super.onCreate(savedInstanceState);
17         setContentView(R.layout.activity_main);
18  ...
19
20         //图片加载
21         initOverWatch();
22         RecyclerView reccyclerView = (RecyclerView) findViewById(R.id.recycler_view);
23         GridLayoutManager layoutManager = new GridLayoutManager(MainActivity.this,2);
24         reccyclerView.setLayoutManager(layoutManager);
25         overWatchAdapter = new OverWatchAdapter(overWatchList);
26         reccyclerView.setAdapter(overWatchAdapter);
27     }
28
29 ...
30     }
31
32 ...
33
34     //存放图片
35     private  void initOverWatch(){
36         overWatchList.clear();
37         for (int i = 0; i < 50; i++){
38             Random random = new Random();
39             int index = random.nextInt(overWatches.length);
40             overWatchList.add(overWatches[index]);
41         }
42     }
43 }
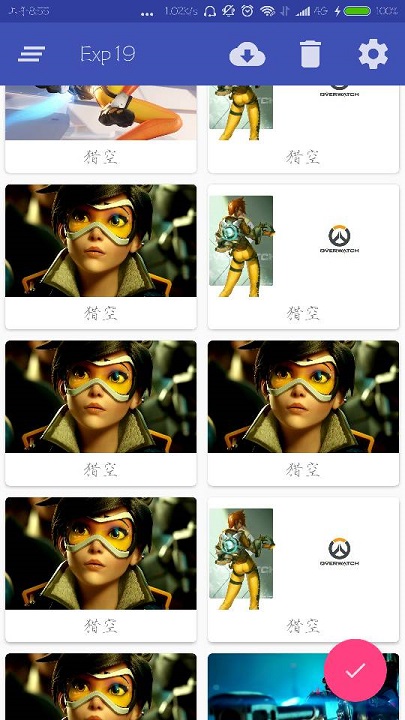
运行程序:

二、AppBarLayout
刚刚的RecyclerView把Toolbar挡住了.从布局xml中看:
    <android.support.design.widget.CoordinatorLayout
        android:layout_width="match_parent"
        android:layout_height="match_parent">

        <android.support.v7.widget.Toolbar
            android:id="@+id/toolbar"
            android:layout_width="match_parent"
            android:layout_height="?attr/actionBarSize"
            android:background="?attr/colorPrimary"
            android:theme="@style/ThemeOverlay.AppCompat.Dark.ActionBar"
            app:popupTheme="@style/ThemeOverlay.AppCompat.Light"/>

        <android.support.v7.widget.RecyclerView
            android:id="@+id/recycler_view"
            android:layout_height="match_parent"
            android:layout_width="match_parent" />

        <android.support.design.widget.FloatingActionButton
            android:id="@+id/fab"
            android:layout_width="wrap_content"
            android:layout_height="wrap_content"
            android:background="@drawable/fab"
            android:layout_gravity="bottom|end"
            android:layout_margin="16dp"
            android:src="@drawable/ic_done"
            app:elevation="8dp" />

    </android.support.design.widget.CoordinatorLayout>
Toolbar、RecyclerView、FloatingActionButton都是放置在CoordinatorLayout中的,因为CoordinatorLayout就是一个加强版的FrameLayout,从上到下的布局会逐渐覆盖,所以我们可以把Toolbar的布局代码下移试试:
但是这样Toolbar又把RecyclerView的一部分覆盖住了,所以再试试在CoordinatorLayout中嵌套一个LinearLayout:
    <android.support.design.widget.CoordinatorLayout
        android:layout_width="match_parent"
        android:layout_height="match_parent">

        <LinearLayout
            android:orientation="vertical"
            android:layout_width="match_parent"
            android:layout_height="match_parent">

            <android.support.v7.widget.Toolbar
                android:id="@+id/toolbar"
                android:layout_width="match_parent"
                android:layout_height="?attr/actionBarSize"
                android:background="?attr/colorPrimary"
                android:theme="@style/ThemeOverlay.AppCompat.Dark.ActionBar"
                app:popupTheme="@style/ThemeOverlay.AppCompat.Light"/>

            <android.support.v7.widget.RecyclerView
                android:id="@+id/recycler_view"
                android:layout_height="match_parent"
                android:layout_width="match_parent" />
        </LinearLayout>

        <android.support.design.widget.FloatingActionButton
            android:id="@+id/fab"
            android:layout_width="wrap_content"
            android:layout_height="wrap_content"
            android:background="@drawable/fab"
            android:layout_gravity="bottom|end"
            android:layout_margin="16dp"
            android:src="@drawable/ic_done"
            app:elevation="8dp" />
    </android.support.design.widget.CoordinatorLayout>
然后就完成了:

然后其实这里想讲的是AppBarLayout,其实AppBarLayout就是垂直方向上的LinearLayout不过是在其内部做了很多滚动事件的封装,所以可以用AppBarLayout避免这个遮挡
先把Toolbar嵌套到AppBarLayout中,然后给RecyclerView指定一个布局行为:
    <android.support.design.widget.CoordinatorLayout
        android:layout_width="match_parent"
        android:layout_height="match_parent">

        <android.support.design.widget.AppBarLayout
            android:layout_width="match_parent"
            android:layout_height="wrap_content">

            <android.support.v7.widget.Toolbar
                android:id="@+id/toolbar"
                android:layout_width="match_parent"
                android:layout_height="?attr/actionBarSize"
                android:background="?attr/colorPrimary"
                android:theme="@style/ThemeOverlay.AppCompat.Dark.ActionBar"
                app:popupTheme="@style/ThemeOverlay.AppCompat.Light"/>

        </android.support.design.widget.AppBarLayout>

        <android.support.v7.widget.RecyclerView
            android:id="@+id/recycler_view"
            android:layout_height="match_parent"
            android:layout_width="match_parent"
            app:layout_behavior="@string/appbar_scrolling_view_behavior"/>

        <android.support.design.widget.FloatingActionButton
            android:id="@+id/fab"
            android:layout_width="wrap_content"
            android:layout_height="wrap_content"
            android:background="@drawable/fab"
            android:layout_gravity="bottom|end"
            android:layout_margin="16dp"
            android:src="@drawable/ic_done"
            app:elevation="8dp" />
    </android.support.design.widget.CoordinatorLayout>
效果和使用LinearLayout一样。但是AppBarLayout做了一些滚动事件的封装。比如这样改:
<android.support.design.widget.AppBarLayout
        android:layout_width="match_parent"
        android:layout_height="wrap_content">

        <android.support.v7.widget.Toolbar
            android:id="@+id/toolbar"
            android:layout_width="match_parent"
            android:layout_height="?attr/actionBarSize"
            android:background="?attr/colorPrimary"
            android:theme="@style/ThemeOverlay.AppCompat.Dark.ActionBar"
            app:popupTheme="@style/ThemeOverlay.AppCompat.Light"
            app:layout_scrollFlags="scroll|enterAlways|snap"/>

    </android.support.design.widget.AppBarLayout>
app:layout_scrollFlags这个属性的值指定为scroll就是,当RecyclerView向上滚动的时候,Toolbar会随着滚动而隐藏,enterAlways是指向下滚动的时候,snap指根据滚动的距离,自动选择隐藏还是显示。
三、下拉刷新
使用的是SwipeRefreshLayout然某个控件实现下拉刷新:
        <android.support.v4.widget.SwipeRefreshLayout
            android:id="@+id/swip_refresh"
            android:layout_width="match_parent"
            android:layout_height="match_parent"
            app:layout_behavior="@string/appbar_scrolling_view_behavior">

            <android.support.v7.widget.RecyclerView
                android:id="@+id/recycler_view"
                android:layout_height="match_parent"
                android:layout_width="match_parent" />

        </android.support.v4.widget.SwipeRefreshLayout>
将想要实现下拉刷新的某控件嵌套在SwipeRefreshLayout就行了,这里要注意把app:layout_behavior="@string/appbar_scrolling_view_behavior"这个属性移到SwipeRefreshLayout。
然后是JAVA代码:
public class MainActivity extends AppCompatActivity {

...

    private SwipeRefreshLayout swipeRefresh;
    @Override
    protected void onCreate(Bundle savedInstanceState) {
        super.onCreate(savedInstanceState);
        setContentView(R.layout.activity_main);
...

        //下拉刷新
        swipeRefresh = (SwipeRefreshLayout) findViewById(R.id.swip_refresh);
        swipeRefresh.setColorSchemeResources(R.color.colorPrimary);
        swipeRefresh.setOnRefreshListener(new SwipeRefreshLayout.OnRefreshListener() {
            @Override
            public void onRefresh() {
                refreshOverWatch();
            }
        });
    }

 ...

    //刷新图片
    private  void refreshOverWatch(){
        new Thread(new Runnable() {
            @Override
            public void run() {
                try{
                    Thread.sleep(1000);
                }catch (InterruptedException e){
                    e.printStackTrace();
                }
                runOnUiThread(new Runnable() {
                    @Override
                    public void run() {
                        initOverWatch();
                        overWatchAdapter.notifyDataSetChanged();
                        swipeRefresh.setRefreshing(false);
                    }
                });
            }
        }).start();
    }
}
具体步骤就是:
1、获取SwipeRefreshLayout的实例。
2、设置监听器。
3、编写刷新的使用的方法
在这里要注意的有,setColorSchemeResources()这个方法设置的是刷新时进度条的颜色,Thread.sleep(1000)先让线程沉睡一秒,让,然后改变数据,接着调用overWatchAdapter.notifyDataSetChanged()方法通知数据发生了变化,swipeRefresh.setRefreshing(false)用于表示刷新事件结束,并隐藏进度条。