因为之前参照微信的原生的文档写过一些小程序的demo,写的过程比较繁琐,后来出了美团的mpvue,可以直接使用vue开发,其他的不作对比,这篇文章记录一下踩坑之旅.
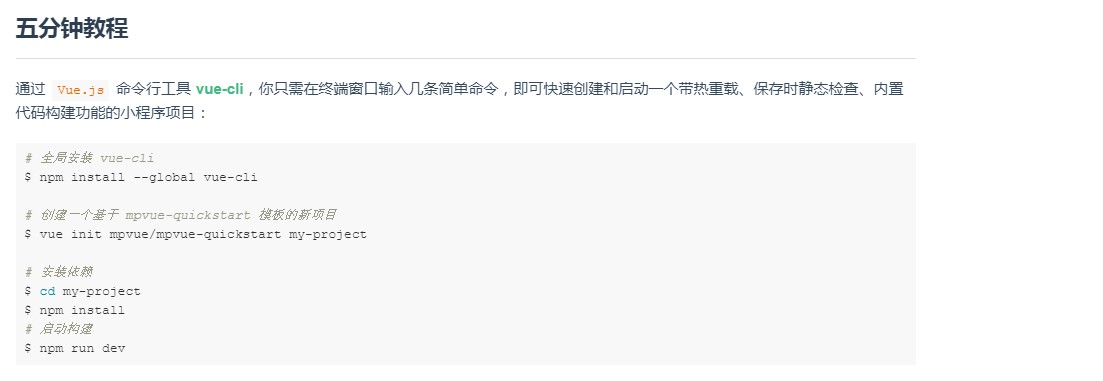
参照mpvue http://mpvue.com/mpvue/#_2的官网的五分钟的教程搭建项目
在创建的过程中,需要输入微信小程序的个人appId,可以去微信小程序开发平台复制进去。
创建完成后的项目其实和使用vue-cli创建的脚手架大同小异,没图案也只是对其封装,然后转化为wxml。
1.首先引进iview weapp的组件库https://weapp.iviewui.com/docs/guide/start
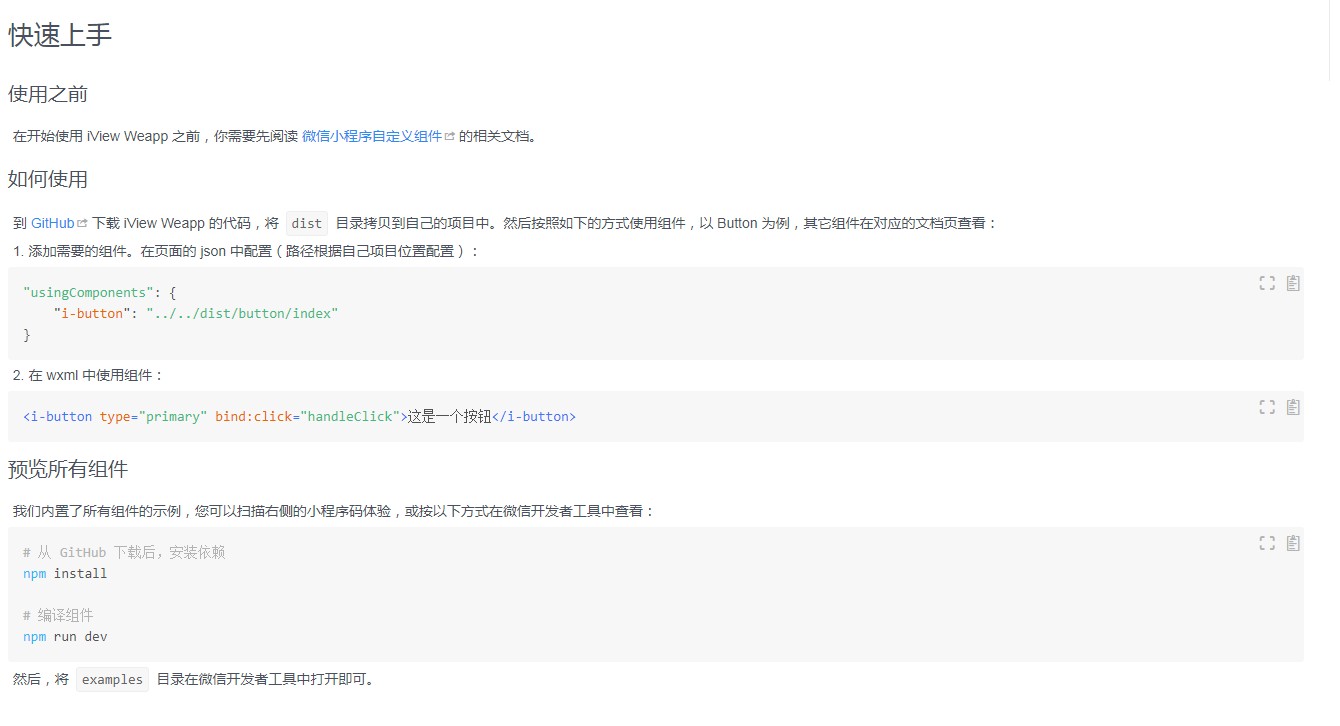
官网是将需要使用的组件,按照小程序的自定义封装组件的方式,将所需要的组件封装成小程序的自定义的组件,然后通过usingComponents的方式将你需要的组件引进来。
下面是一些例子:
pages/logs/index.vue(此处是文件的路径):
 1 <template>
 2   <div class="followRecords">
 3     <i-button @click="handleClick">默认按钮</i-button>
 4     <i-button @click="handleClick" type="error" long="true">联通两边按钮</i-button>
 5     <i-button @click="handleClick" type="primary">Primary</i-button>
 6     <i-button @click="handleClick" type="ghost">Ghost</i-button>
 7     <i-button @click="handleClick" type="info">Info</i-button>
 8     <i-button @click="handleClick" type="success">Success</i-button>
 9     <i-button @click="handleClick" type="warning">Warning</i-button>
10     <i-button @click="handleClick" type="error">Error</i-button>
11   </div>
12 </template>
13 <script>
14   export default {
15     name: 'followRecords',
16     data () {
17       return {
18       }
19     },
20     mounted () {
21     },
22     methods: {
23       handleClick(e) {
24         console.log(e);
25       }
26     }
27   }
28 </script>
29 <style lang="scss">
30   .followRecords {
31   }
32 </style>
pages/logs/main.json
{
  "navigationBarTitleText": "首页",
  "navigationBarBackgroundColor": "#000",
  "usingComponents": {
    "i-card": "../../../static/iview/card/index",
    "i-steps": "../../../static/iview/steps/index",
    "i-step": "../../../static/iview/step/index",
    "i-button": "../../../static/iview/button/index",
    "i-divider": "../../../static/iview/divider/index",
    "i-panel": "../../../static/iview/panel/index",
    "i-toast": "../../../static/iview/toast/index",
    "i-message": "../../../static/iview/message/index",
    "i-icon": "../../../static/iview/icon/index",
    "i-cell-group": "../../../static/iview/cell-group/index",
    "i-cell": "../../../static/iview/cell/index",
    "i-grid": "../../../static/iview/grid/index",
    "i-grid-item": "../../../static/iview/grid-item/index",
    "i-grid-icon": "../../../static/iview/grid-icon/index",
    "i-grid-label": "../../../static/iview/grid-label/index",
    "i-row": "../../../static/iview/row/index",
    "i-col": "../../../static/iview/col/index",
    "i-tag": "../../../static/iview/tag/index",
    "ec-canvas": "../../../static/ec-canvas/ec-canvas"
  }
}
此处做一个提示,mpvue创建的pages下的目录需要自行创建一个main.json文件,对该页进行配置,效果如下,颜色还是挺好看的:

这就是将iview的组件引入使用的过程。
这里提出一些遇到的问题,在app.json配置了tabBar的时候,它不一定会显示出来,解决办法:关闭微信开发工具重新打开,或者重新npm run dev一遍吧,记得在某处看过mpvue的解释,他们觉得重新添加的页面也不会太多,所以重启一下也没事大的影响。
在使用的过程中tabBar的icon会404,还是重启微信开发工具,理由就不解释了
在mpvue里使用echarts怎么办,其实echarts也是封装了小程序的组件 https://github.com/ecomfe/echarts-for-weixin,将下载下来的ec-canvas放到微信的目录里,从上面的截图里看一看到,我是将他的dist目录放到了static,引用的路径是'../../../static/iview/..'
有的时候放到src/assets/的时候会一直报错找不到文件,是因为dist/assets没有找到,你需要把他复制下来放到assets/,应该是打包没有打包下来
引用ec-canvas的方法和iview一样,在usingComponents里加入
<template>
  <div class='container'>
    <div class="pie-content">
      <div class="diseease-info">
        <div class="title">疾病分类情况</div>
        <div class="select">
          <picker class="weui-btn" @change="PickerChange" :value="indexPicker" :range="array">
              <view class="picker">
                筛选:<span>{{selectTime}}</span>
              </view>
            </picker>
        </div>
      </div>
      <div class="disease-echart">
        <ec-canvas class="canvas" id="mychart-dom-bar" canvas-id="mychart-bar" :ec="ec"></ec-canvas>
      </div>
    </div>
  </div>
</template>

<script>
// 此处 opyions为echarts的setOptions
const options = {
  backgroundColor: "#fff",
  color: ["#f36837", "#5e65e3", "#5e98e3", "#59d0bd", "#f9df94", "#0f0"],
  tooltip: {
    trigger: 'item',
    formatter: "{a} <br/>{b}: {c} ({d}%)"
  },
  legend: {
    orient: 'vertical',
    left: '65%',
    y: 'middle',
    data: ['北京', '武汉', '杭州', '广州', '上海'],
    textStyle: {
      color: "#666",
      fontWeight: 'normal'
    }
  },
  grid: {
    top: '0%',
    left: '0%',
    containLabel: true,
  },
  series: [{
    label: {
      show: false
    },
    type: 'pie',
    center: ['30%', '50%'],
    radius: ['40%', '55%'],
    data: [
      {
        value: 55,
        name: '北京'
      }, {
        value: 20,
        name: '武汉'
      }, {
        value: 10,
        name: '杭州'
      }, {
        value: 20,
        name: '广州'
      }, {
        value: 38,
        name: '上海'
      }
    ],
    itemStyle: {
      emphasis: {
        shadowBlur: 10,
        shadowOffsetX: 0,
        shadowColor: 'rgba(0, 2, 2, 0.3)'
      }
    }
  }]
};
export default {
  data () {
    return {
      indexPicker: 3,
      array: ['全部', '近七天', '近三个月', '近半年', '近一年'],
      selectTime: '',
      userInfo: {}, // 用户信息
      ec: {
        options: options
      },
      ecLine: {
        options: lineOptions
      }
    }
  },
  mounted () {
    this.checkTime()

  },
  onShow () {
  },
  watch: {
    // ..
  },
  created () {
    // 调用应用实例的方法获取全局数据
    this.getUserInfo()
  },
  methods: {// 选择时间
    PickerChange(e) {
      this.selectTime = this.array[e.mp.detail.value]
      this.array.forEach( (item, index) => {
        if(this.array[e.mp.detail.value] === item) {
          this.indexPicker = index
        }
      })
    },
    checkTime() {
       this.array.forEach( (item, index) => {
        if(this.indexPicker === index) {
          this.selectTime = this.array[index]
        }
      })
    }
  }
}
</script>

<style lang="scss" scoped>
// 标题title
@mixin diseeaseInfo {
  height: 78rpx;
  line-height: 78rpx;
  color: #666;
  font-weight: bold;
  .title {
    float: left;
    text-indent: 20rpx;
    font-size: 30rpx;
  }
  .select {
    float: right;
    font-size: 28rpx;
    padding-right: 2em;
    span {
      font-weight: normal;
    }
  }
}
// 宽高
@mixin size($width, $height, $background) {
   $width;
  height: $height;
  background: $background;
}
.header {
  margin-bottom: 10rpx;
  padding: 30rpx 24rpx;
   706rpx;
  height: 406rpx;
  background: #f8f8f8;
  .header-info {
    height: 162rpx;
    margin: 10rpx 0 42rpx;
    img {
       162rpx;
      height: 162rpx;
      float: left;
      border-radius: 50%;
    }
    p{
      line-height: 46rpx;
       420rpx;
      font-size: 30rpx;
      color: #818181;
      padding-left: 33rpx;
      float: left;
      text-indent:2em;
    }
    .search {
      float:right;
      30rpx;
      margin-right:34rpx;
    }
  }
  .header-message {

    padding: 28rpx 20rpx;
     666rpx;
    background: #fff;
    box-shadow:0 0 10rpx rgba(0, 0, 0, 0.25);
    display:flex;
    border-radius:10rpx;
    .message {
      flex: 1;
      height: 120rpx;
      border-left: 1rpx solid #e5e5e5;
      color: #6c6c6c;
      text-align: center;
      p {
        font-size: 26rpx;
        line-height:50rpx;
        .number {
          font-size:38rpx;
          color:#333;
        }
        .name {
          color:#f36800;
        }
      }
    }
    .message:nth-of-type(1) {
      border: none;
    }
  }
}
.pie-content {
  margin-bottom: 20rpx;
  @include size(100%, 380rpx, #fff);
  .diseease-info {
    @include diseeaseInfo;
  }
  .disease-echart, .medicine-echart {
    @include size(100%, 300rpx, #fff);
    .canvas {
      @include size(100%, 300rpx, #fff);
    }
  }
}
.line-content {
  margin-bottom: 20rpx;
  @include size(100%, 510rpx, #fff);
  .diseease-info {
    @include diseeaseInfo;
  }
  .medicine-echart {
    @include size(92%, 400rpx, #fff);
    margin: 2% 4%;
    border-radius: 3%;
    overflow: hidden;
    .canvas {
      @include size(100%, 100%, #fff);
    }
  }
}
.care-content {
  margin-bottom: 20rpx;
  @include size(100%, 610rpx, #fff);
  .diseease-info {
    @include diseeaseInfo;
  }
  .care-list {
    margin: 2% 4%;
    @include size(92%, 500rpx, #fff);
    overflow-y: auto;
    i-row {
      font-size: 26rpx;
      line-height: 65rpx;
      color:#666;
      height: 65rpx;
      i-col {
        border-bottom: 1rpx solid #666;
      }
    }
  }

}

</style>
效果图如下:
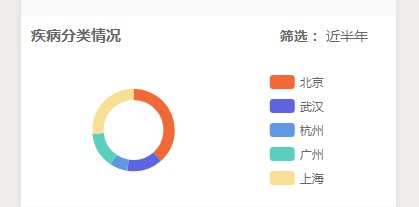
友情提示:微信小程序里是没有select这个标签的,微信的组件里封装了picker组件,其实是对select的一种另类展示,因为微信小程序是针对移动端的,点点点不容易点到select里的其他选项,所以没有select吧,我瞎猜的,。。。
在这里也提一下mpvue的缺点,mpvue并没有将微信小程序里的数据双向绑定实现,再多出api中均存在这样的问题,虽然不影响使用,也就是多写几行代码,以下举出几个例子,
在使用i-tab的时候,value其实是没有根据变化而变化的,当你点击的时候,你需要手动改变iview的value,然后他才会跳到点击的tab,其他的组件都有这种问题,大家慢慢体会吧。。。