#################################################
未曾验证:(据说只适合python 2)
https://www.cnblogs.com/datou-swag/articles/10671842.html
http://www.voidcn.com/article/p-hmuycojw-bms.html
http://www.voidcn.com/article/p-uewkhlef-bbc.html
#################################################
OpenCV 的 cv2.putText 方法中无法放置中文。
但是PIL 的 Image.Draw 的方法中有 draw.text 的方法是可以设置中文字体的。simsum.ttc 宋体。
OpenCV 读出的图像是np.ndarray 的图像格式。
PIL 读出的图像格式与上述有所不同。所以当图像从cv2 转到 PIL 操作时,两者的图像格式需要做一些变化。
#!/usr/bin/env python
# !_*_ coding:utf-8 _*_

import face_recognition
import cv2
import numpy as np
from PIL import Image, ImageDraw, ImageFont


def cv2ImgAddText(img, text, left, top, textColor=(0, 255, 0), textSize=20):
    if (isinstance(img, np.ndarray)):
        pil_img = Image.fromarray(cv2.cvtColor(img, cv2.COLOR_BGR2RGB))
        draw = ImageDraw.Draw(pil_img)
        # 字体默认在 C:WindowsFonts 下面,要鼠标右键查看属性
        # fontStyle = ImageFont.truetype('simsun.ttc', textSize, encoding='utf-8')
        fontStyle = ImageFont.truetype('msyh.ttc', textSize, encoding='utf-8')
        draw.text((left, top), text, textColor, font=fontStyle)
        return cv2.cvtColor(np.asarray(pil_img), cv2.COLOR_RGB2BGR)


face_image = face_recognition.load_image_file('imgs/qsz001.jpg')
# face_recognition.load_image_file 读出的文件是RGB,而后面需要在cv2 上画框,cv2是BGR 的np.ndarray的数组文件
face_image = cv2.cvtColor(face_image, cv2.COLOR_RGB2BGR)
face_locations = face_recognition.face_locations(face_image)
for face_location in face_locations:
    print(face_location)
    top, right, bottom, left = face_location
    cv2.rectangle(face_image, (left, top), (right, bottom), (0, 255, 0), 2)
    face_image = cv2ImgAddText(face_image, "邱淑贞", left, bottom + 5, (255, 0, 0), 20)

    cv2.imshow("image", face_image)
    cv2.waitKey(0)
    cv2.destroyAllWindows()
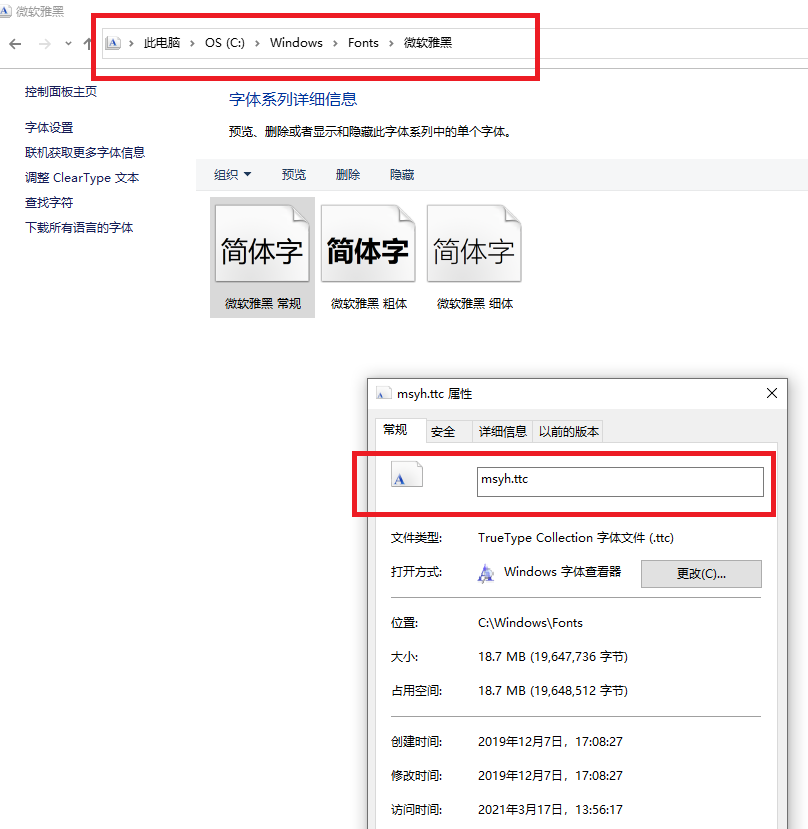
注意 字体的路径:
字体默认在 C:WindowsFonts 下面,要鼠标右键查看属性


下面代码是经过测试的,能够正常运行。
#!/usr/bin/env python
# !_*_ coding:utf-8 _*_

import numpy as np
import freetype
import copy
import pdb
"""
##################################################
# tools                                          #
#------------------------------------------------#
# draw chinese text using freetype on python3.7  #
# 2020-04-12                                     #
##################################################
https://www.pythonheidong.com/blog/article/327766/a72be84affd143fcc7f1/

"""

class put_chinese_text(object):
    def __init__(self, ttf):
        self._face = freetype.Face(ttf)

    def draw_text(self, image, pos, text, text_size, text_color):
        '''
        draw chinese(or not) text with ttf
        :param image:     image(numpy.ndarray) to draw text
        :param pos:       where to draw text
        :param text:      the context, for chinese should be unicode type
        :param text_size: text size
        :param text_color:text color
        :return:          image
        '''
        self._face.set_char_size(text_size * 64)
        metrics = self._face.size
        ascender = metrics.ascender / 64.0

        # descender = metrics.descender/64.0
        # height = metrics.height/64.0
        # linegap = height - ascender + descender
        ypos = int(ascender)

        # if not isinstance(text, unicode):
        #    text = text.decode('utf-8')
        img = self.draw_string(image, pos[0], pos[1] + ypos, text, text_color)
        return img

    def draw_string(self, img, x_pos, y_pos, text, color):
        '''
        draw string
        :param x_pos: text x-postion on img
        :param y_pos: text y-postion on img
        :param text:  text (unicode)
        :param color: text color
        :return:      image
        '''
        prev_char = 0
        pen = freetype.Vector()
        pen.x = x_pos << 6  # div 64
        pen.y = y_pos << 6

        hscale = 1.0
        matrix = freetype.Matrix(int(hscale) * 0x10000, int(0.2 * 0x10000),
                                 int(0.0 * 0x10000), int(1.1 * 0x10000))
        cur_pen = freetype.Vector()
        pen_translate = freetype.Vector()

        image = copy.deepcopy(img)
        for cur_char in text:
            self._face.set_transform(matrix, pen_translate)

            self._face.load_char(cur_char)
            kerning = self._face.get_kerning(prev_char, cur_char)
            pen.x += kerning.x
            slot = self._face.glyph
            bitmap = slot.bitmap

            cur_pen.x = pen.x
            cur_pen.y = pen.y - slot.bitmap_top * 64
            self.draw_ft_bitmap(image, bitmap, cur_pen, color)

            pen.x += slot.advance.x
            prev_char = cur_char

        return image

    def draw_ft_bitmap(self, img, bitmap, pen, color):
        '''
        draw each char
        :param bitmap: bitmap
        :param pen:    pen
        :param color:  pen color e.g.(0,0,255) - red
        :return:       image
        '''
        x_pos = pen.x >> 6
        y_pos = pen.y >> 6
        cols = bitmap.width
        rows = bitmap.rows

        glyph_pixels = bitmap.buffer

        for row in range(rows):
            for col in range(cols):
                if glyph_pixels[row * cols + col] != 0:
                    img[y_pos + row][x_pos + col][0] = color[0]
                    img[y_pos + row][x_pos + col][1] = color[1]
                    img[y_pos + row][x_pos + col][2] = color[2]


if __name__ == '__main__':
    # just for test
    import cv2

    line = '美美的'
    # img = np.zeros([300,300,3])
    img = cv2.imread('imgs/qsz001.jpg', cv2.IMREAD_COLOR)

    color_ = (0, 0, 255)  # Green
    pos = (30, 30)
    text_size = 50

    # ft = put_chinese_text('wqy-zenhei.ttc')
    ft = put_chinese_text('C:/Windows/Fonts/simkai.ttf')
    image = ft.draw_text(img, pos, line, text_size, color_)

    cv2.imshow('freetype', image)
    cv2.waitKey(0)
    cv2.destroyAllWindows()
My Code
#!/usr/bin/env python
# !_*_ coding:utf-8 _*_

import cv2
import face_recognition
import numpy as np
from PIL import Image, ImageFont, ImageDraw
import os


def load_image(path):
    """
    读取已知的文件库,把所有人的 encodings 作为一个文件库,后续视频中的头像来与他做比较。
    os.walk() 与 os.listdir() 都可以得到文件的filenames。

    :param path:
    :return:
    """
    for root, dirnames, filenames in os.walk(path):
        # print(root, dirnames, filenames)
        print("正在加载已知人员的图片信息......")
        facelib_encodings = []
        for filename in filenames:
            file_path = os.path.join(root, filename)
            # print(file_path)
            face_image = face_recognition.load_image_file(file_path)
            # 因为文件库中的头像均是单人照,所以取索引【0】
            facelib_encoding = face_recognition.face_encodings(face_image)[0]
            facelib_encodings.append(facelib_encoding)

    return facelib_encodings, filenames


def cv2ImgAddText(img, text, left, top, textcolor, textsize=20):
    if (isinstance(img, np.ndarray)):
        pil_img = Image.fromarray(cv2.cvtColor(img, cv2.COLOR_BGR2RGB))
        draw = ImageDraw.Draw(pil_img)
        # 字体默认在 C:WindowsFonts 下面,要鼠标右键查看属性
        # fontStyle = ImageFont.truetype('simsun.ttc', textSize, encoding='utf-8')
        fontStyle = ImageFont.truetype('simsun.ttc', textsize, encoding='utf-8')
        draw.text((left, top), text, textcolor, font=fontStyle)
        # 因为后面还需要调用cv2.imshow的函数,所以要把pil_img 转化的cv2的领域 RGB---->BGR
        cv2_image = cv2.cvtColor(np.asarray(pil_img), cv2.COLOR_RGB2BGR)
        return cv2_image


# def cv2ImgAddText(img, text, left, top, textColor=(0, 255, 0), textSize=20):
#     if (isinstance(img, np.ndarray)):
#         pil_img = Image.fromarray(cv2.cvtColor(img, cv2.COLOR_BGR2RGB))
#         draw = ImageDraw.Draw(pil_img)
#         # 字体默认在 C:WindowsFonts 下面,要鼠标右键查看属性
#         # fontStyle = ImageFont.truetype('simsun.ttc', textSize, encoding='utf-8')
#         fontStyle = ImageFont.truetype('msyh.ttc', textSize, encoding='utf-8')
#         draw.text((left, top), text, textColor, font=fontStyle)
#         return cv2.cvtColor(np.asarray(pil_img), cv2.COLOR_RGB2BGR)


face_lib, filenames = load_image('facelib')

# 下面摄像头开始抓取图片
capture = cv2.VideoCapture(0, cv2.CAP_DSHOW)
while True:
    ret, frame = capture.read()
    # flip函数是使图像做镜像,由后面的参数决定 0:垂直翻转; 1:水平翻转; -1:水平,垂直均翻转
    # frame = cv2.flip(frame, 1)

    # 把图像缩小至1/4,以便于后续分析,但是后续得到的坐标需要 *4 才是frame上真实的坐标
    small_frame = cv2.resize(frame, (0, 0), fx=0.25, fy=0.25)
    face_locations = face_recognition.face_locations(small_frame)
    face_encodings = face_recognition.face_encodings(small_frame, face_locations)

    names = []
    # 上述得到的face_encodings,可能是单个人像,也有可能是多人的图像(摄像头中可能由多个人)
    for face_encoding in face_encodings:
        name = "未知人像"
        matches = face_recognition.compare_faces(face_lib, face_encoding, tolerance=0.5)
        # 如果有人匹配,要找出匹配的索引,以便于找到相应的 filename,然后取其姓名。
        for item in matches:
            if item == True:
                index_num = matches.index(True)
                name = filenames[index_num].split(".")[0]
        names.append(name)
        print(names)

    for face_location, name in zip(face_locations, names):
        top, right, bottom, left = face_location
        top *= 4
        right *= 4
        bottom *= 4
        left *= 4
        # 利用cv2画矩形框
        cv2.rectangle(frame, (left, top), (right, bottom), (0, 255, 0), 2)
        # print(name)

        # 利用PIL 写汉字
        frame = cv2ImgAddText(frame, name, left, bottom + 5, (255, 255, 255), 25)

    cv2.imshow("video", frame)
    key = cv2.waitKey(50)
    if key & 0xFF == ord('q'):
        break

cv2.destroyAllWindows()
capture.release()