一、概述
AOP(Aspect Oriented Programming),面向切面编程,通过预编译方式和运行期动态代理实现程序功能的统一维护的一种技术,是Spring框架中的一个重要内容。利用AOP可以对业务逻辑的各个部分进行隔离,从而使得业务逻辑各部分之间的耦合度降低,提高程序的可用性,提高开发效率。
主要功能体现在:日志记录,性能统计,安全控制,事务处理,异常处理等。
主要概念:
- 切面(Aspect):要实现的交叉功能,是应用系统模块化的一个切面或领域,常见的例子就是日志记录
- 连接点(JoinPoint):应用程序执行过程中插入切面的地点,可以是方法调用,异常抛出,切面代码在这些地方插入到你的应用流程中,添加新的行为
- 通知(Advice):通知切面的实际实现,它通知应用系统新的行为
- 切入点(Pointcut):定义了通知应该在应用在哪些连接点,通常通过指定类名和方法名或者匹配类名和方法名式样的正则表达式来指定切入点
- 目标对象(Target):被通知的对象,既可以是你编写的类也可以是你要添加定制行为的第三方类
AOP实现的关键在于AOP框架自动创建的AOP代理,AOP代理主要分为静态代理和动态代理两大类,其中静态代理是使用AOP框架提供的命令进行编译,从而在编译阶段就可以生成AOP代理类,也称为编译时增强,动态代理则在运行时借助于JDK动态代理、CGLIB等在内存中临时生成的动态代理类,也被称为运行时增强。静态代理以AspectJ为代表,动态代理则以Spring AOP为代表。
下面对两者进行逐一分析。
二、基于动态代理实现AOP
1、JDK动态代理
下面以记录日志为例作一个简单的示例,首先是声明一个接口:
public interface Aithmetic
{
    public int add(int i,int j);
    public int sub(int i,int j);
}
然后定义接口的实现:
public class AithmeticImpl implements Aithmetic
{
    @Override
    public int add(int i, int j)
    {
        int result=i+j;
        return result;
    }
    @Override
    public int sub(int i, int j)
    {
        int result=i-j;
        return result;
    }
}
如果想在做加减法操作前后加一些日志记录,就要编写代理实现:
public class AithmeticLoggingProxy
{
    private Aithmetic target;
    public AithmeticLoggingProxy(Aithmetic target)
    {
        super();
        this.target = target;
    }
    public Aithmetic getLoggingProxy()
    {
        Aithmetic proxy=null;
        //代理对象由哪一个类加载器加载
        ClassLoader loader=target.getClass().getClassLoader();
        //代理对象的类型,即其中有哪些方法
        Class[] interfaces=new Class[]{Aithmetic.class};
        //当调用代理对象其中的方法时,该执行的代码
        InvocationHandler h=new InvocationHandler()
        {
            @Override
            public Object invoke(Object proxy, Method method, Object[] args) throws Throwable
            {
                String methodName=method.getName();
                System.out.println("the method:"+methodName+"开始"+Arrays.asList(args));
                Object result=method.invoke(target, args);
                System.out.println("the method:"+methodName+"结束"+result);
                return result;
            }
        };
        proxy=(Aithmetic) Proxy.newProxyInstance(loader, interfaces, h);
        return proxy;
    }
}
编写测试类:
public class TestAithmethicLogging
{
    public static void main(String[] args)
    {
        Aithmetic target=new AithmeticImpl();
        Aithmetic proxy=new AithmeticLoggingProxy(target).getLoggingProxy();
        System.out.println(proxy.add(2, 3));
    }
}
运行结果为:

2、CGLIB动态代理实现AOP
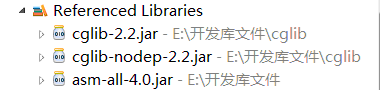
上面提到基于JDK动态代理的对象必须实现一个或多个接口,如果想代理没有接口的继承的类时,就需要使用CGLIB包,CGLIB包的底层是通过使用一个小而快的字节码处理框架ASM,来转换字节码并生成新的类。我们在工程中引入下面这三个jar包:
编写需要代理的目标对象:
public class Hello
{
    public int add(int i,int j)
    {
        int result=i+j;
        return result;
    }
}
创建cglib代理的工厂类:
public class HelloProxy implements MethodInterceptor
{
    //设置需要创建子类的类
    private Object targetObject;
    public Object createProxyInstance(Object target)
    {
        this.targetObject = target;
        Enhancer enhancer = new Enhancer();
        enhancer.setSuperclass(this.targetObject.getClass());
        //设置回调函数
        enhancer.setCallback(this);
        //通过字节码技术动态创建子类实例
        return enhancer.create();
    }
    @Override
    public Object intercept(Object obj, Method method, Object[] args, MethodProxy methodProxy) throws Throwable
    {
        /*obj:目标类实例
         *method:目标类法方法的反射对象
         *args:方法的动态入参
         *methodProxy:代理类实例
        */
        System.out.println("加法操作开始");
        //通过代理类调用父类中的方法
        Object result = methodProxy.invoke(targetObject, args);
        System.out.println("加法操作结束");
        return result;
    }
}
编写测试类并运行:
public class TestHello
{
    public static void main(String[] args)
    {
        HelloProxy proxy=new HelloProxy();
        Hello hello=(Hello) proxy.createProxyInstance(new Hello());
        System.out.println(hello.add(2, 3));
    }
}
运行结果与上图一致。
注:CGLIB是针对类实现代理,主要是对指定的类生成一个子类,覆盖其中的方法。因为是继承,所以该类或方法不要声明成final。
三、Spring的AOP实现
Spring的连接点模型是建立在方法拦截上的,我们编写的Spring通知会在方法调用周围的各个地方织入系统中,以下是Spring提供的几种类型的通知以及他们在什么地方织入到你的代码中:

注:使用Spring的AOP需要引入Spring和aopalliance的jar包。
现在我们假设有这样的接口和其实现:
public interface Service
{
    public void add(int i,int j);
}

//接口实现类
public class ServiceImpl implements Service
{
    @Override
    public void add(int i,int j)
    {
        int result=i+j;
     return result;
    }
}
Spring可以通过不同的方式来引入通知:
1、编程式
我们来写一个前置通知:
public class ServiceBeforeAdvice implements MethodBeforeAdvice
{
    @Override
    public void before(Method arg0, Object[] arg1, Object arg2) throws Throwable
    {
        System.out.println("Before");
    }
}
编写客户端将他们集成起来:
public class Client
{
    public static void main(String[] args)
    {
        ProxyFactory proxyFactory=new ProxyFactory();
        //射入目标对象
        proxyFactory.setTarget(new ServiceImpl());
        //添加前置增强
        proxyFactory.addAdvice(new ServiceBeforeAdvice());
        Service  service=(Service) proxyFactory.getProxy();
        System.out.println("运算结果为:"+service.add(2, 3));
    }
}
运行结果为:

2、声明式
下面引入一个环绕通知:
@Component
public class ServiceAroundAdvice implements MethodInterceptor
{
     @Override
        public Object invoke(MethodInvocation invocation) throws Throwable
        {
            before();
            Object result = invocation.proceed();
            after();
            return result;
        }
        private void before()
        {
            System.out.println("Before");
        }
        private void after()
        {
            System.out.println("After");
        }
}
然后编写Spring配置文件:
<?xml version="1.0" encoding="UTF-8"?>
<beans xmlns="http://www.springframework.org/schema/beans"
    xmlns:xsi="http://www.w3.org/2001/XMLSchema-instance"
    xmlns:context="http://www.springframework.org/schema/context"
    xmlns:aop="http://www.springframework.org/schema/aop"
    xsi:schemaLocation="http://www.springframework.org/schema/aop http://www.springframework.org/schema/aop/spring-aop-3.1.xsd
        http://www.springframework.org/schema/beans http://www.springframework.org/schema/beans/spring-beans.xsd
        http://www.springframework.org/schema/context http://www.springframework.org/schema/context/spring-context-3.0.xsd">
    <!--配置自动扫描的包-->
    <context:component-scan base-package="springAOP"></context:component-scan>

    <!-- 配置一个代理 -->
   <bean id="serviceProxy" class="org.springframework.aop.framework.ProxyFactoryBean">
        <property name="interfaces" value="springAOP.Service"/>
        <property name="target" ref="serviceImpl"/>
        <property name="interceptorNames" value="serviceAroundAdvice"/>
    </bean>
</beans>
最后编写客户端
public class Client
{
    public static void main(String[] args)
    {
        ApplicationContext context=new ClassPathXmlApplicationContext("bean.xml");
        Service service=(Service) context.getBean("serviceProxy");
        System.out.println(service.add(2, 3));
    }
}
运行结果截图:

Spring AOP切面:我们可以通过切面,将增强类与拦截匹配条件组合在一起,然后将这个切面配置到ProxyFactory中,从而生成代理,这里的拦截条件在AOP即为切点。
假设我们现在的实现类有两个方法,add和sub,我们只想拦截add方法,对sub不做拦截。
@Component
public class ServiceImpl implements Service
{

    @Override
    public int add(int i, int j)
    {
        int result=i+j;
        return result;
    }

    @Override
    public int sub(int i, int j)
    {
        int result=i-j;
        return result;
    }
}
Spring配置文件为:
<?xml version="1.0" encoding="UTF-8"?>
<beans xmlns="http://www.springframework.org/schema/beans"
    xmlns:xsi="http://www.w3.org/2001/XMLSchema-instance"
    xmlns:context="http://www.springframework.org/schema/context"
    xmlns:aop="http://www.springframework.org/schema/aop"
    xsi:schemaLocation="http://www.springframework.org/schema/aop http://www.springframework.org/schema/aop/spring-aop-3.1.xsd
        http://www.springframework.org/schema/beans http://www.springframework.org/schema/beans/spring-beans.xsd
        http://www.springframework.org/schema/context http://www.springframework.org/schema/context/spring-context-3.0.xsd">
    <!--配置自动扫描的包-->
     <context:component-scan base-package="springAOP"></context:component-scan>

     <!--配置一个切面  -->
     <bean id="serviceAdvisor" class="org.springframework.aop.support.RegexpMethodPointcutAdvisor">
         <property name="advice" ref="serviceAroundAdvice"/>
         <property name="pattern" value="springAOP.ServiceImpl.add"/>
     </bean>

    <!-- 配置一个代理 -->
   <bean id="serviceProxy" class="org.springframework.aop.framework.ProxyFactoryBean">
        <property name="target" ref="serviceImpl"/>
           <property name="proxyTargetClass" value="true"/>
            <property name="interceptorNames" value="serviceAdvisor"/>
    </bean>
</beans>
编写并运行客户端:
public class Client
{
    public static void main(String[] args)
    {
        ApplicationContext context=new ClassPathXmlApplicationContext("bean2.xml");
        Service service=(Service) context.getBean("serviceProxy");
        System.out.println(service.add(2, 3));
        System.out.println(service.sub(3, 1));
    }
}
结果截图

可以看到只对add方法引入了环绕通知,而sub方法并没有进行拦截。
四、基于Spring+AspectJ方式
使用Spring AOP,在Spring配置文件中会存在大量的切面配置,相当的麻烦。现在Spring在保留了上面的提到的切面与代理配置方式也集成了AspectJ,使用AspectJ需要引入下面两个包
 。
。
1、基于注解:通过Aspect execution表达式拦截方法
首先我们来定义一个Aspect切面类:
@Aspect
@Component
//把这个类声明为一个切面:需要把这个类放入到IOC容器中,在声明为一个切面
public class ServiceAspect
{
    @Around("execution(* springAOP.Service.*(..))")
    public Object around(ProceedingJoinPoint point) throws Throwable
    {
        before();
        Object result=point.proceed();
        after();
        return result;
    }
    private void after()
    {
        System.out.println("after");

    }
    private void before()
    {
        System.out.println("before");
    }
}
类上面标注的@Aspect注解,表明该类是一个Aspect,在方法上标注@Around表示环绕增强,在注解中使用了Aspect切点表达式,方法的参数中包括一个ProceedingJoinPoint对象,在AOP中被称为JoinPoint连接点,可以通过该对象获取方法的任何信息,例如方法名、参数等。
再看看Spring的配置文件:
<?xml version="1.0" encoding="UTF-8"?>
<beans xmlns="http://www.springframework.org/schema/beans"
    xmlns:xsi="http://www.w3.org/2001/XMLSchema-instance"
    xmlns:context="http://www.springframework.org/schema/context"
    xmlns:aop="http://www.springframework.org/schema/aop"
    xsi:schemaLocation="http://www.springframework.org/schema/aop http://www.springframework.org/schema/aop/spring-aop-3.1.xsd
        http://www.springframework.org/schema/beans http://www.springframework.org/schema/beans/spring-beans.xsd
        http://www.springframework.org/schema/context http://www.springframework.org/schema/context/spring-context-3.0.xsd">

    <!--配置自动扫描的包-->
    <context:component-scan base-package="springAOP"></context:component-scan>

    <!--使AspectJ注解起作用:自动为匹配的类生成代理对象-->
    <aop:aspectj-autoproxy></aop:aspectj-autoproxy>
</beans>
编写客户端并运行:
public class Client
{
    public static void main(String[] args)
    {
        ApplicationContext context=new ClassPathXmlApplicationContext("bean3.xml");
        Service service=(Service) context.getBean(Service.class);
        System.out.println(service.add(2, 3));
        System.out.println(service.sub(3, 1));
    }
}
结果为:

2、基于配置
Spring AOP还提供了基于配置的方式来定义切面类:
/*@Aspect*/
/*@Component*/
//把这个类声明为一个切面:需要把这个类放入到IOC容器中,在声明为一个切面
public class ServiceAspect
{
    /*@Around("execution(* springAOP.Service.(..))")*/
    public Object around(ProceedingJoinPoint point) throws Throwable
    {
        before();
        Object result=point.proceed();
        after();
        return result;
    }
    private void after()
    {
        System.out.println("after");

    }
    private void before()
    {
        System.out.println("before");
    }
}
Spring配置文件如下:
<?xml version="1.0" encoding="UTF-8"?>
<beans xmlns="http://www.springframework.org/schema/beans"
    xmlns:xsi="http://www.w3.org/2001/XMLSchema-instance"
    xmlns:context="http://www.springframework.org/schema/context"
    xmlns:aop="http://www.springframework.org/schema/aop"
    xsi:schemaLocation="http://www.springframework.org/schema/aop http://www.springframework.org/schema/aop/spring-aop-3.1.xsd
        http://www.springframework.org/schema/beans http://www.springframework.org/schema/beans/spring-beans.xsd
        http://www.springframework.org/schema/context http://www.springframework.org/schema/context/spring-context-3.0.xsd">

    <bean id="ServiceImpl" class="springAOP.ServiceImpl">
    </bean>

    <bean id="ServiceAspect" class="springAOP.ServiceAspect">
    </bean>

    <aop:config>
        <aop:aspect ref="ServiceAspect">
            <aop:around method="around" pointcut="execution(* springAOP.Service.*(..))"/>
        </aop:aspect>
    </aop:config>
</beans>
编写客户端并运行:
public class Client
{
    public static void main(String[] args)
    {
        ApplicationContext context=new ClassPathXmlApplicationContext("bean4.xml");
        Service service=(Service) context.getBean("ServiceImpl");
        System.out.println(service.add(2, 3));
        System.out.println(service.sub(3, 1));
    }
}
运行结果同上图一致。
五、总结
通过上述的阐述,可用一张图来总结Spring AOP的知识结构:
