一:前言
Monit是一个开源监控管理工具(类似supervisor),能够监控linux系统的负载、文件、进程等。当系统负载过高、监控文件被篡改、进程异常退出时,能够发送邮件报警,并能够自动启动或关闭异常进程。Monit内嵌web界面,能够看到当前主机上的监控项状态。
M/Monit是一个集中式管理多台Monit的可视化工具,也是收费工具,可以免费试用30天。
二:规划
M/Monit(集中管理) 192.168.0.1
Monit(监控机) 192.168.0.2
Monit(监控机) 192.168.0.3
三:安装M/Monit
(1)安装M/Monit
|
1
2
3
4
|
$cd /opt$wget https://mmonit.com/dist/mmonit-3.5.1-linux-x64.tar.gz$tar xf mmonit-3.5.1-linux-x64.tar.gz$cd mmonit-3.5.1 |
(2)配置M/Monit
1:MMonit的配置文件是conf/server.xml,不需要任何改动即可使用,默认配置是8080端口。
|
1
|
<Connector address="*" port="8080" processors="10" /> |
2:MMonit默认使用的是包内自带的sqlite3数据库,默认配置如下
|
1
2
3
4
|
<Realm url="sqlite:///db/mmonit.db?synchronous=normal&heap_limit=8000&foreign_keys=on&journal_mode=wal" minConnections="5" maxConnections="25" reapConnections="300" /> |
也可以改成mysql和postgresql数据库.以myqsl为例(使用默认的sqlite可以跳过):
-
修改sqlite配置为
|
1
2
3
4
|
<Realm url="mysql://mmonit:passwd@10.10.10.10/mmonit" minConnections="5" maxConnections="25" reapConnections="300" /> |
-
并导入mysql数据库
|
1
|
$mysql -ummonit -ppasswd < /opt/mmonit-3.5.1/db/mmonit-schema.mysql |
(3)启动M/Monit
|
1
|
$bin/mmonit -c conf/server.xml |
(4)启动M/Monit
访问 192.168.0.1:8080,显示登录页。
默认用户名
|
user |
password |
权限 |
|
admin |
swordfish |
管理员 |
|
monit |
monit |
普通用户 |
登录进去后,里面是空白的,No hosts,这是因为monit还没有加入进来,下面配置monit
四:安装配置monit
(1)安装Monit
-
192.168.0.2 192.168.0.3
|
1
2
3
4
|
$cd /opt$wget https://mmonit.com/monit/dist/binary/5.19.0/monit-5.19.0-linux-x64.tar.gz$tar xf monit-5.19.0-linux-x64.tar.gz$cd monit-5.19.0 |
(2)配置Monit
|
1
2
3
4
5
6
7
8
9
10
11
12
13
14
15
16
17
18
19
20
21
22
23
24
25
26
27
28
29
30
31
32
33
34
35
36
37
38
39
40
41
42
43
44
45
46
47
48
49
50
51
52
53
54
55
56
57
58
59
60
61
62
63
64
65
66
67
|
$vim conf/monitrc#检测周期set daemon 30#进程文件配置set logfile syslogset pidfile /var/run/monit.pidset idfile /var/.monit.idset statefile /var/.monit.state#事件队列set eventqueue basedir /var/monit slots 100 #配置mmonit(将监控数据发送至MMonit进行统一展示)set mmonit http://monit:monit@192.168.0.1:8080/collector#邮件服务器地址set mailserver 10.10.10.10 port 25 username "monit@cctv.com" password "monit"#自定义发送邮件格式($DATE等都是monit内置变量)set mail-format { from: Monit@cctv.com subject: monit alert -- $EVENT $SERVICE message: $EVENT Service $SERVICE Date: $DATE Action: $ACTION Host: $HOST Description: $DESCRIPTION }#设置报警收件人set alert zhangsan@cctv.comset alert lisi@cctv.com#配置https,用于web界面,由于使用MMonit的界面管理,也可以不配置.set httpd port 2812 and use address localhost allow localhost allow admin:monit #----以下为监控项,以几个常见监控项为例----##检查monit配置文件更新check file monitrc path /opt/monit-5.19.0/conf/monitrc if changed sha1 checksum then exec "/opt/monit-5.19.0/bin/monit -c /opt/monit-5.19.0/conf/monitrc reload"#检查系统负载check system 192.168.0.2 group system if loadavg (1min) > 4 then alert if loadavg (5min) > 2 then alert if cpu usage > 95% for 10 cycles then alert if memory usage > 75% then alert if swap usage > 25% then alert#磁盘各目录空间check filesystem root with path / group system if space usage > 90% then alertcheck filesystem usr with path /usr group system if space usage > 80% then alertcheck filesystem var with path /var group system if space usage > 90% then alert#监控ssh服务check process sshd with pidfile /var/run/sshd.pid start program "/etc/init.d/sshd start" stop program "/etc/init.d/sshd stop" if failed host 127.0.0.1 port 22 protocol ssh then restart#监控nginx(不仅可以监控进程PID文件的变化,还可以监控80端口)check process nginx with pidfile /var/run/nginx.pid start program = "/etc/init.d/nginx start" with timeout 60 seconds stop program = "/etc/init.d/nginx stop" if changed pid for 5 cycles then restart if failed port 80 protocol http with timeout 2 seconds then alert |
(3)启动monit
|
1
|
$bin/monit -c conf/monitrc |
(4)访问MMonit,192.168.0.1:8080
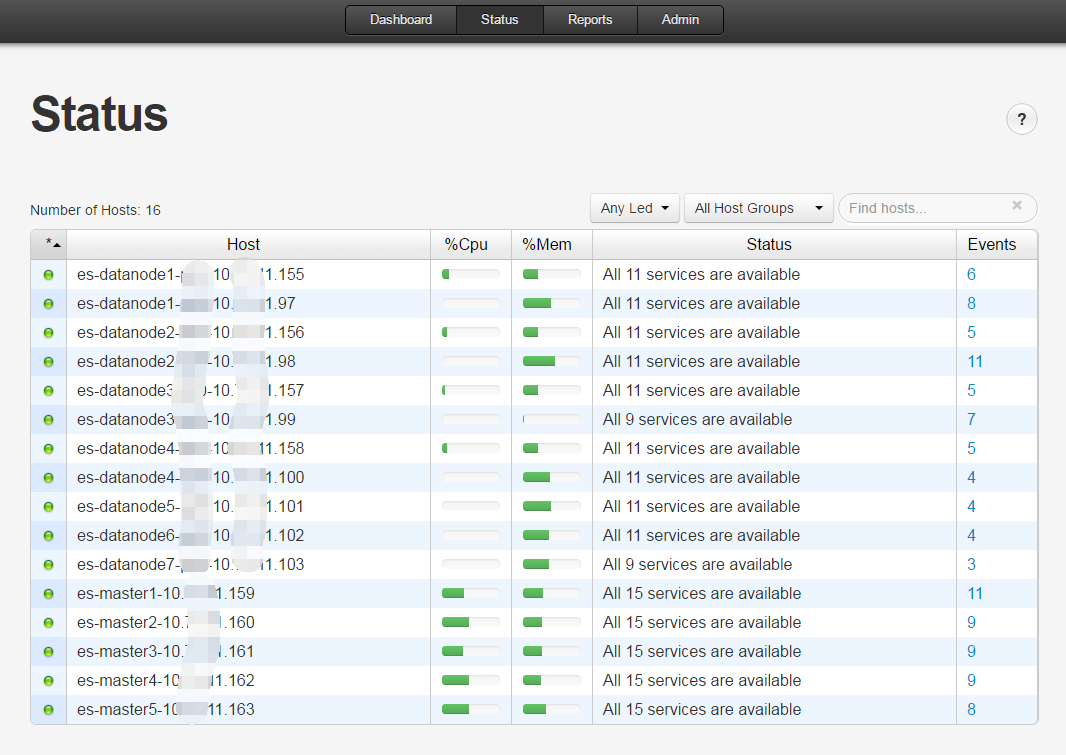
已经能够看到192.168.0.2和192.168.0.3两台机器。
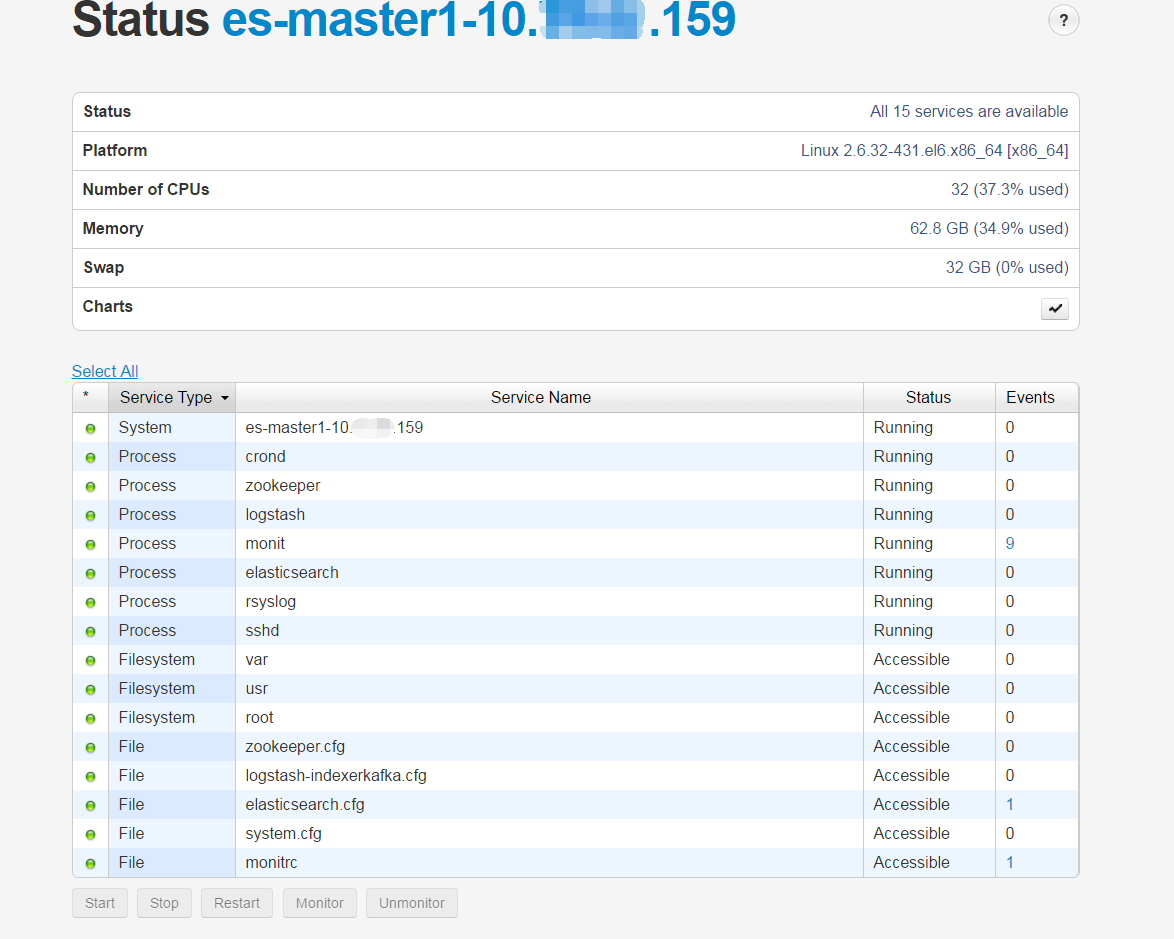
点进去机器,可以看到该机器的监控项,包括系统监控、进程监控、文件系统、配置文件监控。
大功告成!!!!!
此时,你可以去机器上试一试,手动kill掉nginx进程,你会发现进程会自动被拉起。
下面放两张我使用监控ELK集群的图,机器多一点。
本文出自 “酱酱酱子” 博客,请务必保留此出处http://heqin.blog.51cto.com/8931355/1863924


